

Last Updated: 02/25/2023 @ 07:29 am
Credit: TunerMaxima3000
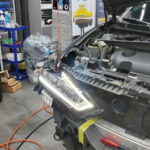
You need to pull your gauges out, simple enough to do. Get the cluster in hand, then disassemble the plastic surround.
The back side of the gauges is basically a big circuit board, there are screws holding your gauges on (should be), they’ll be a goldish color. You’ll need to very gently remove the screws for each gauge, store them in a safe spot, such as a Ziploc bag.
Now you can gently remove the circuit board from the gauges and gauge face. Set the gauge face back into the cover piece to protect it for storage.
Now flip over the circuit board, it will be one of the two below, I’m pretty sure it’s the first one:


Now all you have to do is de-solder the chip. LABLE THE CHIP WITH MARKER OR SOMETHING, so you don’t get them mixed up. You should also note or take a picture of the orientation, but since I’ve posted it for you you can just reference this if you need to.
It’s soldered on the reverse side, use solder wick or a solder sucker and keep going from pin to pin removing the solder until it all looks pretty much gone. Then warm the pins as you gently pry on the chip with a precision screwdriver, applying even pressure and only lifting straight out.
The big thing here is to NOT HEAT THE PINS TOO MUCH! If you do, you’ll damage the chip. Don’t let this scare you away, but just be aware that it’s not hard to overheat them, so use FLUX PASTE, it’ll make the job so much easier. Doing it without means sitting there for a while warming the crap out of it before the solder flows. So use the paste, or you’ll mess something up
When you get the chip out, it’s cake, just do the same and swap it over. Be sure to label the chip you want to use so you don’t get them mixed up
Assemble in reverse order.
![]()

Comments are closed.