

Member Credit: Ghozt
Tools required : Phillips screwdriver, torx bit set, gloves, a cookie/pizza baking sheet, aluminum foil, an oven (the bigger the better, I’ve seen some too small to fit the headlights in so check to make sure it fits before doing anything else)
Personally I was able to bake open and re-seal many times using the original OEM sealant because it is easy to work with and stays in the grooves well. If you are nervous about the reseal you can purchase additional butyl sealant from TheRetrofitsource.com
FYI instructions may be slightly different if you have non-HID OEM headlights.
This DIY first requires you to at least partially remove the front bumper, please click to read instructions for how to remove the front bumper. Once your front bumper is either removed, or partially removed so that it can slide forward you are ready to begin. Now you will begin by removing the headlights from the car.
Optional: You can go in through your wheel wells behind the fender liner and unplug your bulbs/harnesses from the headlight now (there are 4 that need to be unplugged: high beam, low beam, turn signal, front side marker – they all either need to be twisted or pinched to come out) if you want. The other option is to wait until you have unbolted the headlights and slid them forward a few inches so you can access the bulbs that way. Take care not to touch the HID bulbs themselves as the oils from your skin can cause them to burn out prematurely. Clean with rubbing alcohol if you do.
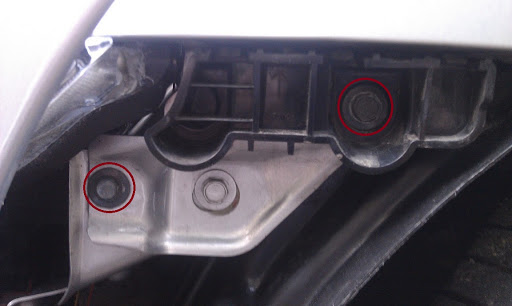
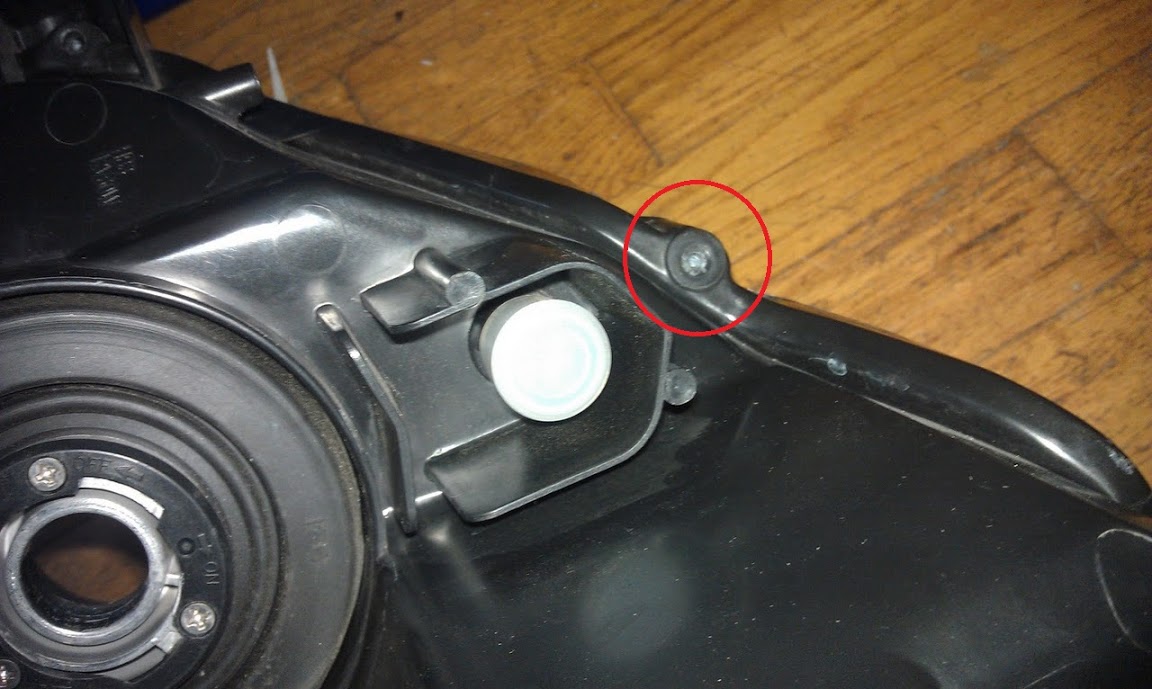
Step 1. Remove the 5 10mm bolts holding the headlight on, 2 are on the side near the top of the light close to the tire, 1 is on the top under the rubber trim the hood rests on, and 2 are on the front (1 underneath, 1 on the inside edge).
1 on the inside edge
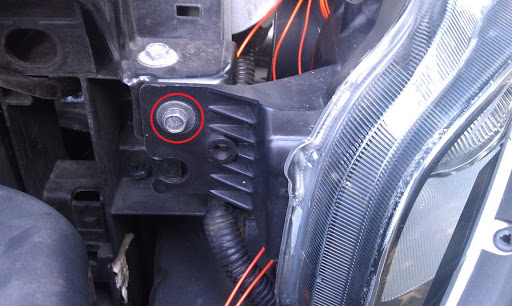
2 are on the side near the top of the light
1 underneath the headlight
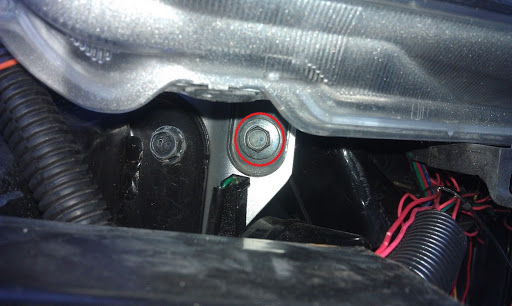
1 under the rubber trim
Step 2. Now lift the headlight slightly to unhook the plastic hook on the top and slide the headlight towards the front of the car. Note: If you haven’t unplugged the bulbs yet then you can only pull the headlight forward a few inches before the wires reach their length, but this also gives you room to work to remove the 4 bulbs from the back. [I]One of the wire harnesses is clipped onto the back of the headlight, it can be a pain to remove but you pinch it to get it out.[/I] All of the bulbs twist to come out except for the low beam which you just pinch the plastic piece to release the harness. Remember to be careful not to touch the high beam bulbs because oil from your fingers can cause it to prematurely burn out.
Step 3. With both headlights removed from the car, take care to collect your bulbs and place them all in a safe place. If you are concerned about your car having empty holes on the front, a car cover is a great way to cover the car for weather and “security” purposes if you have to park on the street. You are now ready to bake.

To bake and open your headlights:
Step 1. Make sure nothing is in your oven first, then get your cookie or pizza baking sheet, wrap it in aluminum foil, and place it on the very bottom rack. (This is to help prevent anything from melting on the metal rack or sheet.
Step 2. Pre-heat your oven to 200 degrees.
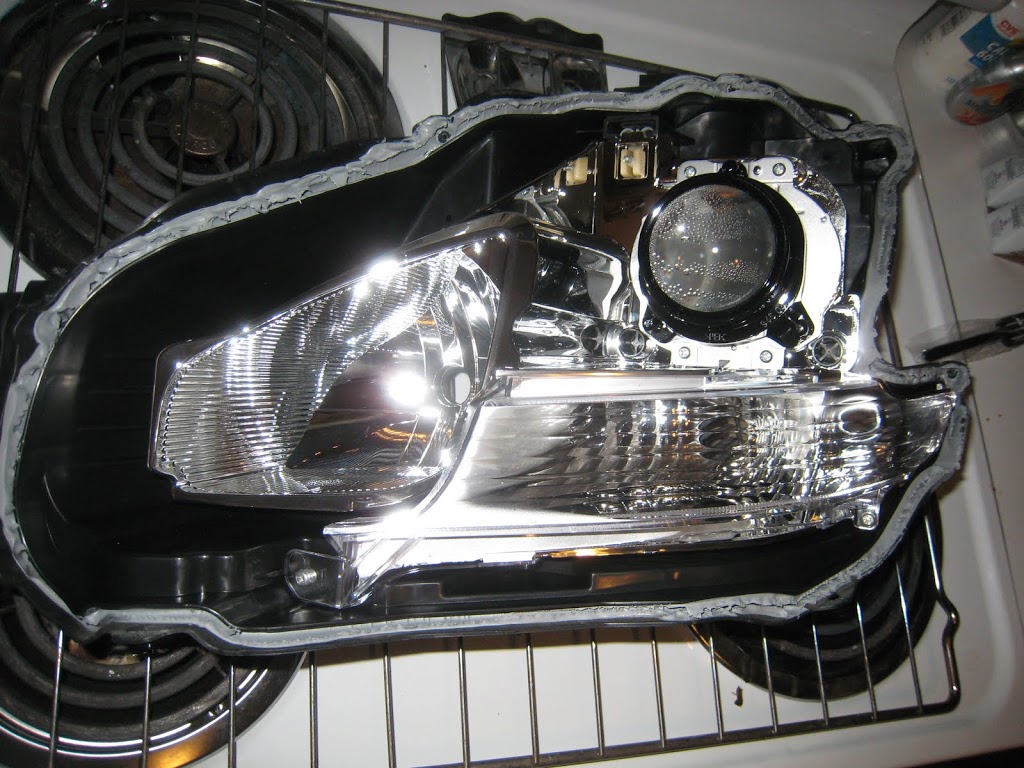
Step 3. You’ll need to remove several pieces off of the headlight before baking it. (Ignore the extra wiring I’ve added.)
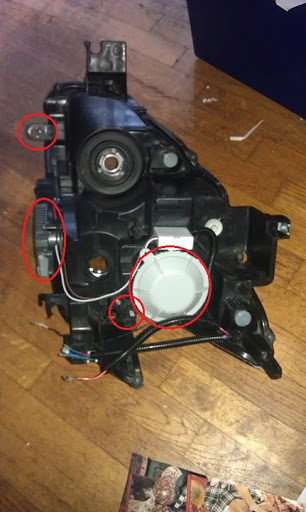
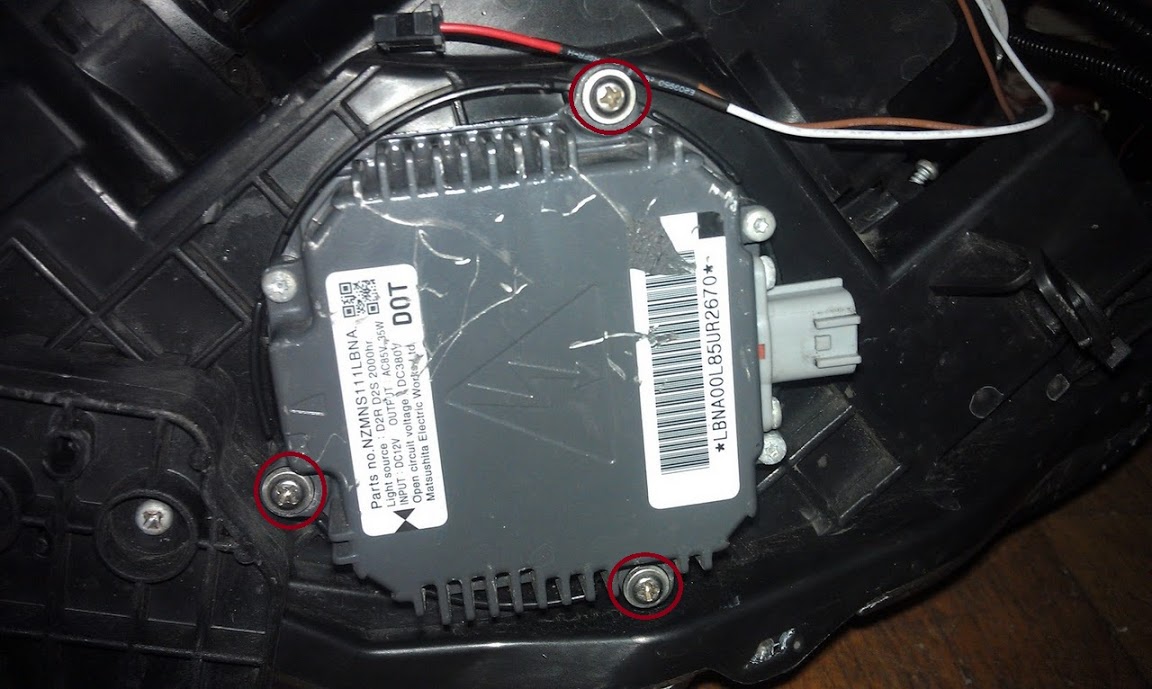
Start by removing the 3 screws holding the HID ballast and pull the ballast out. On the other side of the ballast is 1 small screw, remove this screw and unplug the HID bulb from the ballast.
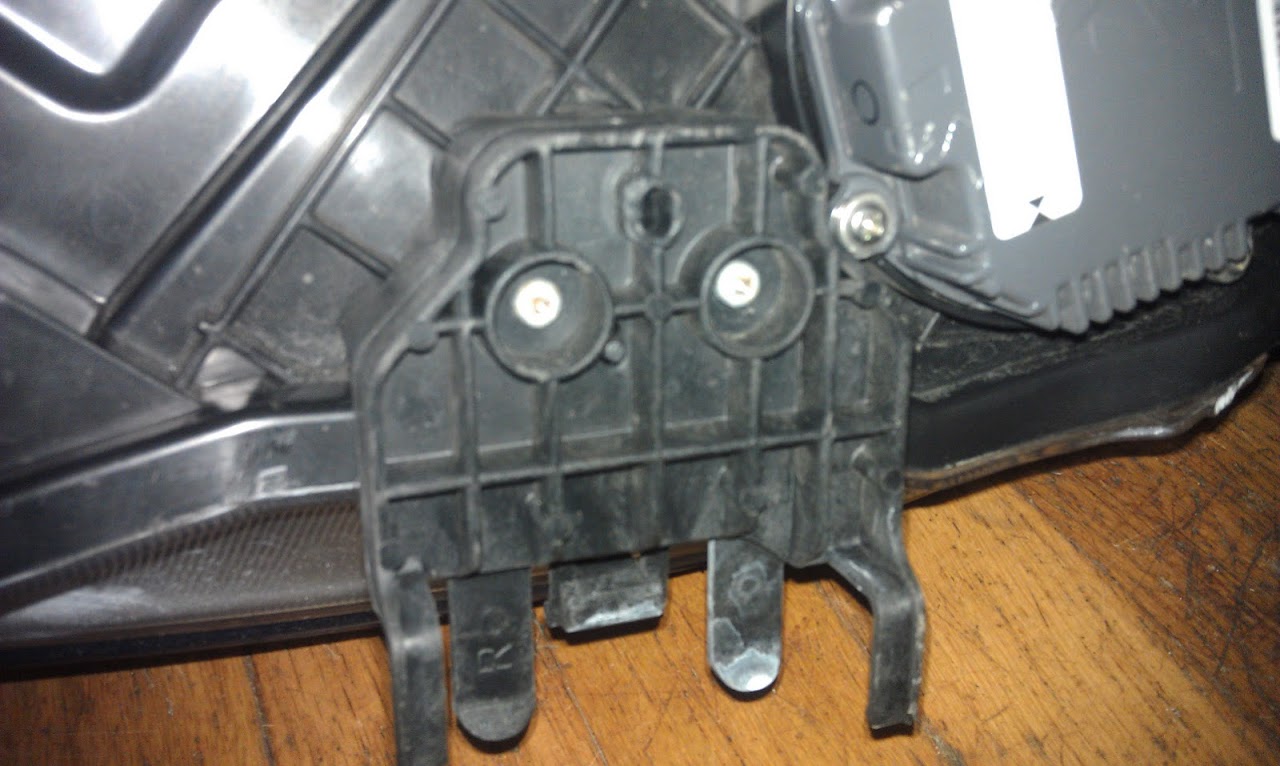
Step 4. Remove the 2 screws holding this black plastic piece on the bottom, then take the black plastic piece off
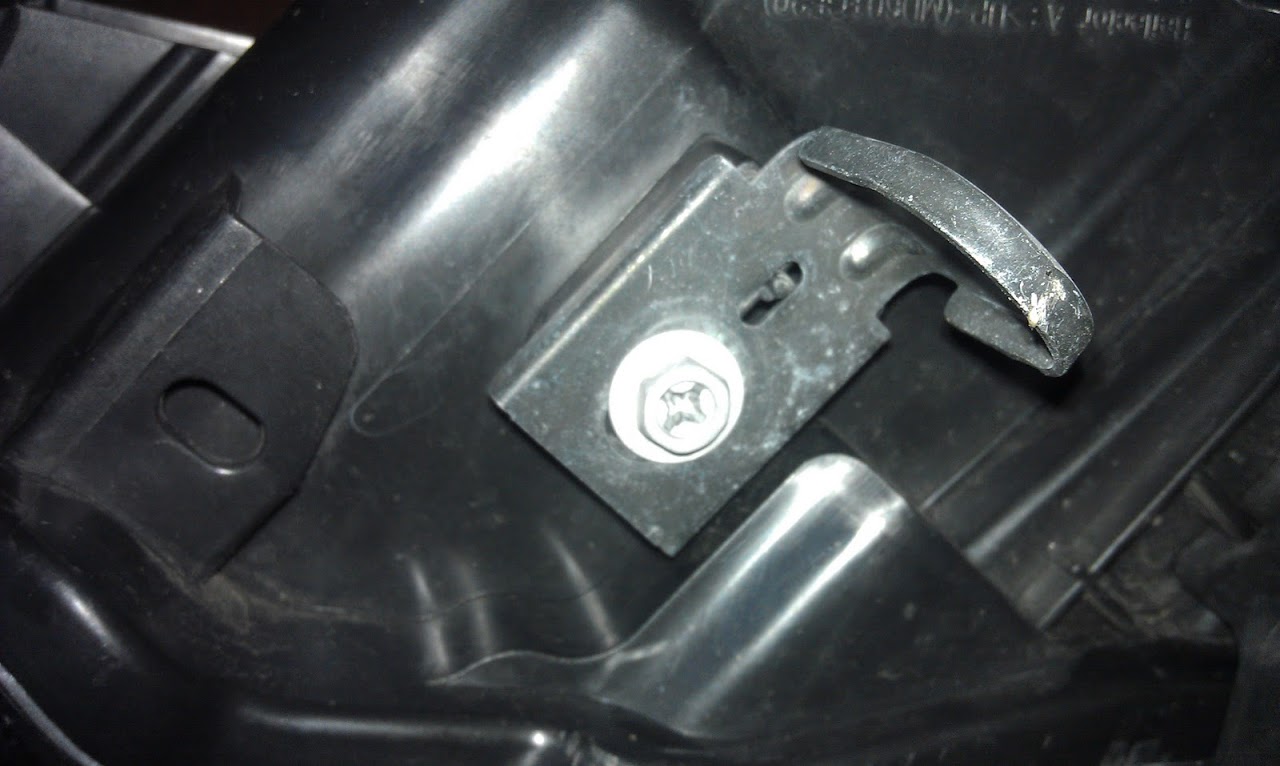
Step 5. Remove this screw and metal bracket. Take note of where it’s positioned so you can re-install it the same way it is now.
Step 6. Undo this screw on the top, then slide the black plastic piece backwards then up to remove it
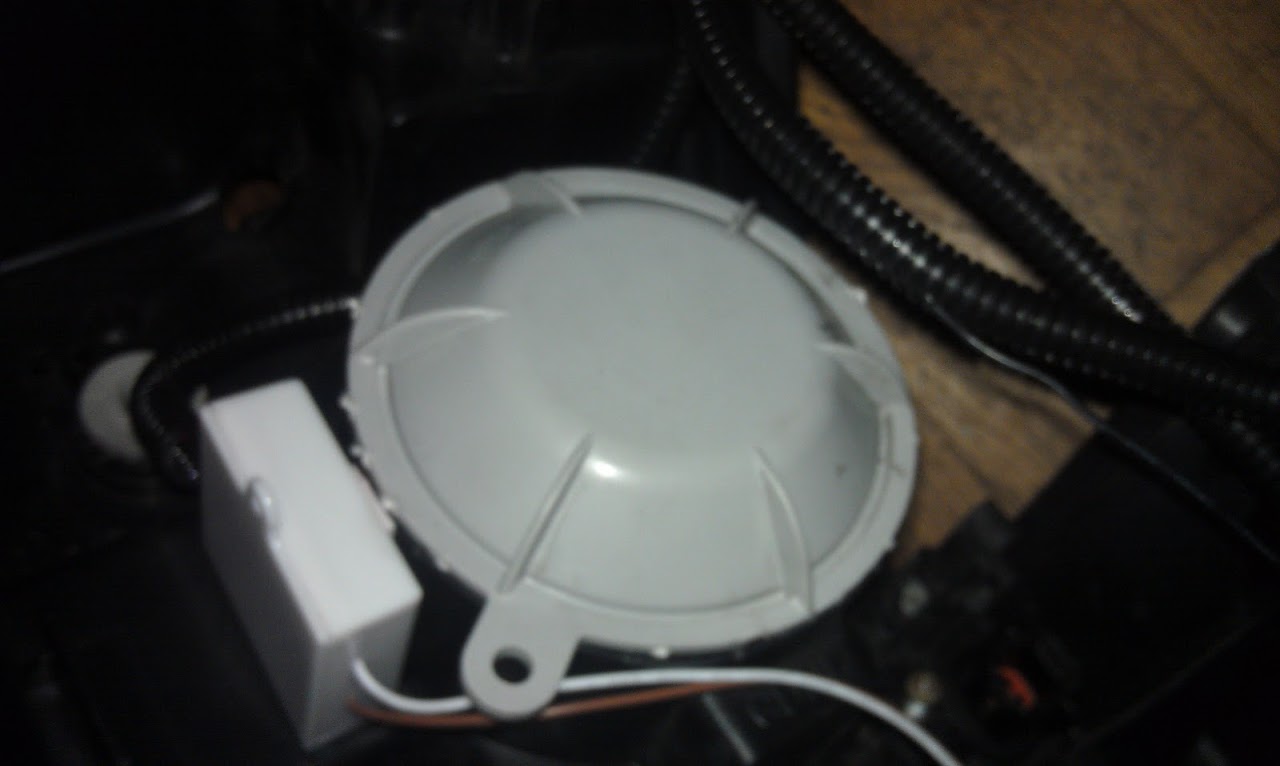
Step 7. Twist this grey plastic piece to unlock it, then pull off. Inside is the HID bulb. )Take care not to touch the actual bulb because oils from your hands can cause it to burn out)
Step 8. There are two metal pins holding in the bulb, just pinch them together and pull back and the bulb will come out. The HID bulb has a cable running over to the ballast. Since you already unplugged this pull the bulb and cable out of the headlight – don’t worry its fairly easy to get back in there.
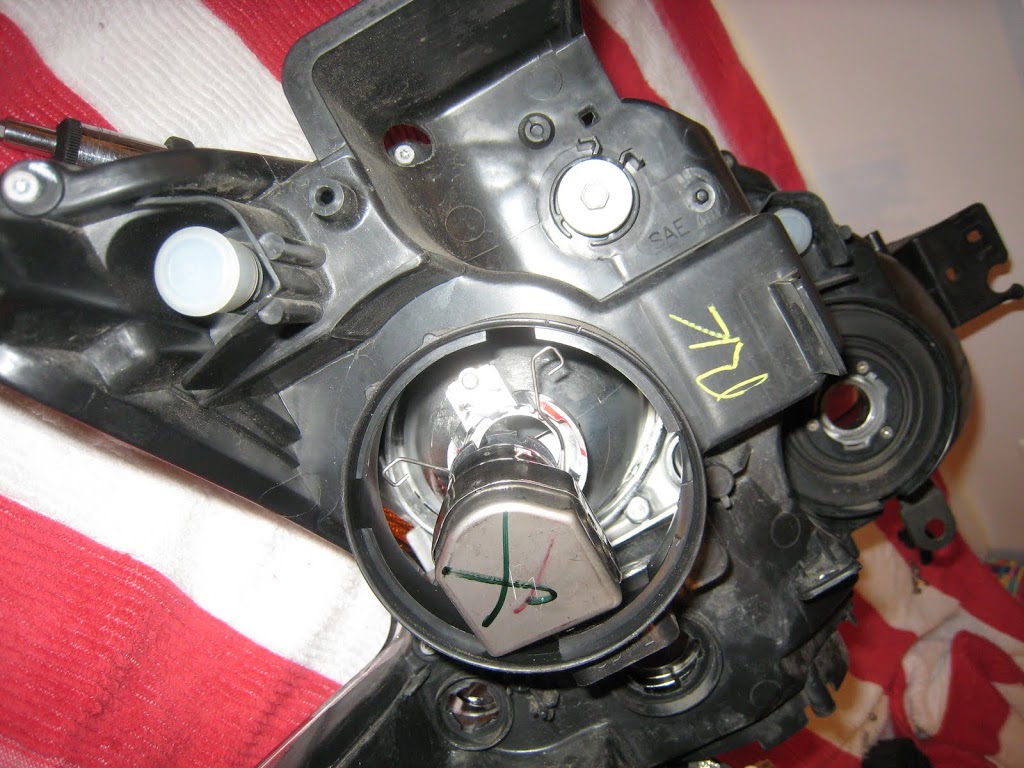
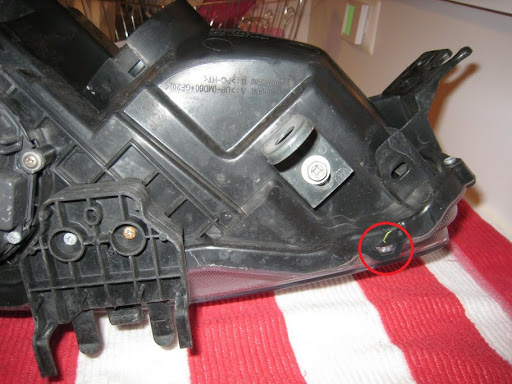
Step 9. Remove this one screw and the plastic piece it holds on, this is blocking one of the Torx screws. It is down/right from the grey cap in the middle of the picture
Step 10. There are 7 Torx (updating shortly with exact size) screws holding on the plastic lens, remove them all. Trace the edge of the headlight lens to find all of them, they’re at the edges like this and look like a star pattern on top
Before proceeding make sure you have removed all the pieces as described so far including bulbs from the headlight.
Step 11. Place the headlight in the oven making sure nothing touches the sides of the oven, and set the timer for 12 minutes. (I know, it’s a little intimidating at first but don’t worry 200 degrees is a safe temp to work with.)
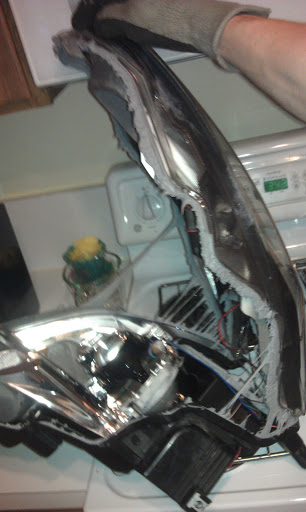
When the timer goes off, put on your gloves (that have good rubberized grip) and move quickly.
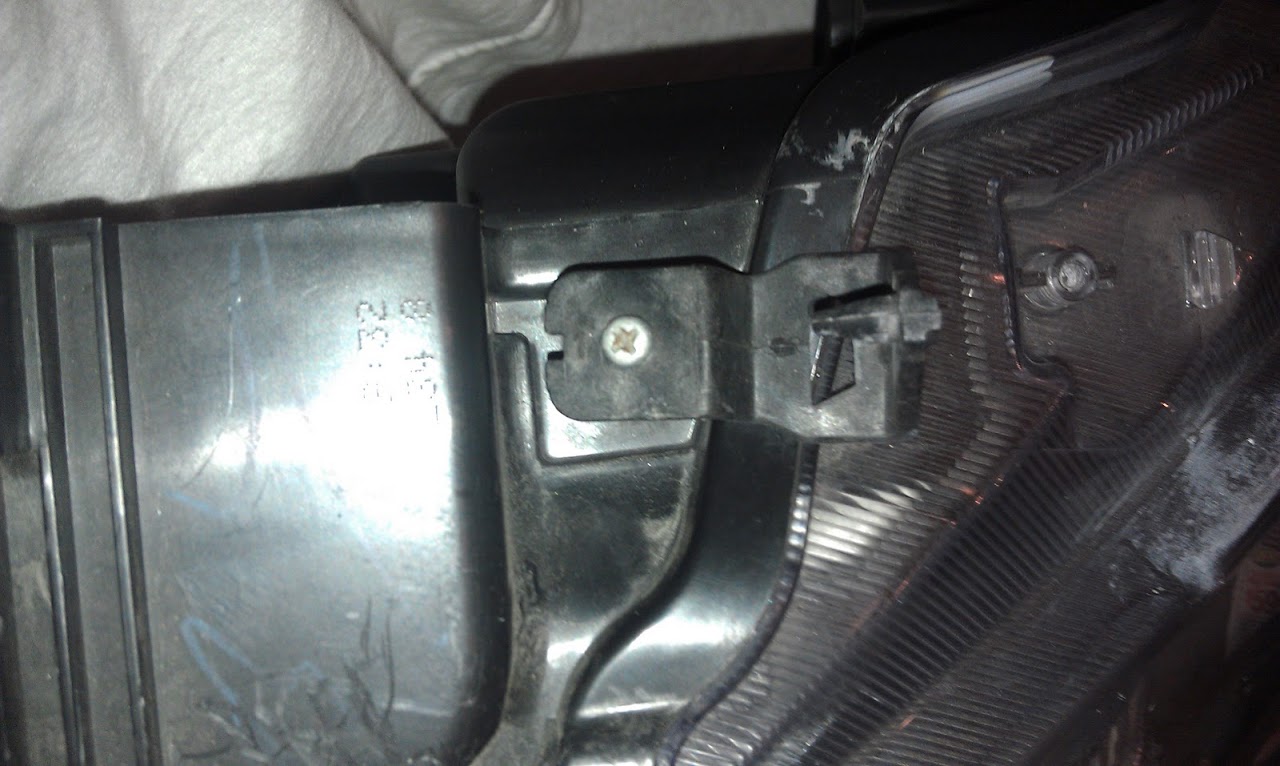
Step 12. Take the headlight out of the oven. First make sure the two clear plastic tabs that are on the bottom of the light are lifted up so they don’t prevent you from taking the lens off. Here’s a pic of one of them, in the lower right corner you can see the tab. Don’t worry they won’t break they’re flexible when they’re warm.
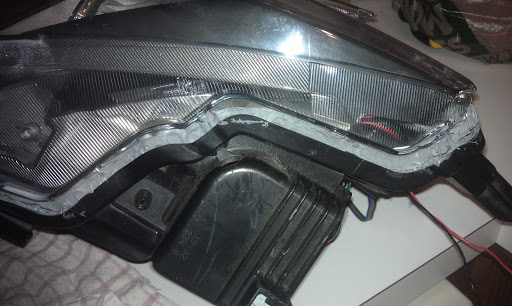
Step 13. The easiest way I found to open the headlights up is to simply pull them open like you’re He-Man. Quickly grab the headlight (near the front of it that would be close to the car’s grill when installed) with one hand on the black part and one hand on the lens and just PULL them apart. There are some edges to the lens you can use to help get a grip on it, but you literally can just pull the lens right off the headlight from front to back. [I](You’ll need gloves with some decent rubberized grip for this.)[/I] Open from the front of the light to the back, it will not separate from back to front.
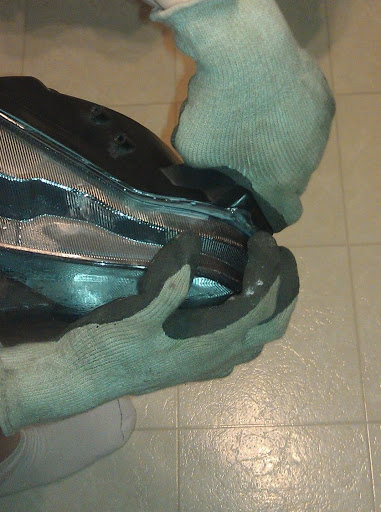
You should see it start to separate and look like melted cheese stretching between the pieces, it will give resistance but still move. If its isn’t moving at all make sure you have all screws removed and then try baking again in small 3-4 minute bakes to soften the adhesive. Don’t worry about the adhesive it stays in the grooves VERY well for re-sealing.
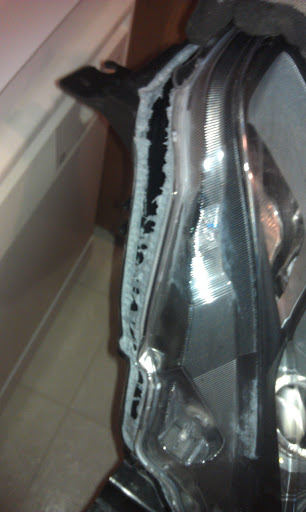
When you pull off your lens you’ll have this.
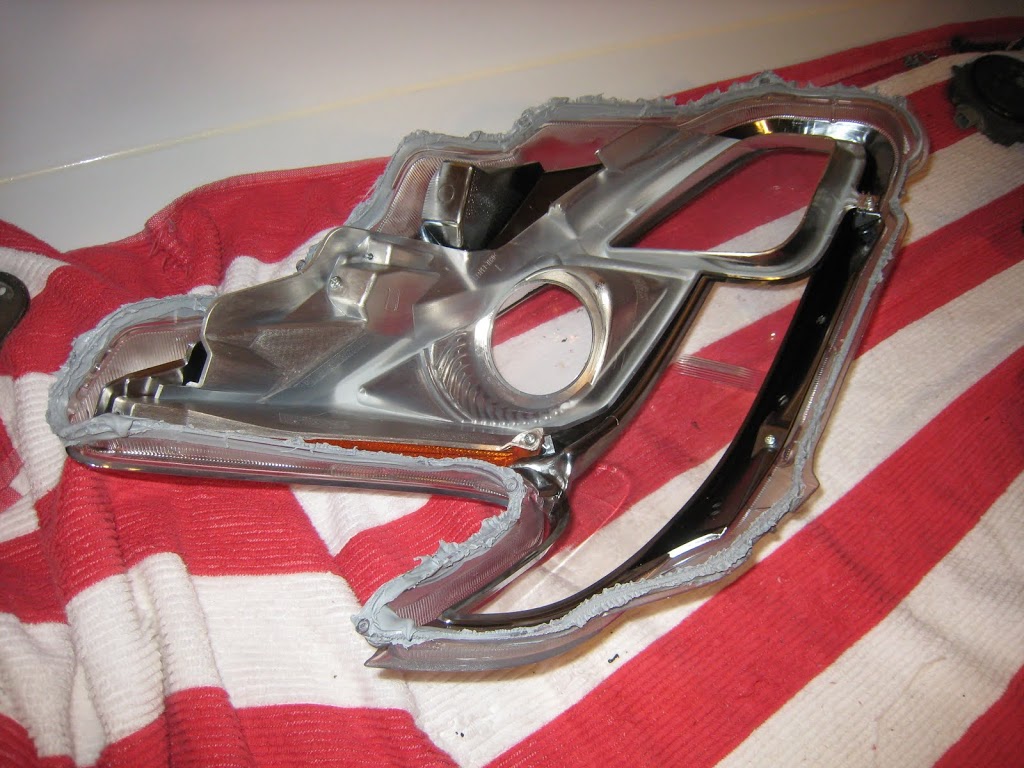
Now your headlights are open!
If you want to paint your headlight housing, you can click the following link for a How to Paint your Headlight Housing DIY – To do this it will require you to remove the plastic housing from the lens piece to paint them(this is described in the DIY). You can remove your amber side marker or black it out
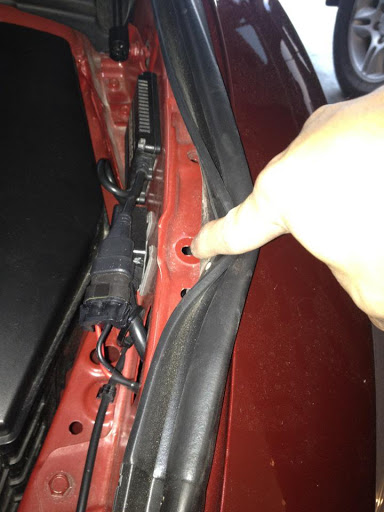
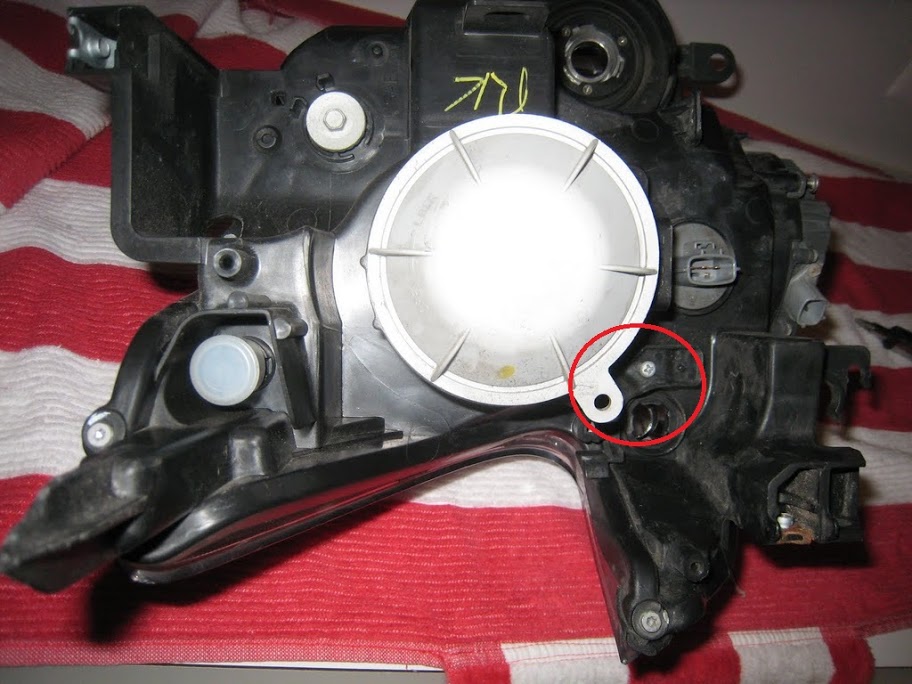
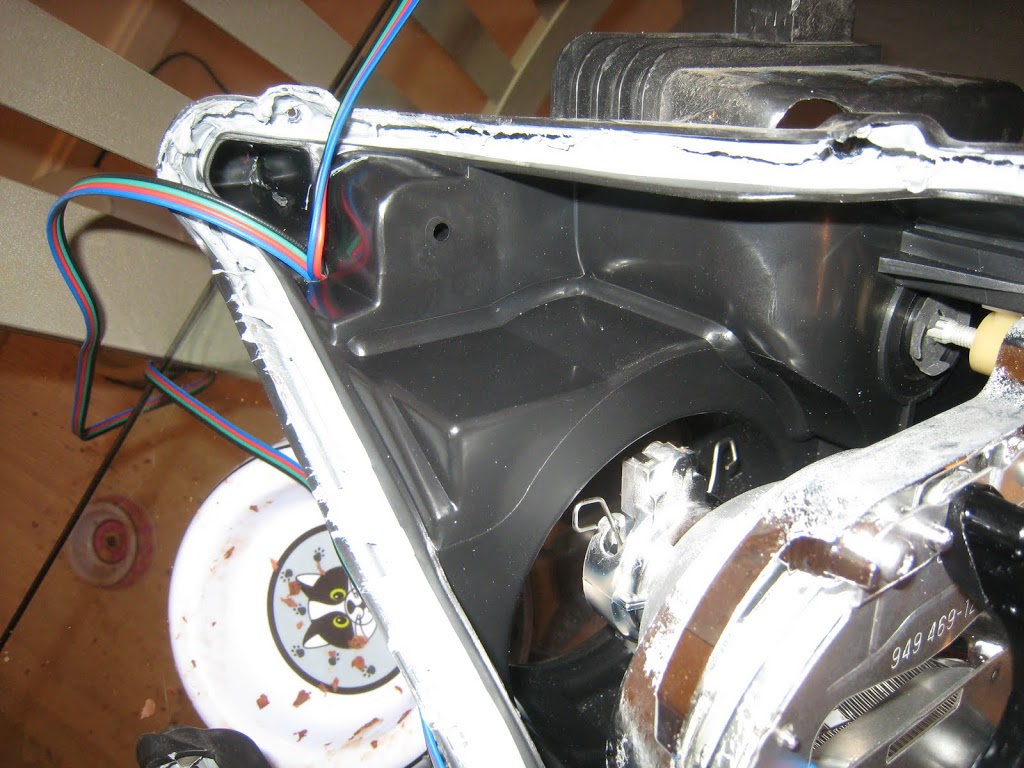
If you need to drill a hole for new wiring you’re adding, here is where I put mine. I sealed it from the other side using black silicone
You can add desiccant packets to the inside to help prevent moisture build-up as a precaution.
To re-seal the headlights:
Step 1. Re-install the housing pieces by inserting them onto the lens. They slide on to some plastic pegs first, and then you re-attach the 5 screws holding the pieces to the lens.
Step 2. Push the lens back onto the headlight as best you can (it won’t go on that far because the sealant is hard but you can get it in place).
Step 3. Preheat the oven to 200 degrees if you turned it off earlier. When it is preheated, bake the headlight for 10 minutes. When the timer goes off again move quickly and work with gloves on
Step 4. Pull it out of the oven and using your hands squeeze together the edges of the light all around it forcing the lens back into the grooves. Concentrate on getting the rear (the two points) of the lens pushed deep into the grooves then clamp the lens with your hands around the edges to force the lens in around the rest of the light. Don’t worry about getting it perfect we’re baking 1 more time.
Step 5. Bake the headlight in the oven for another 5-6 minutes. While it is baking go get all your Torx screws (the 7 star-shaped ones holding the lens on) and get ready. When you take the headlight out squeeze the headlight pieces together near where each screw hole is while putting in the Torx screws. These really help for a nice seal because they pull the lens against the rest of the headlight. (Don’t overtorque here this is all plastic so easy to strip!)
With your light baked back together, follow the above steps in reverse to add all the extraneous plastic bits and light bulbs back to it, and go plug it in!
If you painted your housings pieces, you should leave one of your bulbs unplugged (or simply not install the headlights and wait) for 24 hours to let it dry out and/or let the paint fumes settle.
Don’t forget to turn your oven off!
![]()

Comments are closed.