

 Event")
 Views
0
Likes
0
Views
0
Likes
0
Uploaded
02/09/2017
 Views
0
Likes
0
Views
0
Likes
0
Uploaded
02/09/2017
 Views
0
Likes
0
Views
0
Likes
0
Uploaded
02/09/2017
 Views
0
Likes
0
Views
0
Likes
0
Uploaded
02/09/2017
 Views
1
Likes
0
Views
1
Likes
0
Uploaded
02/09/2017
 Views
0
Likes
0
Views
0
Likes
0
Uploaded
02/09/2017
 Views
0
Likes
0
Views
0
Likes
0
Uploaded
02/08/2017
 Views
0
Likes
0
Views
0
Likes
0
Uploaded
02/09/2017
 Views
1
Likes
0
Views
1
Likes
0
Uploaded
02/09/2017
 Views
1
Likes
0
Views
1
Likes
0
Uploaded
02/09/2017
 Views
0
Likes
0
Views
0
Likes
0
Uploaded
02/09/2017
 Views
0
Likes
0
Views
0
Likes
0
Uploaded
02/09/2017
 Views
0
Likes
0
Views
0
Likes
0
Uploaded
02/09/2017
 Views
0
Likes
0
Views
0
Likes
0
Uploaded
02/09/2017
 Views
0
Likes
0
Views
0
Likes
0
Uploaded
02/09/2017
 Views
0
Likes
0
Views
0
Likes
0
Uploaded
02/09/2017
 Views
0
Likes
0
Views
0
Likes
0
Uploaded
02/09/2017
 Views
0
Likes
0
Views
0
Likes
0
Uploaded
02/08/2017
 Views
0
Likes
0
Views
0
Likes
0
Uploaded
02/09/2017
 Views
0
Likes
0
Views
0
Likes
0
Uploaded
02/09/2017
 Views
0
Likes
0
Views
0
Likes
0
Uploaded
02/08/2017
 Views
1
Likes
0
Views
1
Likes
0
Uploaded
02/09/2017
 Views
3
Likes
0
Views
3
Likes
0
Uploaded
02/09/2017
 Views
0
Likes
0
Views
0
Likes
0
Uploaded
02/09/2017
 Views
0
Likes
0
Views
0
Likes
0
Uploaded
02/09/2017
 Views
1
Likes
0
Views
1
Likes
0
Uploaded
02/09/2017
 Views
0
Likes
0
Views
0
Likes
0
Uploaded
02/09/2017
 Views
1
Likes
0
Views
1
Likes
0
Uploaded
02/09/2017
 Views
1
Likes
0
Views
1
Likes
0
Uploaded
02/09/2017
 Views
0
Likes
0
Views
0
Likes
0
Uploaded
02/08/2017
 Views
0
Likes
0
Views
0
Likes
0
Uploaded
02/08/2017
 Views
0
Likes
0
Views
0
Likes
0
Uploaded
02/09/2017
 Views
1
Likes
0
Views
1
Likes
0
Uploaded
02/09/2017
 Views
0
Likes
0
Views
0
Likes
0
Uploaded
02/09/2017
 Views
1
Likes
0
Views
1
Likes
0
Uploaded
02/08/2017
 Views
0
Likes
0
Views
0
Likes
0
Uploaded
02/08/2017
 Views
0
Likes
0
Views
0
Likes
0
Uploaded
02/09/2017
 Views
0
Likes
0
Views
0
Likes
0
Uploaded
02/09/2017
 Views
0
Likes
0
Views
0
Likes
0
Uploaded
02/09/2017
 Views
0
Likes
0
Views
0
Likes
0
Uploaded
02/08/2017
 Views
0
Likes
0
Views
0
Likes
0
Uploaded
02/09/2017
 Views
0
Likes
0
Views
0
Likes
0
Uploaded
02/09/2017
 Views
0
Likes
0
Views
0
Likes
0
Uploaded
02/09/2017
 Views
0
Likes
0
Views
0
Likes
0
Uploaded
02/09/2017
 Views
0
Likes
0
Views
0
Likes
0
Uploaded
02/09/2017
 Views
0
Likes
0
Views
0
Likes
0
Uploaded
02/08/2017
 Views
0
Likes
0
Views
0
Likes
0
Uploaded
02/09/2017
 Views
0
Likes
0
Views
0
Likes
0
Uploaded
02/08/2017
 Views
0
Likes
0
Views
0
Likes
0
Uploaded
02/09/2017
 Views
0
Likes
0
Views
0
Likes
0
Uploaded
02/08/2017
 Views
0
Likes
0
Views
0
Likes
0
Uploaded
02/08/2017
 Views
0
Likes
0
Views
0
Likes
0
Uploaded
02/09/2017
 Views
0
Likes
0
Views
0
Likes
0
Uploaded
02/09/2017
 Views
0
Likes
0
Views
0
Likes
0
Uploaded
02/09/2017
 Views
0
Likes
0
Views
0
Likes
0
Uploaded
02/09/2017
 Views
0
Likes
0
Views
0
Likes
0
Uploaded
02/09/2017
 Views
0
Likes
0
Views
0
Likes
0
Uploaded
02/09/2017
 Views
0
Likes
0
Views
0
Likes
0
Uploaded
02/09/2017
 Views
0
Likes
0
Views
0
Likes
0
Uploaded
02/09/2017
 Views
0
Likes
0
Views
0
Likes
0
Uploaded
02/09/2017
 Views
0
Likes
0
Views
0
Likes
0
Uploaded
02/09/2017
 Views
1
Likes
0
Views
1
Likes
0
Uploaded
02/09/2017
 Views
1
Likes
0
Views
1
Likes
0
Uploaded
02/08/2017
 Views
3
Likes
0
Views
3
Likes
0
Uploaded
02/09/2017
 Views
0
Likes
0
Views
0
Likes
0
Uploaded
02/09/2017
 Views
0
Likes
0
Views
0
Likes
0
Uploaded
02/09/2017
 Views
0
Likes
0
Views
0
Likes
0
Uploaded
02/08/2017
 Views
0
Likes
0
Views
0
Likes
0
Uploaded
02/09/2017
 Views
0
Likes
0
Views
0
Likes
0
Uploaded
02/09/2017
 Views
0
Likes
0
Views
0
Likes
0
Uploaded
02/09/2017
 Views
0
Likes
0
Views
0
Likes
0
Uploaded
02/09/2017
 Views
1
Likes
0
Views
1
Likes
0
Uploaded
02/09/2017
 Views
0
Likes
0
Views
0
Likes
0
Uploaded
02/09/2017
 Views
1
Likes
0
Views
1
Likes
0
Uploaded
02/09/2017
 Views
0
Likes
0
Views
0
Likes
0
Uploaded
02/09/2017
 Views
0
Likes
0
Views
0
Likes
0
Uploaded
02/09/2017
 Views
0
Likes
0
Views
0
Likes
0
Uploaded
02/08/2017
 Views
1
Likes
0
Views
1
Likes
0
Uploaded
02/09/2017
 Views
0
Likes
0
Views
0
Likes
0
Uploaded
02/08/2017
 Views
0
Likes
0
Views
0
Likes
0
Uploaded
02/08/2017
 Views
0
Likes
0
Views
0
Likes
0
Uploaded
02/08/2017
 Views
1
Likes
0
Views
1
Likes
0
Uploaded
02/08/2017
 Views
0
Likes
0
Views
0
Likes
0
Uploaded
02/09/2017
 Views
2
Likes
0
Views
2
Likes
0
Uploaded
02/09/2017
 Views
1
Likes
0
Views
1
Likes
0
Uploaded
02/08/2017
 Views
1
Likes
0
Views
1
Likes
0
Uploaded
02/09/2017
 Views
0
Likes
0
Views
0
Likes
0
Uploaded
02/09/2017
 Views
1
Likes
0
Views
1
Likes
0
Uploaded
02/09/2017
 Views
0
Likes
0
Views
0
Likes
0
Uploaded
02/09/2017
 Views
0
Likes
0
Views
0
Likes
0
Uploaded
02/09/2017
 Views
0
Likes
0
Views
0
Likes
0
Uploaded
02/09/2017
 Views
0
Likes
0
Views
0
Likes
0
Uploaded
02/09/2017
 Views
0
Likes
0
Views
0
Likes
0
Uploaded
02/08/2017
 Views
0
Likes
0
Views
0
Likes
0
Uploaded
02/09/2017
 Views
1
Likes
0
Views
1
Likes
0
Uploaded
02/09/2017
 Views
1
Likes
0
Views
1
Likes
0
Uploaded
02/08/2017
 Views
0
Likes
0
Views
0
Likes
0
Uploaded
02/09/2017
 Views
1
Likes
0
Views
1
Likes
0
Uploaded
02/09/2017
 Views
0
Likes
0
Views
0
Likes
0
Uploaded
02/09/2017
 Views
0
Likes
0
Views
0
Likes
0
Uploaded
02/09/2017
 Views
0
Likes
0
Views
0
Likes
0
Uploaded
02/09/2017
 Views
2
Likes
0
Views
2
Likes
0
Uploaded
02/08/2017
 Views
1
Likes
0
Views
1
Likes
0
Uploaded
02/08/2017
 Views
0
Likes
0
Views
0
Likes
0
Uploaded
02/08/2017
 Views
1
Likes
0
Views
1
Likes
0
Uploaded
02/09/2017
 Views
1
Likes
0
Views
1
Likes
0
Uploaded
02/09/2017
 Views
0
Likes
0
Views
0
Likes
0
Uploaded
02/09/2017
 Views
2
Likes
0
Views
2
Likes
0
Uploaded
02/09/2017
 Views
1
Likes
0
Views
1
Likes
0
Uploaded
02/09/2017
 Views
0
Likes
0
Views
0
Likes
0
Uploaded
02/09/2017
 Views
0
Likes
0
Views
0
Likes
0
Uploaded
02/09/2017
 Views
0
Likes
0
Views
0
Likes
0
Uploaded
02/08/2017
 Views
0
Likes
0
Views
0
Likes
0
Uploaded
02/09/2017
 Views
3
Likes
0
Views
3
Likes
0
Uploaded
02/09/2017
 Views
0
Likes
0
Views
0
Likes
0
Uploaded
02/08/2017
 Views
0
Likes
0
Views
0
Likes
0
Uploaded
02/08/2017
 Views
0
Likes
0
Views
0
Likes
0
Uploaded
02/09/2017
 Views
0
Likes
0
Views
0
Likes
0
Uploaded
02/09/2017
 Views
0
Likes
0
Views
0
Likes
0
Uploaded
02/09/2017
 Views
0
Likes
0
Views
0
Likes
0
Uploaded
02/09/2017
 Views
0
Likes
0
Views
0
Likes
0
Uploaded
02/09/2017
 Views
1
Likes
0
Views
1
Likes
0
Uploaded
02/09/2017
 Views
0
Likes
0
Views
0
Likes
0
Uploaded
02/09/2017
 Views
0
Likes
0
Views
0
Likes
0
Uploaded
02/09/2017
 Views
0
Likes
0
Views
0
Likes
0
Uploaded
02/09/2017
 Views
1
Likes
0
Views
1
Likes
0
Uploaded
02/09/2017
 Views
0
Likes
0
Views
0
Likes
0
Uploaded
02/08/2017
 Views
1
Likes
0
Views
1
Likes
0
Uploaded
02/09/2017
 Views
0
Likes
0
Views
0
Likes
0
Uploaded
02/09/2017
 Views
1
Likes
0
Views
1
Likes
0
Uploaded
02/09/2017
 Views
0
Likes
0
Views
0
Likes
0
Uploaded
02/09/2017
 Views
1
Likes
0
Views
1
Likes
0
Uploaded
02/09/2017
 Views
1
Likes
0
Views
1
Likes
0
Uploaded
02/09/2017
 Views
1
Likes
0
Views
1
Likes
0
Uploaded
02/08/2017
 Views
0
Likes
0
Views
0
Likes
0
Uploaded
02/09/2017
 Views
0
Likes
0
Views
0
Likes
0
Uploaded
02/09/2017
 Views
0
Likes
0
Views
0
Likes
0
Uploaded
02/08/2017
 Views
0
Likes
0
Views
0
Likes
0
Uploaded
02/08/2017
 Views
0
Likes
0
Views
0
Likes
0
Uploaded
02/09/2017
 Views
0
Likes
0
Views
0
Likes
0
Uploaded
02/09/2017
 Views
0
Likes
0
Views
0
Likes
0
Uploaded
02/09/2017
 Views
0
Likes
0
Views
0
Likes
0
Uploaded
02/09/2017
 Views
2
Likes
0
Views
2
Likes
0
Uploaded
02/09/2017
 Views
0
Likes
0
Views
0
Likes
0
Uploaded
02/09/2017
 Views
1
Likes
0
Views
1
Likes
0
Uploaded
02/09/2017
 Views
0
Likes
0
Views
0
Likes
0
Uploaded
02/08/2017
 Views
0
Likes
0
Views
0
Likes
0
Uploaded
02/08/2017
 Views
0
Likes
0
Views
0
Likes
0
Uploaded
02/08/2017
 Views
0
Likes
0
Views
0
Likes
0
Uploaded
02/09/2017
 Views
0
Likes
0
Views
0
Likes
0
Uploaded
02/08/2017
 Views
1
Likes
0
Views
1
Likes
0
Uploaded
02/09/2017
 Views
0
Likes
0
Views
0
Likes
0
Uploaded
02/09/2017
 Views
0
Likes
0
Views
0
Likes
0
Uploaded
02/09/2017
 Views
0
Likes
0
Views
0
Likes
0
Uploaded
02/08/2017
 Views
0
Likes
0
Views
0
Likes
0
Uploaded
02/08/2017
 Views
0
Likes
0
Views
0
Likes
0
Uploaded
02/08/2017
 Views
0
Likes
0
Views
0
Likes
0
Uploaded
02/09/2017
 Views
0
Likes
0
Views
0
Likes
0
Uploaded
02/08/2017
 Views
2
Likes
0
Views
2
Likes
0
Uploaded
02/09/2017
 Views
0
Likes
0
Views
0
Likes
0
Uploaded
02/08/2017
 Views
0
Likes
0
Views
0
Likes
0
Uploaded
02/09/2017
 Views
0
Likes
0
Views
0
Likes
0
Uploaded
02/08/2017
 Views
0
Likes
0
Views
0
Likes
0
Uploaded
02/09/2017
 Views
1
Likes
0
Views
1
Likes
0
Uploaded
02/09/2017
 Views
0
Likes
0
Views
0
Likes
0
Uploaded
02/09/2017
 Views
1
Likes
0
Views
1
Likes
0
Uploaded
02/09/2017
 Views
0
Likes
0
Views
0
Likes
0
Uploaded
02/09/2017
 Views
0
Likes
0
Views
0
Likes
0
Uploaded
02/08/2017
 Views
0
Likes
0
Views
0
Likes
0
Uploaded
02/09/2017
 Views
0
Likes
0
Views
0
Likes
0
Uploaded
02/09/2017
 Views
1
Likes
0
Views
1
Likes
0
Uploaded
02/08/2017
 Views
0
Likes
0
Views
0
Likes
0
Uploaded
02/09/2017
 Views
0
Likes
0
Views
0
Likes
0
Uploaded
02/08/2017
 Views
0
Likes
0
Views
0
Likes
0
Uploaded
02/08/2017
 Views
0
Likes
0
Views
0
Likes
0
Uploaded
02/09/2017
 Views
0
Likes
0
Views
0
Likes
0
Uploaded
02/09/2017
 Views
0
Likes
0
Views
0
Likes
0
Uploaded
02/09/2017
 Views
0
Likes
0
Views
0
Likes
0
Uploaded
02/09/2017
 Views
0
Likes
0
Views
0
Likes
0
Uploaded
02/08/2017
 Views
1
Likes
0
Views
1
Likes
0
Uploaded
02/09/2017
 Views
0
Likes
0
Views
0
Likes
0
Uploaded
02/09/2017
 Views
0
Likes
0
Views
0
Likes
0
Uploaded
02/09/2017
 Views
0
Likes
0
Views
0
Likes
0
Uploaded
02/09/2017
 Views
0
Likes
0
Views
0
Likes
0
Uploaded
02/08/2017
 Views
0
Likes
0
Views
0
Likes
0
Uploaded
02/09/2017
 Views
0
Likes
0
Views
0
Likes
0
Uploaded
02/09/2017
 Views
0
Likes
0
Views
0
Likes
0
Uploaded
02/09/2017
 Views
0
Likes
0
Views
0
Likes
0
Uploaded
02/08/2017
 Views
0
Likes
0
Views
0
Likes
0
Uploaded
02/09/2017
 Views
1
Likes
0
Views
1
Likes
0
Uploaded
02/08/2017
 Views
2
Likes
0
Views
2
Likes
0
Uploaded
02/09/2017
 Views
0
Likes
0
Views
0
Likes
0
Uploaded
02/09/2017
 Views
0
Likes
0
Views
0
Likes
0
Uploaded
02/09/2017
 Views
0
Likes
0
Views
0
Likes
0
Uploaded
02/08/2017
 Views
0
Likes
0
Views
0
Likes
0
Uploaded
02/09/2017
 Views
0
Likes
0
Views
0
Likes
0
Uploaded
02/08/2017
 Views
0
Likes
0
Views
0
Likes
0
Uploaded
02/09/2017
 Views
1
Likes
0
Views
1
Likes
0
Uploaded
02/09/2017
 Views
0
Likes
0
Views
0
Likes
0
Uploaded
02/09/2017
 Views
0
Likes
0
Views
0
Likes
0
Uploaded
02/09/2017
 Views
0
Likes
0
Views
0
Likes
0
Uploaded
02/09/2017
 Views
0
Likes
0
Views
0
Likes
0
Uploaded
02/09/2017
 Views
0
Likes
0
Views
0
Likes
0
Uploaded
02/09/2017
 Views
0
Likes
0
Views
0
Likes
0
Uploaded
02/08/2017
 Views
1
Likes
0
Views
1
Likes
0
Uploaded
02/08/2017
 Views
0
Likes
0
Views
0
Likes
0
Uploaded
02/09/2017
 Views
0
Likes
0
Views
0
Likes
0
Uploaded
02/09/2017
 Views
1
Likes
0
Views
1
Likes
0
Uploaded
02/08/2017
 Views
0
Likes
0
Views
0
Likes
0
Uploaded
02/09/2017
 Views
0
Likes
0
Views
0
Likes
0
Uploaded
02/08/2017
 Views
2
Likes
0
Views
2
Likes
0
Uploaded
02/09/2017
 Views
0
Likes
0
Views
0
Likes
0
Uploaded
02/09/2017
 Views
1
Likes
0
Views
1
Likes
0
Uploaded
02/08/2017
 Views
0
Likes
0
Views
0
Likes
0
Uploaded
02/09/2017
 Views
0
Likes
0
Views
0
Likes
0
Uploaded
02/09/2017
 Views
0
Likes
0
Views
0
Likes
0
Uploaded
02/09/2017
 Views
0
Likes
0
Views
0
Likes
0
Uploaded
02/09/2017
 Views
0
Likes
0
Views
0
Likes
0
Uploaded
02/09/2017
 Views
1
Likes
0
Views
1
Likes
0
Uploaded
02/09/2017
 Views
0
Likes
0
Views
0
Likes
0
Uploaded
02/09/2017
 Views
0
Likes
0
Views
0
Likes
0
Uploaded
02/09/2017
 Views
2
Likes
0
Views
2
Likes
0
Uploaded
02/09/2017
 Views
0
Likes
0
Views
0
Likes
0
Uploaded
02/09/2017
 Views
0
Likes
0
Views
0
Likes
0
Uploaded
02/09/2017
 Views
0
Likes
0
Views
0
Likes
0
Uploaded
02/08/2017
 Views
0
Likes
0
Views
0
Likes
0
Uploaded
02/08/2017
 Views
0
Likes
0
Views
0
Likes
0
Uploaded
02/09/2017
 Views
1
Likes
0
Views
1
Likes
0
Uploaded
02/09/2017
 Views
0
Likes
0
Views
0
Likes
0
Uploaded
02/08/2017
 Views
0
Likes
0
Views
0
Likes
0
Uploaded
02/09/2017
 Views
1
Likes
0
Views
1
Likes
0
Uploaded
02/09/2017
 Views
2
Likes
0
Views
2
Likes
0
Uploaded
02/09/2017
 Views
0
Likes
0
Views
0
Likes
0
Uploaded
02/08/2017
 Views
0
Likes
0
Views
0
Likes
0
Uploaded
02/09/2017
 Views
0
Likes
0
Views
0
Likes
0
Uploaded
02/09/2017
 Views
1
Likes
0
Views
1
Likes
0
Uploaded
02/08/2017
 Views
0
Likes
0
Views
0
Likes
0
Uploaded
02/08/2017
 Views
0
Likes
0
Views
0
Likes
0
Uploaded
02/08/2017
 Views
0
Likes
0
Views
0
Likes
0
Uploaded
02/08/2017
 Views
1
Likes
0
Views
1
Likes
0
Uploaded
02/08/2017
 Views
0
Likes
0
Views
0
Likes
0
Uploaded
02/09/2017
 Views
0
Likes
0
Views
0
Likes
0
Uploaded
02/09/2017
 Views
1
Likes
0
Views
1
Likes
0
Uploaded
02/09/2017
 Views
0
Likes
0
Views
0
Likes
0
Uploaded
02/09/2017
 Views
0
Likes
0
Views
0
Likes
0
Uploaded
02/08/2017
 Views
0
Likes
0
Views
0
Likes
0
Uploaded
02/09/2017
 Views
0
Likes
0
Views
0
Likes
0
Uploaded
02/09/2017
 Views
1
Likes
0
Views
1
Likes
0
Uploaded
02/08/2017
 Views
0
Likes
0
Views
0
Likes
0
Uploaded
02/09/2017
 Views
1
Likes
0
Views
1
Likes
0
Uploaded
02/09/2017
 Views
2
Likes
0
Views
2
Likes
0
Uploaded
02/08/2017
 Views
0
Likes
0
Views
0
Likes
0
Uploaded
02/09/2017
 Views
1
Likes
0
Views
1
Likes
0
Uploaded
02/08/2017
 Views
1
Likes
0
Views
1
Likes
0
Uploaded
02/08/2017
 Views
1
Likes
0
Views
1
Likes
0
Uploaded
02/09/2017
 Views
0
Likes
0
Views
0
Likes
0
Uploaded
02/09/2017
 Views
0
Likes
0
Views
0
Likes
0
Uploaded
02/08/2017
 Views
1
Likes
0
Views
1
Likes
0
Uploaded
02/09/2017
 Views
0
Likes
0
Views
0
Likes
0
Uploaded
02/09/2017
 Views
0
Likes
0
Views
0
Likes
0
Uploaded
02/09/2017
 Views
0
Likes
0
Views
0
Likes
0
Uploaded
02/09/2017
 Views
2
Likes
0
Views
2
Likes
0
Uploaded
02/09/2017
 Views
1
Likes
0
Views
1
Likes
0
Uploaded
02/09/2017
 Views
0
Likes
0
Views
0
Likes
0
Uploaded
02/09/2017
 Views
2
Likes
0
Views
2
Likes
0
Uploaded
02/08/2017
 Views
0
Likes
0
Views
0
Likes
0
Uploaded
02/09/2017
 Views
0
Likes
0
Views
0
Likes
0
Uploaded
02/08/2017
 Views
0
Likes
0
Views
0
Likes
0
Uploaded
02/09/2017
 Views
1
Likes
0
Views
1
Likes
0
Uploaded
02/09/2017
 Views
0
Likes
0
Views
0
Likes
0
Uploaded
02/08/2017
 Views
1
Likes
0
Views
1
Likes
0
Uploaded
02/09/2017
 Views
0
Likes
0
Views
0
Likes
0
Uploaded
02/08/2017
 Views
0
Likes
0
Views
0
Likes
0
Uploaded
02/09/2017
 Views
1
Likes
0
Views
1
Likes
0
Uploaded
02/09/2017
 Views
0
Likes
0
Views
0
Likes
0
Uploaded
02/09/2017
 Views
0
Likes
0
Views
0
Likes
0
Uploaded
02/08/2017
 Views
0
Likes
0
Views
0
Likes
0
Uploaded
02/08/2017
 Views
0
Likes
0
Views
0
Likes
0
Uploaded
02/09/2017
 Views
1
Likes
0
Views
1
Likes
0
Uploaded
02/09/2017
 Views
0
Likes
0
Views
0
Likes
0
Uploaded
02/08/2017
 Views
1
Likes
0
Views
1
Likes
0
Uploaded
02/09/2017
 Views
0
Likes
0
Views
0
Likes
0
Uploaded
02/08/2017
 Views
0
Likes
0
Views
0
Likes
0
Uploaded
02/09/2017
 Views
1
Likes
0
Views
1
Likes
0
Uploaded
02/08/2017
 Views
0
Likes
0
Views
0
Likes
0
Uploaded
02/08/2017
 Views
0
Likes
0
Views
0
Likes
0
Uploaded
02/08/2017
 Views
1
Likes
0
Views
1
Likes
0
Uploaded
02/09/2017
 Views
0
Likes
0
Views
0
Likes
0
Uploaded
02/09/2017
 Views
1
Likes
0
Views
1
Likes
0
Uploaded
02/09/2017
 Views
0
Likes
0
Views
0
Likes
0
Uploaded
02/09/2017
 Views
0
Likes
0
Views
0
Likes
0
Uploaded
02/09/2017
 Views
0
Likes
0
Views
0
Likes
0
Uploaded
02/09/2017
 Views
0
Likes
0
Views
0
Likes
0
Uploaded
02/09/2017
 Views
0
Likes
0
Views
0
Likes
0
Uploaded
02/08/2017
 Views
0
Likes
0
Views
0
Likes
0
Uploaded
02/08/2017
 Views
0
Likes
0
Views
0
Likes
0
Uploaded
02/09/2017
 Views
0
Likes
0
Views
0
Likes
0
Uploaded
02/08/2017
 Views
0
Likes
0
Views
0
Likes
0
Uploaded
02/08/2017
 Views
2
Likes
0
Views
2
Likes
0
Uploaded
02/09/2017
 Views
1
Likes
0
Views
1
Likes
0
Uploaded
02/09/2017
 Views
0
Likes
0
Views
0
Likes
0
Uploaded
02/09/2017
 Views
0
Likes
0
Views
0
Likes
0
Uploaded
02/09/2017
 Views
0
Likes
0
Views
0
Likes
0
Uploaded
02/09/2017
 Views
0
Likes
0
Views
0
Likes
0
Uploaded
02/09/2017
 Views
0
Likes
0
Views
0
Likes
0
Uploaded
02/08/2017
 Views
0
Likes
0
Views
0
Likes
0
Uploaded
02/09/2017
 Views
0
Likes
0
Views
0
Likes
0
Uploaded
02/09/2017
 Views
1
Likes
0
Views
1
Likes
0
Uploaded
02/09/2017
 Views
0
Likes
0
Views
0
Likes
0
Uploaded
02/09/2017
 Views
0
Likes
0
Views
0
Likes
0
Uploaded
02/09/2017
 Views
1
Likes
0
Views
1
Likes
0
Uploaded
02/09/2017
 Views
0
Likes
0
Views
0
Likes
0
Uploaded
02/09/2017
 Views
0
Likes
0
Views
0
Likes
0
Uploaded
02/08/2017
 Views
0
Likes
0
Views
0
Likes
0
Uploaded
02/08/2017
 Views
0
Likes
0
Views
0
Likes
0
Uploaded
02/08/2017
 Views
0
Likes
0
Views
0
Likes
0
Uploaded
02/09/2017
 Views
0
Likes
0
Views
0
Likes
0
Uploaded
02/09/2017
 Views
0
Likes
0
Views
0
Likes
0
Uploaded
02/09/2017
 Views
0
Likes
0
Views
0
Likes
0
Uploaded
02/08/2017
 Views
0
Likes
0
Views
0
Likes
0
Uploaded
02/08/2017
 Views
0
Likes
0
Views
0
Likes
0
Uploaded
02/09/2017
 Views
3
Likes
0
Views
3
Likes
0
Uploaded
02/09/2017
 Views
0
Likes
0
Views
0
Likes
0
Uploaded
02/09/2017
 Views
0
Likes
0
Views
0
Likes
0
Uploaded
02/08/2017
 Views
1
Likes
0
Views
1
Likes
0
Uploaded
02/09/2017
 Views
1
Likes
0
Views
1
Likes
0
Uploaded
02/08/2017
 Views
0
Likes
0
Views
0
Likes
0
Uploaded
02/09/2017
 Views
1
Likes
0
Views
1
Likes
0
Uploaded
02/08/2017
 Views
0
Likes
0
Views
0
Likes
0
Uploaded
02/08/2017
 Views
1
Likes
0
Views
1
Likes
0
Uploaded
02/08/2017
 Views
0
Likes
0
Views
0
Likes
0
Uploaded
02/09/2017
 Views
0
Likes
0
Views
0
Likes
0
Uploaded
02/09/2017
 Views
0
Likes
0
Views
0
Likes
0
Uploaded
02/09/2017
 Views
0
Likes
0
Views
0
Likes
0
Uploaded
02/08/2017
 Views
0
Likes
0
Views
0
Likes
0
Uploaded
02/09/2017
 Views
0
Likes
0
Views
0
Likes
0
Uploaded
02/09/2017
 Views
1
Likes
0
Views
1
Likes
0
Uploaded
02/09/2017
 Views
0
Likes
0
Views
0
Likes
0
Uploaded
02/09/2017
 Views
0
Likes
0
Views
0
Likes
0
Uploaded
02/08/2017
 Views
0
Likes
0
Views
0
Likes
0
Uploaded
02/08/2017
 Views
0
Likes
0
Views
0
Likes
0
Uploaded
02/09/2017
 Views
0
Likes
0
Views
0
Likes
0
Uploaded
02/09/2017
 Views
1
Likes
0
Views
1
Likes
0
Uploaded
02/08/2017
 Views
0
Likes
0
Views
0
Likes
0
Uploaded
02/09/2017
 Views
0
Likes
0
Views
0
Likes
0
Uploaded
02/09/2017
 Views
0
Likes
0
Views
0
Likes
0
Uploaded
02/08/2017
 Views
0
Likes
0
Views
0
Likes
0
Uploaded
02/09/2017
 Views
1
Likes
0
Views
1
Likes
0
Uploaded
02/09/2017
 Views
0
Likes
0
Views
0
Likes
0
Uploaded
02/09/2017
 Views
0
Likes
0
Views
0
Likes
0
Uploaded
02/09/2017
 Views
0
Likes
0
Views
0
Likes
0
Uploaded
02/09/2017
 Views
0
Likes
0
Views
0
Likes
0
Uploaded
02/08/2017
 Views
0
Likes
0
Views
0
Likes
0
Uploaded
02/09/2017
 Views
1
Likes
0
Views
1
Likes
0
Uploaded
02/08/2017
 Views
0
Likes
0
Views
0
Likes
0
Uploaded
02/09/2017
 Views
0
Likes
0
Views
0
Likes
0
Uploaded
02/09/2017
 Views
1
Likes
0
Views
1
Likes
0
Uploaded
02/09/2017
 Views
0
Likes
0
Views
0
Likes
0
Uploaded
02/08/2017
 Views
1
Likes
0
Views
1
Likes
0
Uploaded
02/09/2017
 Views
2
Likes
0
Views
2
Likes
0
Uploaded
02/09/2017
 Views
0
Likes
0
Views
0
Likes
0
Uploaded
02/08/2017
 Views
0
Likes
0
Views
0
Likes
0
Uploaded
02/09/2017
 Views
1
Likes
0
Views
1
Likes
0
Uploaded
02/09/2017
 Views
0
Likes
0
Views
0
Likes
0
Uploaded
02/09/2017
 Views
0
Likes
0
Views
0
Likes
0
Uploaded
02/09/2017
 Views
0
Likes
0
Views
0
Likes
0
Uploaded
02/08/2017
 Views
0
Likes
0
Views
0
Likes
0
Uploaded
02/09/2017
 Views
1
Likes
0
Views
1
Likes
0
Uploaded
02/09/2017
 Views
3
Likes
0
Views
3
Likes
0
Uploaded
02/09/2017
 Views
0
Likes
0
Views
0
Likes
0
Uploaded
02/09/2017
 Views
0
Likes
0
Views
0
Likes
0
Uploaded
02/09/2017
 Views
0
Likes
0
Views
0
Likes
0
Uploaded
02/09/2017
 Views
1
Likes
0
Views
1
Likes
0
Uploaded
02/09/2017
 Views
0
Likes
0
Views
0
Likes
0
Uploaded
02/09/2017
 Views
0
Likes
0
Views
0
Likes
0
Uploaded
02/09/2017
 Views
0
Likes
0
Views
0
Likes
0
Uploaded
02/09/2017
 Views
0
Likes
0
Views
0
Likes
0
Uploaded
02/08/2017
 Views
2
Likes
0
Views
2
Likes
0
Uploaded
02/08/2017
 Views
0
Likes
0
Views
0
Likes
0
Uploaded
02/09/2017
 Views
0
Likes
0
Views
0
Likes
0
Uploaded
02/09/2017
 Views
1
Likes
0
Views
1
Likes
0
Uploaded
02/09/2017
 Views
1
Likes
0
Views
1
Likes
0
Uploaded
02/09/2017
 Views
0
Likes
0
Views
0
Likes
0
Uploaded
02/08/2017
 Views
0
Likes
0
Views
0
Likes
0
Uploaded
02/09/2017
 Views
1
Likes
0
Views
1
Likes
0
Uploaded
02/09/2017
 Views
1
Likes
0
Views
1
Likes
0
Uploaded
02/09/2017
 Views
0
Likes
0
Views
0
Likes
0
Uploaded
02/09/2017
 Views
1
Likes
0
Views
1
Likes
0
Uploaded
02/09/2017
 Views
0
Likes
0
Views
0
Likes
0
Uploaded
02/09/2017
 Views
0
Likes
0
Views
0
Likes
0
Uploaded
02/09/2017
 Views
0
Likes
0
Views
0
Likes
0
Uploaded
02/08/2017
 Views
0
Likes
0
Views
0
Likes
0
Uploaded
02/09/2017
 Views
0
Likes
0
Views
0
Likes
0
Uploaded
02/09/2017
 Views
0
Likes
0
Views
0
Likes
0
Uploaded
02/09/2017
 Views
0
Likes
0
Views
0
Likes
0
Uploaded
02/09/2017
 Views
0
Likes
0
Views
0
Likes
0
Uploaded
02/09/2017
 Views
0
Likes
0
Views
0
Likes
0
Uploaded
02/08/2017
 Views
1
Likes
0
Views
1
Likes
0
Uploaded
02/09/2017
 Views
0
Likes
0
Views
0
Likes
0
Uploaded
02/09/2017
 Views
2
Likes
0
Views
2
Likes
0
Uploaded
02/09/2017
 Views
1
Likes
0
Views
1
Likes
0
Uploaded
02/08/2017
 Views
0
Likes
0
Views
0
Likes
0
Uploaded
02/09/2017
 Views
1
Likes
0
Views
1
Likes
0
Uploaded
02/08/2017
 Views
0
Likes
0
Views
0
Likes
0
Uploaded
02/09/2017
 Views
0
Likes
0
Views
0
Likes
0
Uploaded
02/09/2017
 Views
0
Likes
0
Views
0
Likes
0
Uploaded
02/08/2017
 Views
0
Likes
0
Views
0
Likes
0
Uploaded
02/08/2017
 Views
0
Likes
0
Views
0
Likes
0
Uploaded
02/08/2017
 Views
0
Likes
0
Views
0
Likes
0
Uploaded
02/09/2017
 Views
1
Likes
0
Views
1
Likes
0
Uploaded
02/09/2017
 Views
0
Likes
0
Views
0
Likes
0
Uploaded
02/09/2017
 Views
1
Likes
0
Views
1
Likes
0
Uploaded
02/09/2017
 Views
0
Likes
0
Views
0
Likes
0
Uploaded
02/09/2017
 Views
0
Likes
0
Views
0
Likes
0
Uploaded
02/08/2017
 Views
0
Likes
0
Views
0
Likes
0
Uploaded
02/08/2017
 Views
0
Likes
0
Views
0
Likes
0
Uploaded
02/09/2017
 Views
0
Likes
0
Views
0
Likes
0
Uploaded
02/09/2017
 Views
0
Likes
0
Views
0
Likes
0
Uploaded
02/09/2017
 Views
0
Likes
0
Views
0
Likes
0
Uploaded
02/08/2017
 Views
0
Likes
0
Views
0
Likes
0
Uploaded
02/09/2017
 Views
0
Likes
0
Views
0
Likes
0
Uploaded
02/08/2017
 Views
0
Likes
0
Views
0
Likes
0
Uploaded
02/08/2017
 Views
0
Likes
0
Views
0
Likes
0
Uploaded
02/08/2017
 Views
0
Likes
0
Views
0
Likes
0
Uploaded
02/09/2017
 Views
0
Likes
0
Views
0
Likes
0
Uploaded
02/09/2017
 Views
0
Likes
0
Views
0
Likes
0
Uploaded
02/09/2017
 Views
0
Likes
0
Views
0
Likes
0
Uploaded
02/09/2017
 Views
0
Likes
0
Views
0
Likes
0
Uploaded
02/09/2017
 Views
1
Likes
0
Views
1
Likes
0
Uploaded
02/08/2017
 Views
0
Likes
0
Views
0
Likes
0
Uploaded
02/09/2017
 Views
0
Likes
0
Views
0
Likes
0
Uploaded
02/09/2017
 Views
0
Likes
0
Views
0
Likes
0
Uploaded
02/08/2017
 Views
0
Likes
0
Views
0
Likes
0
Uploaded
02/09/2017
 Views
0
Likes
0
Views
0
Likes
0
Uploaded
02/09/2017
 Views
0
Likes
0
Views
0
Likes
0
Uploaded
02/09/2017
 Views
0
Likes
0
Views
0
Likes
0
Uploaded
02/08/2017
 Views
0
Likes
0
Views
0
Likes
0
Uploaded
02/09/2017
 Views
0
Likes
0
Views
0
Likes
0
Uploaded
02/08/2017
 Views
0
Likes
0
Views
0
Likes
0
Uploaded
02/09/2017
 Views
0
Likes
0
Views
0
Likes
0
Uploaded
02/08/2017
 Views
0
Likes
0
Views
0
Likes
0
Uploaded
02/08/2017
 Views
0
Likes
0
Views
0
Likes
0
Uploaded
02/09/2017
 Views
0
Likes
0
Views
0
Likes
0
Uploaded
02/09/2017
 Views
1
Likes
0
Views
1
Likes
0
Uploaded
02/09/2017
 Views
1
Likes
0
Views
1
Likes
0
Uploaded
02/09/2017
 Views
0
Likes
0
Views
0
Likes
0
Uploaded
02/09/2017
 Views
0
Likes
0
Views
0
Likes
0
Uploaded
02/09/2017
 Views
0
Likes
0
Views
0
Likes
0
Uploaded
02/09/2017
 Views
0
Likes
0
Views
0
Likes
0
Uploaded
02/09/2017
 Views
0
Likes
0
Views
0
Likes
0
Uploaded
02/08/2017
 Views
0
Likes
0
Views
0
Likes
0
Uploaded
02/09/2017
 Views
0
Likes
0
Views
0
Likes
0
Uploaded
02/09/2017
 Views
0
Likes
0
Views
0
Likes
0
Uploaded
02/09/2017
 Views
0
Likes
0
Views
0
Likes
0
Uploaded
02/08/2017
 Views
0
Likes
0
Views
0
Likes
0
Uploaded
02/09/2017
 Views
1
Likes
0
Views
1
Likes
0
Uploaded
02/08/2017
 Views
2
Likes
0
Views
2
Likes
0
Uploaded
02/09/2017
 Views
0
Likes
0
Views
0
Likes
0
Uploaded
02/08/2017
 Views
0
Likes
0
Views
0
Likes
0
Uploaded
02/09/2017
 Views
1
Likes
0
Views
1
Likes
0
Uploaded
02/09/2017
 Views
1
Likes
0
Views
1
Likes
0
Uploaded
02/09/2017
 Views
0
Likes
0
Views
0
Likes
0
Uploaded
02/09/2017
 Views
0
Likes
0
Views
0
Likes
0
Uploaded
02/09/2017
 Views
1
Likes
0
Views
1
Likes
0
Uploaded
02/08/2017
 Views
1
Likes
0
Views
1
Likes
0
Uploaded
02/09/2017
 Views
0
Likes
0
Views
0
Likes
0
Uploaded
02/09/2017
 Views
0
Likes
0
Views
0
Likes
0
Uploaded
02/09/2017
 Views
0
Likes
0
Views
0
Likes
0
Uploaded
02/09/2017
 Views
0
Likes
0
Views
0
Likes
0
Uploaded
02/09/2017
 Views
0
Likes
0
Views
0
Likes
0
Uploaded
02/08/2017
 Views
0
Likes
0
Views
0
Likes
0
Uploaded
02/09/2017
 Views
0
Likes
0
Views
0
Likes
0
Uploaded
02/09/2017
 Views
0
Likes
0
Views
0
Likes
0
Uploaded
02/09/2017
 Views
0
Likes
0
Views
0
Likes
0
Uploaded
02/09/2017
 Views
0
Likes
0
Views
0
Likes
0
Uploaded
02/09/2017
 Views
2
Likes
0
Views
2
Likes
0
Uploaded
02/09/2017
 Views
1
Likes
0
Views
1
Likes
0
Uploaded
02/09/2017
 Views
0
Likes
0
Views
0
Likes
0
Uploaded
02/09/2017
 Views
0
Likes
0
Views
0
Likes
0
Uploaded
02/09/2017
 Views
2
Likes
0
Views
2
Likes
0
Uploaded
02/09/2017
 Views
0
Likes
0
Views
0
Likes
0
Uploaded
02/09/2017
 Views
1
Likes
0
Views
1
Likes
0
Uploaded
02/09/2017
 Views
1
Likes
0
Views
1
Likes
0
Uploaded
02/09/2017
 Views
0
Likes
0
Views
0
Likes
0
Uploaded
02/08/2017
 Views
0
Likes
0
Views
0
Likes
0
Uploaded
02/09/2017
 Views
0
Likes
0
Views
0
Likes
0
Uploaded
02/09/2017
 Views
1
Likes
0
Views
1
Likes
0
Uploaded
02/09/2017
 Views
1
Likes
0
Views
1
Likes
0
Uploaded
02/09/2017
 Views
0
Likes
0
Views
0
Likes
0
Uploaded
02/09/2017
 Views
0
Likes
0
Views
0
Likes
0
Uploaded
02/09/2017
 Views
0
Likes
0
Views
0
Likes
0
Uploaded
02/08/2017
 Views
0
Likes
0
Views
0
Likes
0
Uploaded
02/09/2017
 Views
0
Likes
0
Views
0
Likes
0
Uploaded
02/09/2017
 Views
0
Likes
0
Views
0
Likes
0
Uploaded
02/09/2017
 Views
1
Likes
0
Views
1
Likes
0
Uploaded
02/09/2017
 Views
0
Likes
0
Views
0
Likes
0
Uploaded
02/09/2017
 Views
1
Likes
0
Views
1
Likes
0
Uploaded
02/09/2017
 Views
1
Likes
0
Views
1
Likes
0
Uploaded
02/09/2017
 Views
0
Likes
0
Views
0
Likes
0
Uploaded
02/09/2017
 Views
1
Likes
0
Views
1
Likes
0
Uploaded
02/09/2017

Views
0
Likes
0
| Uploaded | 02/09/2017 |

Views
0
Likes
0
| Uploaded | 02/09/2017 |

Views
0
Likes
0
| Uploaded | 02/09/2017 |

Views
0
Likes
0
| Uploaded | 02/09/2017 |

Views
1
Likes
0
| Uploaded | 02/09/2017 |

Views
0
Likes
0
| Uploaded | 02/09/2017 |
Views
0
Likes
0
| Uploaded | 02/08/2017 |

Views
0
Likes
0
| Uploaded | 02/09/2017 |

Views
1
Likes
0
| Uploaded | 02/09/2017 |

Views
1
Likes
0
| Uploaded | 02/09/2017 |
Views
0
Likes
0
| Uploaded | 02/09/2017 |

Views
0
Likes
0
| Uploaded | 02/09/2017 |

Views
0
Likes
0
| Uploaded | 02/09/2017 |

Views
0
Likes
0
| Uploaded | 02/09/2017 |

Views
0
Likes
0
| Uploaded | 02/09/2017 |

Views
0
Likes
0
| Uploaded | 02/09/2017 |

Views
0
Likes
0
| Uploaded | 02/09/2017 |

Views
0
Likes
0
| Uploaded | 02/08/2017 |

Views
0
Likes
0
| Uploaded | 02/09/2017 |

Views
0
Likes
0
| Uploaded | 02/09/2017 |

Views
0
Likes
0
| Uploaded | 02/08/2017 |

Views
1
Likes
0
| Uploaded | 02/09/2017 |

Views
3
Likes
0
| Uploaded | 02/09/2017 |

Views
0
Likes
0
| Uploaded | 02/09/2017 |

Views
0
Likes
0
| Uploaded | 02/09/2017 |

Views
1
Likes
0
| Uploaded | 02/09/2017 |

Views
0
Likes
0
| Uploaded | 02/09/2017 |

Views
1
Likes
0
| Uploaded | 02/09/2017 |

Views
1
Likes
0
| Uploaded | 02/09/2017 |

Views
0
Likes
0
| Uploaded | 02/08/2017 |

Views
0
Likes
0
| Uploaded | 02/08/2017 |

Views
0
Likes
0
| Uploaded | 02/09/2017 |

Views
1
Likes
0
| Uploaded | 02/09/2017 |

Views
0
Likes
0
| Uploaded | 02/09/2017 |

Views
1
Likes
0
| Uploaded | 02/08/2017 |

Views
0
Likes
0
| Uploaded | 02/08/2017 |

Views
0
Likes
0
| Uploaded | 02/09/2017 |
Views
0
Likes
0
| Uploaded | 02/09/2017 |

Views
0
Likes
0
| Uploaded | 02/09/2017 |

Views
0
Likes
0
| Uploaded | 02/08/2017 |

Views
0
Likes
0
| Uploaded | 02/09/2017 |

Views
0
Likes
0
| Uploaded | 02/09/2017 |

Views
0
Likes
0
| Uploaded | 02/09/2017 |

Views
0
Likes
0
| Uploaded | 02/09/2017 |

Views
0
Likes
0
| Uploaded | 02/09/2017 |

Views
0
Likes
0
| Uploaded | 02/08/2017 |

Views
0
Likes
0
| Uploaded | 02/09/2017 |
Views
0
Likes
0
| Uploaded | 02/08/2017 |

Views
0
Likes
0
| Uploaded | 02/09/2017 |

Views
0
Likes
0
| Uploaded | 02/08/2017 |

Views
0
Likes
0
| Uploaded | 02/08/2017 |

Views
0
Likes
0
| Uploaded | 02/09/2017 |

Views
0
Likes
0
| Uploaded | 02/09/2017 |

Views
0
Likes
0
| Uploaded | 02/09/2017 |

Views
0
Likes
0
| Uploaded | 02/09/2017 |

Views
0
Likes
0
| Uploaded | 02/09/2017 |

Views
0
Likes
0
| Uploaded | 02/09/2017 |

Views
0
Likes
0
| Uploaded | 02/09/2017 |

Views
0
Likes
0
| Uploaded | 02/09/2017 |
Views
0
Likes
0
| Uploaded | 02/09/2017 |

Views
0
Likes
0
| Uploaded | 02/09/2017 |

Views
1
Likes
0
| Uploaded | 02/09/2017 |

Views
1
Likes
0
| Uploaded | 02/08/2017 |

Views
3
Likes
0
| Uploaded | 02/09/2017 |

Views
0
Likes
0
| Uploaded | 02/09/2017 |

Views
0
Likes
0
| Uploaded | 02/09/2017 |

Views
0
Likes
0
| Uploaded | 02/08/2017 |

Views
0
Likes
0
| Uploaded | 02/09/2017 |

Views
0
Likes
0
| Uploaded | 02/09/2017 |

Views
0
Likes
0
| Uploaded | 02/09/2017 |
Views
0
Likes
0
| Uploaded | 02/09/2017 |

Views
1
Likes
0
| Uploaded | 02/09/2017 |

Views
0
Likes
0
| Uploaded | 02/09/2017 |

Views
1
Likes
0
| Uploaded | 02/09/2017 |
Views
0
Likes
0
| Uploaded | 02/09/2017 |

Views
0
Likes
0
| Uploaded | 02/09/2017 |

Views
0
Likes
0
| Uploaded | 02/08/2017 |

Views
1
Likes
0
| Uploaded | 02/09/2017 |

Views
0
Likes
0
| Uploaded | 02/08/2017 |

Views
0
Likes
0
| Uploaded | 02/08/2017 |

Views
0
Likes
0
| Uploaded | 02/08/2017 |
Views
1
Likes
0
| Uploaded | 02/08/2017 |

Views
0
Likes
0
| Uploaded | 02/09/2017 |

Views
2
Likes
0
| Uploaded | 02/09/2017 |

Views
1
Likes
0
| Uploaded | 02/08/2017 |

Views
1
Likes
0
| Uploaded | 02/09/2017 |

Views
0
Likes
0
| Uploaded | 02/09/2017 |

Views
1
Likes
0
| Uploaded | 02/09/2017 |

Views
0
Likes
0
| Uploaded | 02/09/2017 |

Views
0
Likes
0
| Uploaded | 02/09/2017 |

Views
0
Likes
0
| Uploaded | 02/09/2017 |

Views
0
Likes
0
| Uploaded | 02/09/2017 |

Views
0
Likes
0
| Uploaded | 02/08/2017 |

Views
0
Likes
0
| Uploaded | 02/09/2017 |

Views
1
Likes
0
| Uploaded | 02/09/2017 |

Views
1
Likes
0
| Uploaded | 02/08/2017 |

Views
0
Likes
0
| Uploaded | 02/09/2017 |

Views
1
Likes
0
| Uploaded | 02/09/2017 |

Views
0
Likes
0
| Uploaded | 02/09/2017 |

Views
0
Likes
0
| Uploaded | 02/09/2017 |

Views
0
Likes
0
| Uploaded | 02/09/2017 |

Views
2
Likes
0
| Uploaded | 02/08/2017 |

Views
1
Likes
0
| Uploaded | 02/08/2017 |

Views
0
Likes
0
| Uploaded | 02/08/2017 |

Views
1
Likes
0
| Uploaded | 02/09/2017 |

Views
1
Likes
0
| Uploaded | 02/09/2017 |
Views
0
Likes
0
| Uploaded | 02/09/2017 |

Views
2
Likes
0
| Uploaded | 02/09/2017 |

Views
1
Likes
0
| Uploaded | 02/09/2017 |

Views
0
Likes
0
| Uploaded | 02/09/2017 |

Views
0
Likes
0
| Uploaded | 02/09/2017 |

Views
0
Likes
0
| Uploaded | 02/08/2017 |

Views
0
Likes
0
| Uploaded | 02/09/2017 |
Views
3
Likes
0
| Uploaded | 02/09/2017 |

Views
0
Likes
0
| Uploaded | 02/08/2017 |

Views
0
Likes
0
| Uploaded | 02/08/2017 |

Views
0
Likes
0
| Uploaded | 02/09/2017 |

Views
0
Likes
0
| Uploaded | 02/09/2017 |

Views
0
Likes
0
| Uploaded | 02/09/2017 |

Views
0
Likes
0
| Uploaded | 02/09/2017 |

Views
0
Likes
0
| Uploaded | 02/09/2017 |

Views
1
Likes
0
| Uploaded | 02/09/2017 |

Views
0
Likes
0
| Uploaded | 02/09/2017 |

Views
0
Likes
0
| Uploaded | 02/09/2017 |

Views
0
Likes
0
| Uploaded | 02/09/2017 |

Views
1
Likes
0
| Uploaded | 02/09/2017 |

Views
0
Likes
0
| Uploaded | 02/08/2017 |

Views
1
Likes
0
| Uploaded | 02/09/2017 |

Views
0
Likes
0
| Uploaded | 02/09/2017 |

Views
1
Likes
0
| Uploaded | 02/09/2017 |

Views
0
Likes
0
| Uploaded | 02/09/2017 |

Views
1
Likes
0
| Uploaded | 02/09/2017 |

Views
1
Likes
0
| Uploaded | 02/09/2017 |

Views
1
Likes
0
| Uploaded | 02/08/2017 |

Views
0
Likes
0
| Uploaded | 02/09/2017 |

Views
0
Likes
0
| Uploaded | 02/09/2017 |

Views
0
Likes
0
| Uploaded | 02/08/2017 |

Views
0
Likes
0
| Uploaded | 02/08/2017 |

Views
0
Likes
0
| Uploaded | 02/09/2017 |
Views
0
Likes
0
| Uploaded | 02/09/2017 |
Views
0
Likes
0
| Uploaded | 02/09/2017 |

Views
0
Likes
0
| Uploaded | 02/09/2017 |

Views
2
Likes
0
| Uploaded | 02/09/2017 |
Views
0
Likes
0
| Uploaded | 02/09/2017 |

Views
1
Likes
0
| Uploaded | 02/09/2017 |

Views
0
Likes
0
| Uploaded | 02/08/2017 |

Views
0
Likes
0
| Uploaded | 02/08/2017 |

Views
0
Likes
0
| Uploaded | 02/08/2017 |

Views
0
Likes
0
| Uploaded | 02/09/2017 |

Views
0
Likes
0
| Uploaded | 02/08/2017 |

Views
1
Likes
0
| Uploaded | 02/09/2017 |

Views
0
Likes
0
| Uploaded | 02/09/2017 |

Views
0
Likes
0
| Uploaded | 02/09/2017 |

Views
0
Likes
0
| Uploaded | 02/08/2017 |

Views
0
Likes
0
| Uploaded | 02/08/2017 |

Views
0
Likes
0
| Uploaded | 02/08/2017 |

Views
0
Likes
0
| Uploaded | 02/09/2017 |
Views
0
Likes
0
| Uploaded | 02/08/2017 |
Views
2
Likes
0
| Uploaded | 02/09/2017 |

Views
0
Likes
0
| Uploaded | 02/08/2017 |

Views
0
Likes
0
| Uploaded | 02/09/2017 |

Views
0
Likes
0
| Uploaded | 02/08/2017 |

Views
0
Likes
0
| Uploaded | 02/09/2017 |

Views
1
Likes
0
| Uploaded | 02/09/2017 |

Views
0
Likes
0
| Uploaded | 02/09/2017 |

Views
1
Likes
0
| Uploaded | 02/09/2017 |

Views
0
Likes
0
| Uploaded | 02/09/2017 |

Views
0
Likes
0
| Uploaded | 02/08/2017 |

Views
0
Likes
0
| Uploaded | 02/09/2017 |

Views
0
Likes
0
| Uploaded | 02/09/2017 |

Views
1
Likes
0
| Uploaded | 02/08/2017 |

Views
0
Likes
0
| Uploaded | 02/09/2017 |
Views
0
Likes
0
| Uploaded | 02/08/2017 |
Views
0
Likes
0
| Uploaded | 02/08/2017 |

Views
0
Likes
0
| Uploaded | 02/09/2017 |

Views
0
Likes
0
| Uploaded | 02/09/2017 |

Views
0
Likes
0
| Uploaded | 02/09/2017 |

Views
0
Likes
0
| Uploaded | 02/09/2017 |

Views
0
Likes
0
| Uploaded | 02/08/2017 |

Views
1
Likes
0
| Uploaded | 02/09/2017 |

Views
0
Likes
0
| Uploaded | 02/09/2017 |

Views
0
Likes
0
| Uploaded | 02/09/2017 |

Views
0
Likes
0
| Uploaded | 02/09/2017 |
Views
0
Likes
0
| Uploaded | 02/08/2017 |

Views
0
Likes
0
| Uploaded | 02/09/2017 |

Views
0
Likes
0
| Uploaded | 02/09/2017 |

Views
0
Likes
0
| Uploaded | 02/09/2017 |

Views
0
Likes
0
| Uploaded | 02/08/2017 |

Views
0
Likes
0
| Uploaded | 02/09/2017 |
Views
1
Likes
0
| Uploaded | 02/08/2017 |

Views
2
Likes
0
| Uploaded | 02/09/2017 |

Views
0
Likes
0
| Uploaded | 02/09/2017 |

Views
0
Likes
0
| Uploaded | 02/09/2017 |

Views
0
Likes
0
| Uploaded | 02/08/2017 |

Views
0
Likes
0
| Uploaded | 02/09/2017 |

Views
0
Likes
0
| Uploaded | 02/08/2017 |

Views
0
Likes
0
| Uploaded | 02/09/2017 |
Views
1
Likes
0
| Uploaded | 02/09/2017 |

Views
0
Likes
0
| Uploaded | 02/09/2017 |

Views
0
Likes
0
| Uploaded | 02/09/2017 |

Views
0
Likes
0
| Uploaded | 02/09/2017 |

Views
0
Likes
0
| Uploaded | 02/09/2017 |

Views
0
Likes
0
| Uploaded | 02/09/2017 |

Views
0
Likes
0
| Uploaded | 02/08/2017 |

Views
1
Likes
0
| Uploaded | 02/08/2017 |

Views
0
Likes
0
| Uploaded | 02/09/2017 |

Views
0
Likes
0
| Uploaded | 02/09/2017 |
Views
1
Likes
0
| Uploaded | 02/08/2017 |
Views
0
Likes
0
| Uploaded | 02/09/2017 |

Views
0
Likes
0
| Uploaded | 02/08/2017 |

Views
2
Likes
0
| Uploaded | 02/09/2017 |

Views
0
Likes
0
| Uploaded | 02/09/2017 |

Views
1
Likes
0
| Uploaded | 02/08/2017 |

Views
0
Likes
0
| Uploaded | 02/09/2017 |

Views
0
Likes
0
| Uploaded | 02/09/2017 |

Views
0
Likes
0
| Uploaded | 02/09/2017 |

Views
0
Likes
0
| Uploaded | 02/09/2017 |

Views
0
Likes
0
| Uploaded | 02/09/2017 |

Views
1
Likes
0
| Uploaded | 02/09/2017 |

Views
0
Likes
0
| Uploaded | 02/09/2017 |

Views
0
Likes
0
| Uploaded | 02/09/2017 |

Views
2
Likes
0
| Uploaded | 02/09/2017 |
Views
0
Likes
0
| Uploaded | 02/09/2017 |

Views
0
Likes
0
| Uploaded | 02/09/2017 |

Views
0
Likes
0
| Uploaded | 02/08/2017 |

Views
0
Likes
0
| Uploaded | 02/08/2017 |

Views
0
Likes
0
| Uploaded | 02/09/2017 |

Views
1
Likes
0
| Uploaded | 02/09/2017 |

Views
0
Likes
0
| Uploaded | 02/08/2017 |

Views
0
Likes
0
| Uploaded | 02/09/2017 |

Views
1
Likes
0
| Uploaded | 02/09/2017 |

Views
2
Likes
0
| Uploaded | 02/09/2017 |

Views
0
Likes
0
| Uploaded | 02/08/2017 |

Views
0
Likes
0
| Uploaded | 02/09/2017 |

Views
0
Likes
0
| Uploaded | 02/09/2017 |

Views
1
Likes
0
| Uploaded | 02/08/2017 |

Views
0
Likes
0
| Uploaded | 02/08/2017 |

Views
0
Likes
0
| Uploaded | 02/08/2017 |

Views
0
Likes
0
| Uploaded | 02/08/2017 |

Views
1
Likes
0
| Uploaded | 02/08/2017 |

Views
0
Likes
0
| Uploaded | 02/09/2017 |
Views
0
Likes
0
| Uploaded | 02/09/2017 |

Views
1
Likes
0
| Uploaded | 02/09/2017 |

Views
0
Likes
0
| Uploaded | 02/09/2017 |

Views
0
Likes
0
| Uploaded | 02/08/2017 |

Views
0
Likes
0
| Uploaded | 02/09/2017 |

Views
0
Likes
0
| Uploaded | 02/09/2017 |
Views
1
Likes
0
| Uploaded | 02/08/2017 |

Views
0
Likes
0
| Uploaded | 02/09/2017 |
Views
1
Likes
0
| Uploaded | 02/09/2017 |

Views
2
Likes
0
| Uploaded | 02/08/2017 |

Views
0
Likes
0
| Uploaded | 02/09/2017 |

Views
1
Likes
0
| Uploaded | 02/08/2017 |

Views
1
Likes
0
| Uploaded | 02/08/2017 |

Views
1
Likes
0
| Uploaded | 02/09/2017 |
Views
0
Likes
0
| Uploaded | 02/09/2017 |

Views
0
Likes
0
| Uploaded | 02/08/2017 |

Views
1
Likes
0
| Uploaded | 02/09/2017 |

Views
0
Likes
0
| Uploaded | 02/09/2017 |

Views
0
Likes
0
| Uploaded | 02/09/2017 |
Views
0
Likes
0
| Uploaded | 02/09/2017 |

Views
2
Likes
0
| Uploaded | 02/09/2017 |

Views
1
Likes
0
| Uploaded | 02/09/2017 |
Views
0
Likes
0
| Uploaded | 02/09/2017 |

Views
2
Likes
0
| Uploaded | 02/08/2017 |

Views
0
Likes
0
| Uploaded | 02/09/2017 |

Views
0
Likes
0
| Uploaded | 02/08/2017 |

Views
0
Likes
0
| Uploaded | 02/09/2017 |

Views
1
Likes
0
| Uploaded | 02/09/2017 |

Views
0
Likes
0
| Uploaded | 02/08/2017 |

Views
1
Likes
0
| Uploaded | 02/09/2017 |

Views
0
Likes
0
| Uploaded | 02/08/2017 |

Views
0
Likes
0
| Uploaded | 02/09/2017 |

Views
1
Likes
0
| Uploaded | 02/09/2017 |

Views
0
Likes
0
| Uploaded | 02/09/2017 |

Views
0
Likes
0
| Uploaded | 02/08/2017 |

Views
0
Likes
0
| Uploaded | 02/08/2017 |

Views
0
Likes
0
| Uploaded | 02/09/2017 |

Views
1
Likes
0
| Uploaded | 02/09/2017 |

Views
0
Likes
0
| Uploaded | 02/08/2017 |
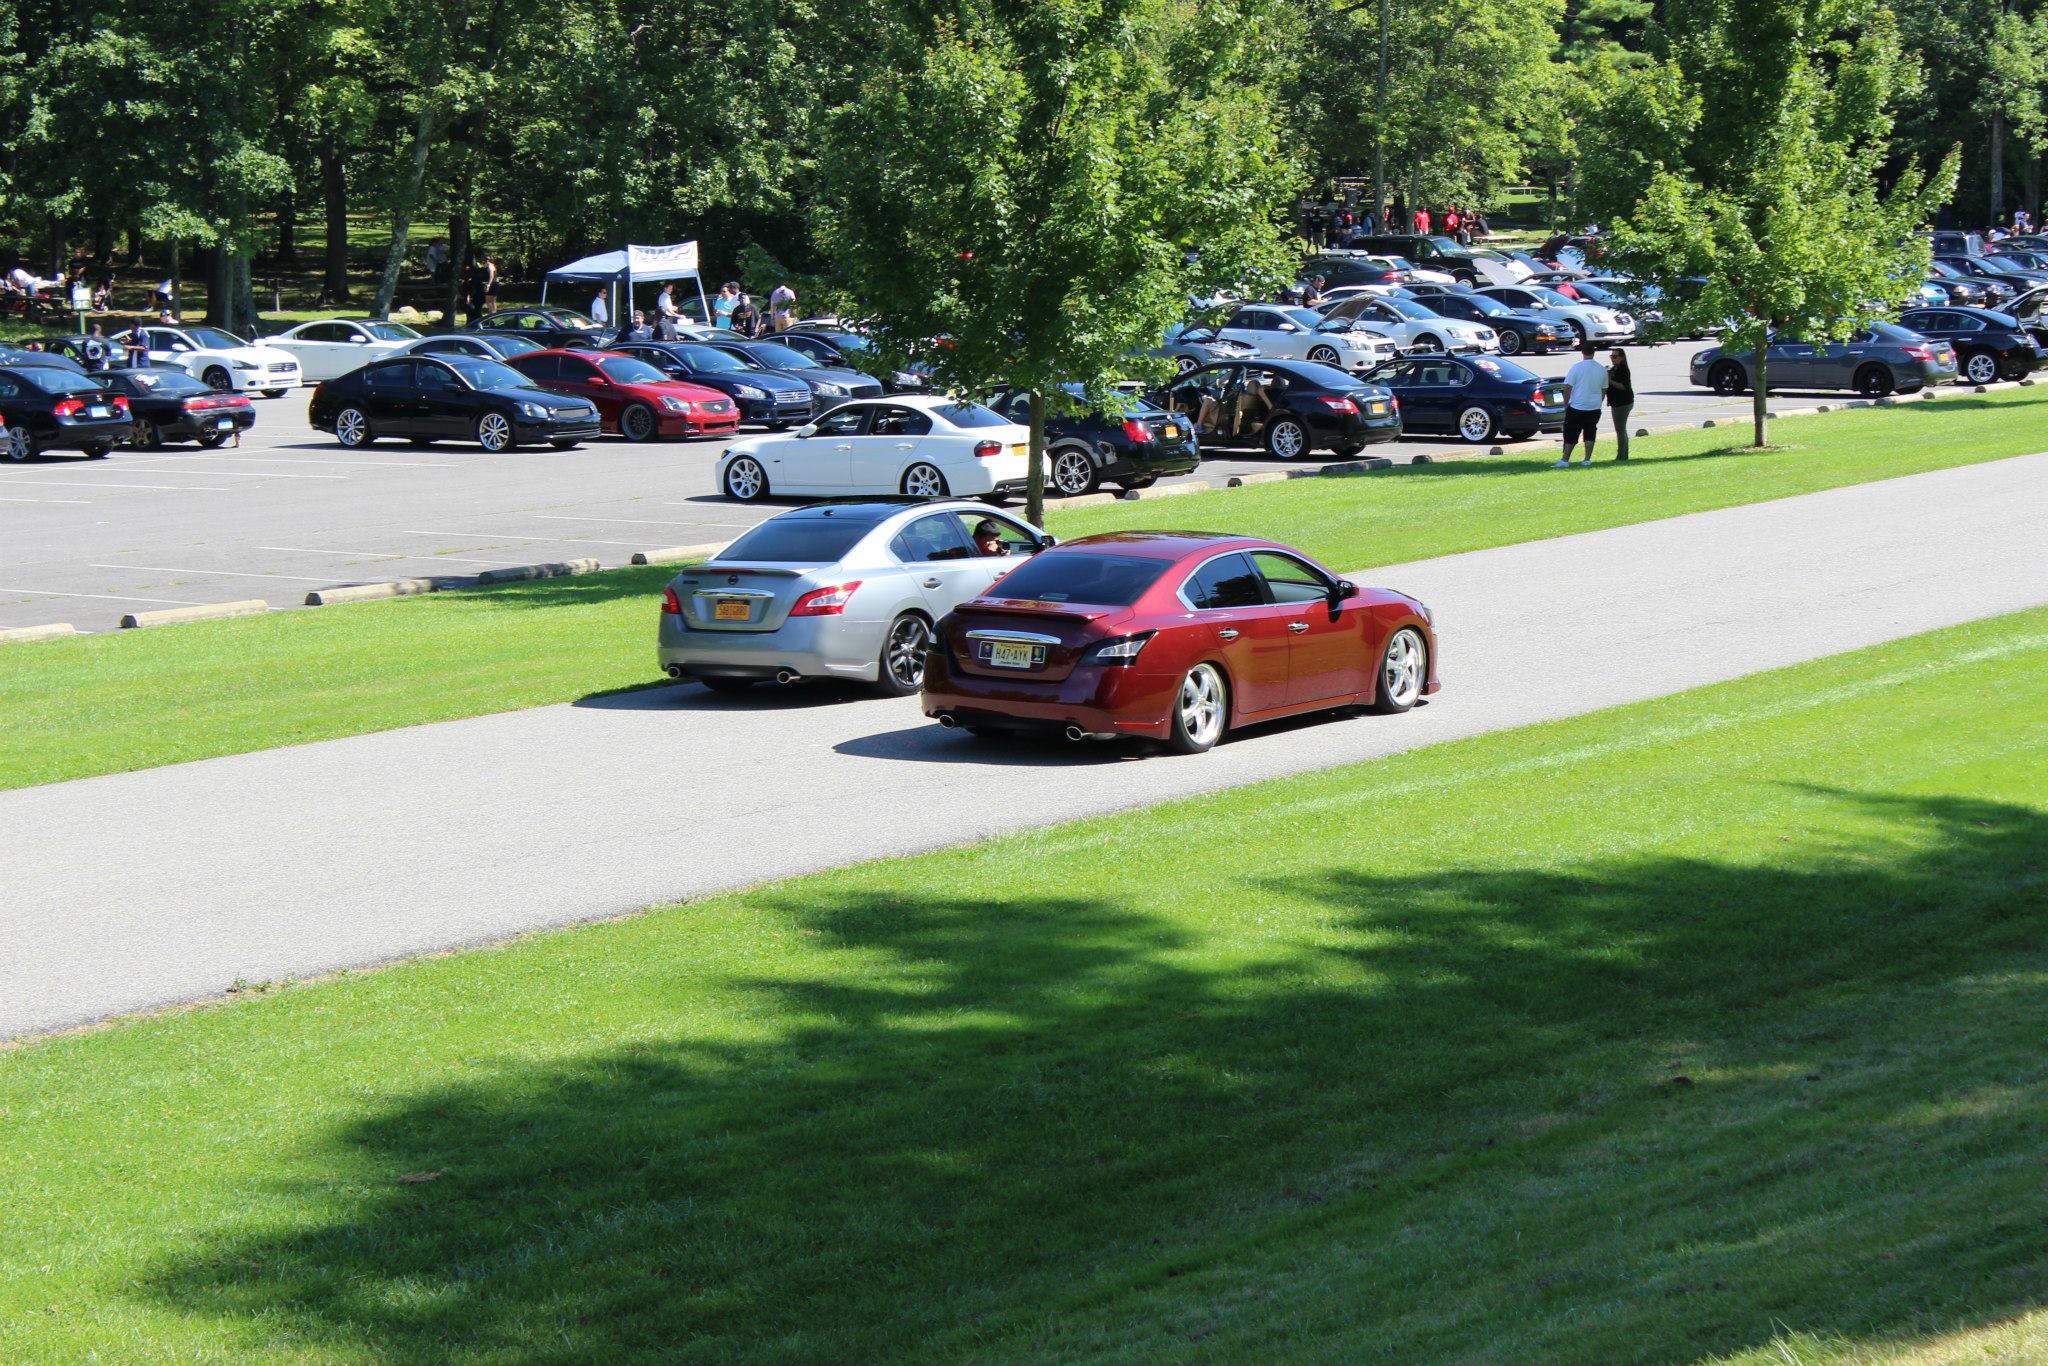
Views
1
Likes
0
| Uploaded | 02/09/2017 |

Views
0
Likes
0
| Uploaded | 02/08/2017 |

Views
0
Likes
0
| Uploaded | 02/09/2017 |

Views
1
Likes
0
| Uploaded | 02/08/2017 |

Views
0
Likes
0
| Uploaded | 02/08/2017 |

Views
0
Likes
0
| Uploaded | 02/08/2017 |

Views
1
Likes
0
| Uploaded | 02/09/2017 |

Views
0
Likes
0
| Uploaded | 02/09/2017 |

Views
1
Likes
0
| Uploaded | 02/09/2017 |

Views
0
Likes
0
| Uploaded | 02/09/2017 |
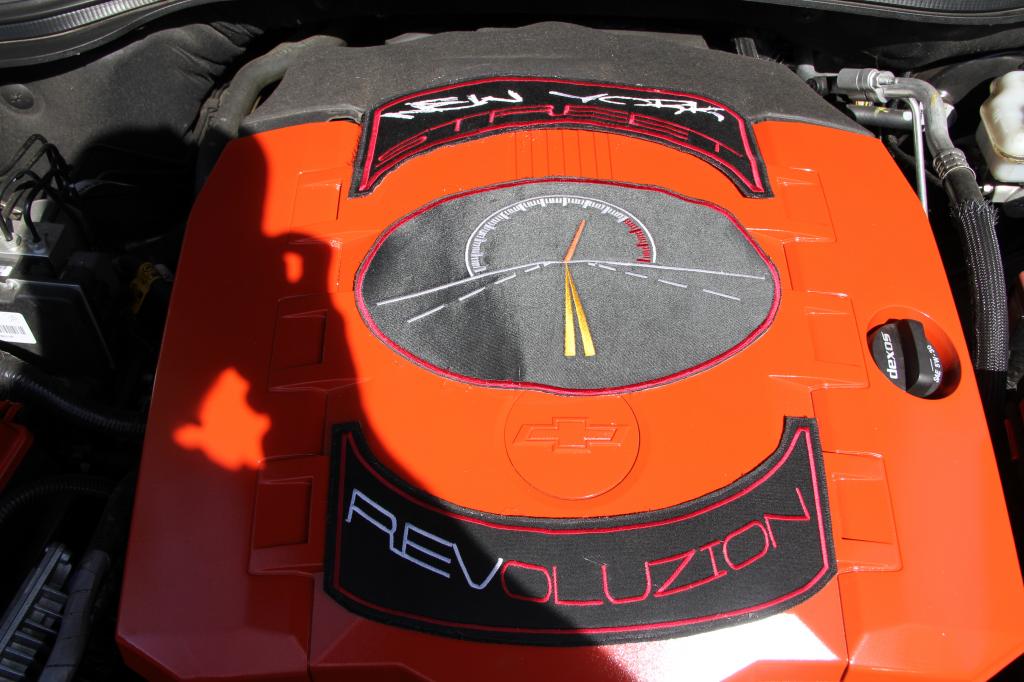
Views
0
Likes
0
| Uploaded | 02/09/2017 |

Views
0
Likes
0
| Uploaded | 02/09/2017 |

Views
0
Likes
0
| Uploaded | 02/09/2017 |

Views
0
Likes
0
| Uploaded | 02/08/2017 |

Views
0
Likes
0
| Uploaded | 02/08/2017 |

Views
0
Likes
0
| Uploaded | 02/09/2017 |

Views
0
Likes
0
| Uploaded | 02/08/2017 |

Views
0
Likes
0
| Uploaded | 02/08/2017 |

Views
2
Likes
0
| Uploaded | 02/09/2017 |

Views
1
Likes
0
| Uploaded | 02/09/2017 |

Views
0
Likes
0
| Uploaded | 02/09/2017 |

Views
0
Likes
0
| Uploaded | 02/09/2017 |
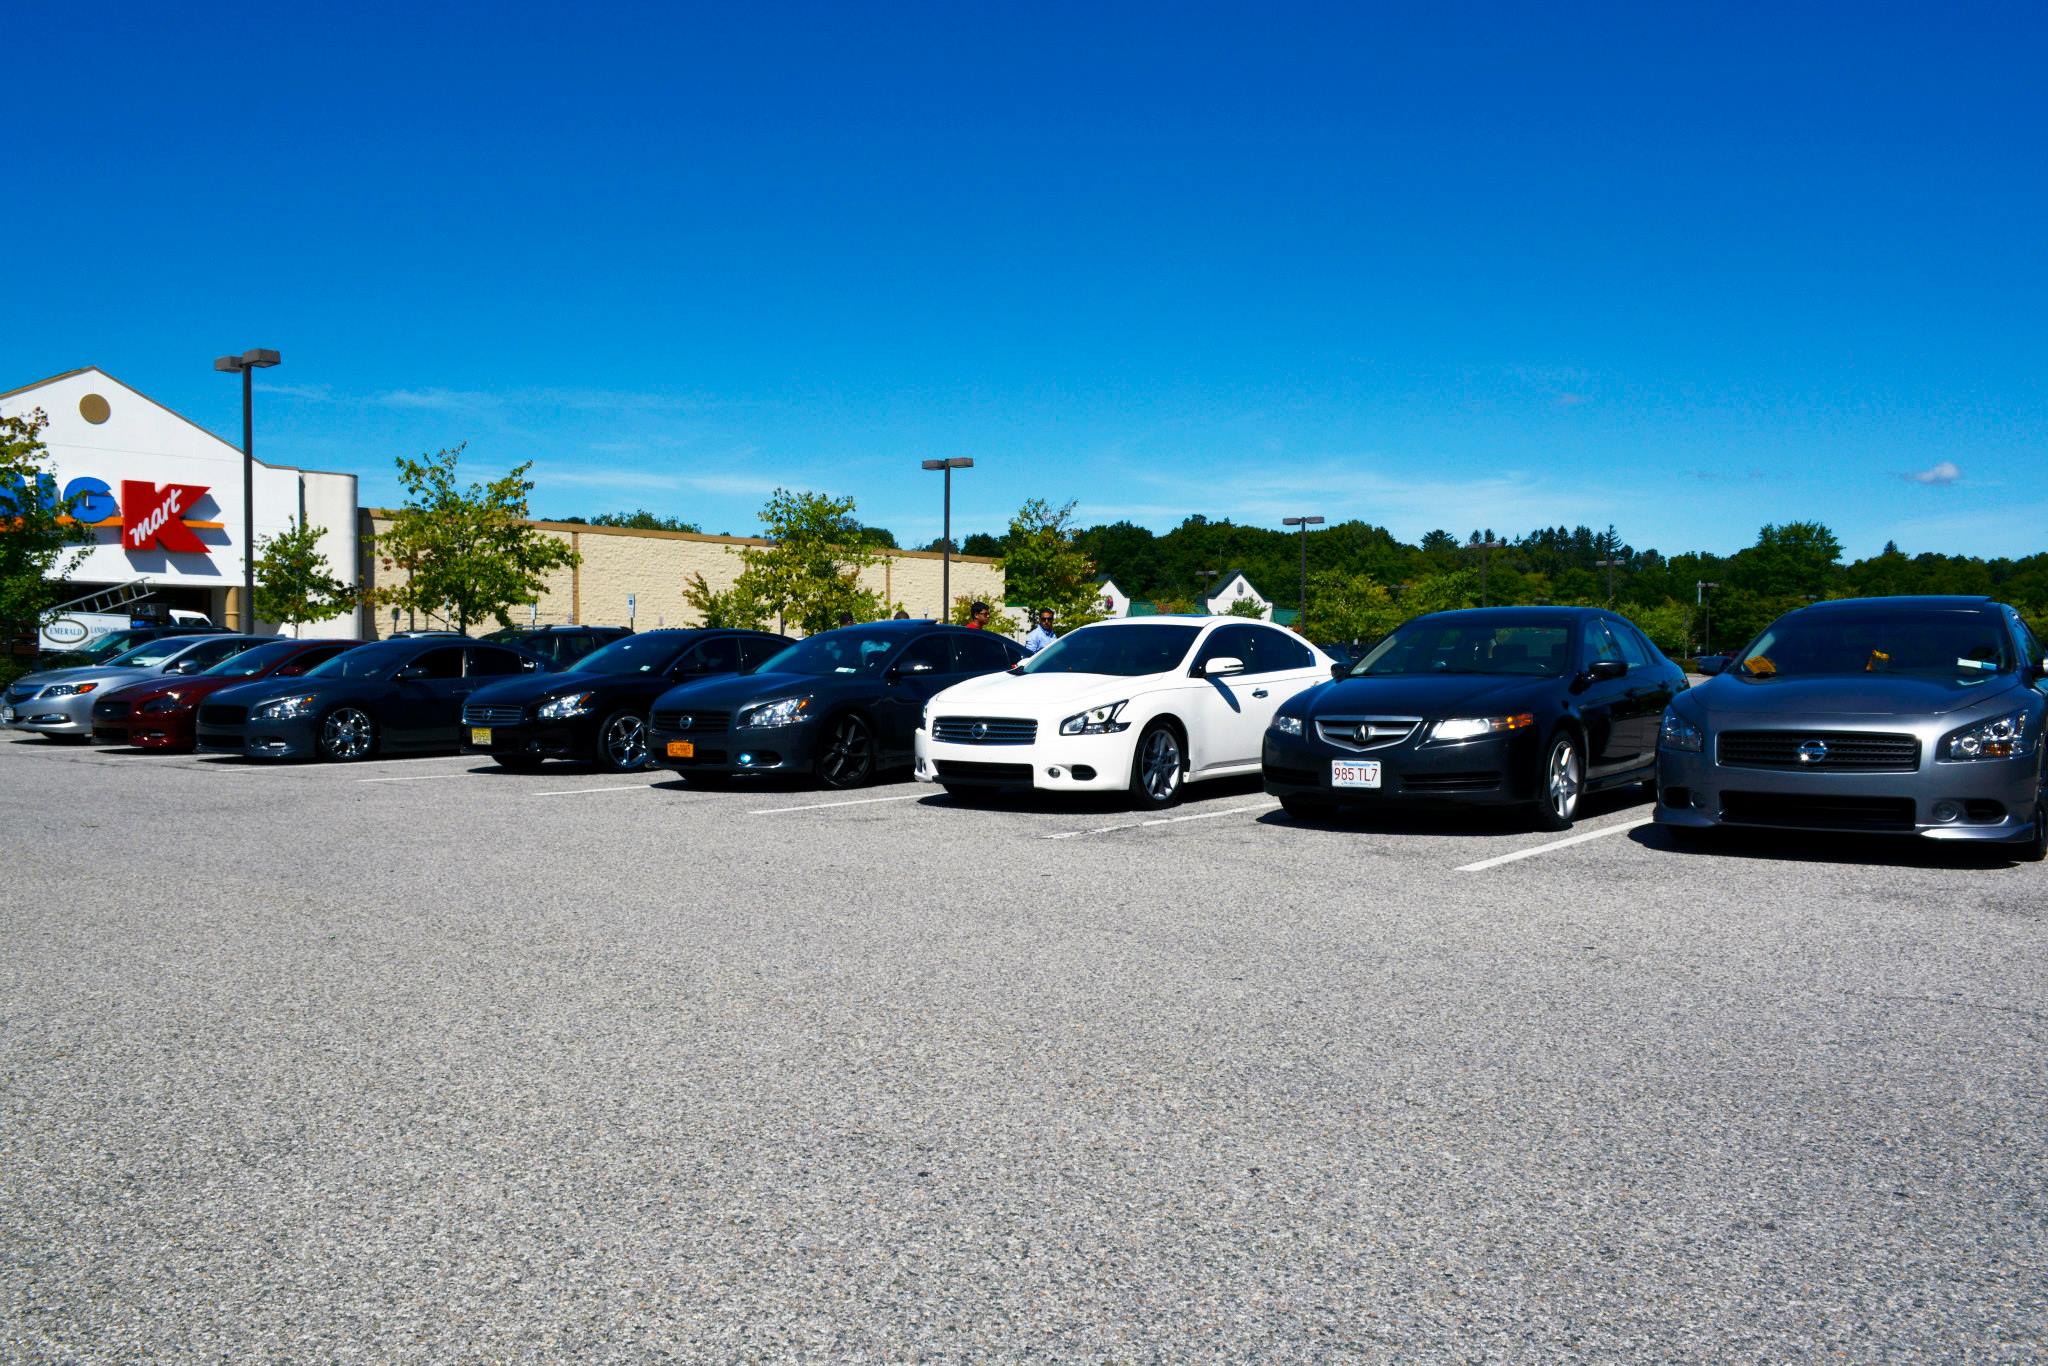
Views
0
Likes
0
| Uploaded | 02/09/2017 |

Views
0
Likes
0
| Uploaded | 02/09/2017 |

Views
0
Likes
0
| Uploaded | 02/08/2017 |

Views
0
Likes
0
| Uploaded | 02/09/2017 |

Views
0
Likes
0
| Uploaded | 02/09/2017 |

Views
1
Likes
0
| Uploaded | 02/09/2017 |

Views
0
Likes
0
| Uploaded | 02/09/2017 |

Views
0
Likes
0
| Uploaded | 02/09/2017 |

Views
1
Likes
0
| Uploaded | 02/09/2017 |

Views
0
Likes
0
| Uploaded | 02/09/2017 |

Views
0
Likes
0
| Uploaded | 02/08/2017 |

Views
0
Likes
0
| Uploaded | 02/08/2017 |

Views
0
Likes
0
| Uploaded | 02/08/2017 |
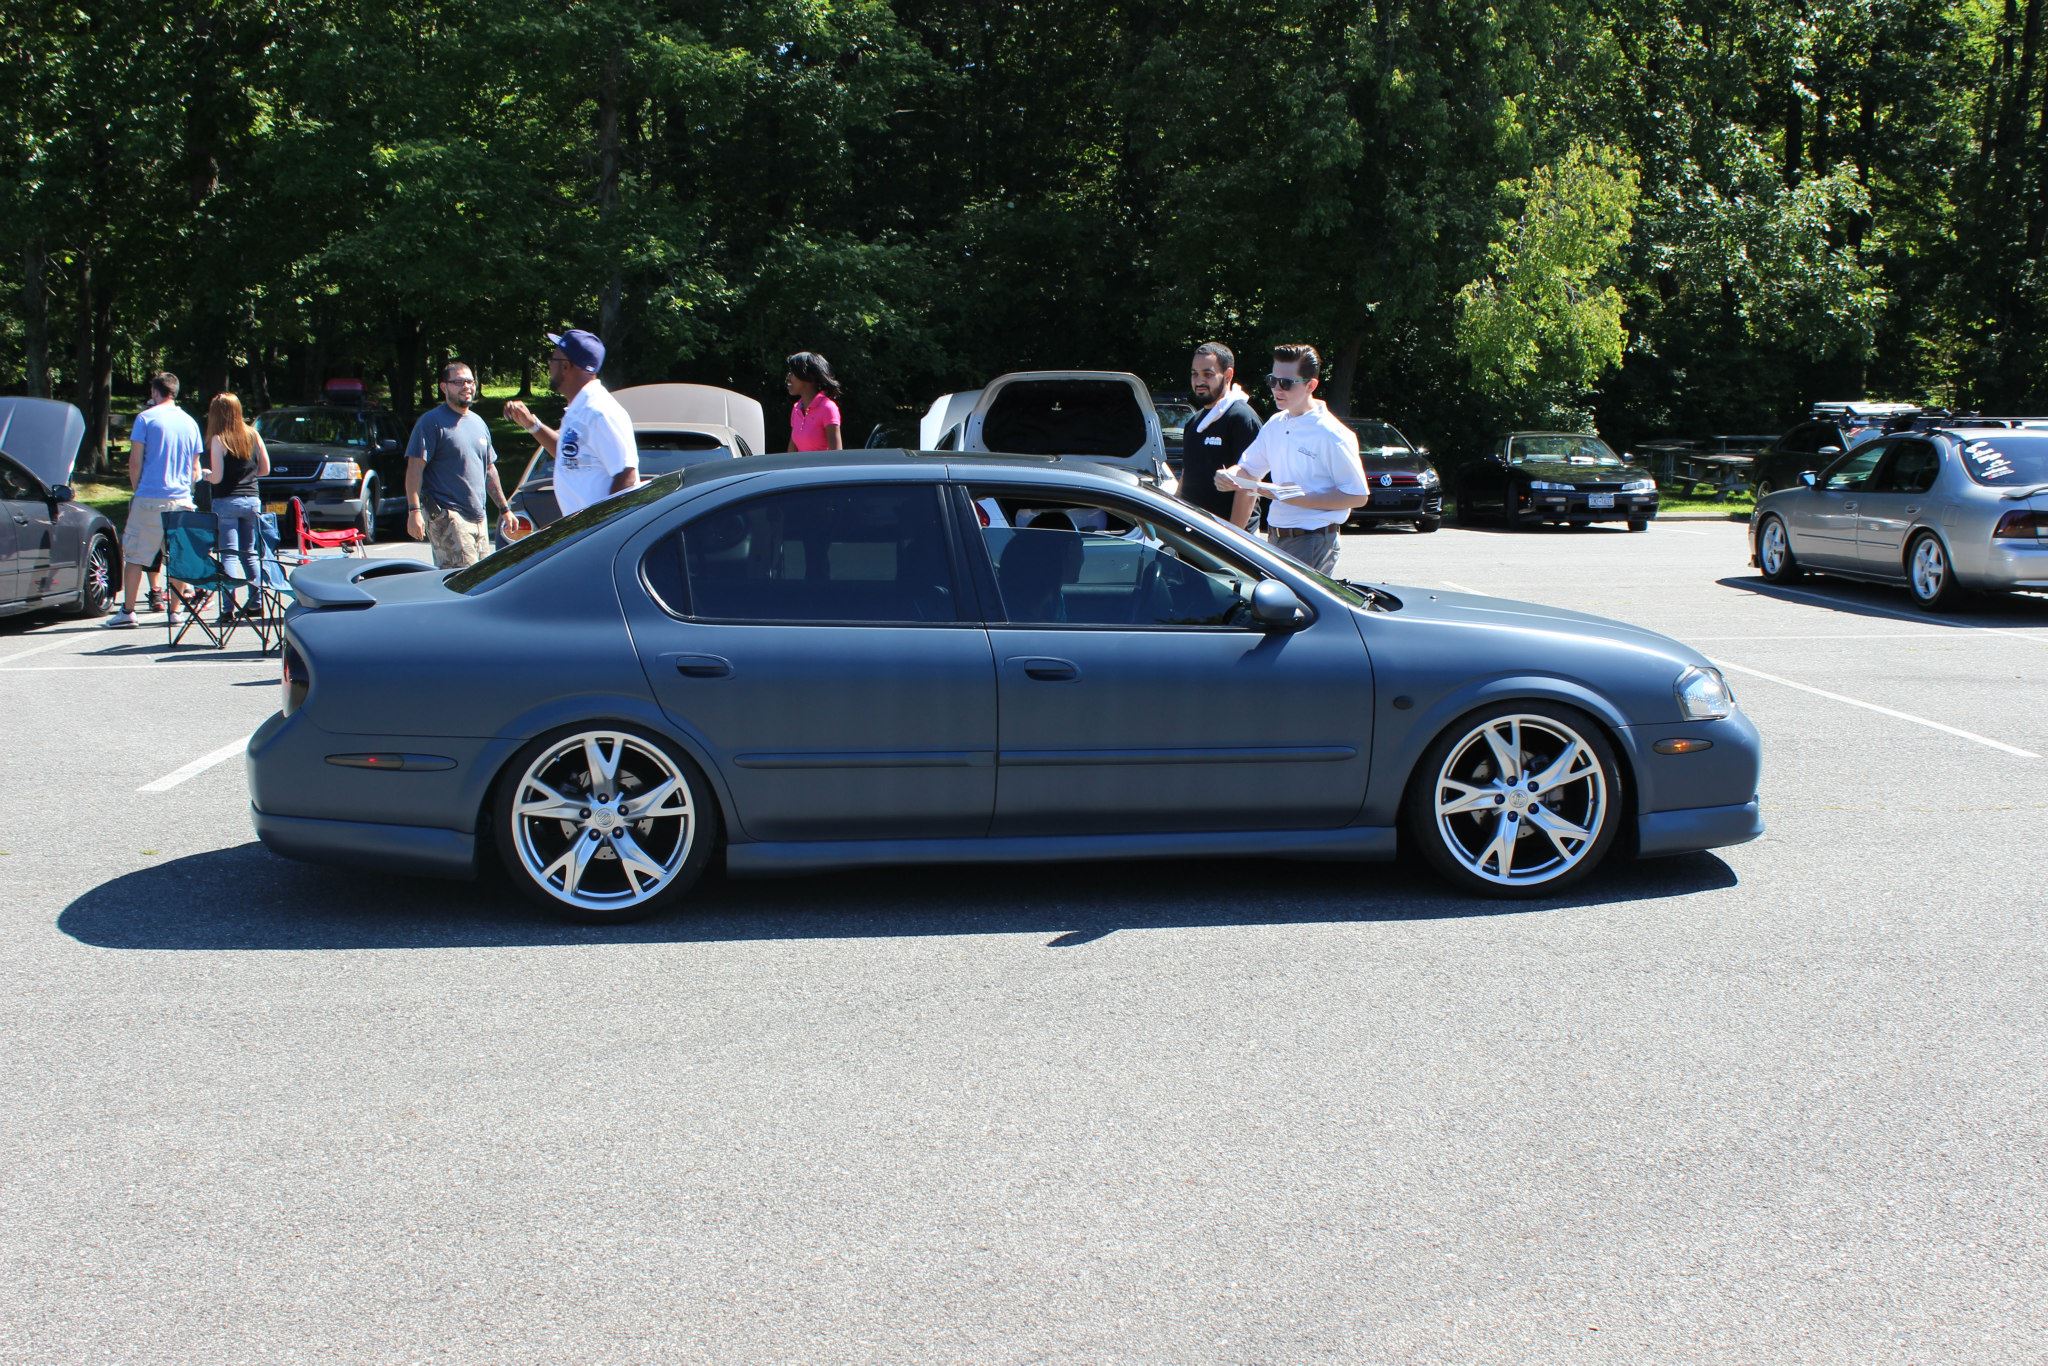
Views
0
Likes
0
| Uploaded | 02/09/2017 |

Views
0
Likes
0
| Uploaded | 02/09/2017 |
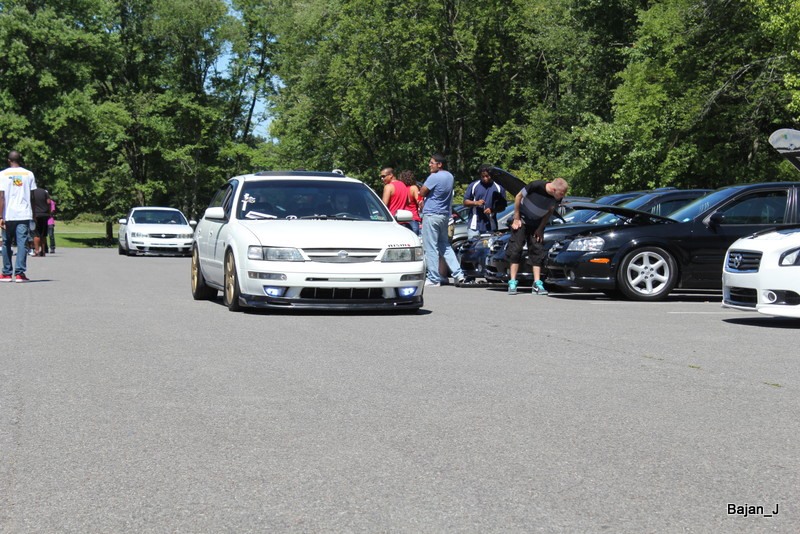
Views
0
Likes
0
| Uploaded | 02/09/2017 |

Views
0
Likes
0
| Uploaded | 02/08/2017 |

Views
0
Likes
0
| Uploaded | 02/08/2017 |

Views
0
Likes
0
| Uploaded | 02/09/2017 |

Views
3
Likes
0
| Uploaded | 02/09/2017 |

Views
0
Likes
0
| Uploaded | 02/09/2017 |

Views
0
Likes
0
| Uploaded | 02/08/2017 |

Views
1
Likes
0
| Uploaded | 02/09/2017 |

Views
1
Likes
0
| Uploaded | 02/08/2017 |

Views
0
Likes
0
| Uploaded | 02/09/2017 |

Views
1
Likes
0
| Uploaded | 02/08/2017 |

Views
0
Likes
0
| Uploaded | 02/08/2017 |

Views
1
Likes
0
| Uploaded | 02/08/2017 |

Views
0
Likes
0
| Uploaded | 02/09/2017 |

Views
0
Likes
0
| Uploaded | 02/09/2017 |

Views
0
Likes
0
| Uploaded | 02/09/2017 |
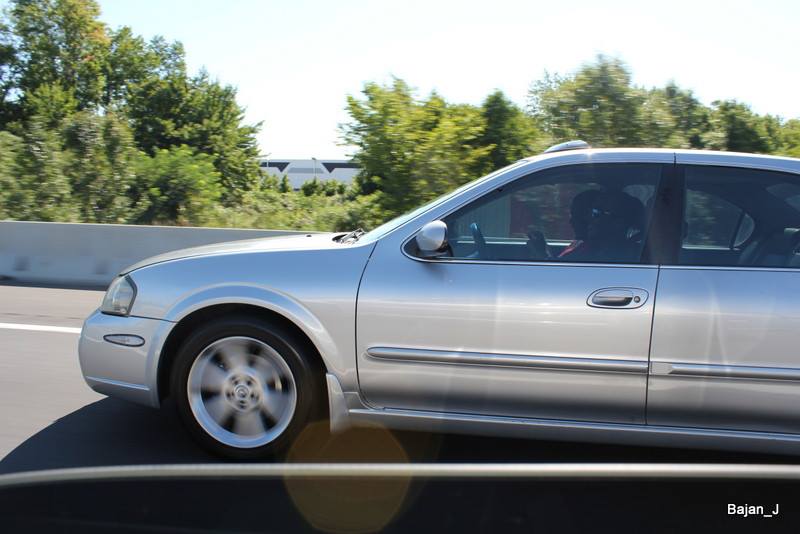
Views
0
Likes
0
| Uploaded | 02/08/2017 |

Views
0
Likes
0
| Uploaded | 02/09/2017 |

Views
0
Likes
0
| Uploaded | 02/09/2017 |

Views
1
Likes
0
| Uploaded | 02/09/2017 |

Views
0
Likes
0
| Uploaded | 02/09/2017 |
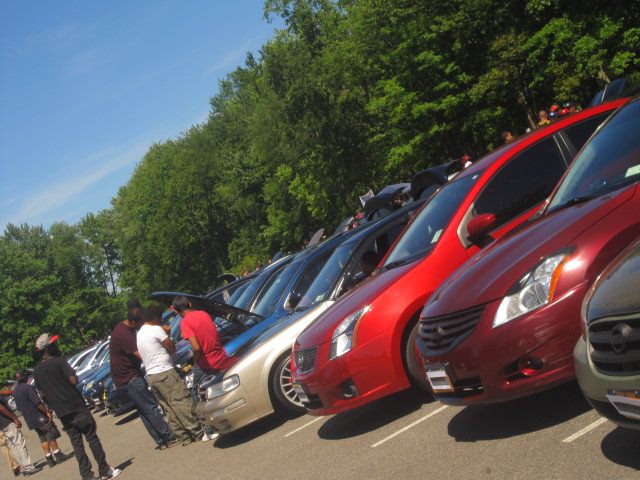
Views
0
Likes
0
| Uploaded | 02/08/2017 |

Views
0
Likes
0
| Uploaded | 02/08/2017 |

Views
0
Likes
0
| Uploaded | 02/09/2017 |
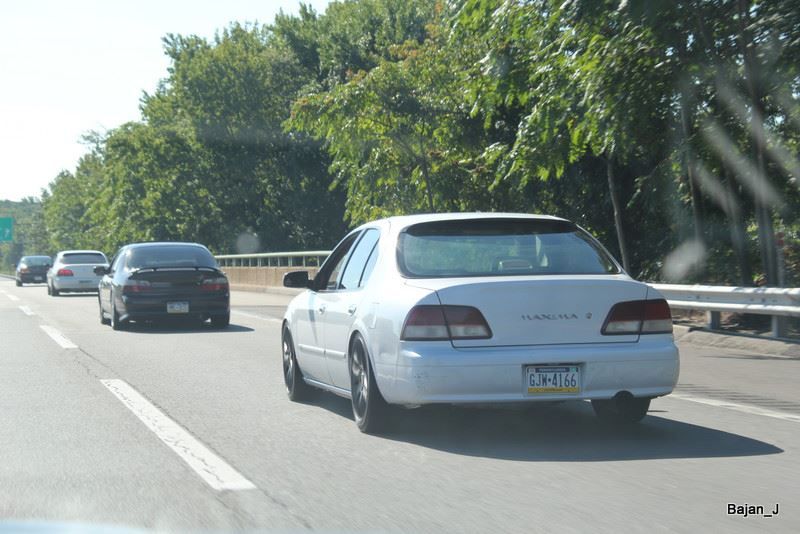
Views
0
Likes
0
| Uploaded | 02/09/2017 |

Views
1
Likes
0
| Uploaded | 02/08/2017 |

Views
0
Likes
0
| Uploaded | 02/09/2017 |
Views
0
Likes
0
| Uploaded | 02/09/2017 |

Views
0
Likes
0
| Uploaded | 02/08/2017 |
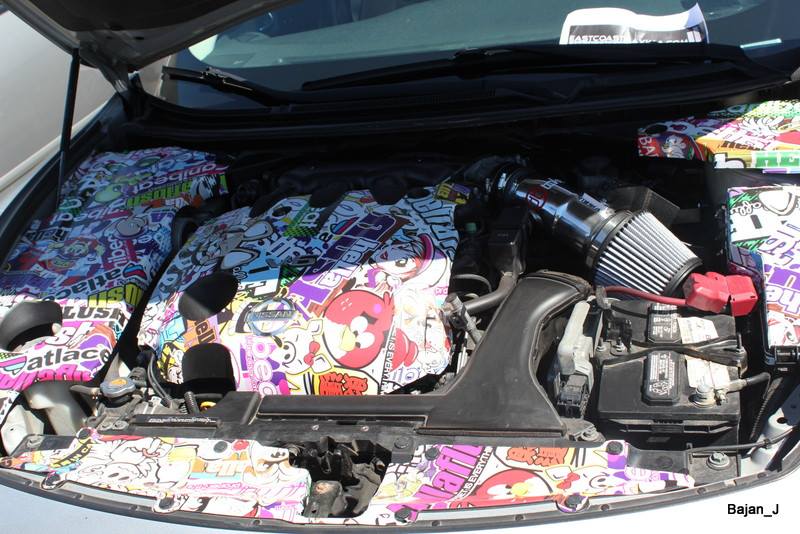
Views
0
Likes
0
| Uploaded | 02/09/2017 |

Views
1
Likes
0
| Uploaded | 02/09/2017 |

Views
0
Likes
0
| Uploaded | 02/09/2017 |

Views
0
Likes
0
| Uploaded | 02/09/2017 |

Views
0
Likes
0
| Uploaded | 02/09/2017 |

Views
0
Likes
0
| Uploaded | 02/08/2017 |

Views
0
Likes
0
| Uploaded | 02/09/2017 |
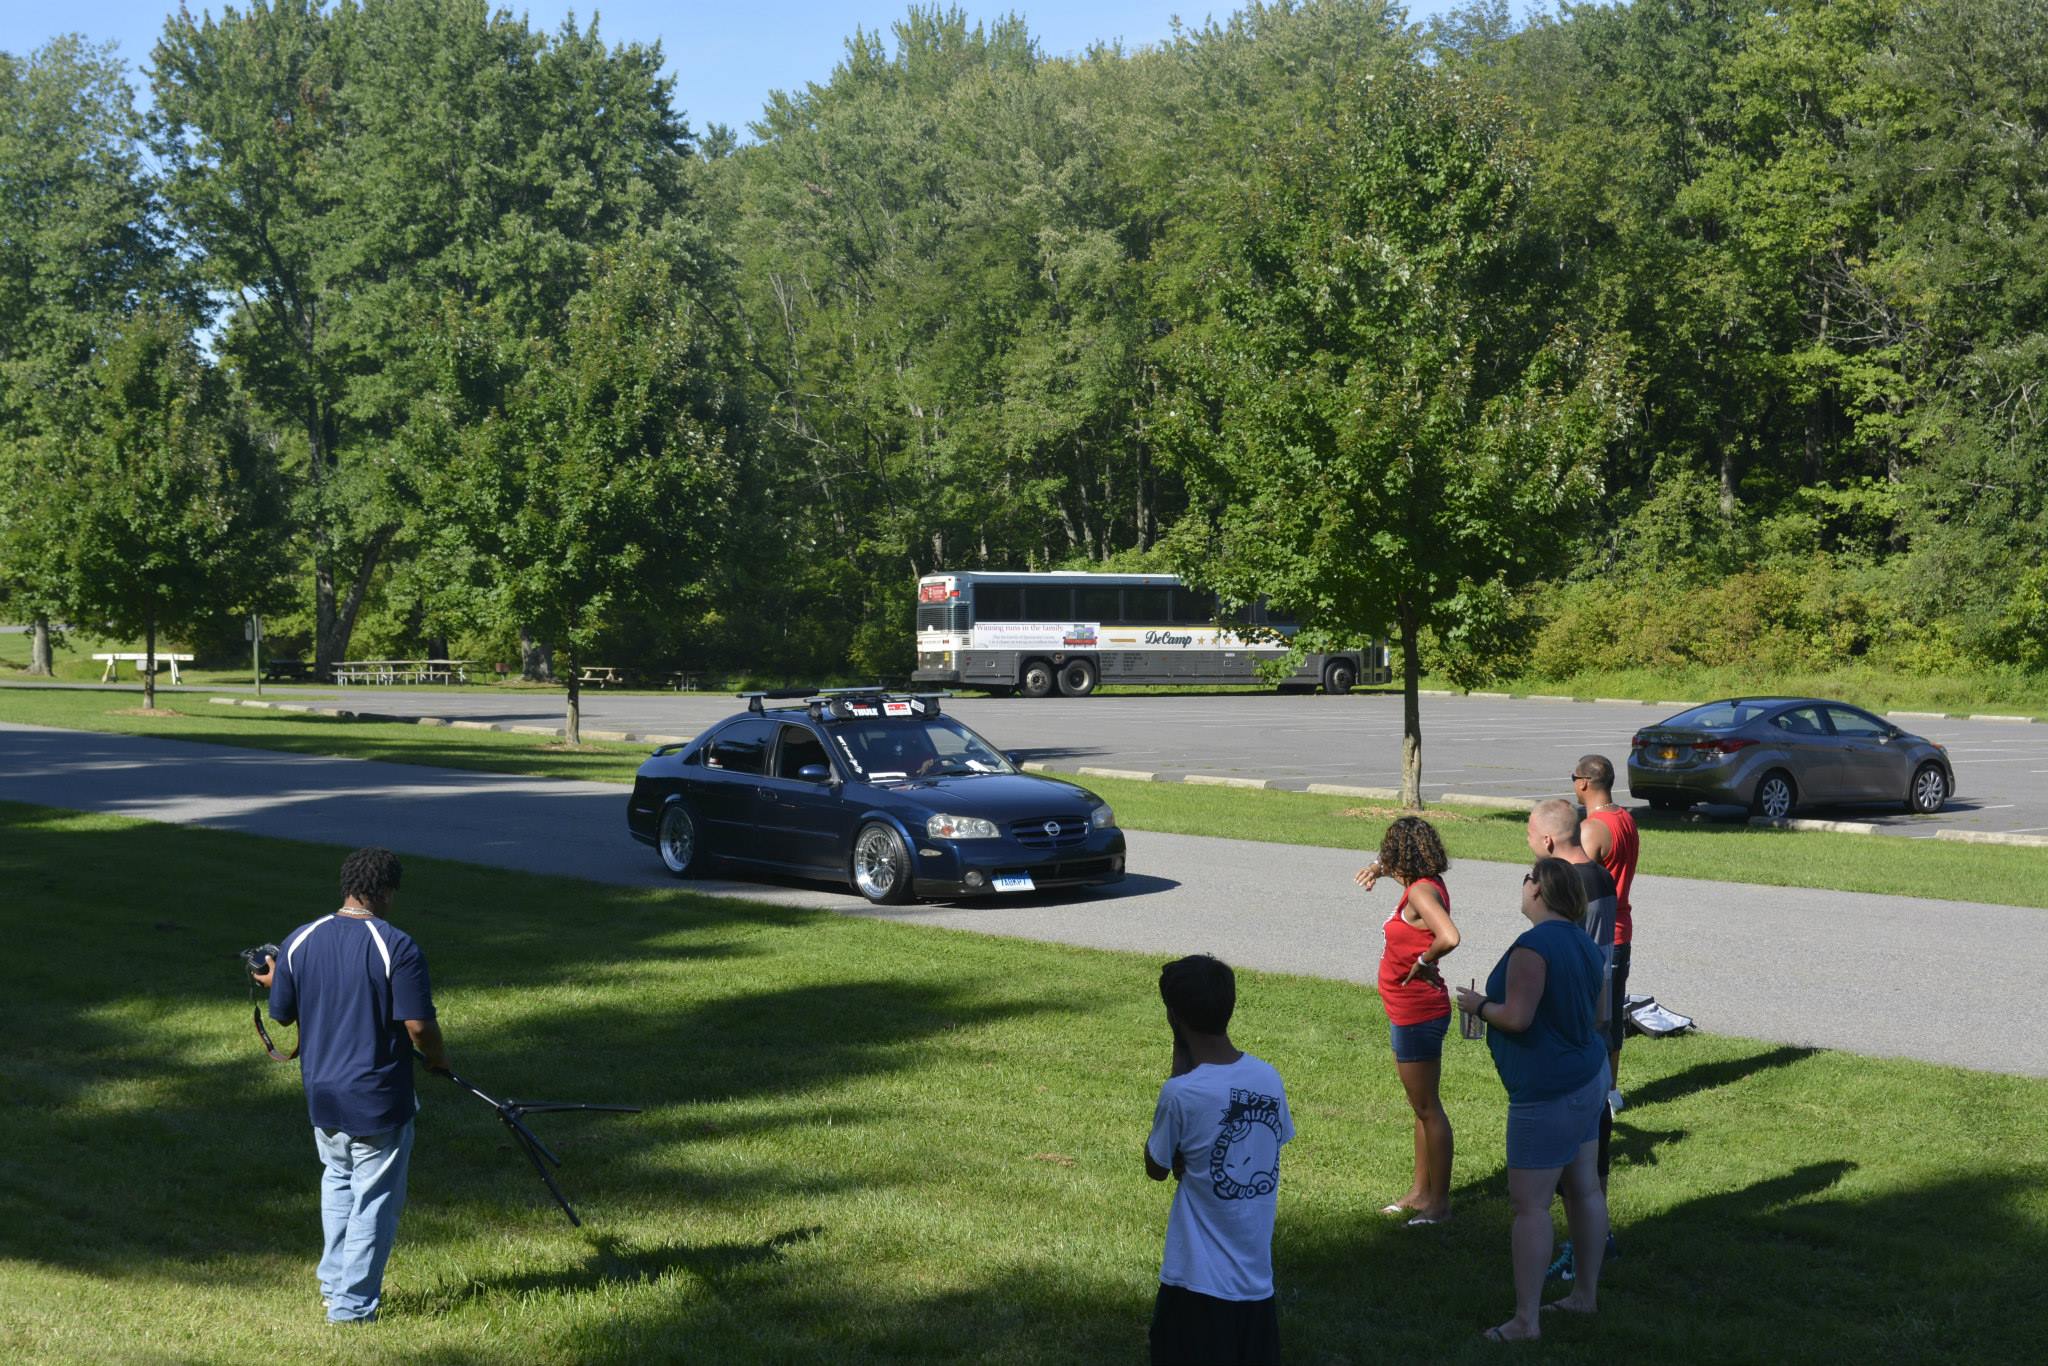
Views
1
Likes
0
| Uploaded | 02/08/2017 |

Views
0
Likes
0
| Uploaded | 02/09/2017 |

Views
0
Likes
0
| Uploaded | 02/09/2017 |

Views
1
Likes
0
| Uploaded | 02/09/2017 |

Views
0
Likes
0
| Uploaded | 02/08/2017 |

Views
1
Likes
0
| Uploaded | 02/09/2017 |

Views
2
Likes
0
| Uploaded | 02/09/2017 |

Views
0
Likes
0
| Uploaded | 02/08/2017 |

Views
0
Likes
0
| Uploaded | 02/09/2017 |

Views
1
Likes
0
| Uploaded | 02/09/2017 |

Views
0
Likes
0
| Uploaded | 02/09/2017 |

Views
0
Likes
0
| Uploaded | 02/09/2017 |

Views
0
Likes
0
| Uploaded | 02/08/2017 |

Views
0
Likes
0
| Uploaded | 02/09/2017 |

Views
1
Likes
0
| Uploaded | 02/09/2017 |

Views
3
Likes
0
| Uploaded | 02/09/2017 |

Views
0
Likes
0
| Uploaded | 02/09/2017 |

Views
0
Likes
0
| Uploaded | 02/09/2017 |

Views
0
Likes
0
| Uploaded | 02/09/2017 |

Views
1
Likes
0
| Uploaded | 02/09/2017 |

Views
0
Likes
0
| Uploaded | 02/09/2017 |

Views
0
Likes
0
| Uploaded | 02/09/2017 |

Views
0
Likes
0
| Uploaded | 02/09/2017 |

Views
0
Likes
0
| Uploaded | 02/08/2017 |

Views
2
Likes
0
| Uploaded | 02/08/2017 |

Views
0
Likes
0
| Uploaded | 02/09/2017 |

Views
0
Likes
0
| Uploaded | 02/09/2017 |

Views
1
Likes
0
| Uploaded | 02/09/2017 |

Views
1
Likes
0
| Uploaded | 02/09/2017 |

Views
0
Likes
0
| Uploaded | 02/08/2017 |

Views
0
Likes
0
| Uploaded | 02/09/2017 |

Views
1
Likes
0
| Uploaded | 02/09/2017 |

Views
1
Likes
0
| Uploaded | 02/09/2017 |
Views
0
Likes
0
| Uploaded | 02/09/2017 |

Views
1
Likes
0
| Uploaded | 02/09/2017 |

Views
0
Likes
0
| Uploaded | 02/09/2017 |

Views
0
Likes
0
| Uploaded | 02/09/2017 |

Views
0
Likes
0
| Uploaded | 02/08/2017 |

Views
0
Likes
0
| Uploaded | 02/09/2017 |
Views
0
Likes
0
| Uploaded | 02/09/2017 |

Views
0
Likes
0
| Uploaded | 02/09/2017 |

Views
0
Likes
0
| Uploaded | 02/09/2017 |

Views
0
Likes
0
| Uploaded | 02/09/2017 |

Views
0
Likes
0
| Uploaded | 02/08/2017 |

Views
1
Likes
0
| Uploaded | 02/09/2017 |

Views
0
Likes
0
| Uploaded | 02/09/2017 |

Views
2
Likes
0
| Uploaded | 02/09/2017 |

Views
1
Likes
0
| Uploaded | 02/08/2017 |

Views
0
Likes
0
| Uploaded | 02/09/2017 |

Views
1
Likes
0
| Uploaded | 02/08/2017 |

Views
0
Likes
0
| Uploaded | 02/09/2017 |

Views
0
Likes
0
| Uploaded | 02/09/2017 |

Views
0
Likes
0
| Uploaded | 02/08/2017 |

Views
0
Likes
0
| Uploaded | 02/08/2017 |

Views
0
Likes
0
| Uploaded | 02/08/2017 |

Views
0
Likes
0
| Uploaded | 02/09/2017 |

Views
1
Likes
0
| Uploaded | 02/09/2017 |

Views
0
Likes
0
| Uploaded | 02/09/2017 |

Views
1
Likes
0
| Uploaded | 02/09/2017 |

Views
0
Likes
0
| Uploaded | 02/09/2017 |

Views
0
Likes
0
| Uploaded | 02/08/2017 |

Views
0
Likes
0
| Uploaded | 02/08/2017 |
Views
0
Likes
0
| Uploaded | 02/09/2017 |

Views
0
Likes
0
| Uploaded | 02/09/2017 |

Views
0
Likes
0
| Uploaded | 02/09/2017 |

Views
0
Likes
0
| Uploaded | 02/08/2017 |

Views
0
Likes
0
| Uploaded | 02/09/2017 |

Views
0
Likes
0
| Uploaded | 02/08/2017 |

Views
0
Likes
0
| Uploaded | 02/08/2017 |
Views
0
Likes
0
| Uploaded | 02/08/2017 |

Views
0
Likes
0
| Uploaded | 02/09/2017 |

Views
0
Likes
0
| Uploaded | 02/09/2017 |

Views
0
Likes
0
| Uploaded | 02/09/2017 |

Views
0
Likes
0
| Uploaded | 02/09/2017 |
Views
0
Likes
0
| Uploaded | 02/09/2017 |

Views
1
Likes
0
| Uploaded | 02/08/2017 |

Views
0
Likes
0
| Uploaded | 02/09/2017 |
Views
0
Likes
0
| Uploaded | 02/09/2017 |

Views
0
Likes
0
| Uploaded | 02/08/2017 |

Views
0
Likes
0
| Uploaded | 02/09/2017 |

Views
0
Likes
0
| Uploaded | 02/09/2017 |
Views
0
Likes
0
| Uploaded | 02/09/2017 |

Views
0
Likes
0
| Uploaded | 02/08/2017 |

Views
0
Likes
0
| Uploaded | 02/09/2017 |

Views
0
Likes
0
| Uploaded | 02/08/2017 |

Views
0
Likes
0
| Uploaded | 02/09/2017 |
Views
0
Likes
0
| Uploaded | 02/08/2017 |

Views
0
Likes
0
| Uploaded | 02/08/2017 |

Views
0
Likes
0
| Uploaded | 02/09/2017 |
Views
0
Likes
0
| Uploaded | 02/09/2017 |

Views
1
Likes
0
| Uploaded | 02/09/2017 |

Views
1
Likes
0
| Uploaded | 02/09/2017 |
Views
0
Likes
0
| Uploaded | 02/09/2017 |

Views
0
Likes
0
| Uploaded | 02/09/2017 |

Views
0
Likes
0
| Uploaded | 02/09/2017 |

Views
0
Likes
0
| Uploaded | 02/09/2017 |

Views
0
Likes
0
| Uploaded | 02/08/2017 |

Views
0
Likes
0
| Uploaded | 02/09/2017 |
Views
0
Likes
0
| Uploaded | 02/09/2017 |
Views
0
Likes
0
| Uploaded | 02/09/2017 |

Views
0
Likes
0
| Uploaded | 02/08/2017 |
Views
0
Likes
0
| Uploaded | 02/09/2017 |

Views
1
Likes
0
| Uploaded | 02/08/2017 |

Views
2
Likes
0
| Uploaded | 02/09/2017 |

Views
0
Likes
0
| Uploaded | 02/08/2017 |

Views
0
Likes
0
| Uploaded | 02/09/2017 |
Views
1
Likes
0
| Uploaded | 02/09/2017 |

Views
1
Likes
0
| Uploaded | 02/09/2017 |

Views
0
Likes
0
| Uploaded | 02/09/2017 |

Views
0
Likes
0
| Uploaded | 02/09/2017 |

Views
1
Likes
0
| Uploaded | 02/08/2017 |

Views
1
Likes
0
| Uploaded | 02/09/2017 |

Views
0
Likes
0
| Uploaded | 02/09/2017 |

Views
0
Likes
0
| Uploaded | 02/09/2017 |

Views
0
Likes
0
| Uploaded | 02/09/2017 |

Views
0
Likes
0
| Uploaded | 02/09/2017 |
Views
0
Likes
0
| Uploaded | 02/08/2017 |

Views
0
Likes
0
| Uploaded | 02/09/2017 |

Views
0
Likes
0
| Uploaded | 02/09/2017 |

Views
0
Likes
0
| Uploaded | 02/09/2017 |

Views
0
Likes
0
| Uploaded | 02/09/2017 |

Views
0
Likes
0
| Uploaded | 02/09/2017 |
Views
2
Likes
0
| Uploaded | 02/09/2017 |

Views
1
Likes
0
| Uploaded | 02/09/2017 |
Views
0
Likes
0
| Uploaded | 02/09/2017 |

Views
0
Likes
0
| Uploaded | 02/09/2017 |

Views
2
Likes
0
| Uploaded | 02/09/2017 |

Views
0
Likes
0
| Uploaded | 02/09/2017 |

Views
1
Likes
0
| Uploaded | 02/09/2017 |

Views
1
Likes
0
| Uploaded | 02/09/2017 |

Views
0
Likes
0
| Uploaded | 02/08/2017 |

Views
0
Likes
0
| Uploaded | 02/09/2017 |

Views
0
Likes
0
| Uploaded | 02/09/2017 |

Views
1
Likes
0
| Uploaded | 02/09/2017 |

Views
1
Likes
0
| Uploaded | 02/09/2017 |

Views
0
Likes
0
| Uploaded | 02/09/2017 |

Views
0
Likes
0
| Uploaded | 02/09/2017 |

Views
0
Likes
0
| Uploaded | 02/08/2017 |

Views
0
Likes
0
| Uploaded | 02/09/2017 |

Views
0
Likes
0
| Uploaded | 02/09/2017 |

Views
0
Likes
0
| Uploaded | 02/09/2017 |

Views
1
Likes
0
| Uploaded | 02/09/2017 |

Views
0
Likes
0
| Uploaded | 02/09/2017 |
Views
1
Likes
0
| Uploaded | 02/09/2017 |
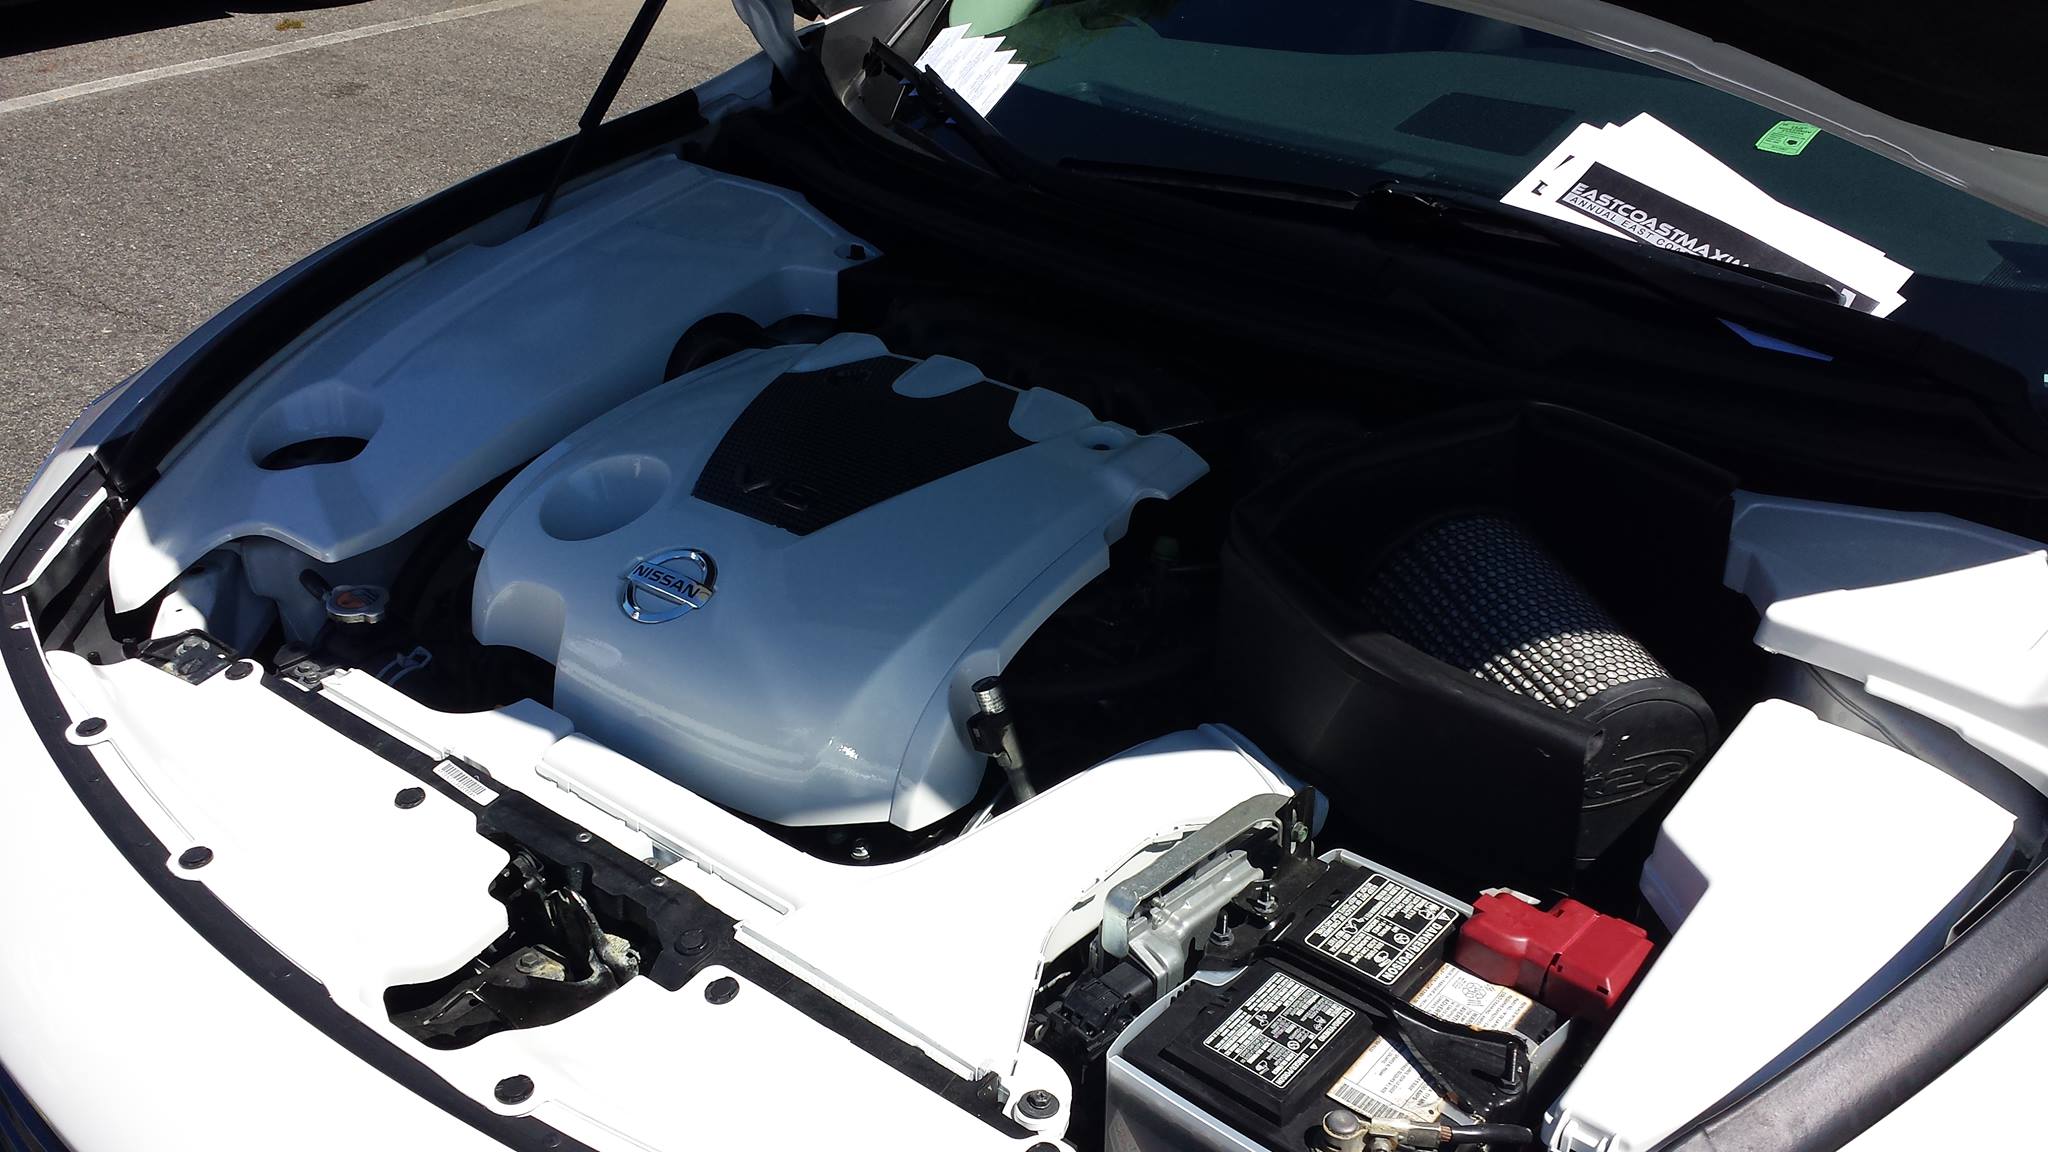
Views
1
Likes
0
| Uploaded | 02/09/2017 |

Views
0
Likes
0
| Uploaded | 02/09/2017 |

Views
1
Likes
0
| Uploaded | 02/09/2017 |
![]()
 Event")


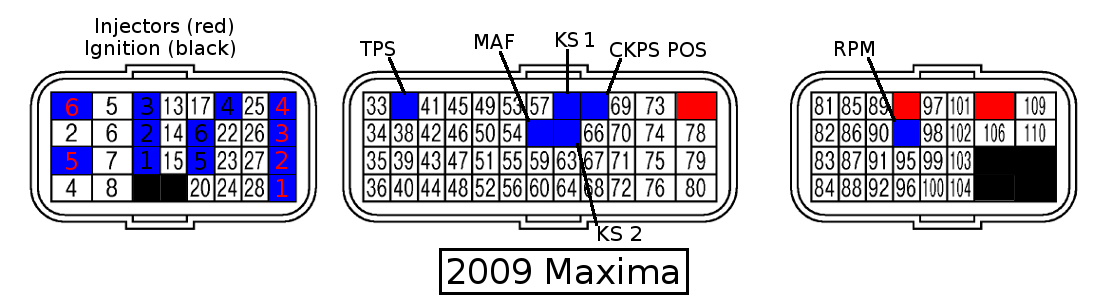


 300ZX Calipers")


