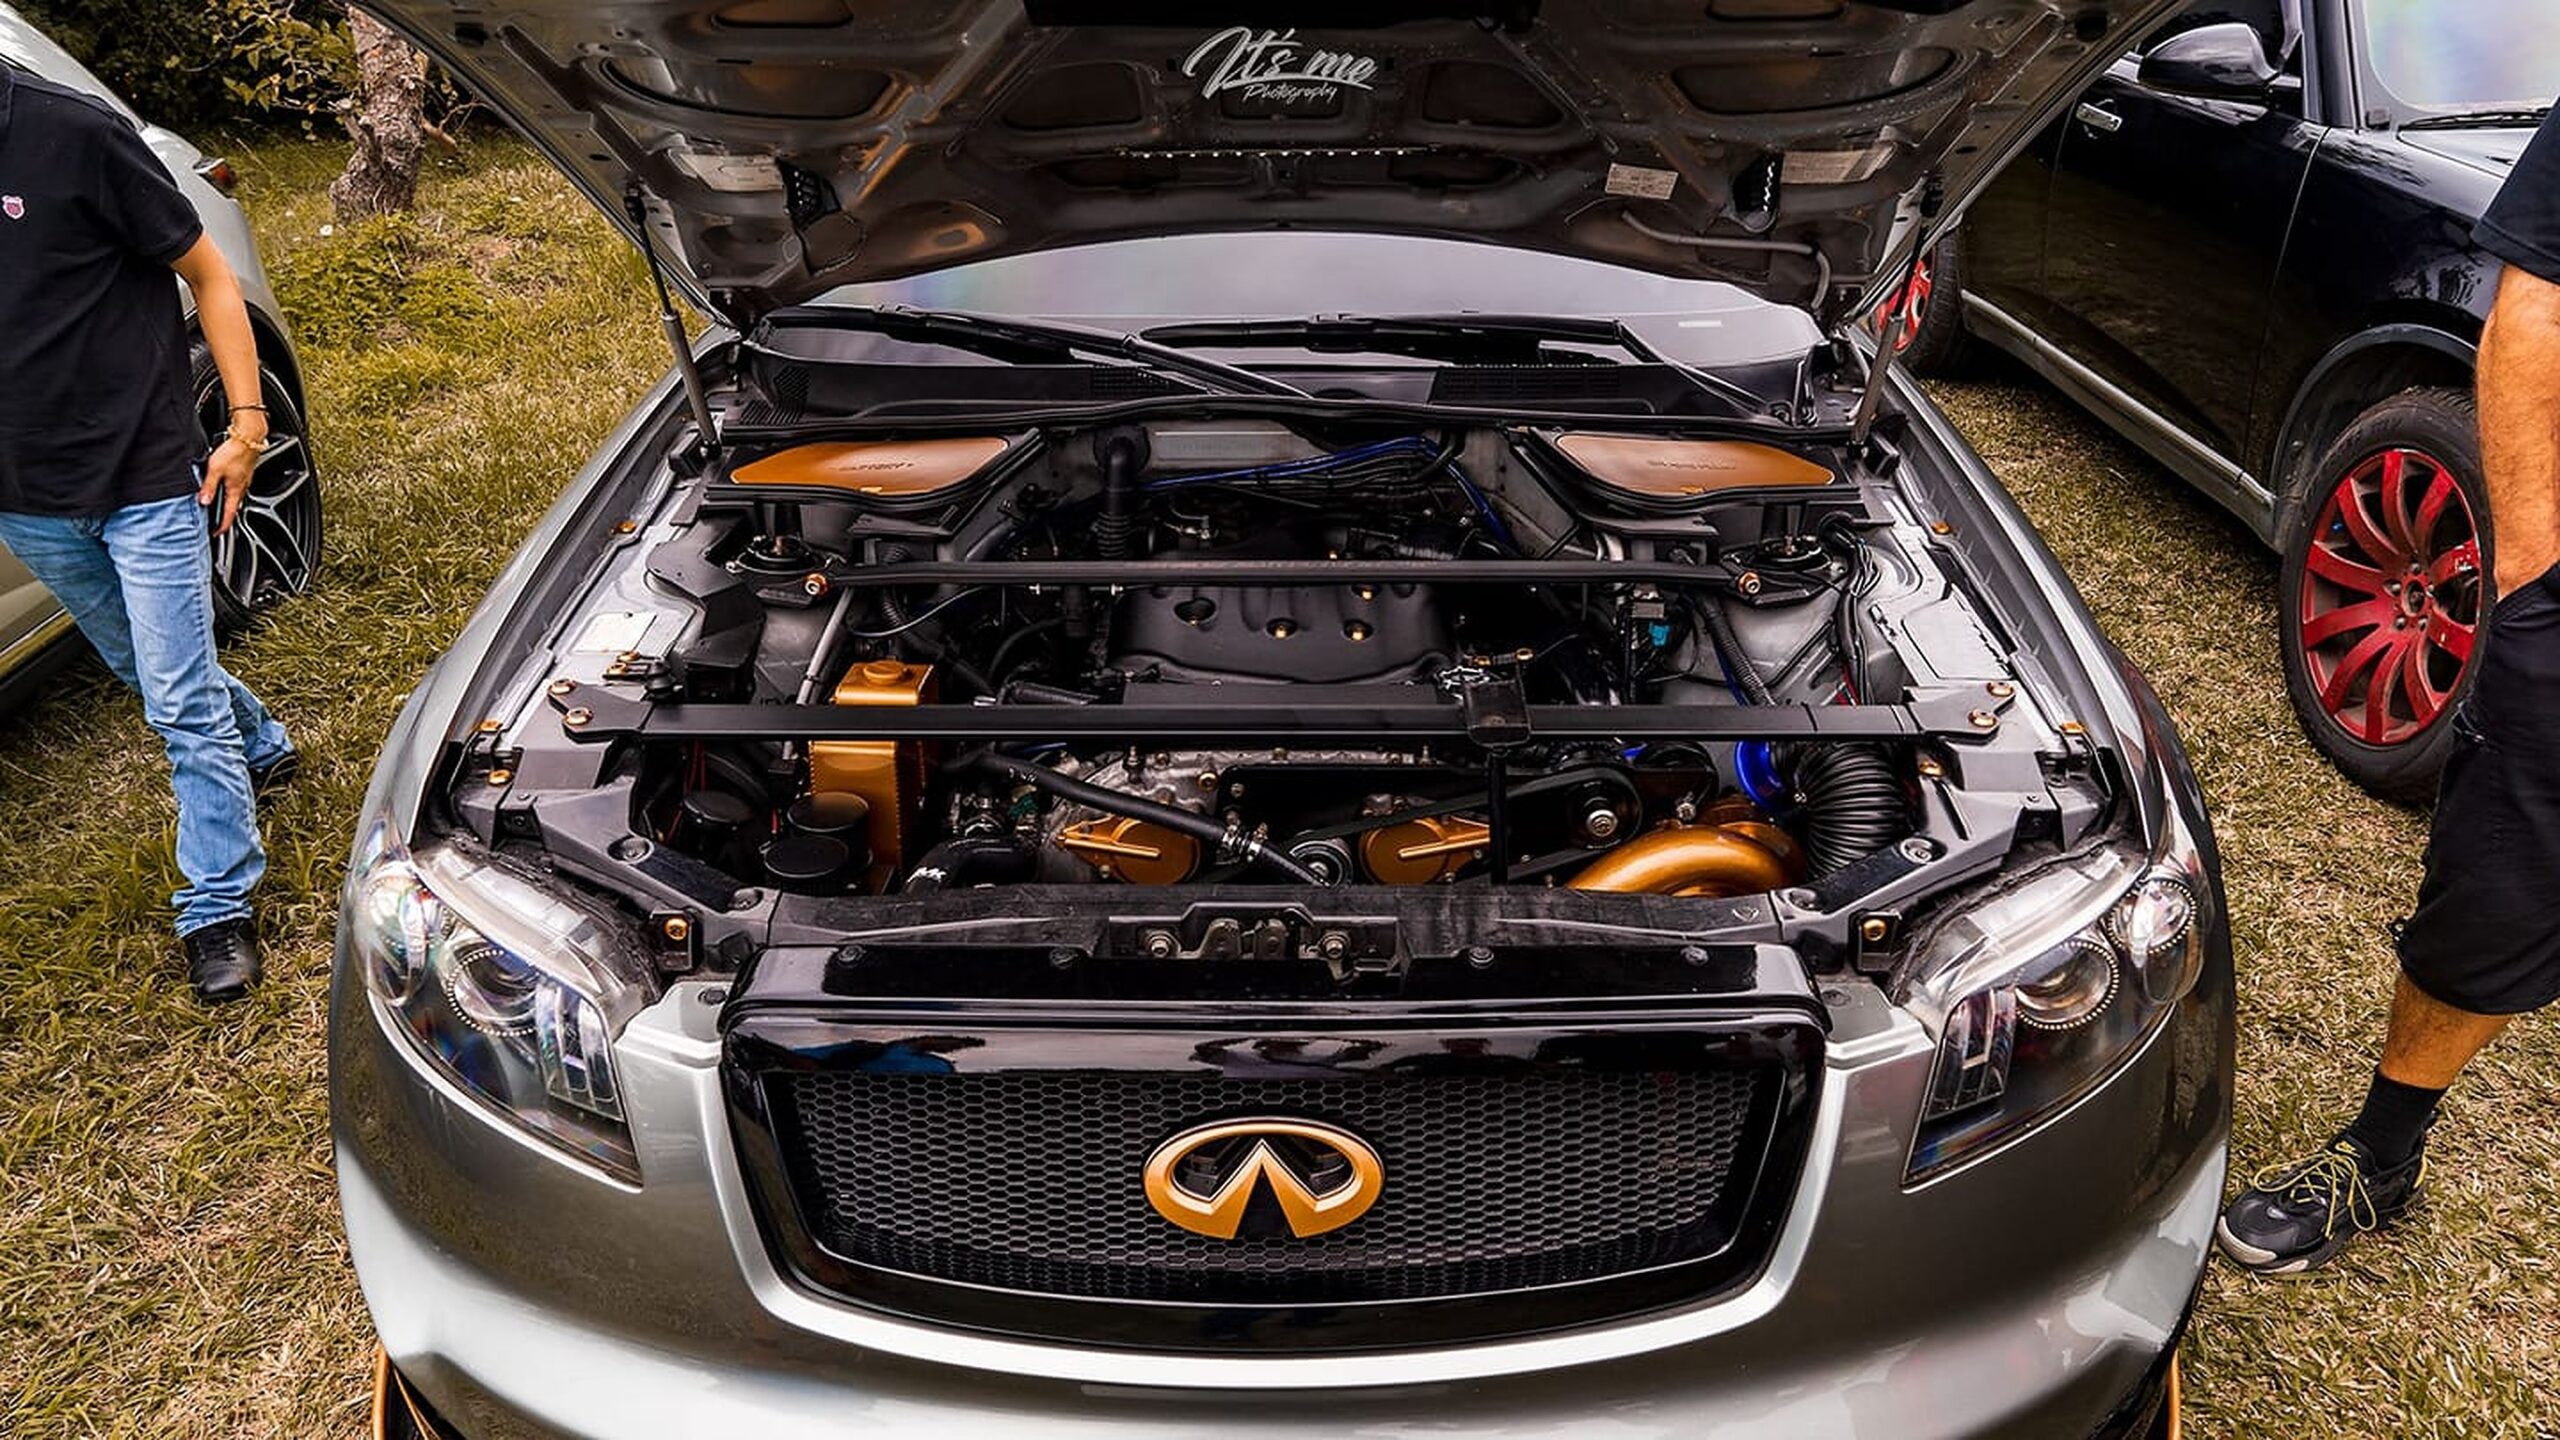
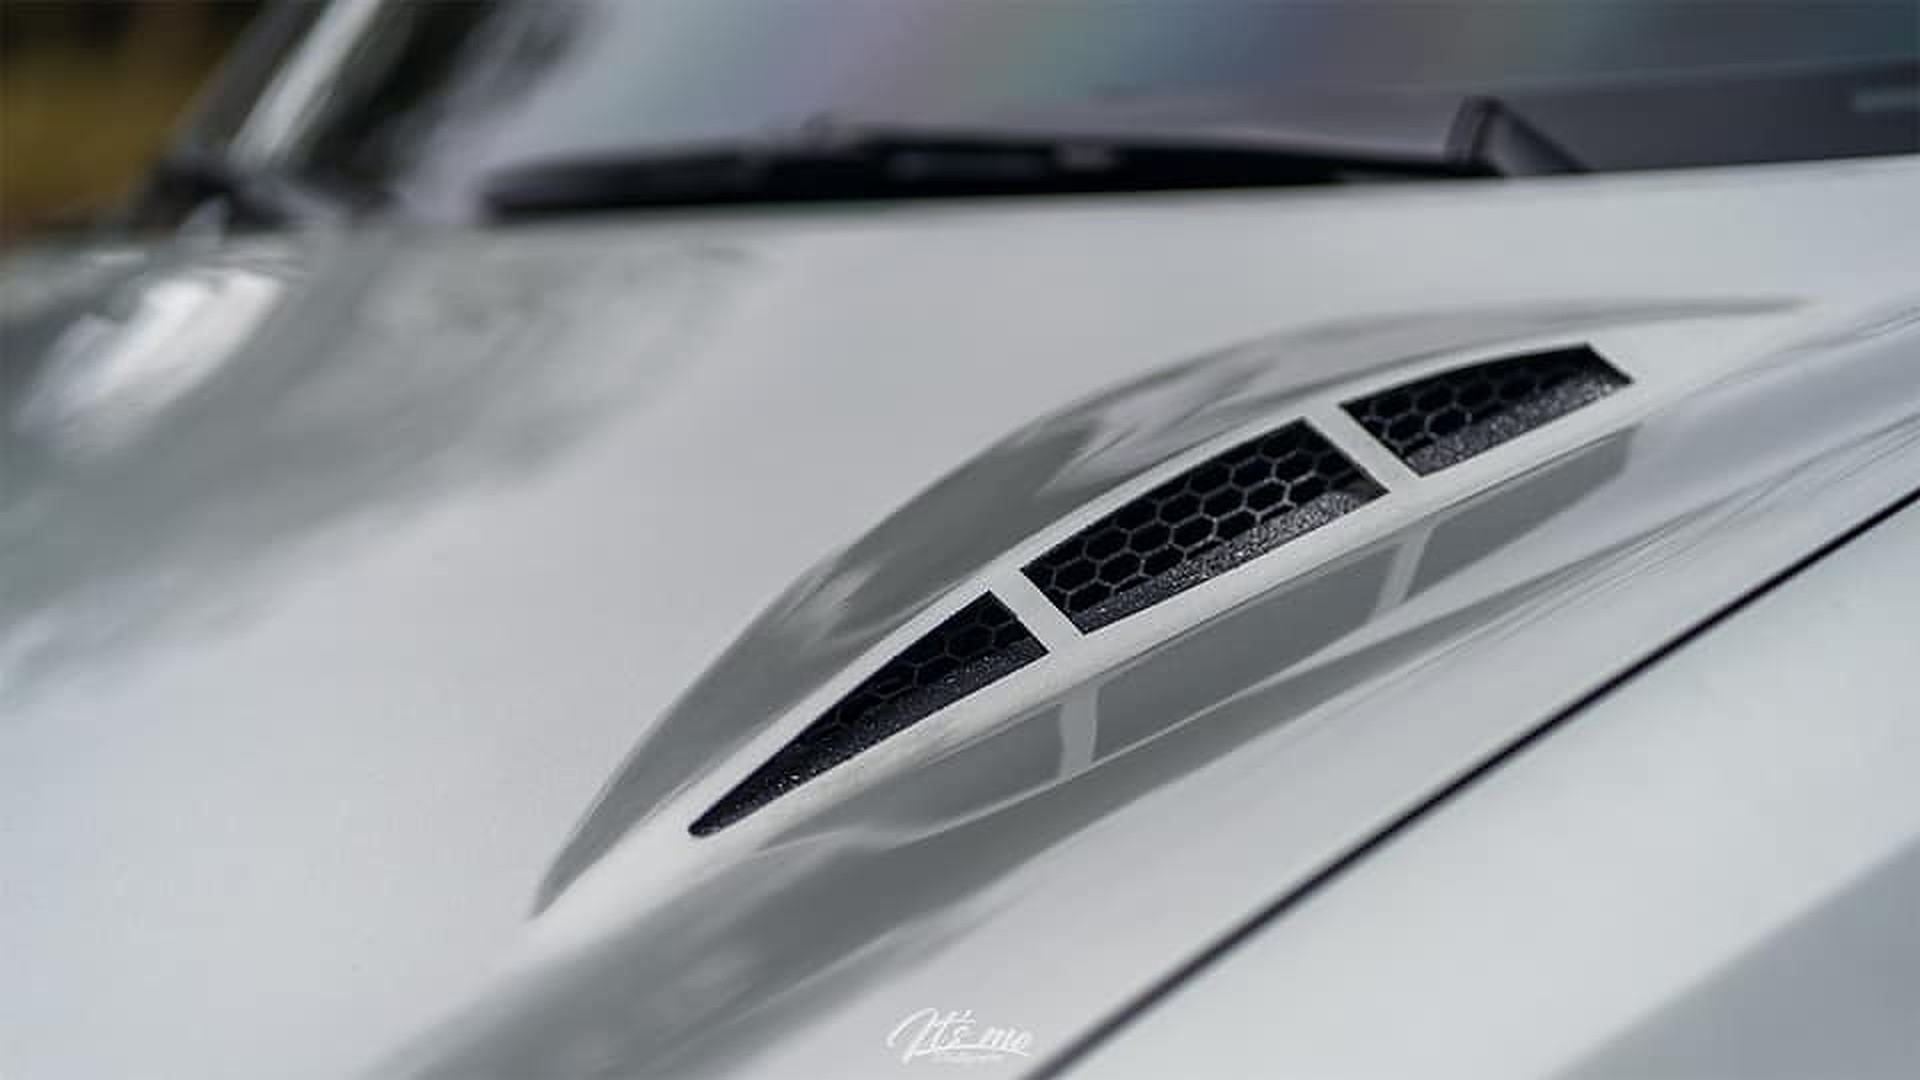
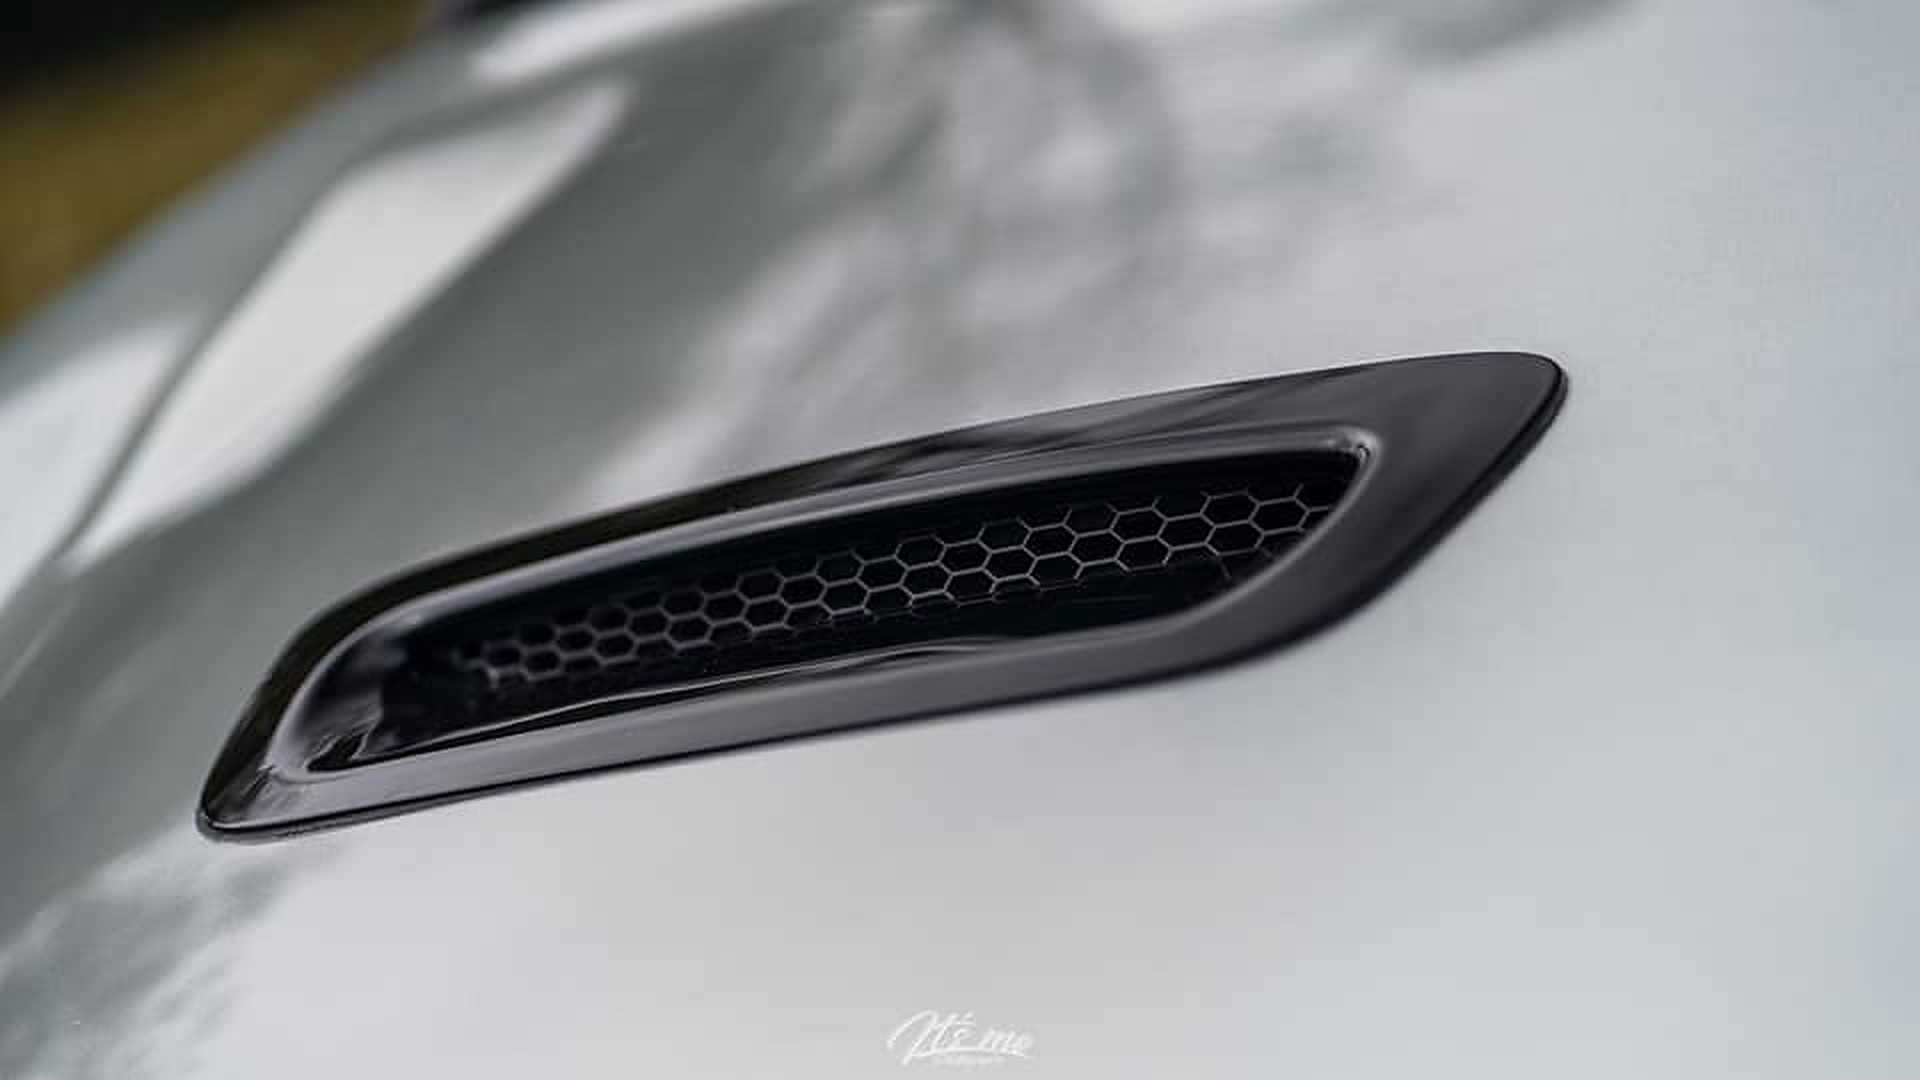
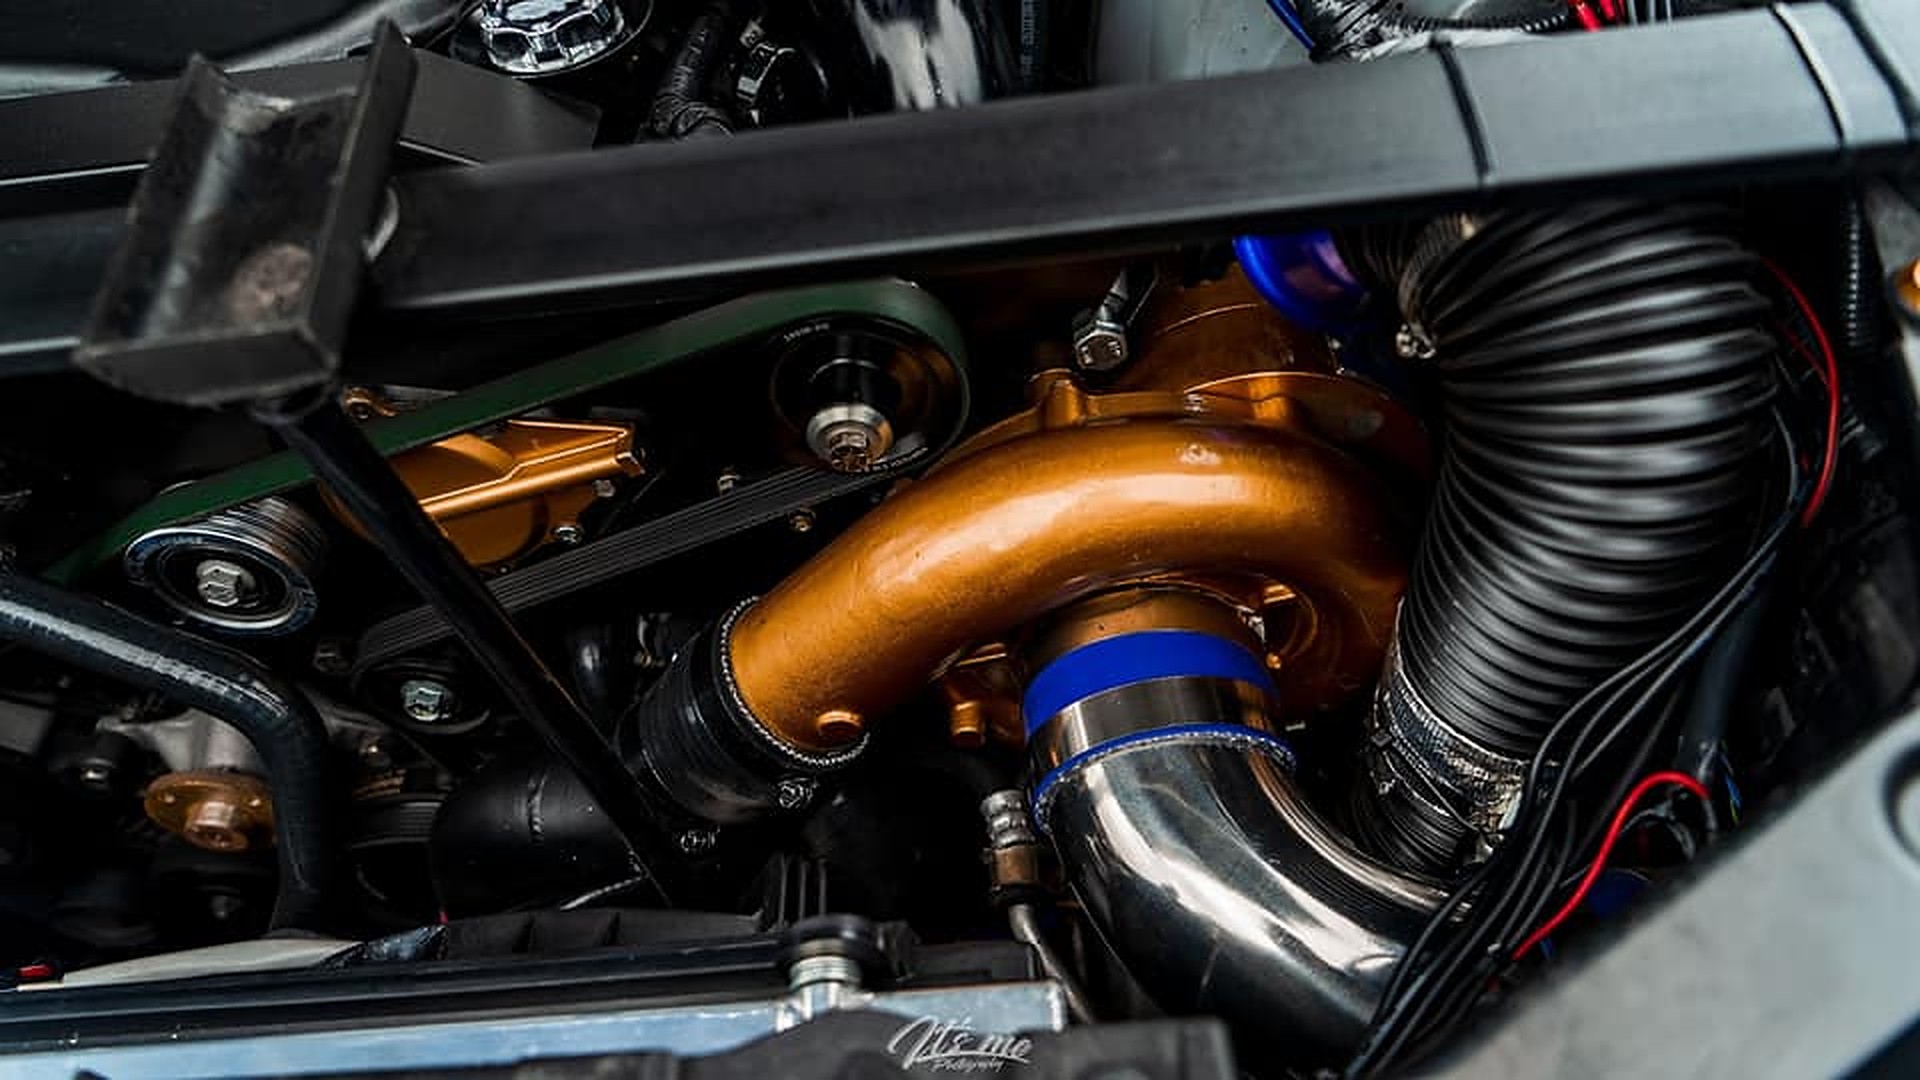
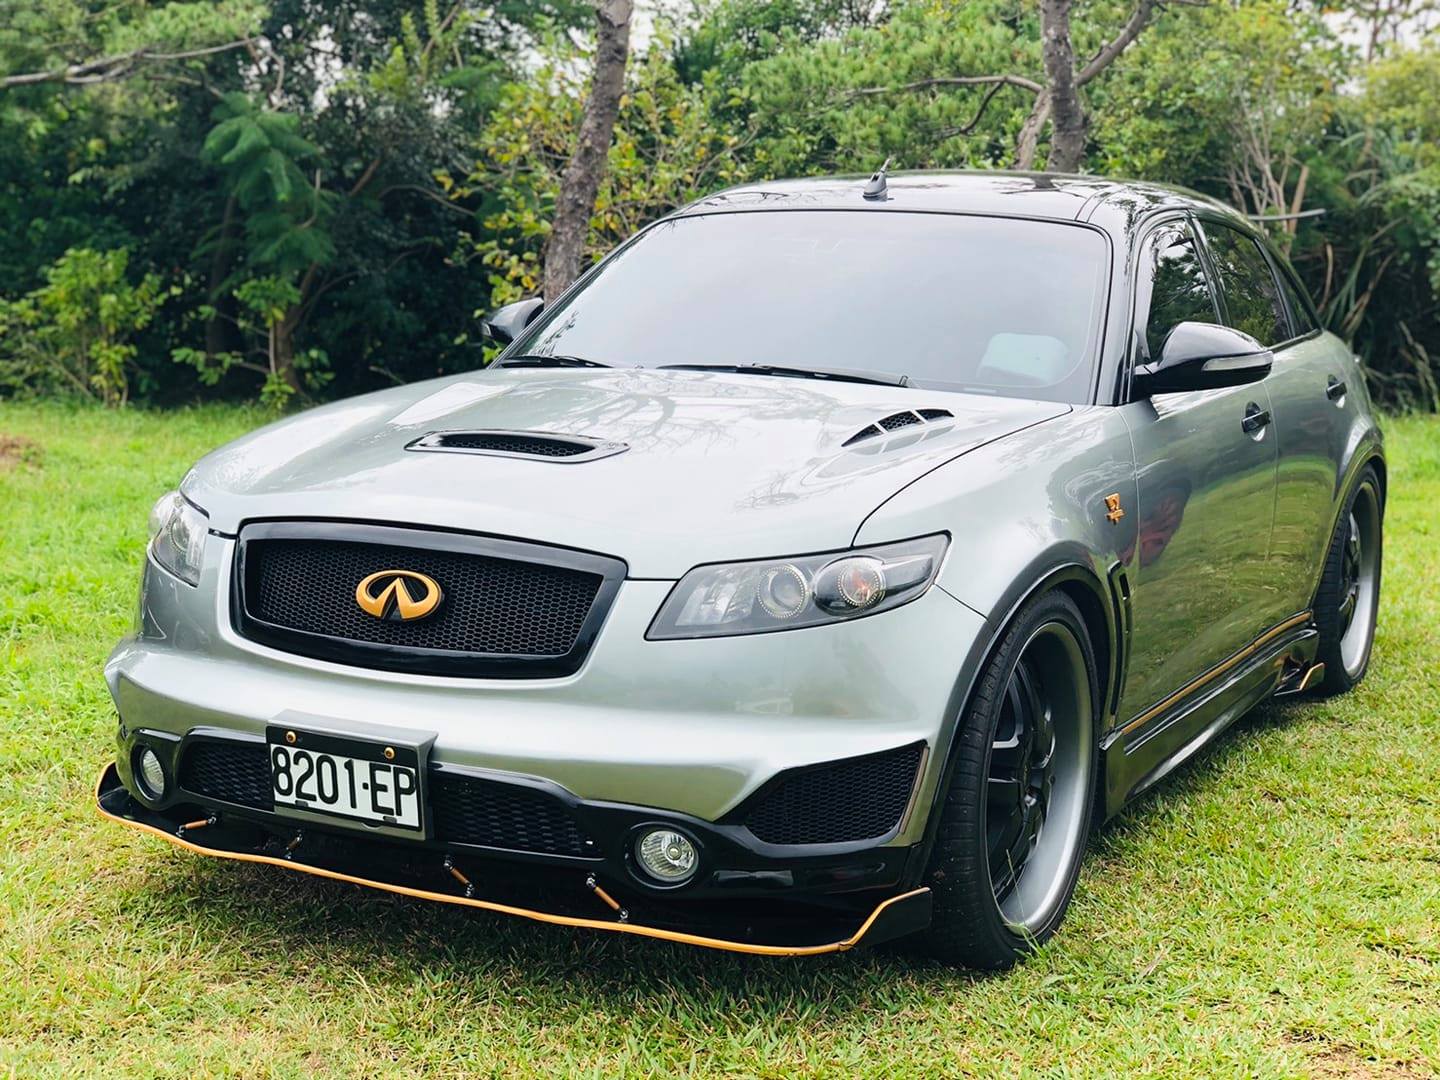
Credit: Jun Jung
Wheels: 22×10.5+5 / 22×12 +0
Tires: 265/35 and 295/30
Rims: Forgestar w/ TE37 Bronze Paint


Older Photos:


![]()


Credit: Jun Jung
Wheels: 22×10.5+5 / 22×12 +0
Tires: 265/35 and 295/30
Rims: Forgestar w/ TE37 Bronze Paint
![]()
")
Article: EddyMaxx
Over the past few months, our FX35 started to experience some odd behavior. When scanning the car for codes it would throw U1001 – Invalid or Missing Data for Primary Id. I noticed this happened about a week after a major rain day that ended up clogging and filling water inside the car (primarily driver side seat). I had to drain all the water out as it was like a little mini-pool. This is what I think caused the issue in the first place. So I sealed the area where I think the car would leak from on roof with silicone. I’m also going to check and clear the sunroof drain ports as this is a common problem with FX35. The car itself would actually drive OK but some issues were very risky such as driving with no wipers in case it rain or no AC in 100 degree weather.
I started searching online and couldn’t not find much helpful info. In fact, most threads that had a similar issue never posted an update on how it was resolved. Each day I did more research to try to find the fix. Randomly, I was watching a YouTube video on CEL Code U1000 and U1001. I happen to find a comment by user “Staten Island Euro Tech” on YouTube that put me in the right direction and helped resolve the issue. So I have to give credit to that user for helping me resolve this. Not only did I save a ton of $$$$$, I also learned a lot in the process. If you are reading this, hopefully this helps you resolve the issue. You can post a comment using FB below for any questions or comments.
Below is the list of the issues:
Order of things I did to troubleshoot:
You need to remove the driver side seat and lift the carpet. It’s literally just four 14MM bolts. Then you need to unplug the connector for seat and SRS airbag light. The airbag light will flash after this, so you need to perform the reset procedure which you can also find on YouTube. Very easy to do.
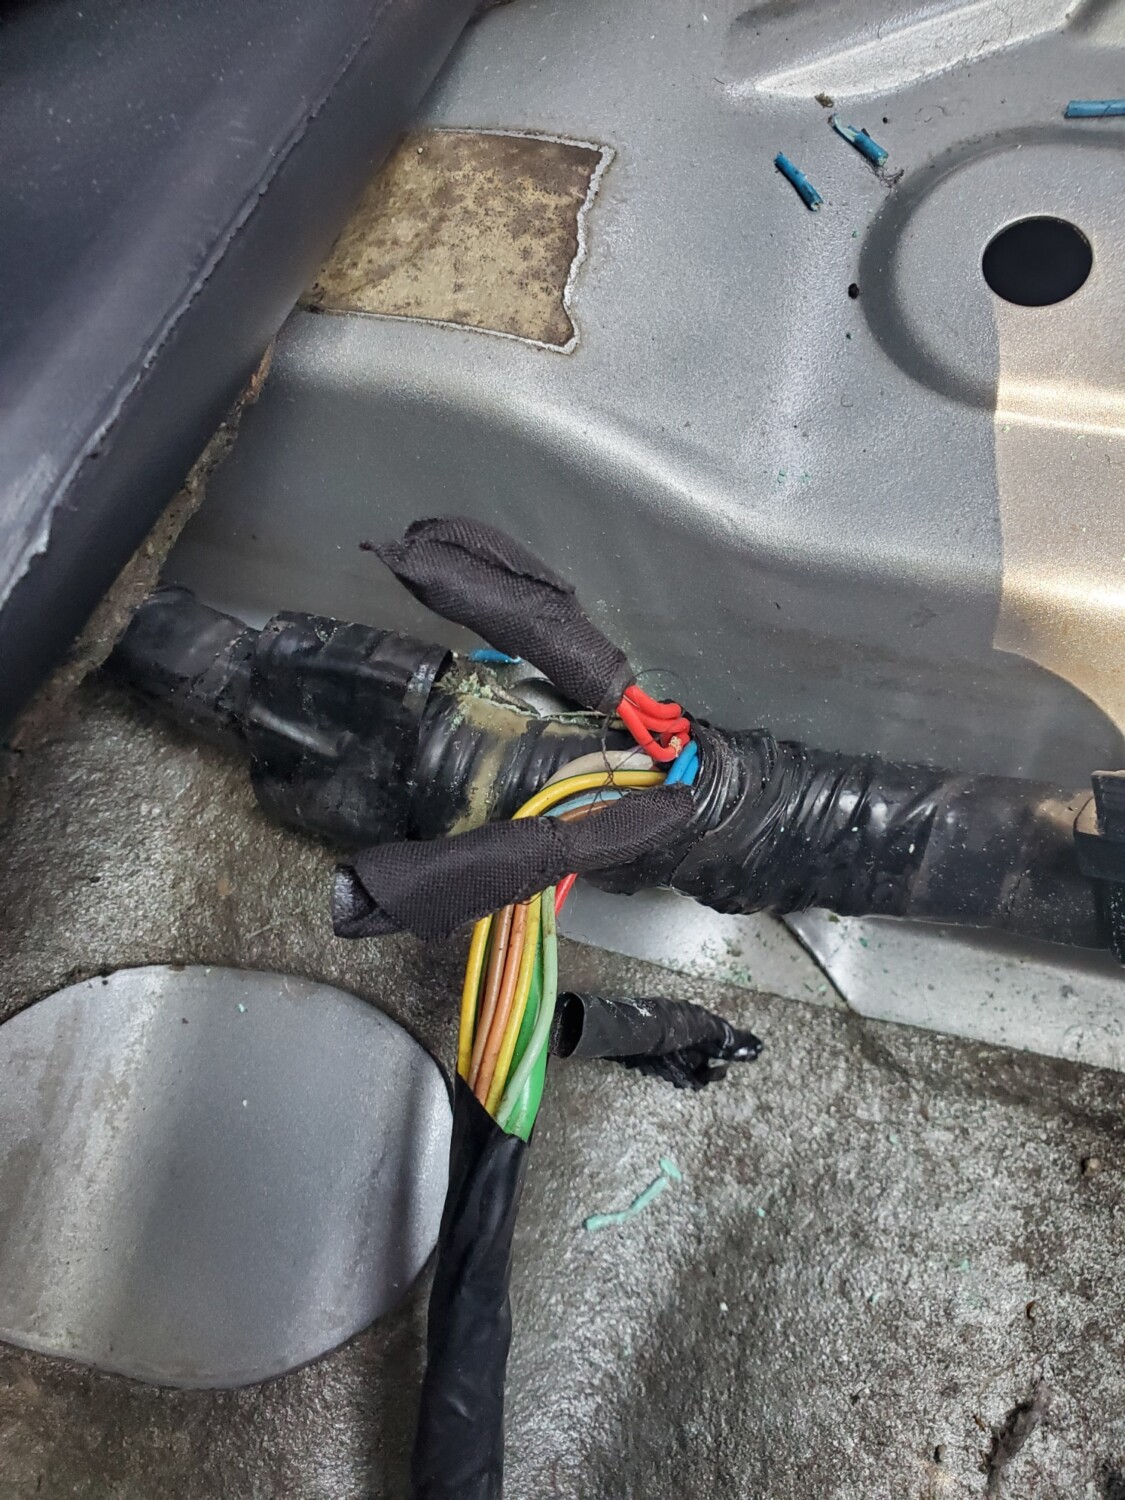
Underneath the carpet you will see two sets of wires under and insulated cap. 3 Red wires and 3 blue wires. Remove the cap and you will see all the wires are broken and corroded. You need to unify them together again.
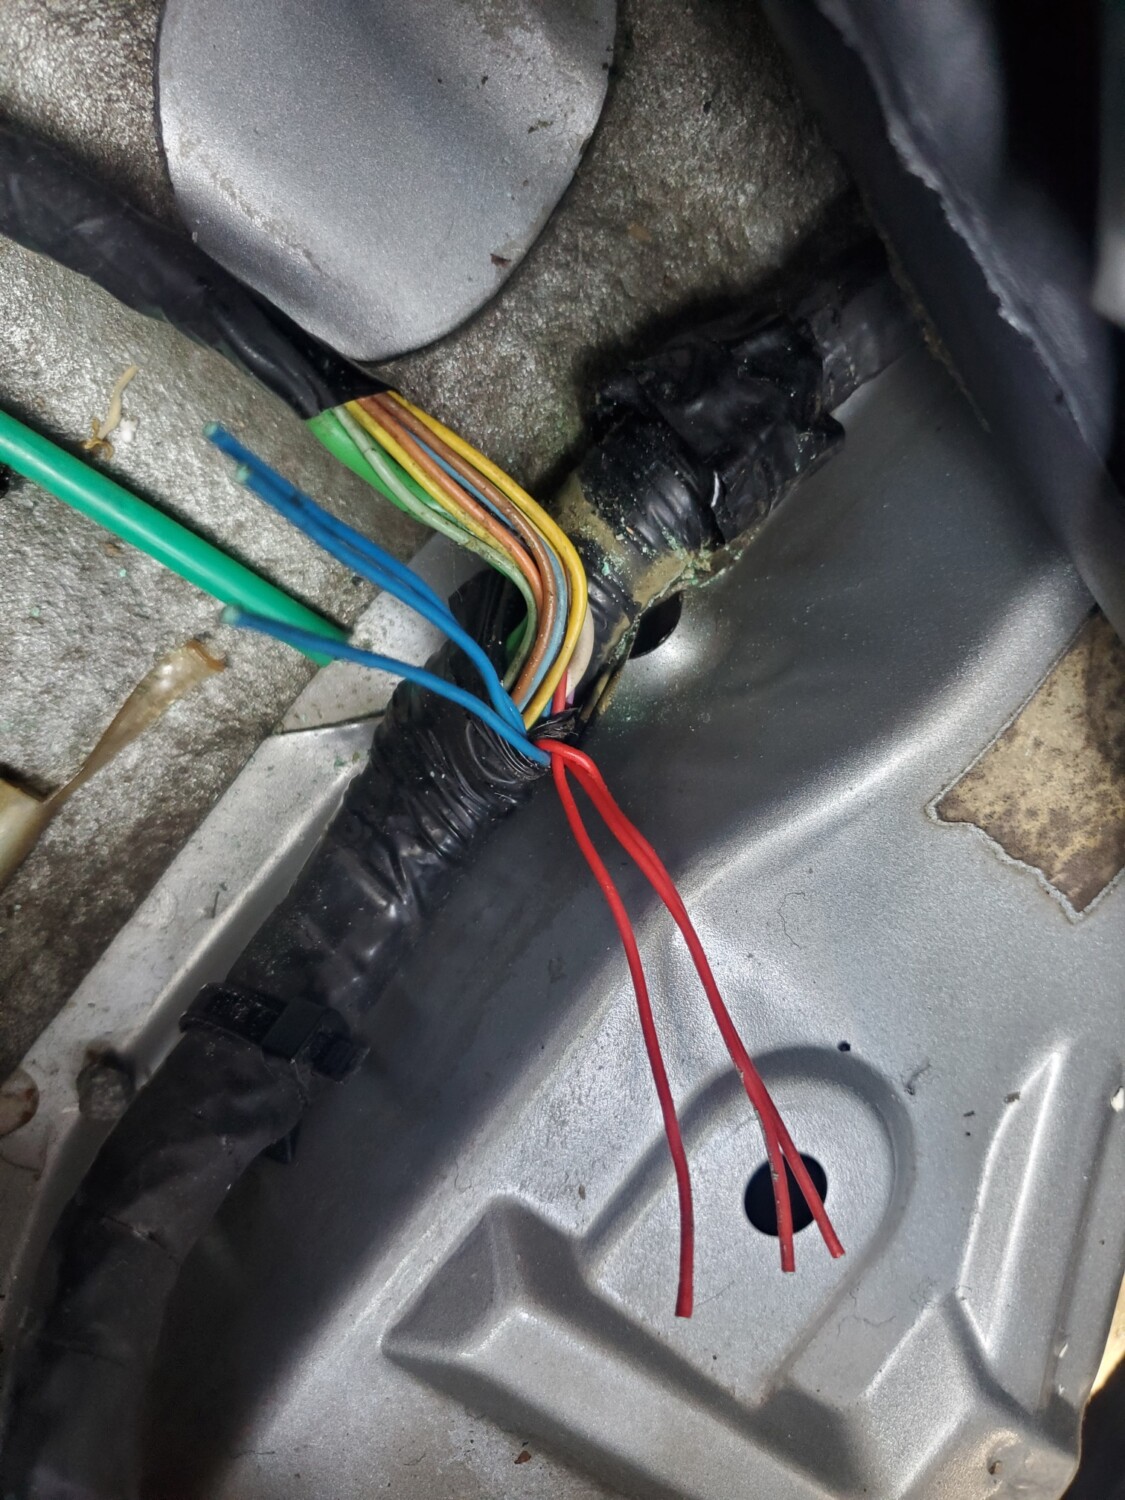

You can see how badly the wires were corroded.

This is just to show how much of the carpet I needed to lift in order to find this. I also took the time to vacuum and clean up the carpet area. I don’t remember when was the last time this was done.
This entire area was flooded with water and this is what I think caused the corrosion and wires to break. I did add silicone around the windshield to stop more water from coming in.

Re-splice the wires together and secure them. Once you do this try testing out your wipers to ensure they work. If they do, then you can proceed them tightening everything up and cleaning the area.

All set. Feels good to have resolved this.


![]()
")
Community Member Credit: Eddy
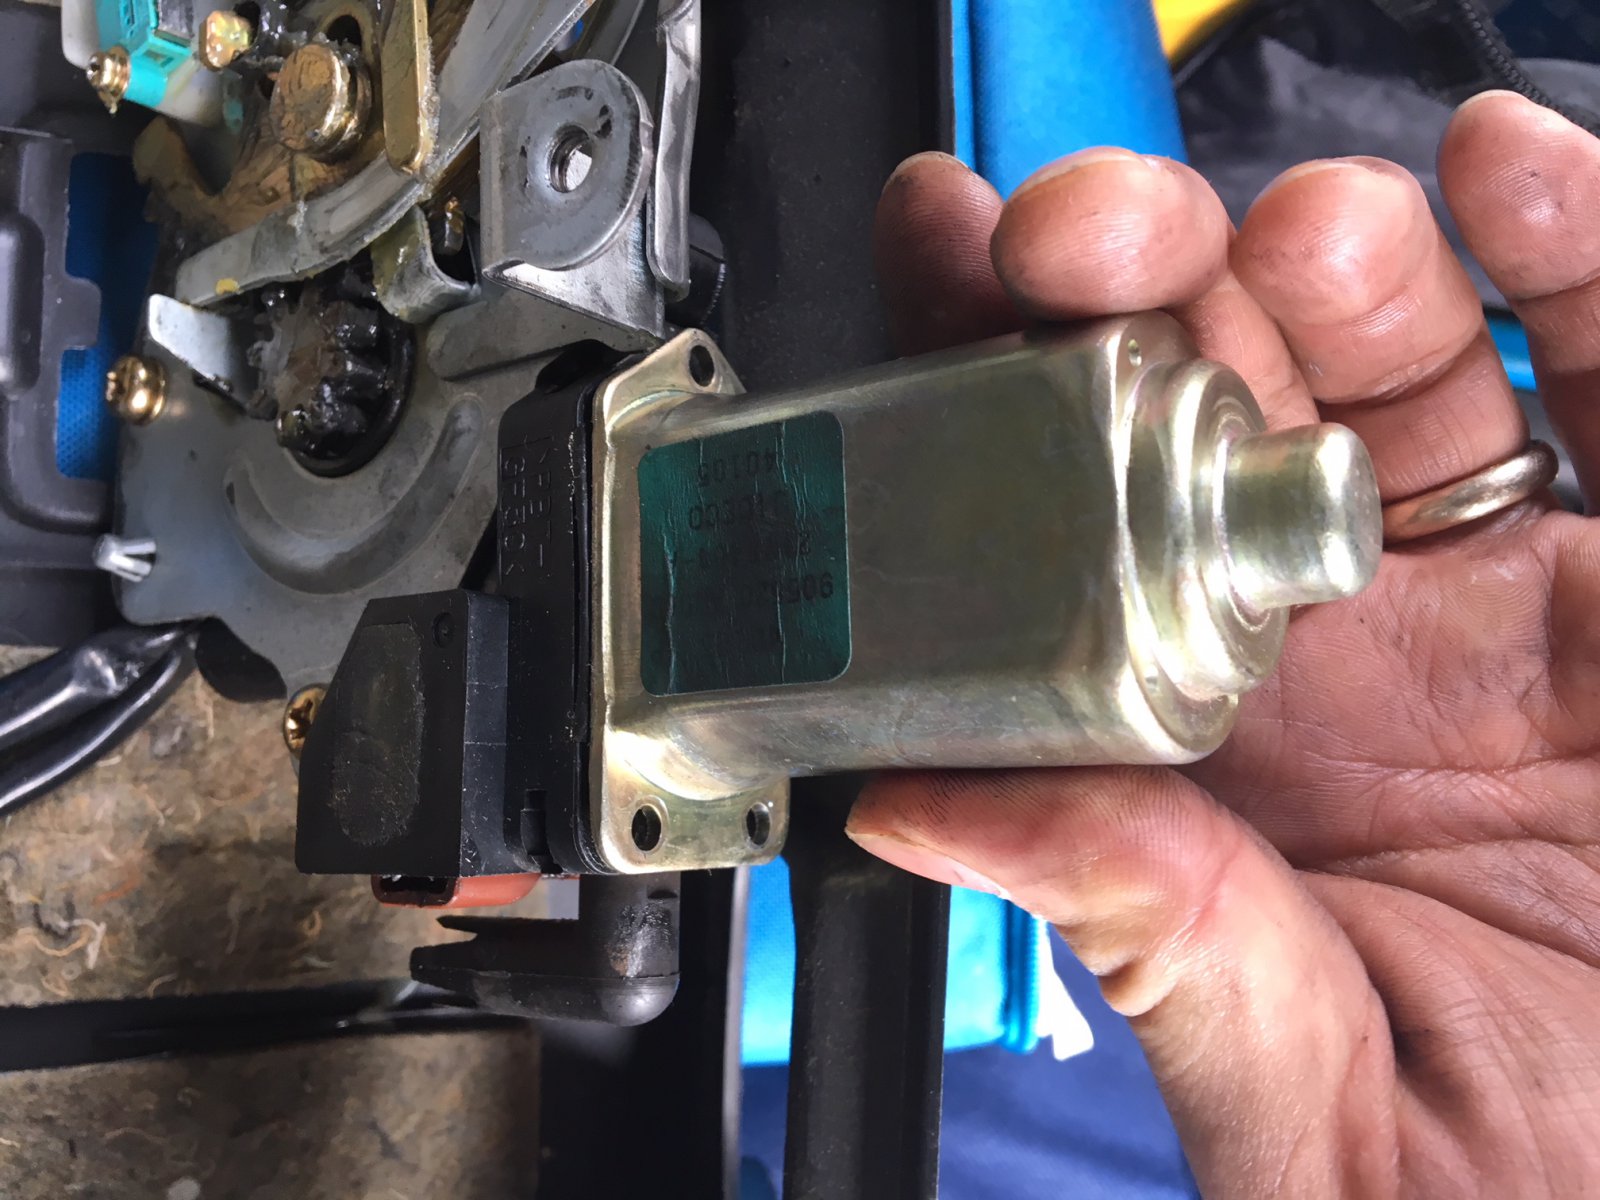
I started having issues with my rear trunk latch life gate on my 2004 Infiniti FX35. It just wouldn’t open. For some time, I was just removing the trunk 15A fuse where it would reset the latch. It would eventually open. But this ultimately got worse. I got tired of taking the fuse in and out whenever I wanted to open the trunk. Also, I really didn’t want to spend $100+ bucks on the part to fix it, so I figured I’d try whatever was out there.
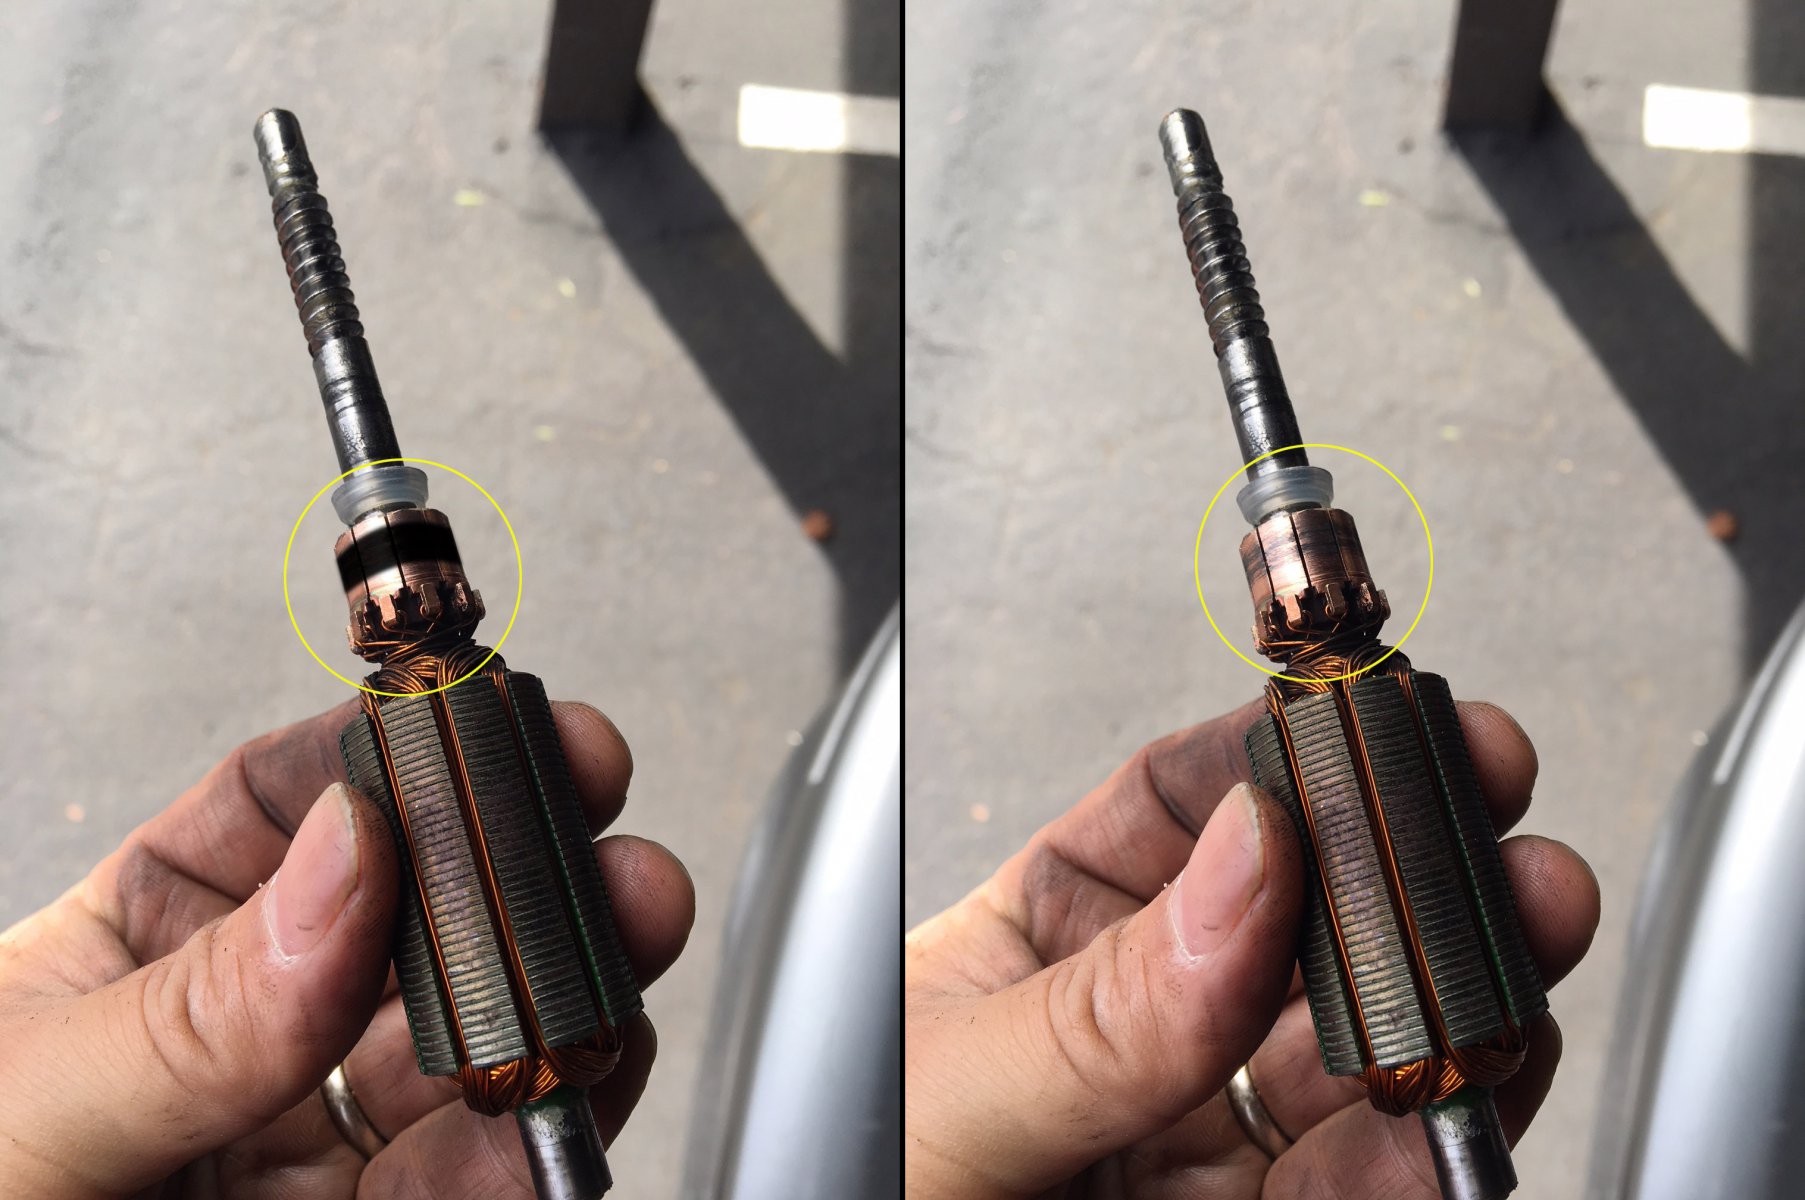
So I tried the solution in this write-up. I won’t take all the credit because I found some info on one of the FX35 forums (member Jim Lee). It took me about 20-30 minutes to do and WOW, everything works again. It’s been a few days now and all works fine. Basically, you turn your motor back to brand new again by following this how-to. The motor has something called a ‘commutator’. It needs to be super clean. When I took my motor out, it was very dirty and black. It is the common issue of the brushed motor. You can Google “Commutator” to learn more about it.
Summary: I would recommend try this how-to. It will save you a lot of money and it’s very simple to do. The part is about $100 bucks and labor may be another $100 bucks. This was FREE to me and just took 20 minutes of my time. Plus you learn a little about how these things work.
If you are looking to just replace and not attempt this how-to, below is the information you need to order the correct part for your FX35. Please cross-check the part number to ensure it works for your generation FX35.
Part Description: Motor-Closure, Back Door
Part Number: 90554-AQ000
Price: $124.03
This video below will show you how to remove the plastic covers to expose and take out the latch motor.
Original Photo Credit: Jim Lee via FX Forums
After doing the above and taking out the motor, you can follow the steps below:
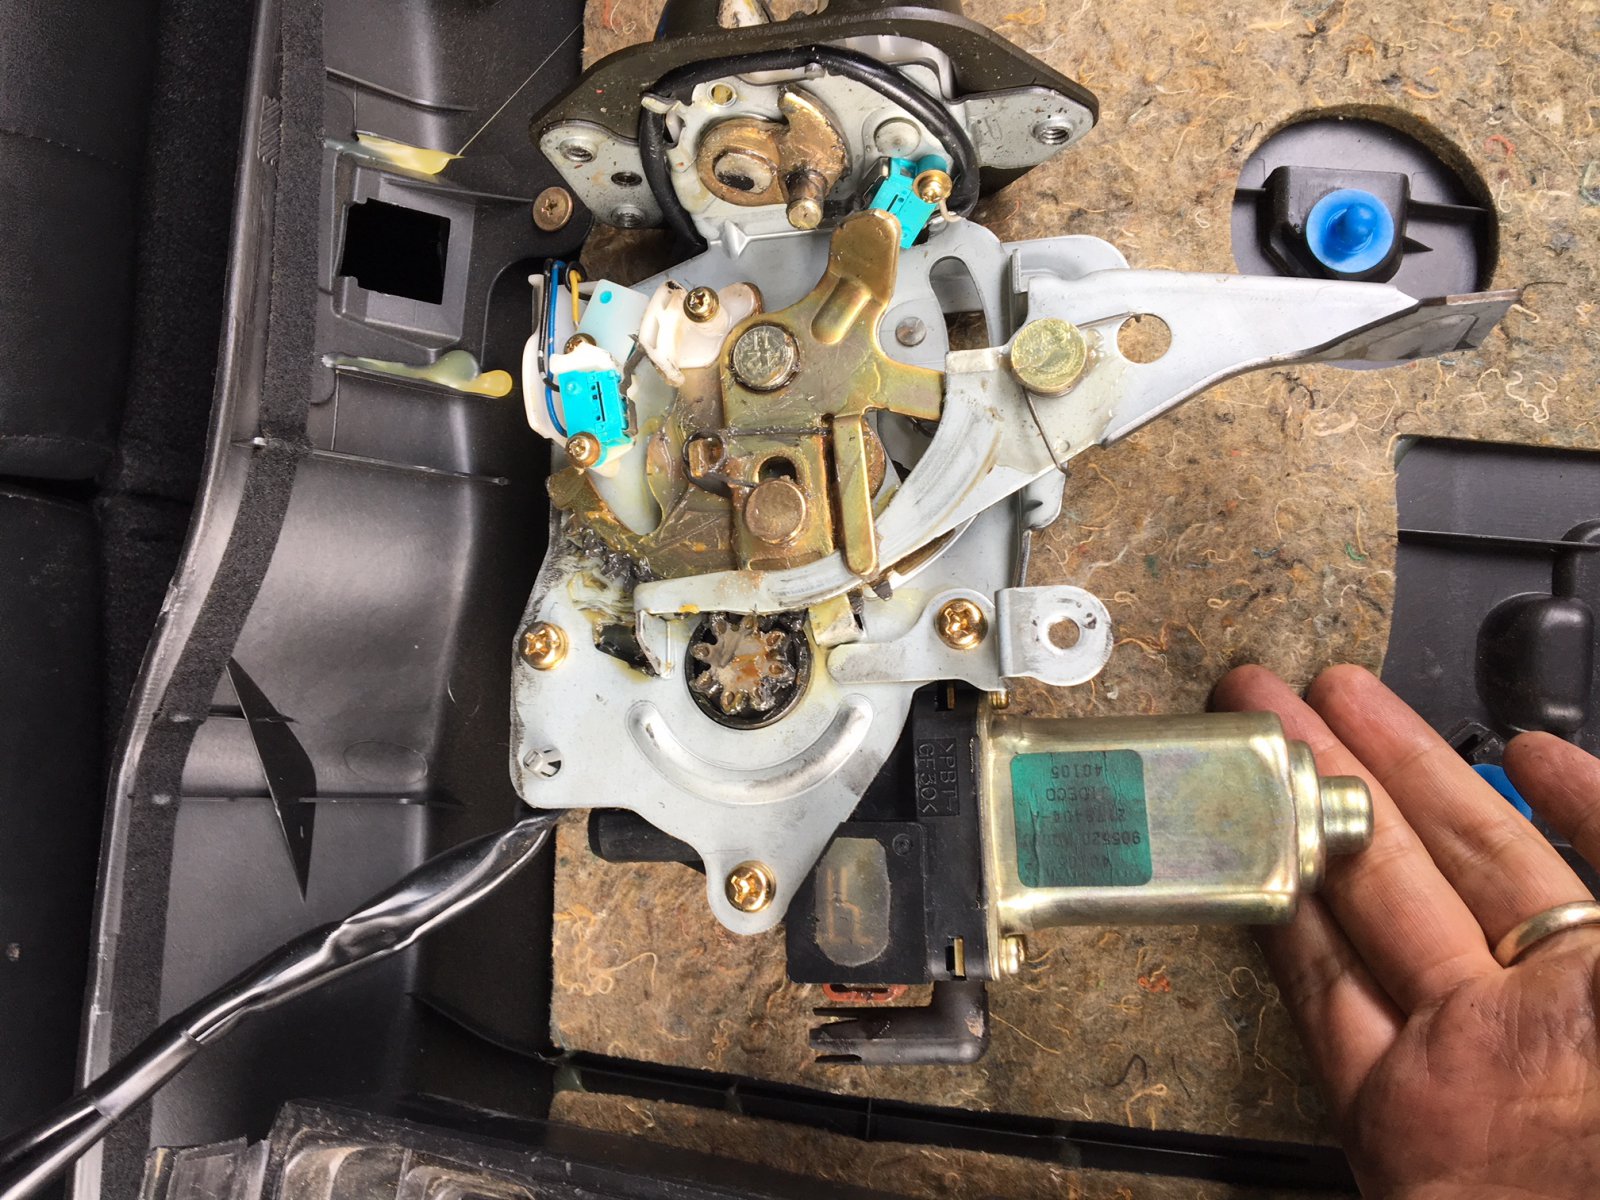
Take off the 3 screws on the motor.
Pull the shaft out of the housing.
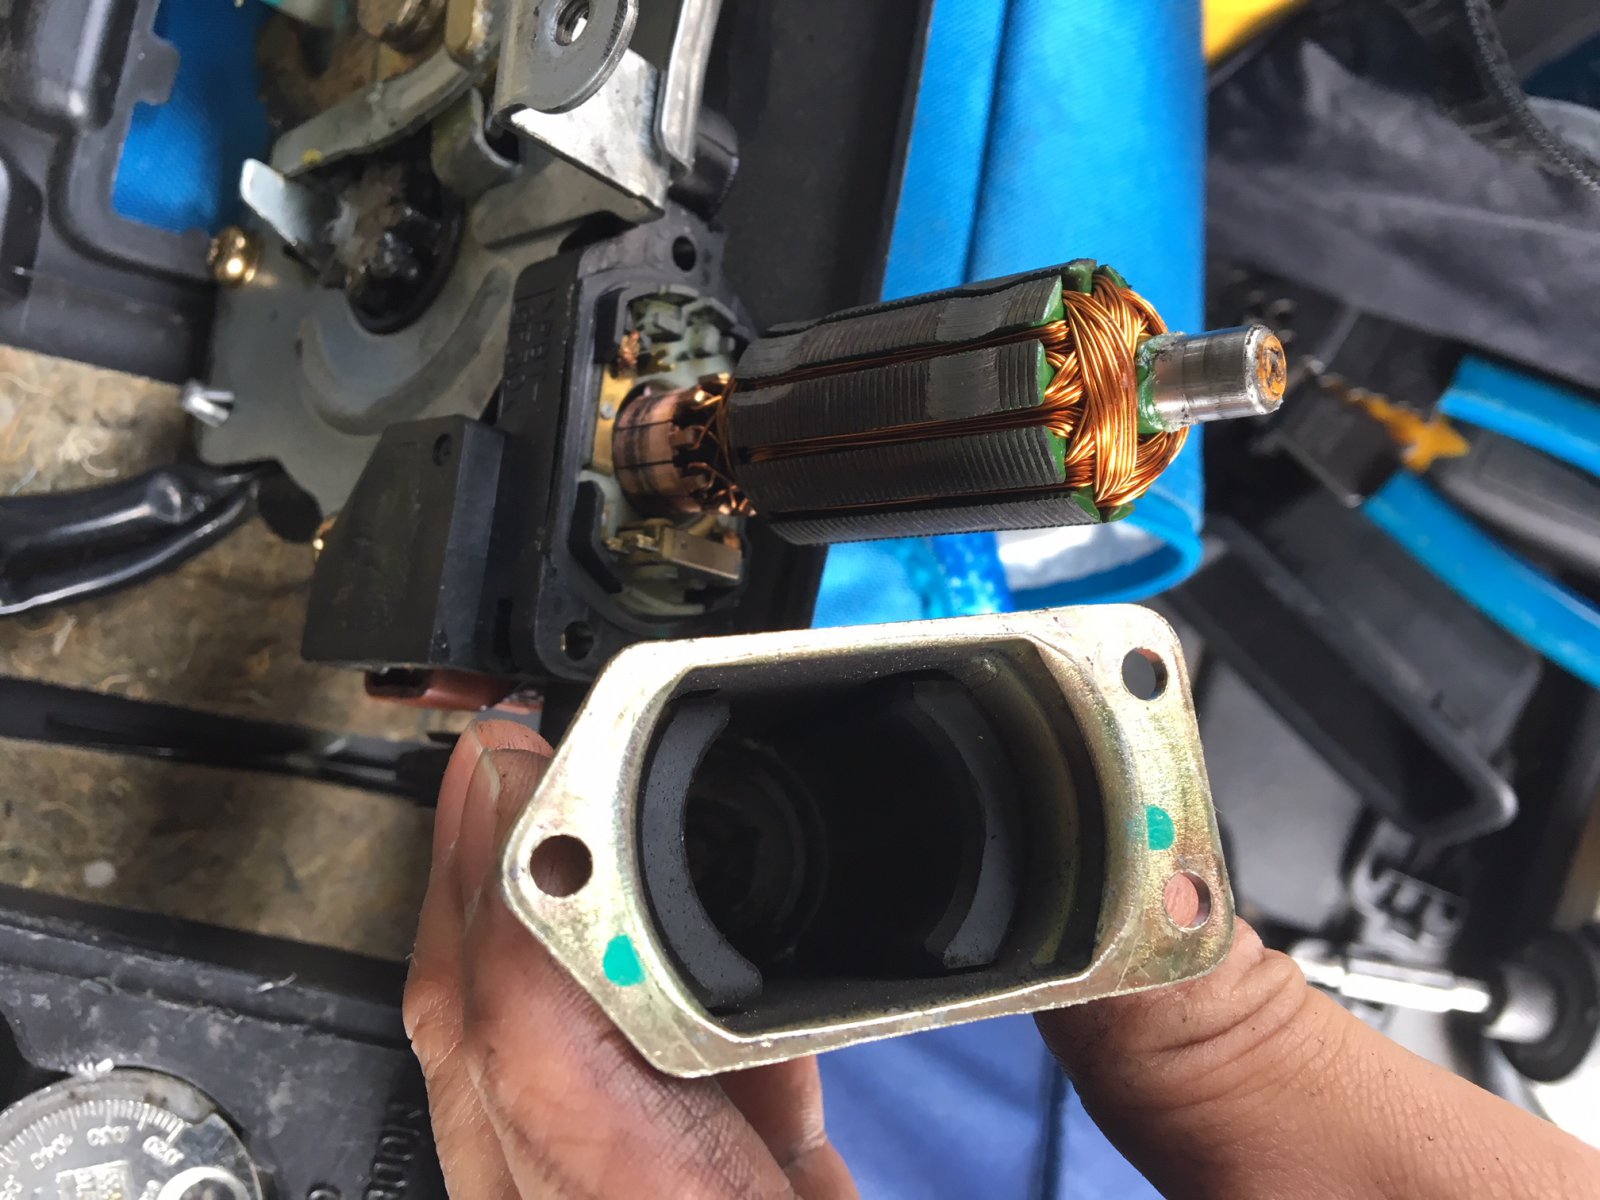
Simply use a terry cloth rag and apply some elbow grease back and forth to clean it.
These were actual pictures of my FX35. You can see how dirty it was as seen above. You can see the green cloth I used.

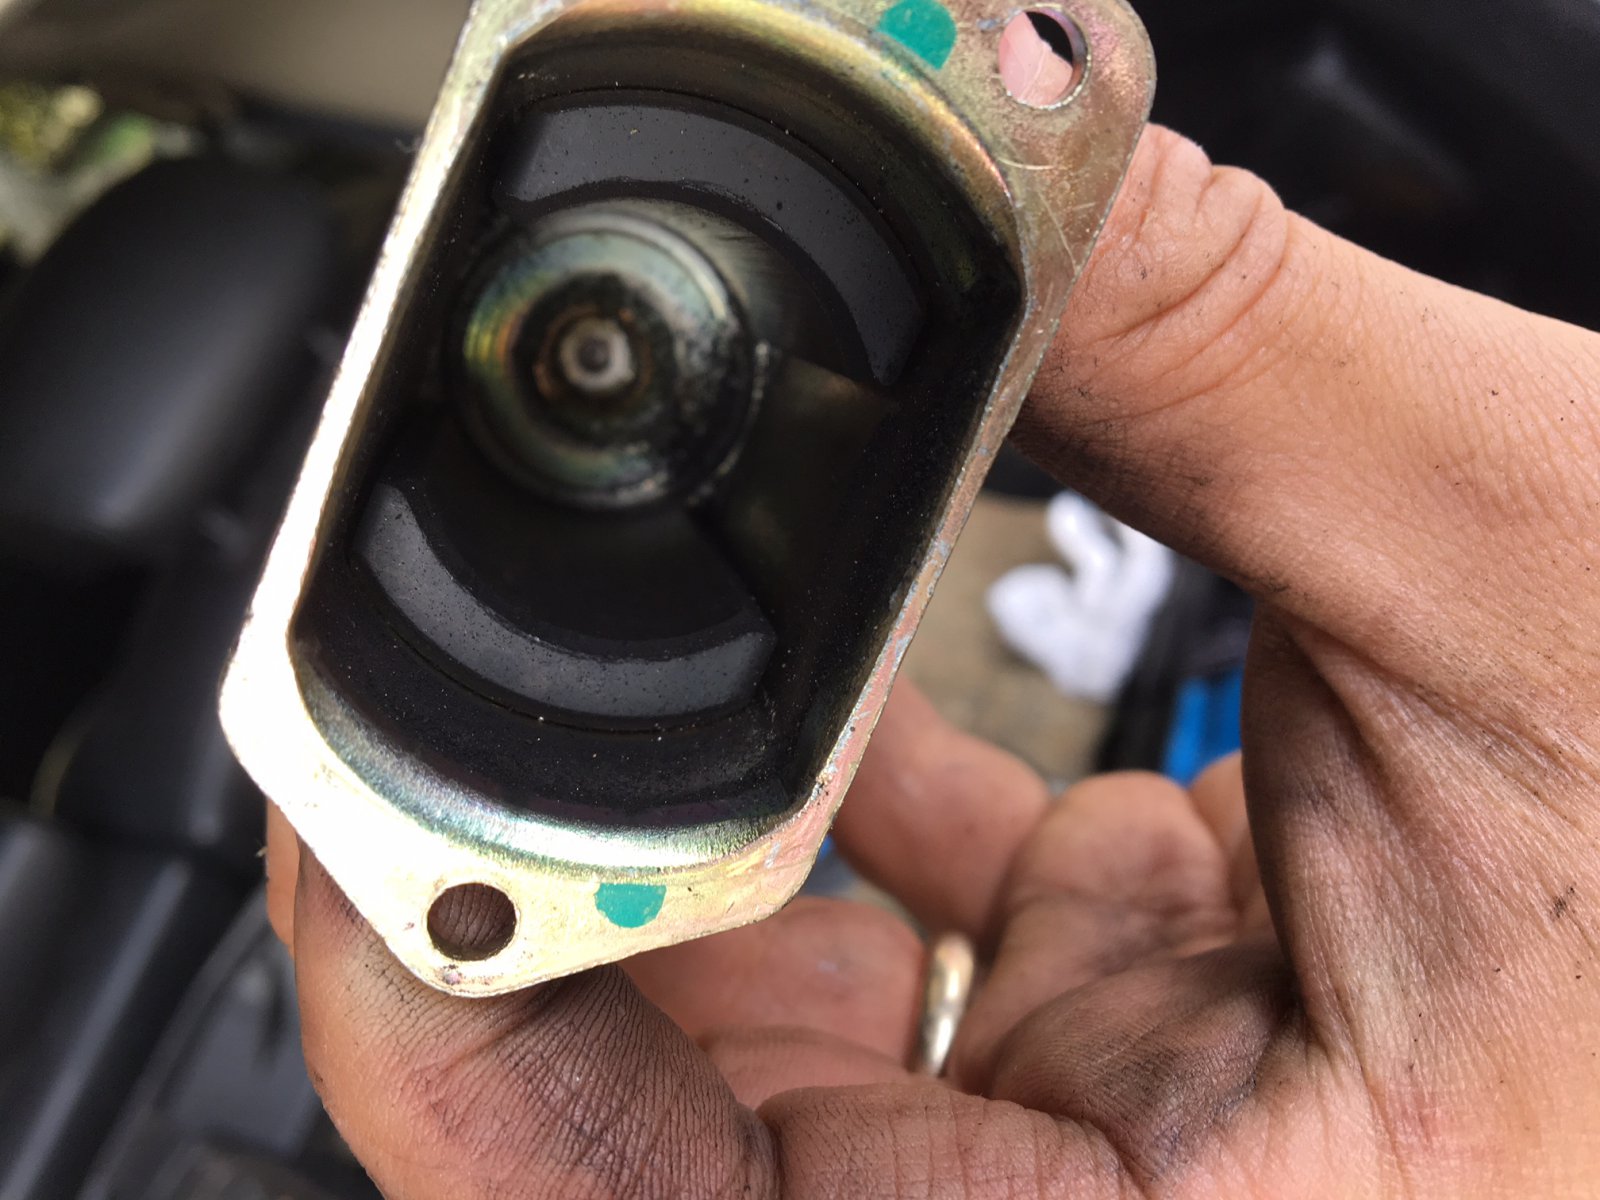
After cleaning it, it looks like this. Literally brand new again!


Put everything back together. AND NOW EVERYTHING WORKS AGAIN! Before I would have to take out the trunk fuse in order to reset it and hoped it opened. Now it opens consistently with no issues at!!


![]()

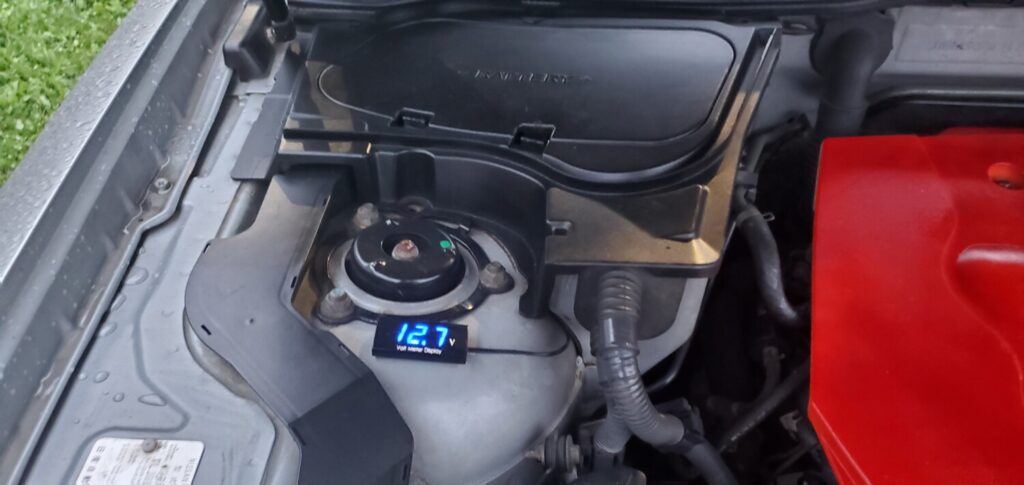
Community Member Credit: Eddy
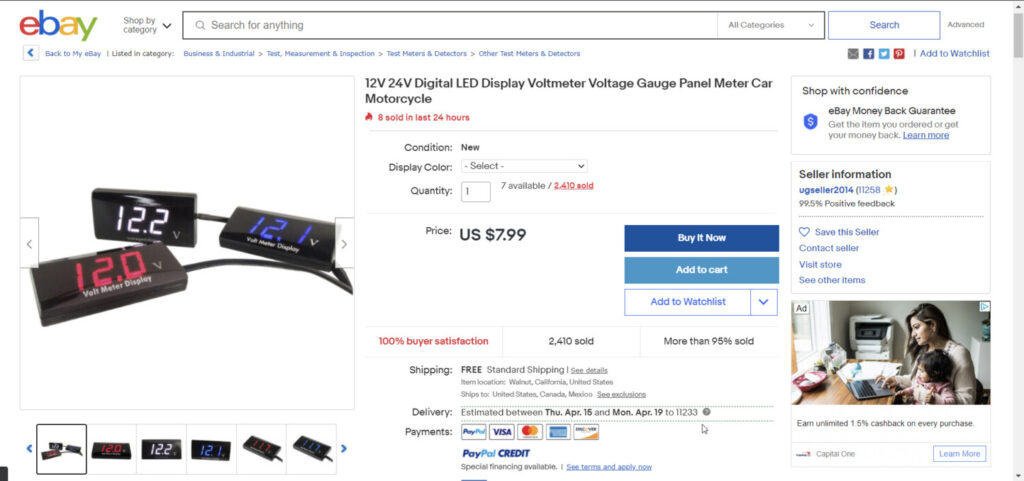
I just installed this little LED Battery Voltage Display Reader on my Infiniti FX35. In order to test or check the battery, you normally have to pop open the plastic cover for it. This makes it easier for me to check the actual battery itself and confirm the voltage reading.
Description: 12V 24V Digital LED Display Voltmeter Voltage Gauge Panel Meter Car Motorcycle
Price: $8.00
Order Link: https://www.ebay.com/itm/12V-24V-Digital-LED-Display-Voltmeter-Voltage-Gauge-Panel-Meter-Car-Motorcycle/112243510428
![]()

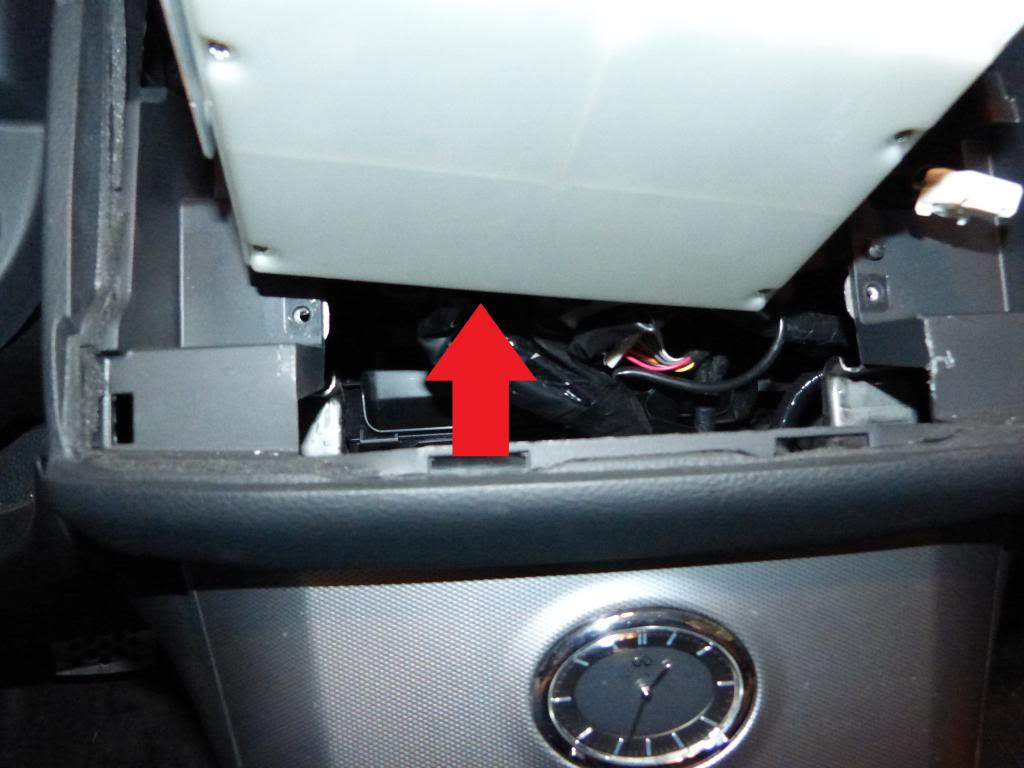
Community Member Credit: Onur Yaşa
As you know common issue for the second-gen FX/QX is the sunroof leak. That leak goes to the floor then kills the modules like the camera etc. The easy and best way to get rid of that leak is just to put another hose to the downside, drain holes in the engine bay.
In that way, you don’t need to break or put the risk of the trim pieces. I used a garden hose and got it to the cabin from the engine bay. when you look at the pics, you will understand. Tested in heavy rain, no issue anymore.


![]()

")
Community Member Credit: smijus
So I was having some cold start problem. I knew that my battery was good so I did some research and it seemed like the AC Amplifier was the best culprit. So here is the process of replacing the AC Amplifier.
First off, the AC Amplifier is the most expensive plastic box that I’ve ever bought and this is what it looks like.
The only explanation I could find was that the AC amp gathers climate information( outside temp, humidity, etc), sends it to the ECU and that determines the fuel/air mix on start up.
Part Number: 27760-CG000, 27760-CG700, 27760-CL000, 27760-CL01A
Part Description: AMPLIFIER – CONTROL, AIR CONDITIONER
Price: $650.97
Part Number: 27760-8Y71A
Part Description: AMPLIFIER – CONTROL, AIR CONDITIONER
Price: $650.97

There are three cable connections at the back of the unit.

The AC Amplifier sits immediately behind the AC Controls under the main display stack in the middle of the dashboard.
To replace your AC Amplifier, do the following:
1. Take a plastic pry tool or something non-scratching and slowly pry around the bezel of the center display panel.

2. You’ll need to slowly make your way around the entire bezel until it starts to pry up, before you pull the center stack out, there are two cables that need to be disconnected. One white connector, seen here from the bottom.
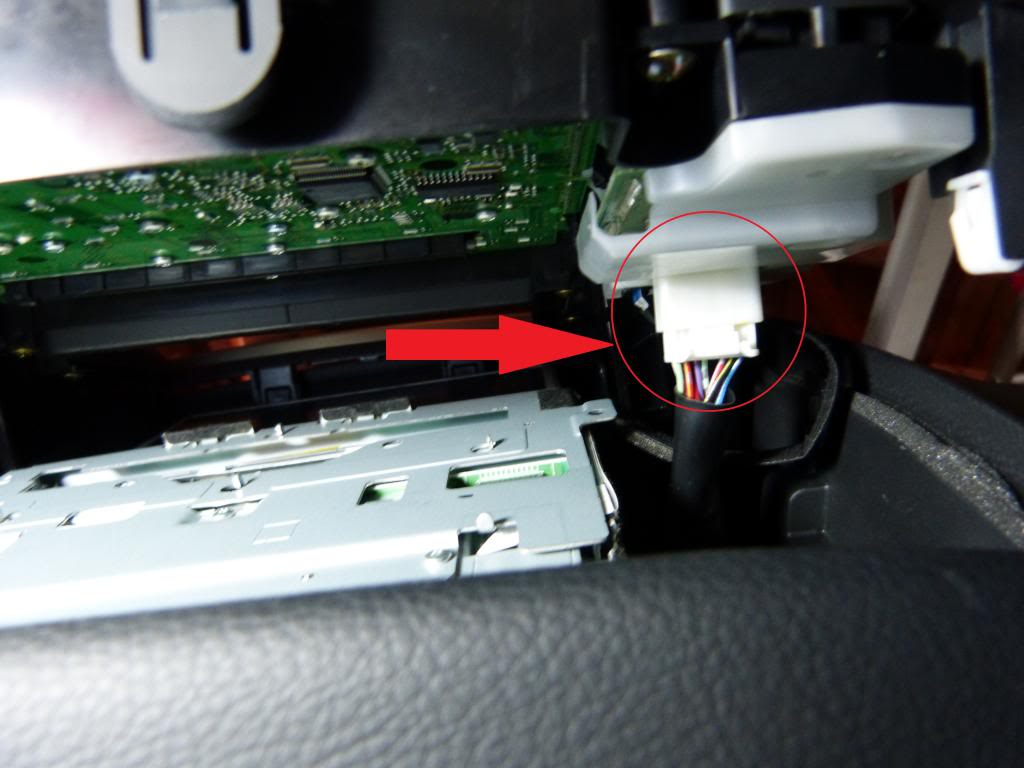
…and one black ribbon cable seen here from the passengers side.

Once these cables are disconnected, you can remove the entire center stack and set aside for the time being.
3. You will now see the guts of your center stack, and the AC Amplifier, the gray plastic box at the bottom. You will need a Philips head screwdriver to remove the 4 screws holding the center stack in place.
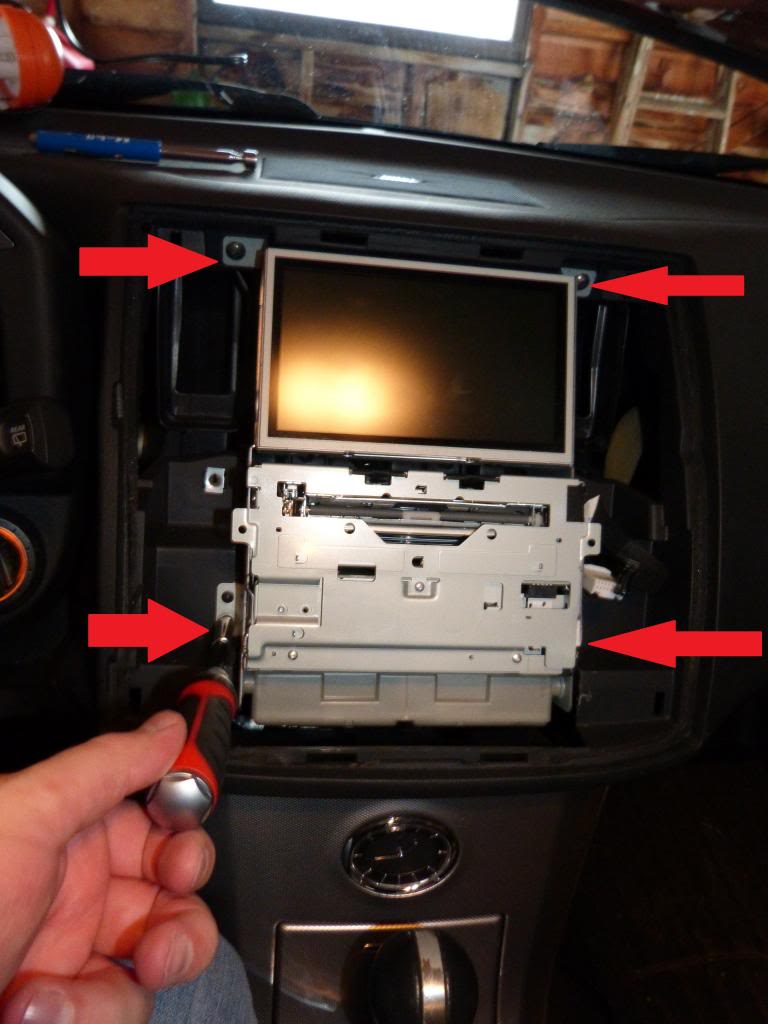
4. Now you can pull the entire center stack slightly out of place so you can access the 2 Philips head screws that hold the AC Amplifier in place. There is one on either side of the unit, remove them both.

5. Once these two screws are out, you should be able to pop the box out of place and more easily access the 3 cables at the rear of the AC Amplifier.
6. Remove the three connectors, replace with the new AC Amplifier and reconnect the 3 cable assemblies.
7. Put the AC Amplifier back into place and return the screw on either side of the unit.
8. Slide the Center Stack back into place and return the 4 mounting screws back into place.
9. Before returning the faceplate, re-attach the white cable and the black ribbon cable.
10. Place the bezel back into place and slowly push firmly around the entire outside of the bezel, you’ll feel the face click back into place.
11. Start up your car and go through all of the functions on the center stack to ensure that everything still works.
12. You’re all done.
![]()

Community Member Credit: fxlr8
PROCEDURE WAS DONE ON MY 2008 M45. PROCEDURE SHOULD BE SIMILAR ON MOST INFINITI VEHICLES. MAKE SURE TO CHECK YOUR OWNERS MANUAL FOR PROPER FLUID SPECS AND CAPACITIES.
TOOLS:
SUPPLIES:
SAFETY:
PROCEDURE:
LIFT AND SUPPORT ALL 4 CORNERS OF YOUR VEHICLE WITH JACKSTANDS. YOU WANT TO KEEP THE THE CAR AS LEVEL AS POSSIBLE SO YOU WILL BE ABLE TO PUMP IN THE CORRECT AMOUNT OF FLUID INTO THE DIFFERENTIAL.
LOOSEN AND REMOVE THE TOP FILLER PLUG FIRST (YOU’LL WANT TO REMOVE THE FILLER PLUG FIRST SO YOU CAN BE SURE THAT YOU WILL BE ABLE TO FILL UP THE DIFFERENTIAL AFTER THE FLUID IS DRAINED).

LOOSEN THE DRAIN PLUG. ALIGN YOUR PAN UNDER THE DIFFERENTIAL AND REMOVE THE PLUG.

LET THE FLUID DRAIN COMPLETELY.

AFTER THE FLUID DRAINS, CLEAN THE DRAIN PLUG AND REINSTALL THE DRAIN PLUG. TIGHTEN THE DRAIN PLUG TO 25FT/LBS.


GRAB YOUR FLUID AND PUMP AND FILL YOUR DIFFERENTIAL UNTIL THE FLUID STARTS COMING OUT OF THE FILLER HOLE. YOU MIGHT HAVE SOME FLUID COMING OUT SLOWLY THE WHOLE TIME YOU ARE PUMPING, BUT IT WILL NOT BE FULL UNTIL IT IS COMING OUT PRETTY GOOD (AROUND 1.7 QUARTS).

AFTER THE FLUID IS LEVEL WITH AND COMING OUT OF THE FILLER HOLE PUT BACK THE FILLER PLUG AND TIGHTEN TO 25FT/LBS.

CLEAN UP ANY FLUID THAT YOU SPILLED, ESPECIALLY OFF THE EXHAUST PIPES.
MY CAR HAD AROUND 39,000 ON IT, NOT SURE IF THE FLUID WAS EVER CHANGED BEFORE I DID IT.
OLD FLUID ON LEFT / NEW FLUID ON RIGHT.

![]()

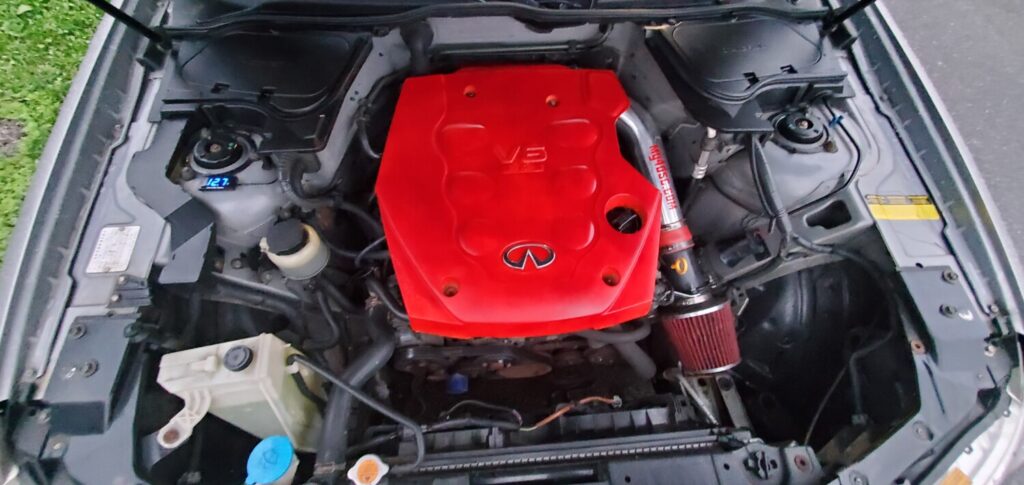
Owner: Sohail Roshan
Year: 2004
Model: FX35
Color: Black
Engine: VQ35DE
Transmission: 5-Speed Automatic


![]()


