

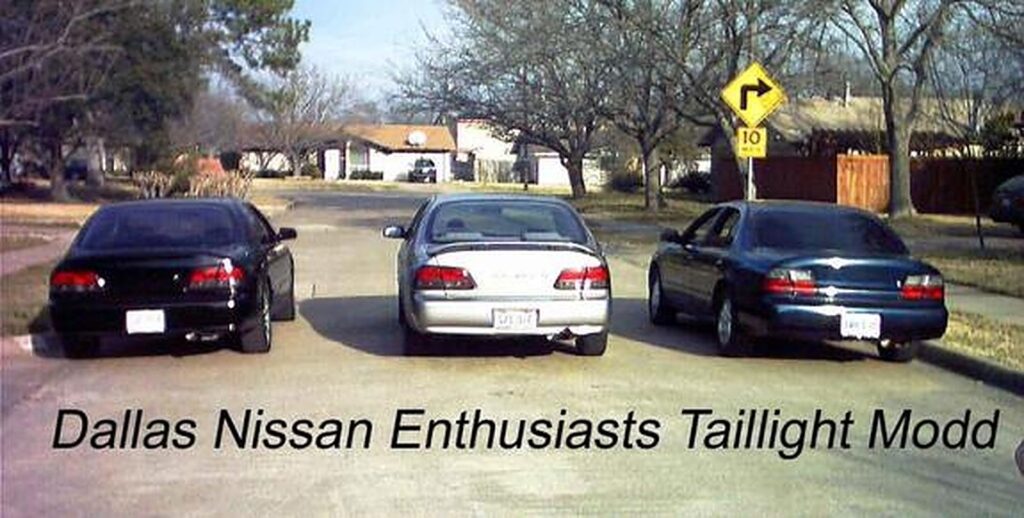
Community Member Credit: Dallas Nissan Enthusiasts
This write-up below is a step-by-step set of instructions with pictures on how to do the Dallas Taillight Mod. It is similar to the 97-99 Red/Clear mod but with a twist.
Things you will need:
- Good size flat head screwdriver
- 8mm deep socket
- Needle nose pliers
- Heat Gun (not necessary but helps a lot)
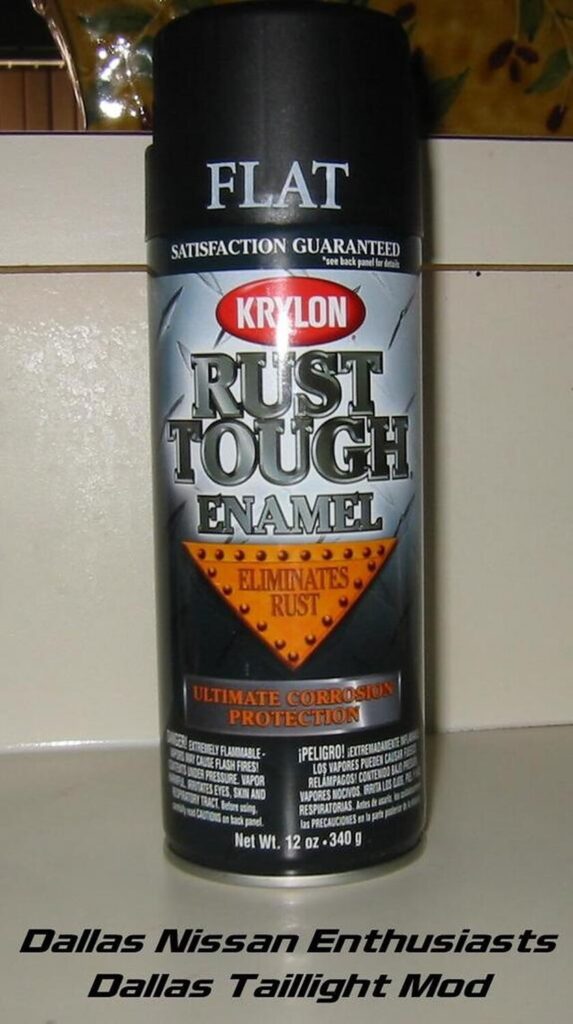
- Can of high temperature flat black spray paint. (AutoZone)
This is the paint we used.
We will start with the reverse light assemblies.
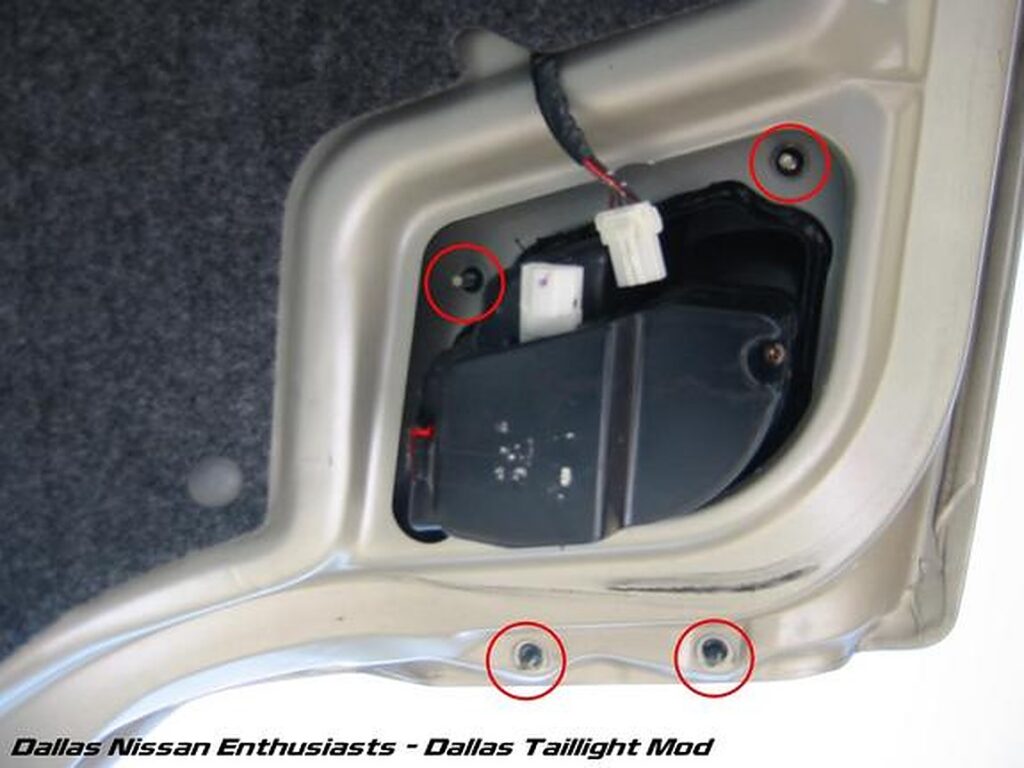
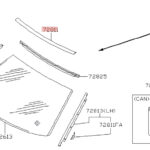
First, unscrew the 4 8mm nuts that hold the reverse light assembly onto the trunk lid. All 4 are highlighted by the red circles. Once these nuts are removed, remove the screw that holds the plastic cover on the back. You should now be able to pull the small plastic cover off which hides the bulbs and sockets. Go ahead and unplug the wiring harness located at the top of the pic.
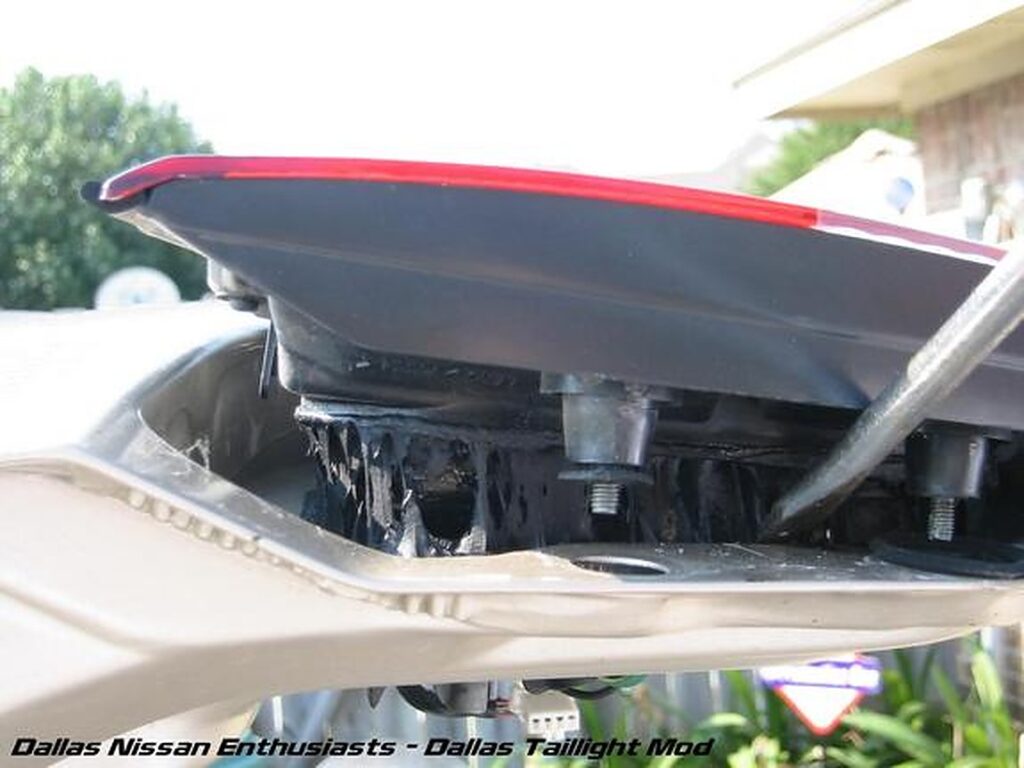
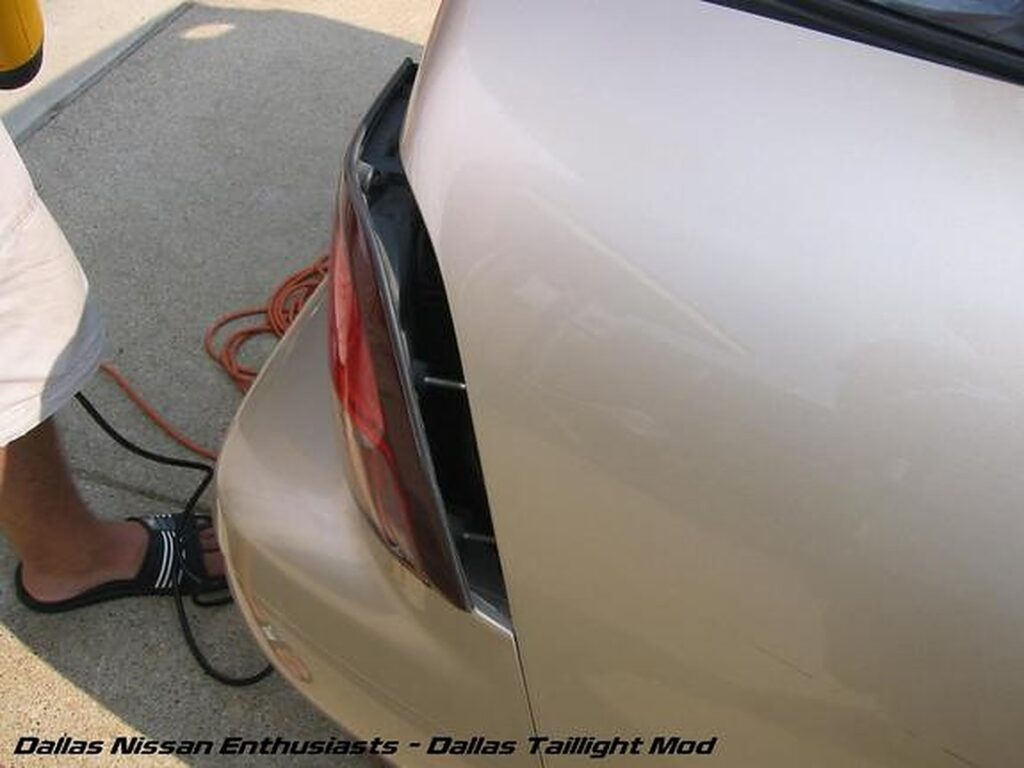
You can now take the flat head screw driver and stick it in between the taillight assembly and trunk lid (as shown on the left) and pry it up (as shown on the right). As it comes up, you can use the heat gun to heat that black goo up which will make it easier to pull it off and make the assembly cleaner once it is off.

Once you have pried that end up, you can use your hands and lift the assembly straight out of the trunk lid.

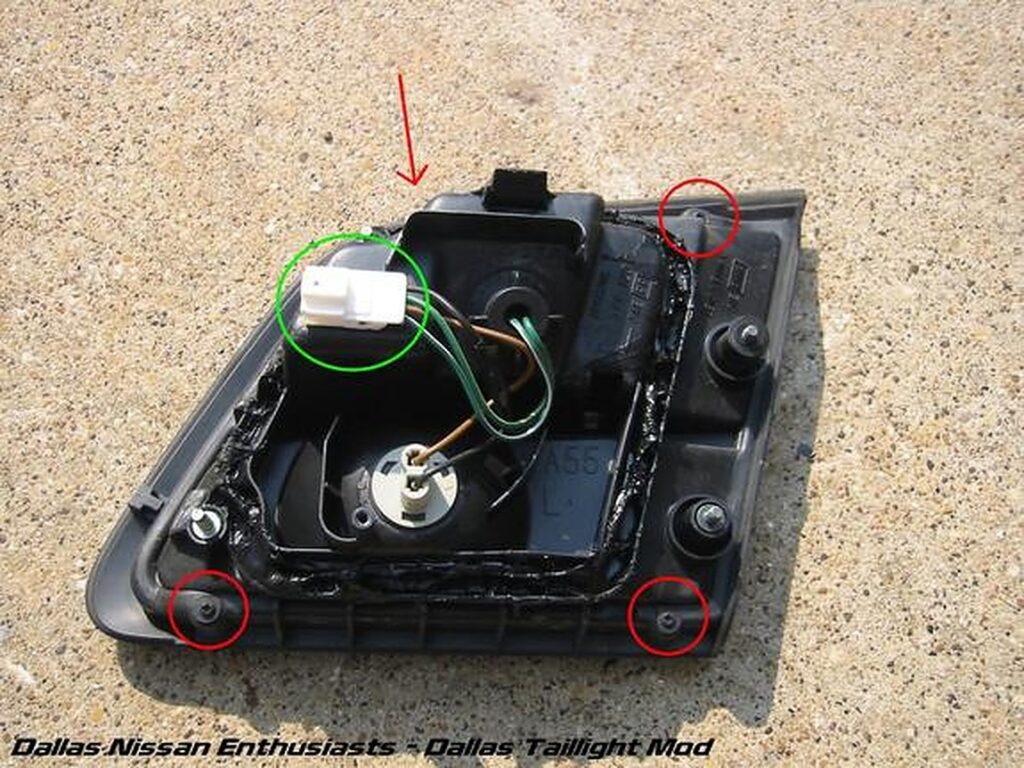
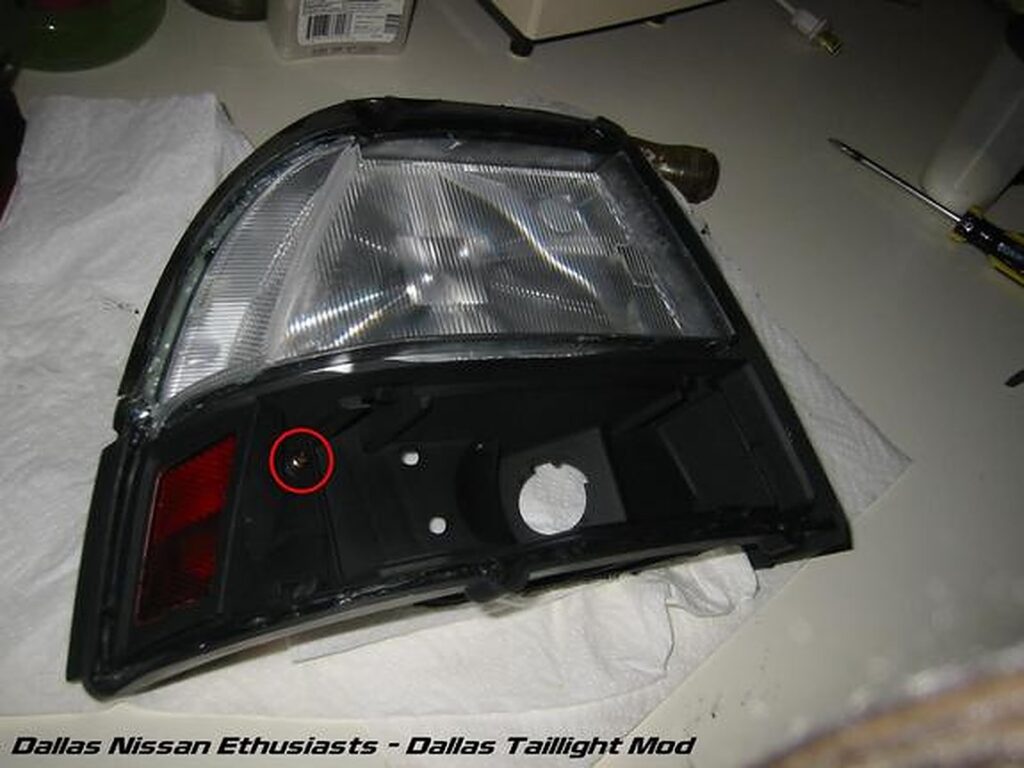
Now that the reverse tail assembly is out, you need to remove the lighting wiring plug from the assembly and remove the four screws. The plug is marked by the green circle and the four screws are marked by the red circles and the red arrow. Using the flat head you can pop the plug off by pushing on the plug from the ride side with a fair amount of force.
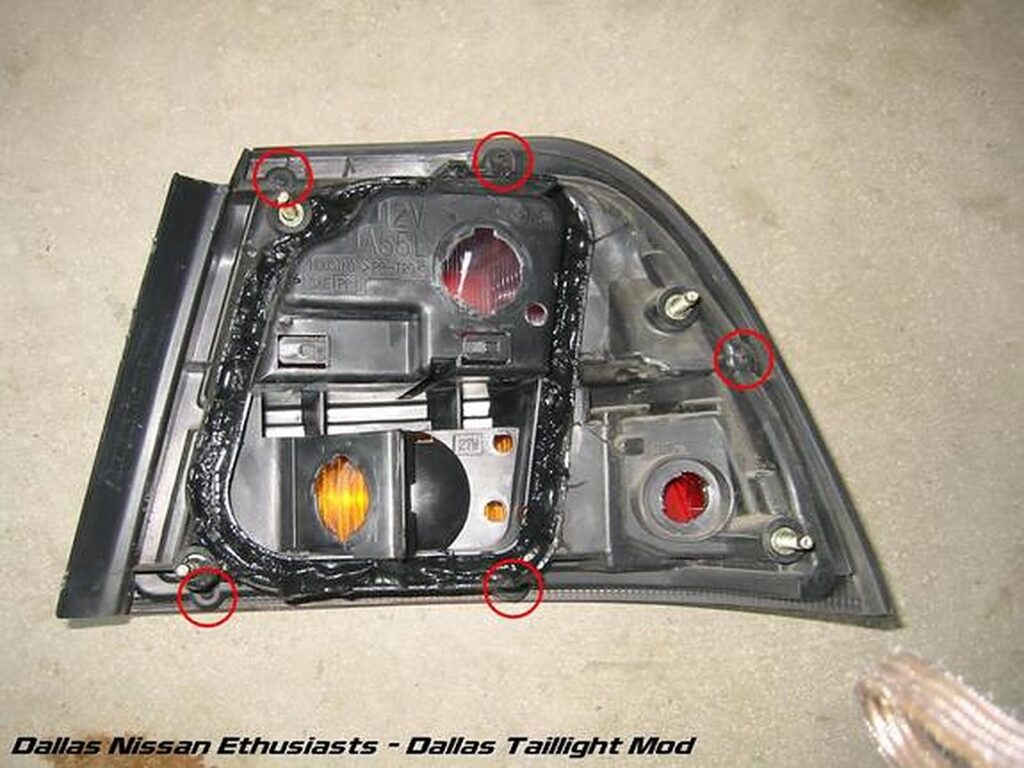
Now we can begin on the turn signal assemblies. Again, unscrew the four nuts which are marked by the red cirlces and the red arrow (didn’t get picture of all four). You will have to pull those white plastic things off the two inner bolts to remove those nuts. A set of needle nose pliers can help if you can’t pull them off with your hands. You can now use the screw driver again and pry from the trunk side, use the heat gun again if you want (makes things easier and cleaner), and pull the assembly straight out (as shown on the right).

For the side, there are two light harness plugs to be popped off (left) and 5 screws that you must remove (right). You can see I am using a big flat head screw driver and a very small sledge hammer to remove the plugs. This is overkill, but it was close, available, and it worked.
![]()
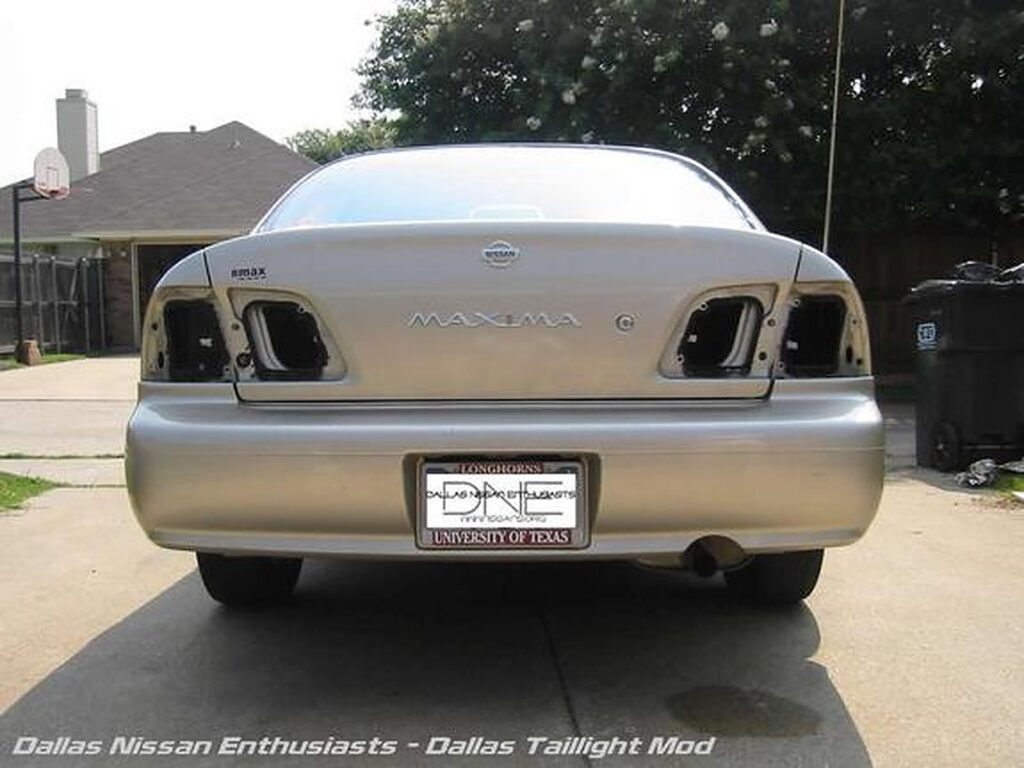
Your ride should kinda look like this now. Pretty huh?
Now with all the tails removed, all the screws removed from each assembly, and all the lighting wiring remove, we can go inside and begin the hard part.
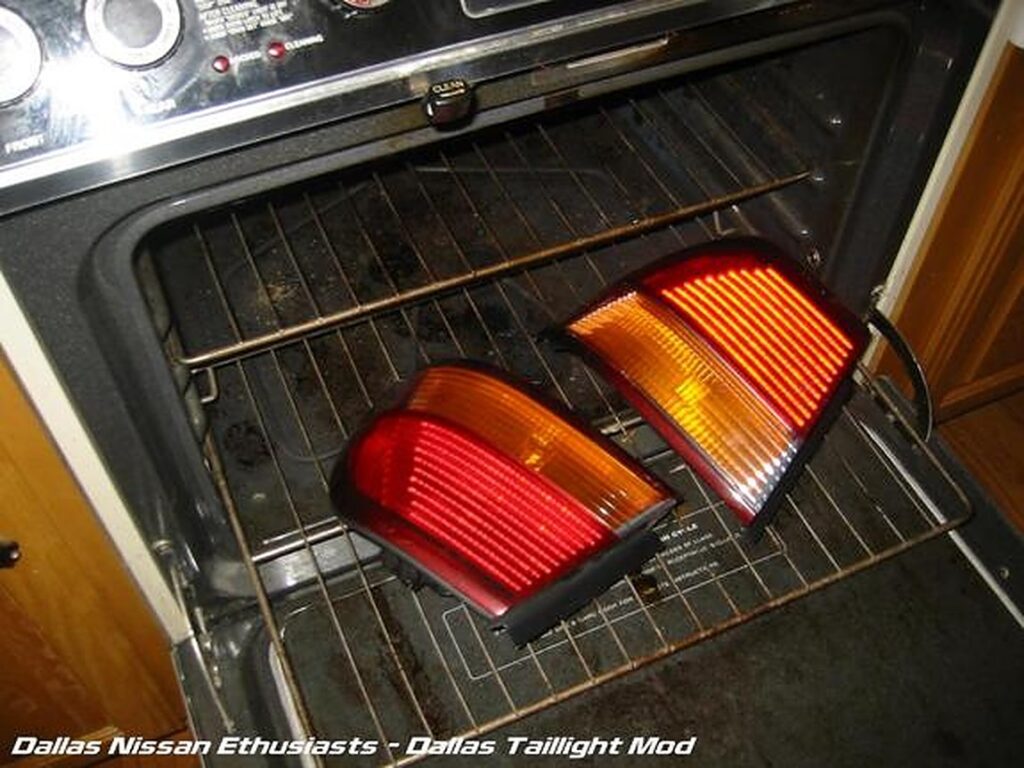
From this point, some people have chosen to sit with a heat gun and heat the edges of the assemblies but that seems to difficult to me, so I use the oven. Set your oven to 200 F degrees. Once the oven has heated up for a bit, place the reverse tail assemblies or the signal tail assemblies in the oven. We did the reverse first, but it doesn’t matter. The pic shows the signal tail assemblies on the lowest oven rack to really get them warm.
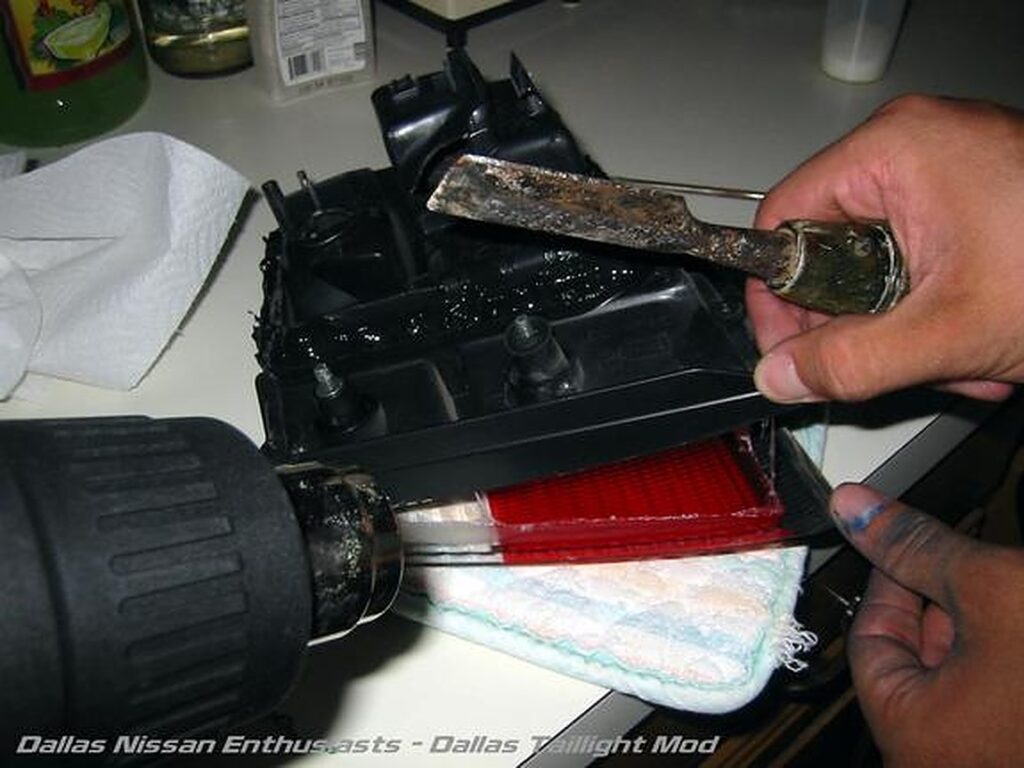
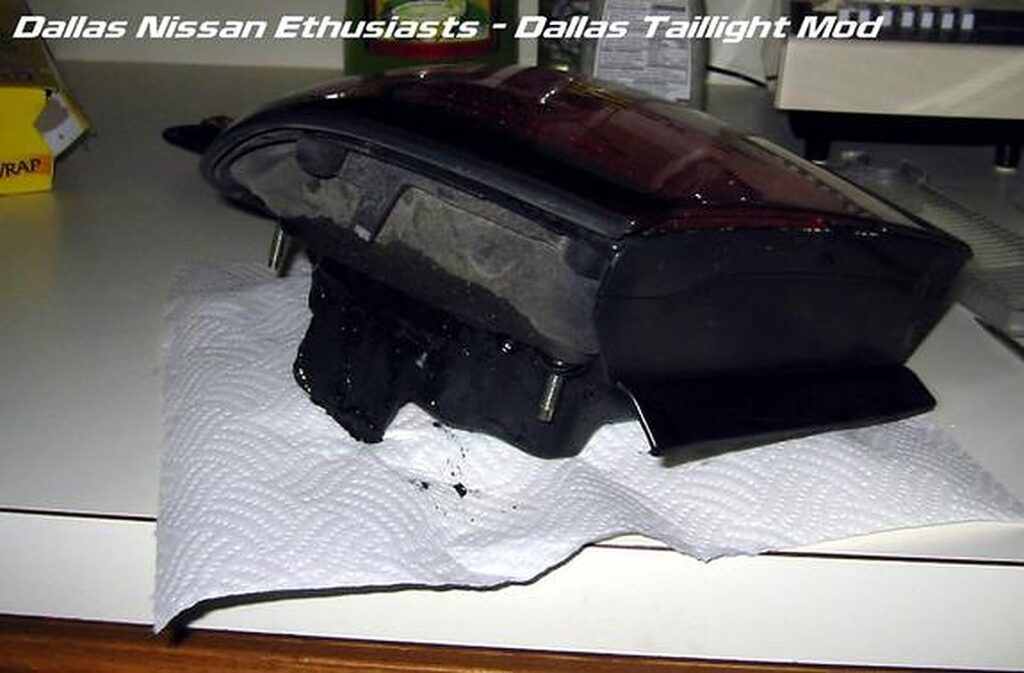
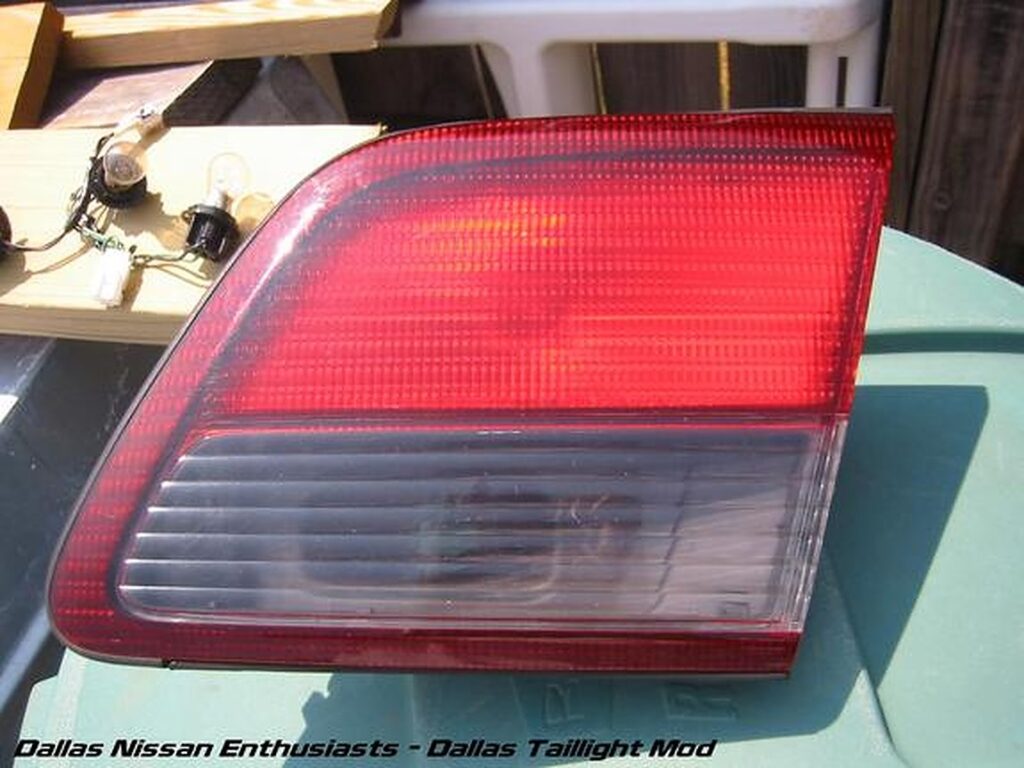
The tails should be in the oven for 10 mins (a little longer won’t hurt). Once 10 mins has passed, pull your tails out (WARNING: They will be VERY hot). Use something with a long flat tip (I ended up using that large untensil in my right hand in the pic on the right) to pry the lense from the plastic assembly (left). Be very careful not to crack your lense. You will have to pry fairly hard, but don’t over do it. Be patient. If possible (a friend is helpful here) use the heat gun at the same time to keep the glue hot and keep things cleaner as you pull the two apart (right).
Opening the turn signal assemblies are a bit more difficult. Start by pulling the lense off from the straight edge. Once the lense is most of the way pulled apart from the housing, pull it straight out. The bottom left corner is a little weird in its design. Be careful with this part as to not break your lense. Now you must pull the orange piece of plastic out of the turn signal assemblies and the clear piece out of the reverse. You should be able to just pull. You will not need these again. Do not pull the clear pieces from the upper half of the tails where the brake lights are. This makes the light spectrum more spread out.
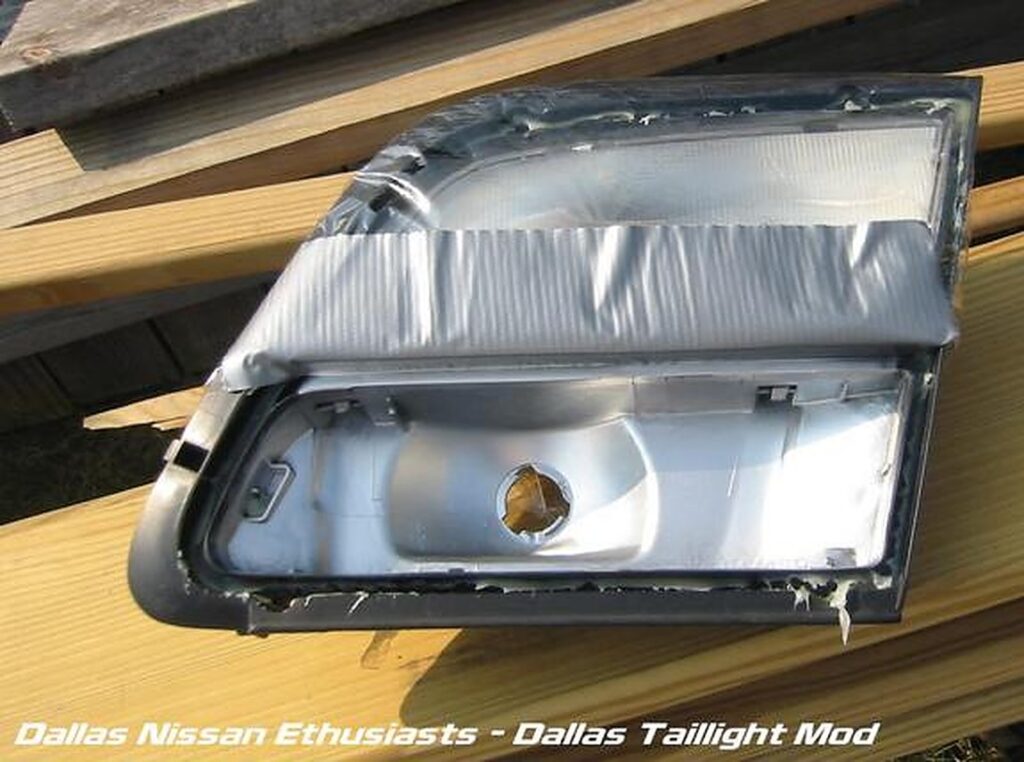
Now that all your lenses have been removed from their housings, prepare the housings to be painted. The best thing would be to use painting tape and some paper to cover the areas you do not want painted, but all we had at the time was duct tape and saran wrap. You can pick up painting tape at your local Home Depot or Lowes.
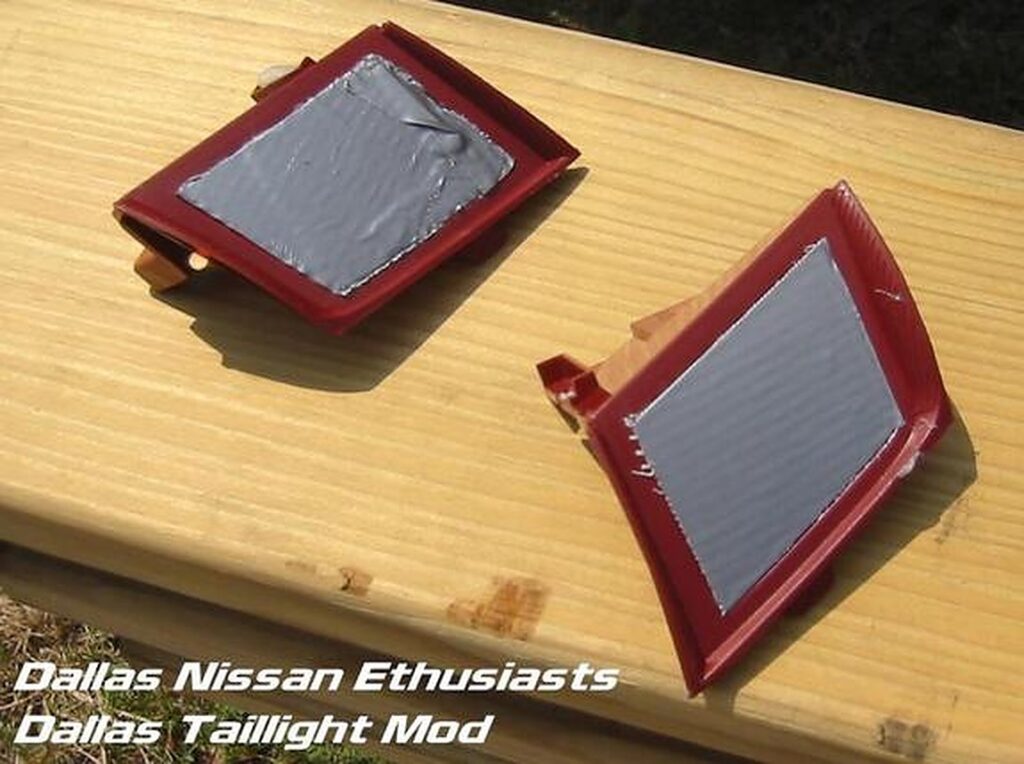
Now, for the turn signal assemblies, you must remove the little red side light cover by removing the one screw that holds it in (sorry no pic). Using the painting tape (or duct tape in our case) cover the reflective part. As to not paint it black. Some people have chosen to leave these covers out completely, but that is your choice.
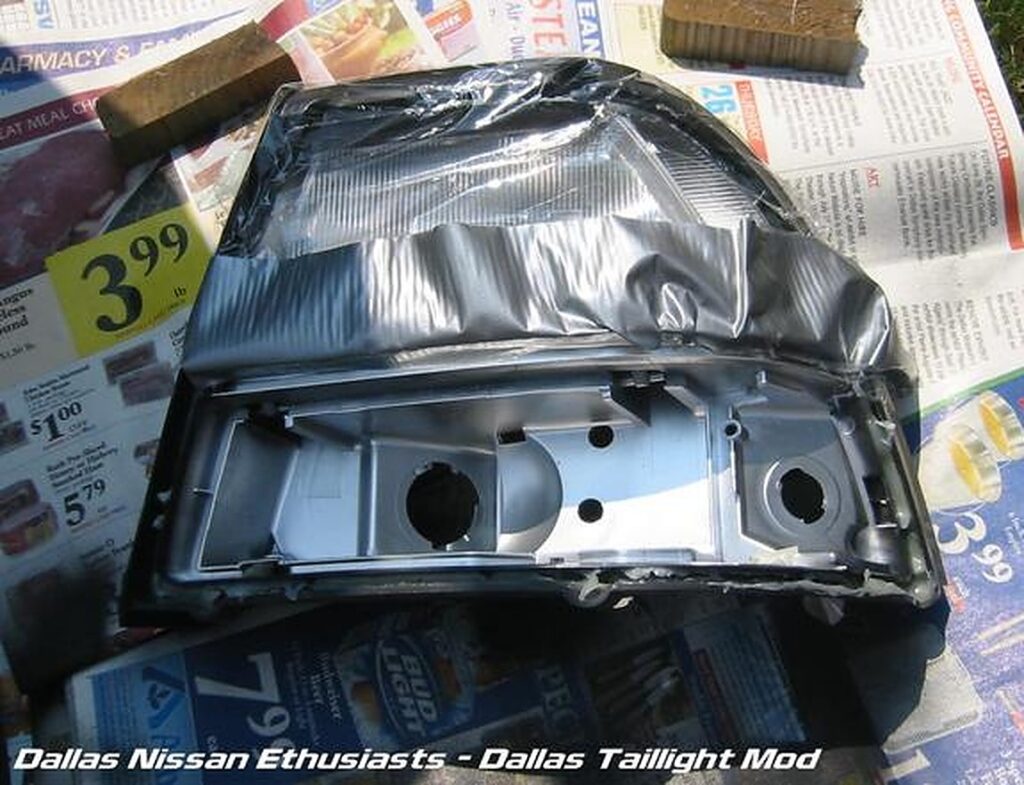
Once you have the protective stuff all put on the tails, you can spray paint your tails. Be sure to get all the corners and hard to get areas for that clean look. I recommend holding the can 12 to 18 inches away from the housing itself as to not get overspray. We put two coats of paint to make sure we got everything. This is what your tails should look like.

Now take your paint turn signal tail assemblies and your painted reflectors and put them back in. Don’t forget to put the screw back in (red circle).
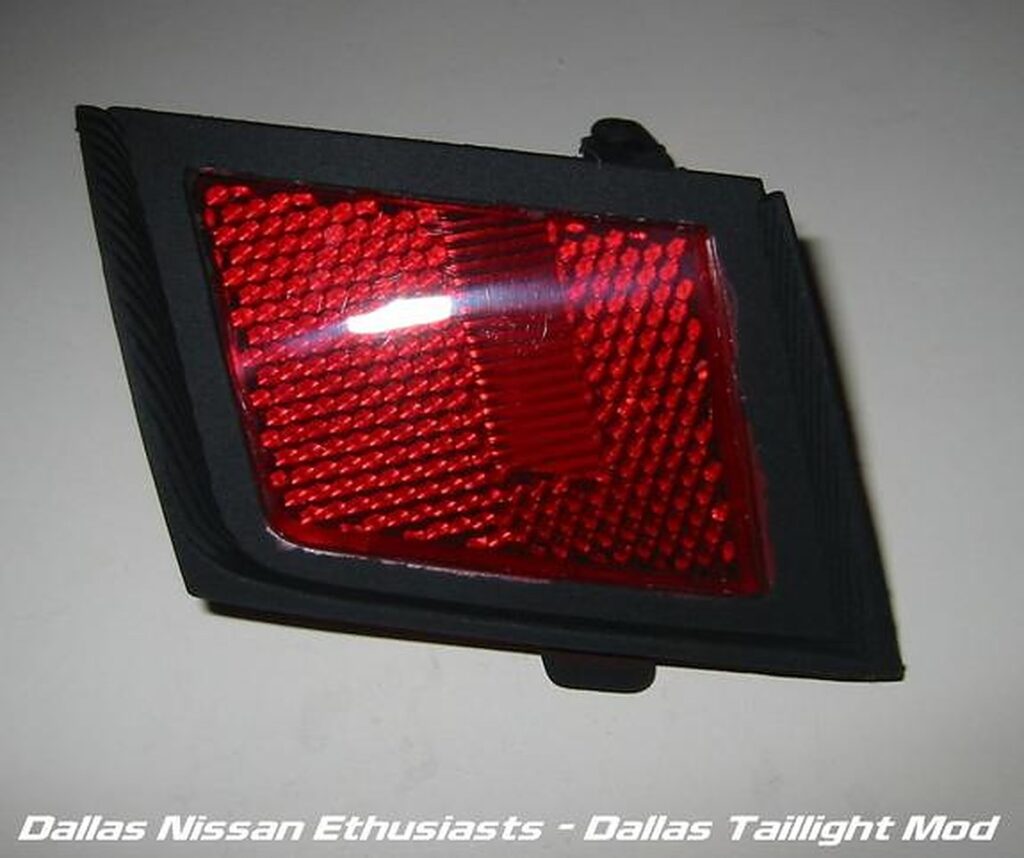
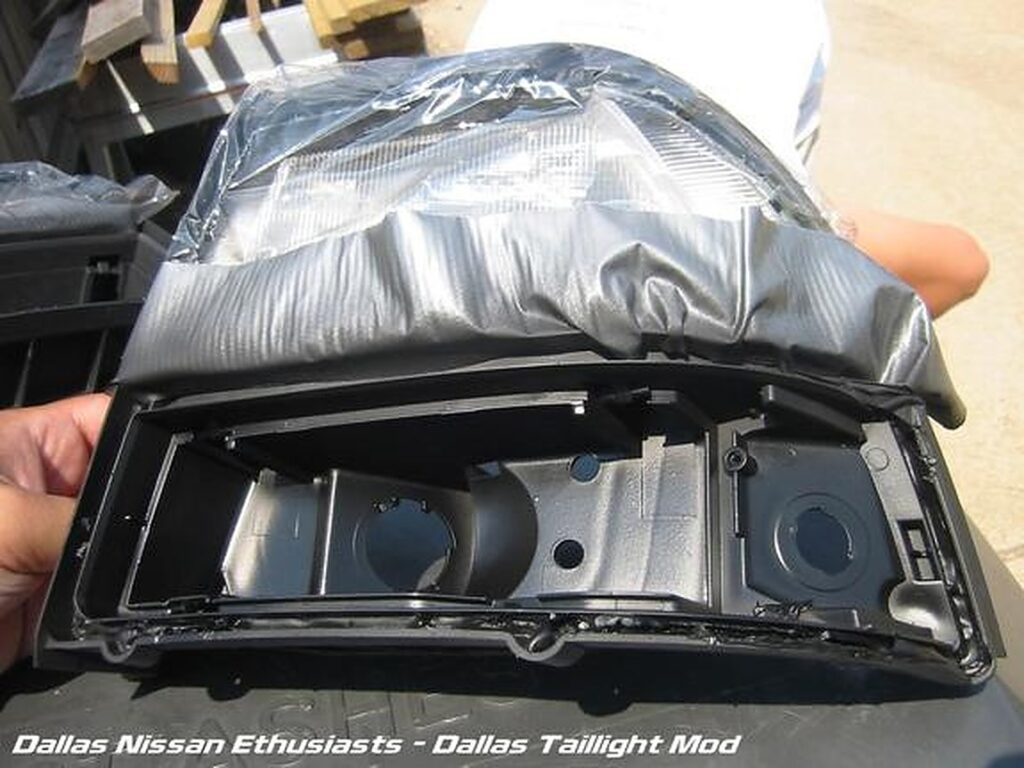
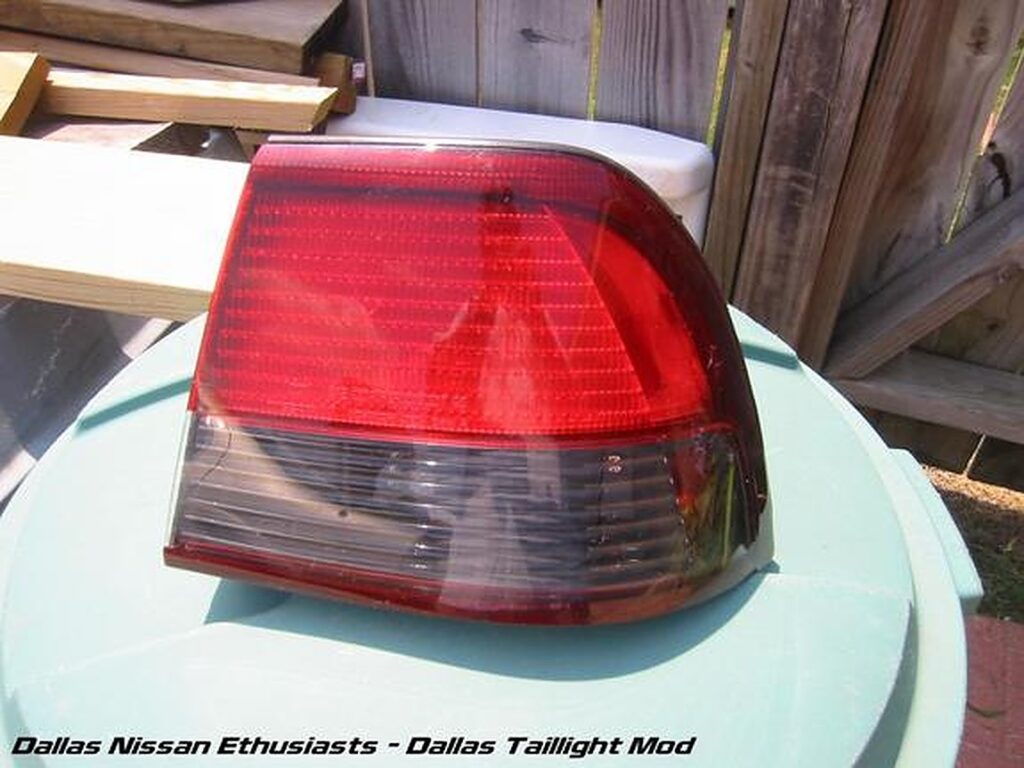
Once the paint has dried, you can put the lenses back on the housings. Use the heat gun to heat up the glue a bit first. Once they are back together, put them in the oven for about 5 mins at 200 degrees. After 5 mins pull them out. The glue has been reheated so that you can push the lenses onto the housing more for a better seal. Once all together, your tails should look like this.
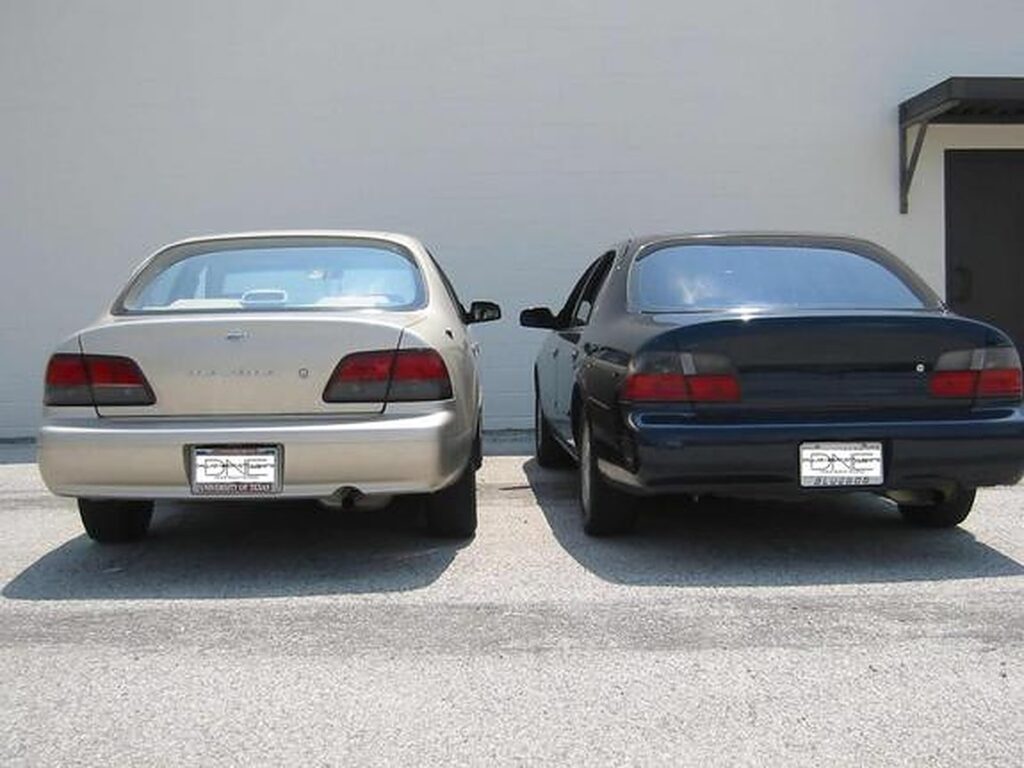
Now all you have to do is put the tails back in and you’re done! What a nice a$$ you have. 🙂
![]()
Comments are closed.