

Member Credit: wariow3
Difficulty:
Easy to moderate.
Knowledge of LED’s + Resistors
Experience with soldering recommended
Items needed:
- Small flat head screw driver
- small phillips screwdriver
- 5mm leds ,I used white LED’s( around 10, more just incase they blow or just dont’ work) I get mine off ebay from the user ctwick or something.
- He ships them from hong kong and it’s free shipping. I paid 9 dollars for 25 blue and 25 white leds. Nice and bright and they come with free resistors too!
- Soldering Iron (small tip preferred) 10-15 dollars from radio shack
- Dremel or a drillbit tool to drill holes
- Tweezers
- Scissors
- electrical tape
- thin probably 20-22 gauge speaker wire ( split in half)
- krazy glue
Dome Light

Start by removing the plastic cover off the dome light itself by prying off from the slit near the switch
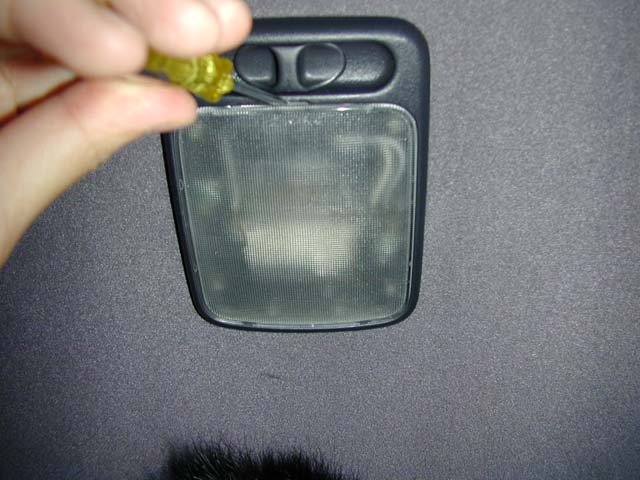
Upon opening you’ll reveal two philips screws, simply remove those with your philips screwdriver.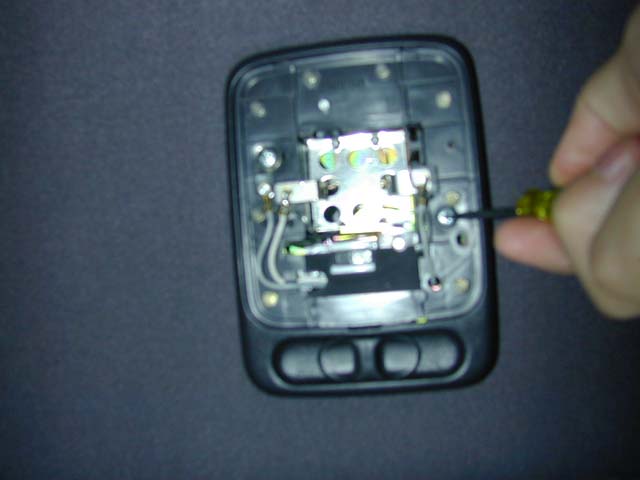
After removing the screws, pull it out from the roof a lil and remove the connections and bring it inside so we can start cooking.
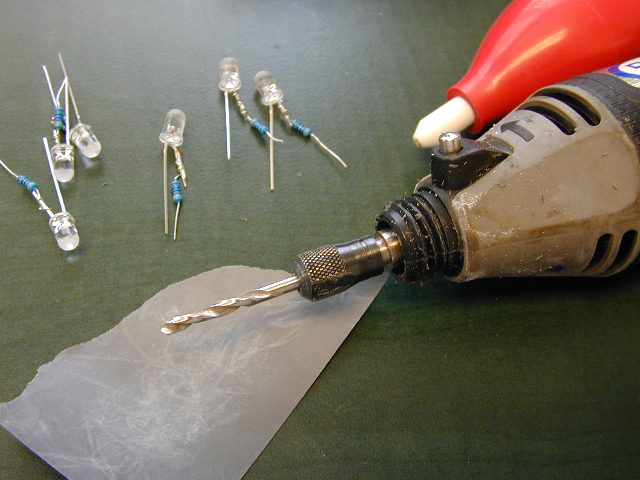
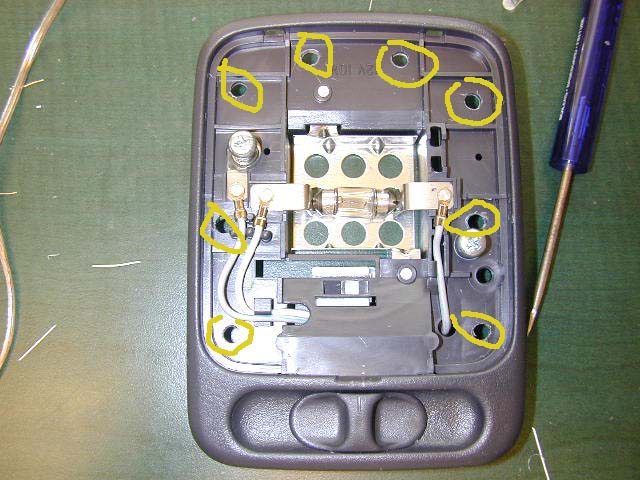
Here we have the dome light opened up. As you can see, I used my dremel and a drill bit and just drilled out an array of holes on the border of the plastic.
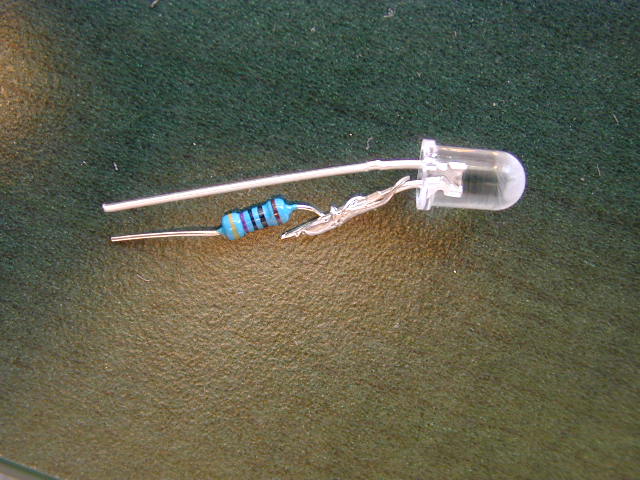
Start making your resisted LED’s by soldering the resistors and LEDs together.
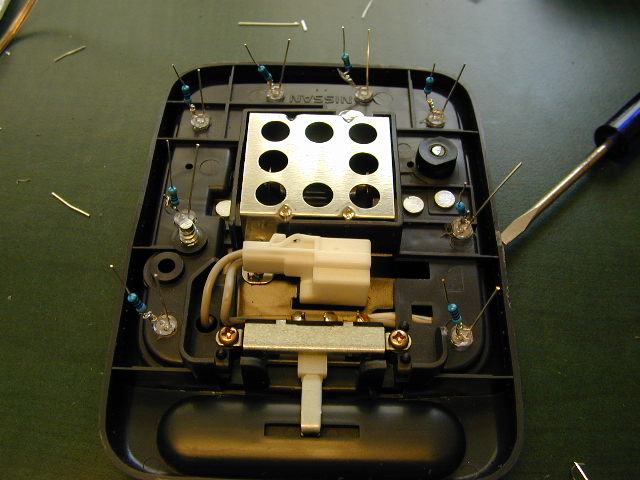
Stick them in from the BACK side of the dome light so that the + and the – of the LED sides are facing a similar way
Use krazy glue on the edges of the LED to secure them in the holes.
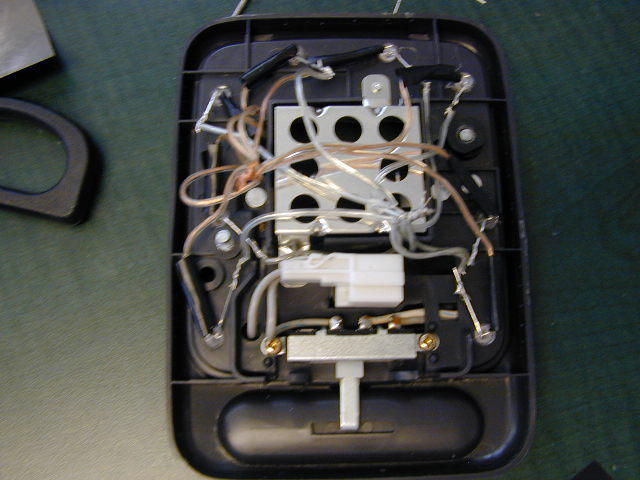
Here’s the tricky and annoying part, using the split speaker wires, Measure the distance of the speaker wire from the led to the center and give it about an inch of clearance.
Connect all the Positive(+) sides of the leds to all one color and solder onto the LED leads.
Connect all the Negative(-) leads to the other color and solder on the leds.
After connecting each color on the LEDs, attach the ends of all the wires into a bunch. Attach another wire on the bunched ends of one color and drag it through a hole to the other side for power.
Use electrical tape to wrap one side of the LED leads so that they won’t make contact with each other.
MAKE SURE NONE OF THE OPPOSITE COLORS TOUCH wether it be the leads or the speaker wires or it will probably blow an led.
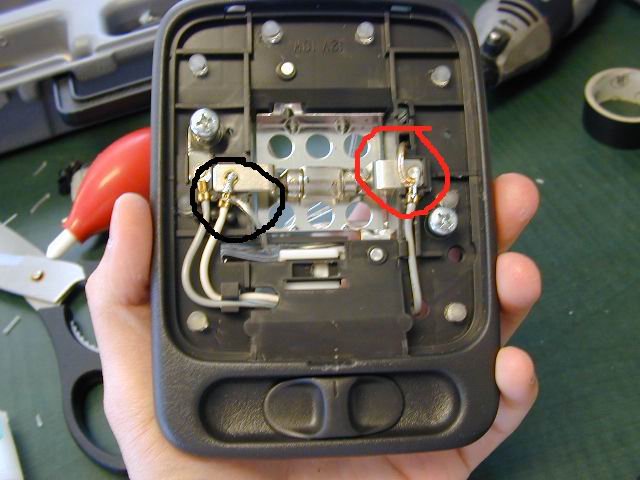
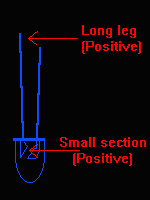
The red circled wire is positive and the black is negative. I connect all my Positives to the red speaker wire and all my negatives to a silver speaker wire.
Connect these with solder onto the existing connection.
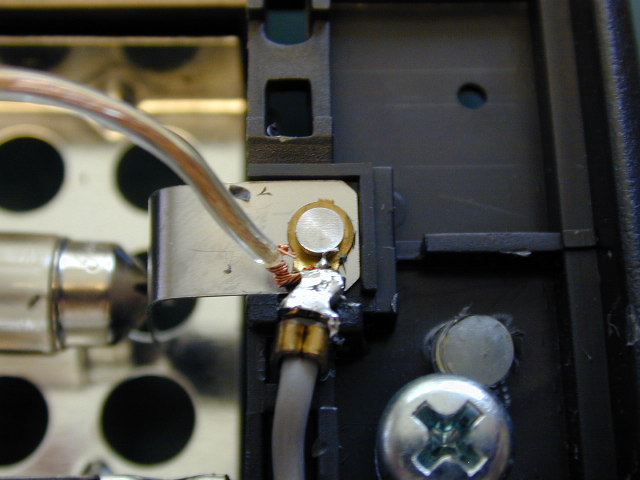
Here’s a closeup of the connection soldered.
Now remove the existing bulb and bring out for testing.
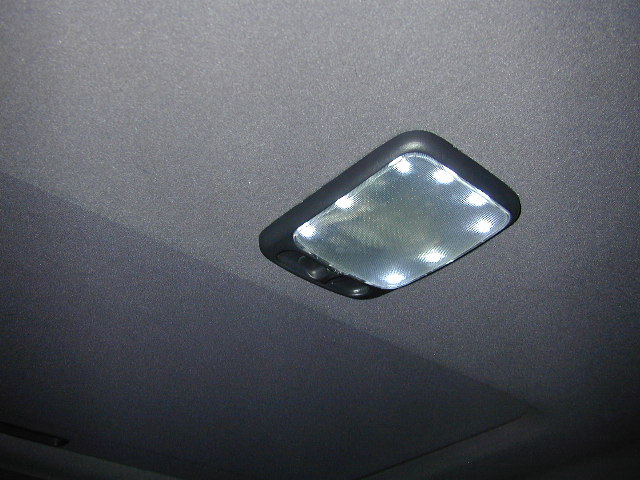
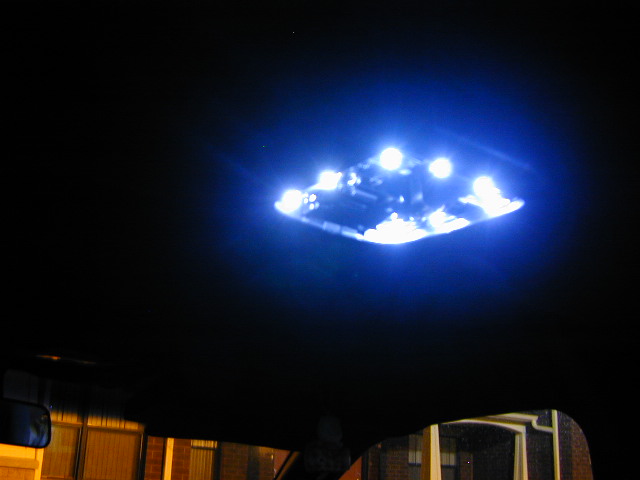
Here’s the finished result. BLING BLING eh? if some don’t light up or none light up at all, check your existing connections and look at your LED’s to see if any have blown. and check the polarity of the LEDs or your wires.
![]()


Comments are closed.