Community Member Credit: BlackCrimsonChin
A little backstory: So I bought my 2012 SV used back in February. The car was sitting there for months waiting to be registered (thank you pandemic). During the height of summer, I was doing my routine engine start and realized the dashboard was blindingly shiny. As I do with anything I want to know more about, I poked it, and alas, the dashboard was sticky and deteriorating.
I asked around the forums, on Facebook, and my sister (who happens to have a 2014 max) if they’d experienced it, and several have but left it/didn’t know what to do. All were 2009-2012 maxes (my sister’s was fine). I did some research, and apparently this was a common issue in the 2005-2014 era for a lot of cars in hot climates. Nissan actually had a recall in Florida for Altimas with this issue, but only for those cars in that state. I called Nissan hoping they’d stand by their product, but they politely gave me the finger over the phone and said, “hopefully the glare doesn’t get you killed on the freeway.” Paraphrasing here


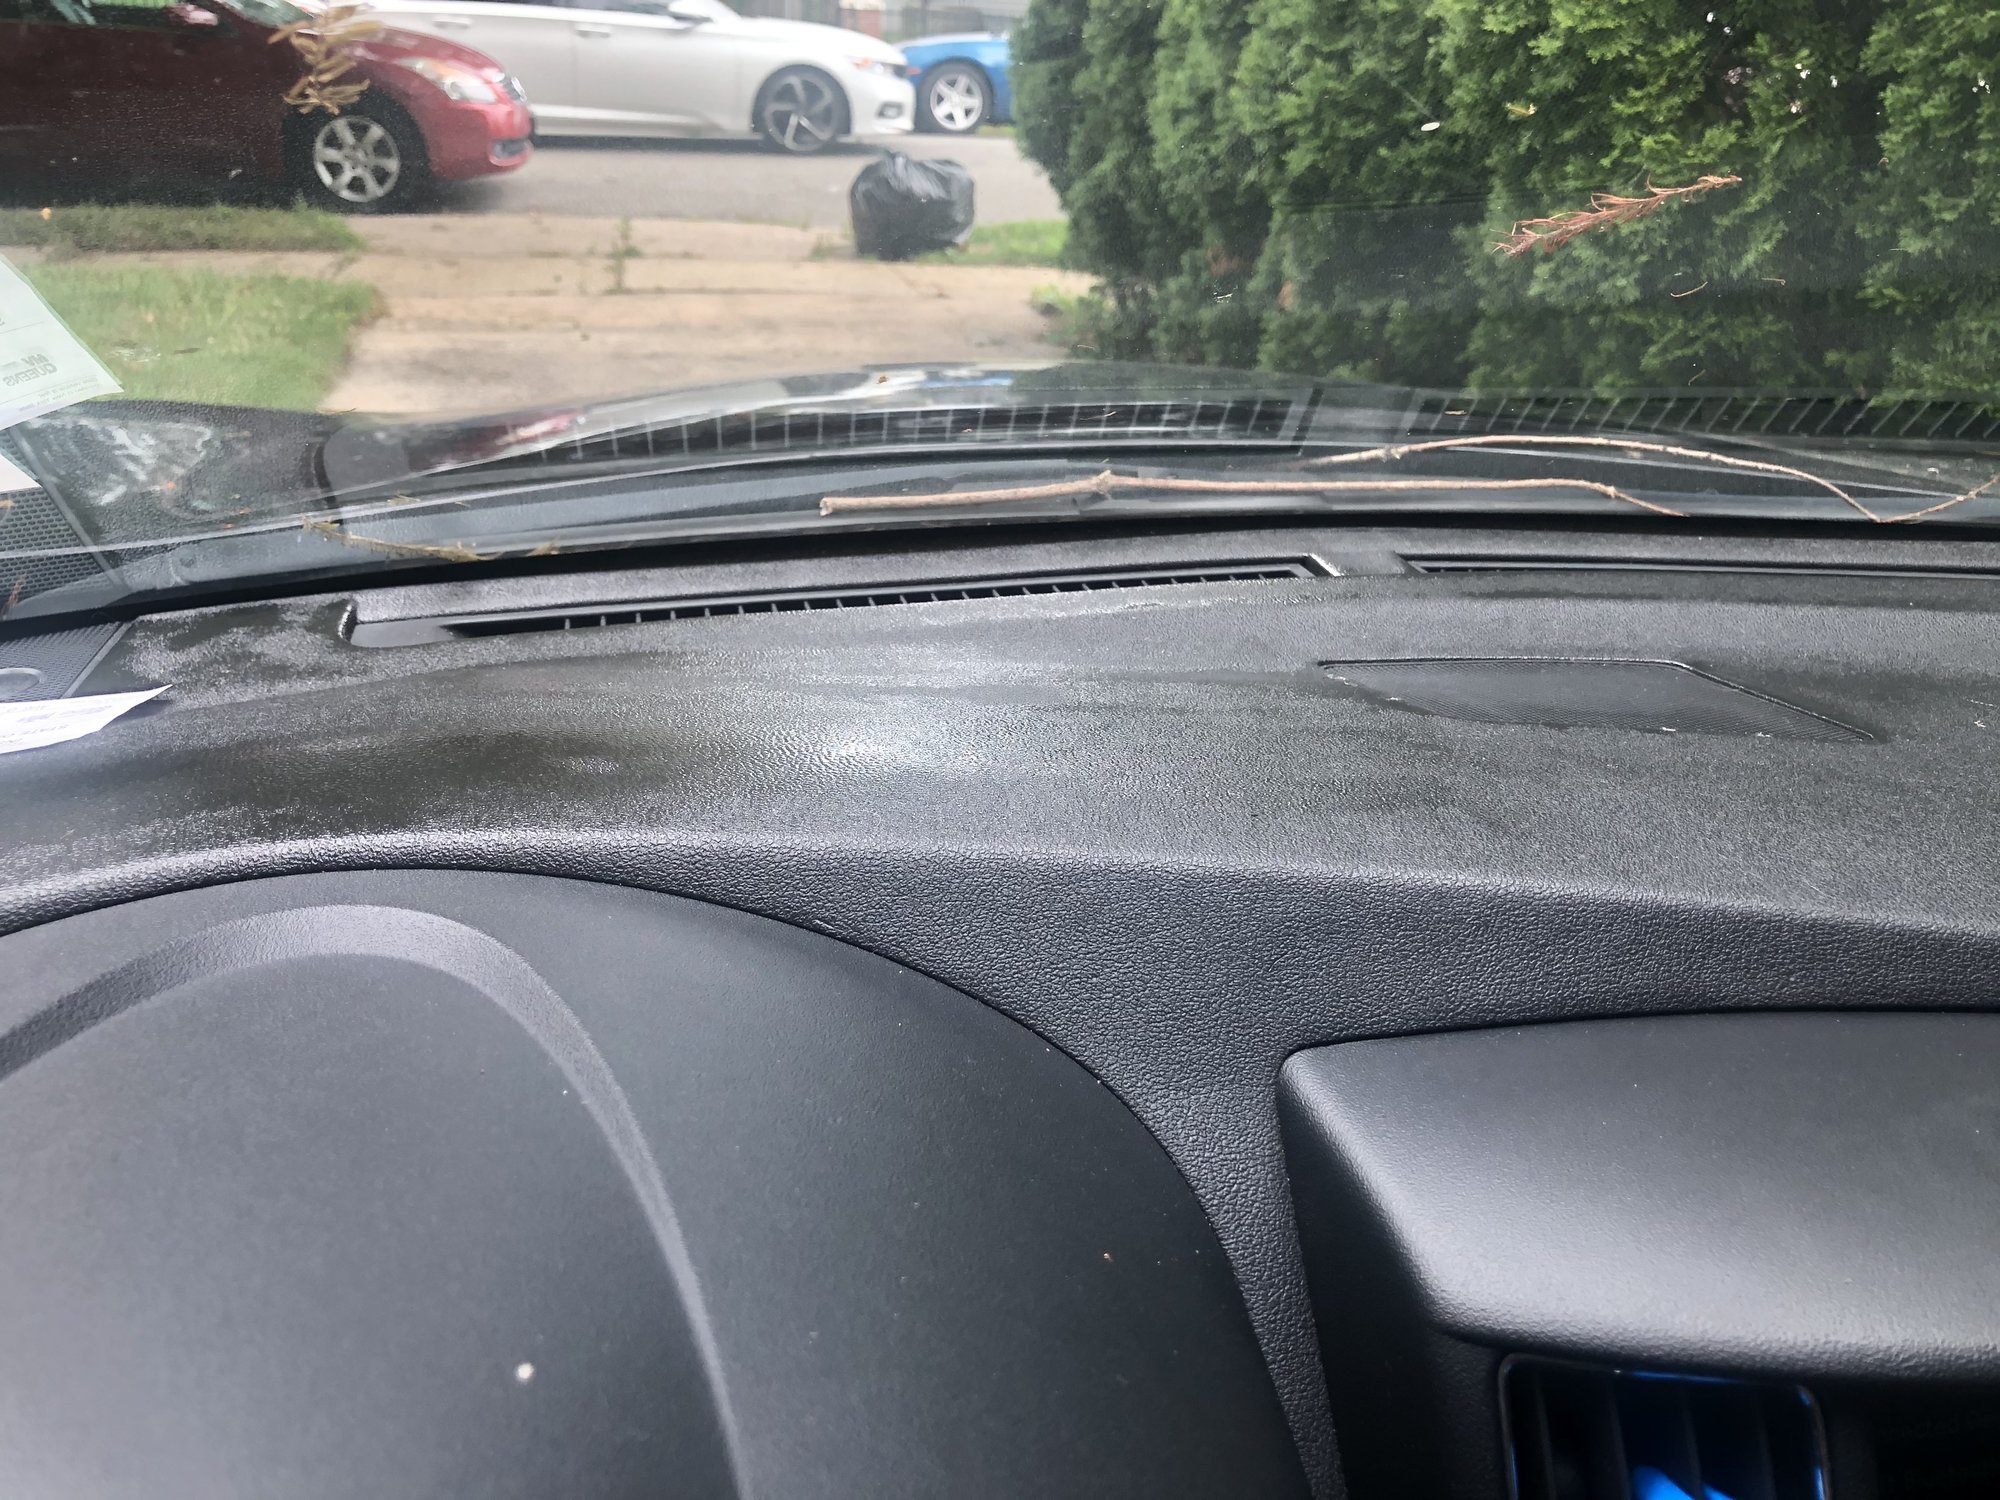
I took to Youtube, and after hours of videos of people scrubbing away their dashboards and gluing sheets of leather & vinyl to it, I found the solution I was looking for: StickyDashFix.com. According to them, the dashboard isn’t literally melting as I originally thought. Apparently there’s a chemical inside the dashboard that oozes up to the top in high heat/humidity, giving it a sticky surface. Their approach is basically to clean the surface of lint, debris, bugs, etc and coat it with a color-matched (their kits are make-specific, Nissan included) matte finish that seals up the pores the chemical surfaces through, and dull the shiny surface. Think Plasti-dip, but more care to retain the texture, color, and feel of the dash. The price seemed a little steep at first for what I was getting (the $40 product not so much, mainly the $20 shipping from Australia), but it beat my other options by far, which were put an ugly carpet on my dashboard for the same price, or replace the dash for over $1K, so I gave them a shot. A 5-week trip around the world later, I got my kit and here I am.
Anyway, enough history. Here’s how their product worked (spoiler, it worked great.):
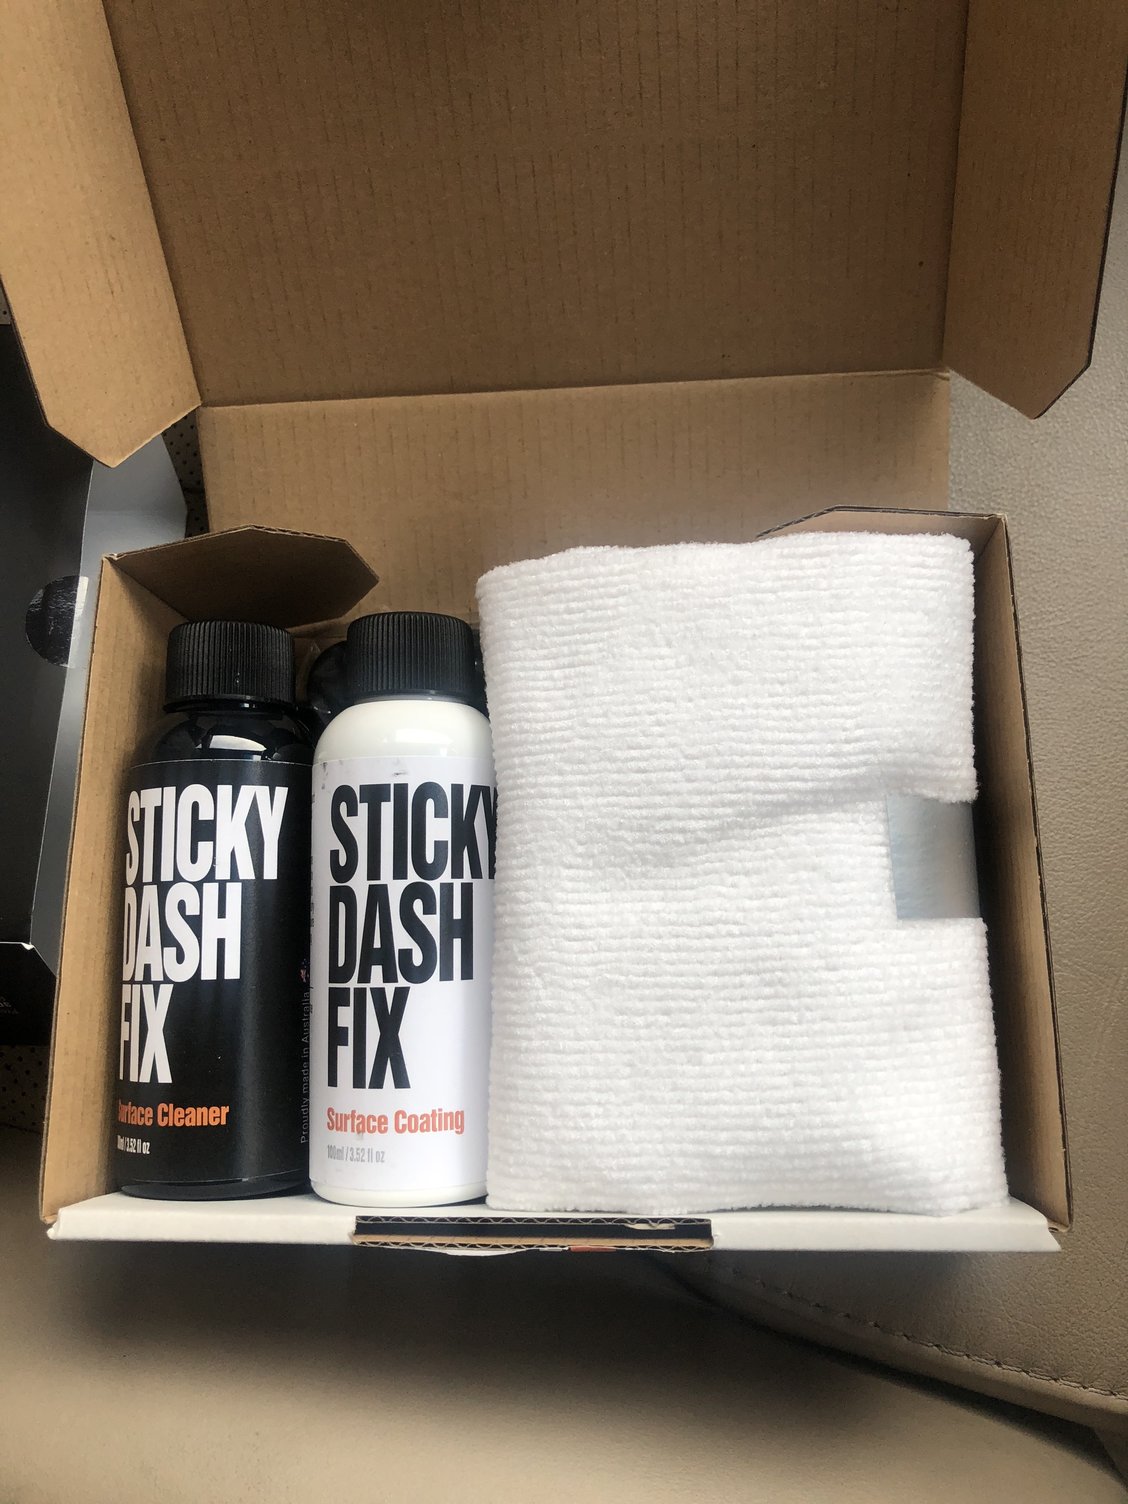
The package comes with a bottle of surface cleaner, the matte surface coating, 2 foam applicator brushes, black nitrile gloves, and a microfiber towel. They threw in an extra bottle of surface coating which was nice, but hopefully I won’t ever need it.
Some other tools I had that were helpful: A razor/cutting knife, tweezers (to remove any stubborn debris), low lint shop towels, a plastic plate to hold the coating liquid, and a flashlight. Doing it in the shade on an overcast day (or even better, indoors) is best.
Step 1, mask off any areas you don’t want charcoal-colored film on. I have the Cafe Latte interior, which was an added challenge for this klutz. I masked off my beige side pillars for obvious reasons. You could also just pop them out, but I have my dash cam wired through the passenger one and I didn’t want to have to go through that again. They say to mask off all the vents, sensors, etc, but the coating won’t adhere to those surfaces anyway, so save yourself the trouble of trying to get tape in that awkward space where the windshield meets the dashboard and just be careful. Only apply to the rubbery dashboard surfaces. If you’re worried about getting coating on the sensors (A/C & Heat sensor on the driver side, headlight sensor on the passenger side if you’re curious), it’s that circle thing on the speakers(?) on either side, so you’ll really have to try to mess that up.

Step 2, clean the surface. Luckily my dash wasn’t too dirty, save some dust here and there, so I probably could’ve even skipped this step. Their cleaner is made to lubricate the surface so it’s less sticky and you can (lightly) brush off the now wet debris. They recommend spraying the cleaner on the microfiber they provide, but be careful: don’t let the edge of the towel touch the sticky surface. The hem of the towel will give off lint. I did this in a few places and had to go in with the tweezers to remove the added lint. Fold the towel and wipe with a section of it without an edge to avoid being worse off than you started. I contacted them about providing or suggesting edgeless or nylon-edged towels, but obviously if you already have one, use it. For the really dirty spots, spray directly on the dash and let it sit for a minute. It’ll slightly discolor the dash, but you’re essentially painting it over in the next step so don’t worry about it.
Step 3, apply the coating. Pour some of the liquid coating on a plastic plate (or a fancy painters tray if you have one). This is common sense, but put the plate somewhere it won’t get knocked over/you won’t drop anything on it. The seat next to you is a good place, just don’t forget it’s there when you switch sides. Also crack a window; the scent can get kinda strong. I used the provided foam applicator pads, but the instructions suggested using a small paint roller (not provided) which I think would’ve given even better results (this was a suggestion from one of their customers, which I thought was pretty cool). Only coat one side of the brush so you don’t get coating on the windshield in that vent corner. I got better coverage doing more pushing strokes than pulling, but remember the brush is a sponge; applying pressure will squeeze out more coating. You want to go light on the first coat and heavier as needed. I got pretty good results after my first, light coat. I left it over night after this coat, but they suggest just 30 minutes in between layers.

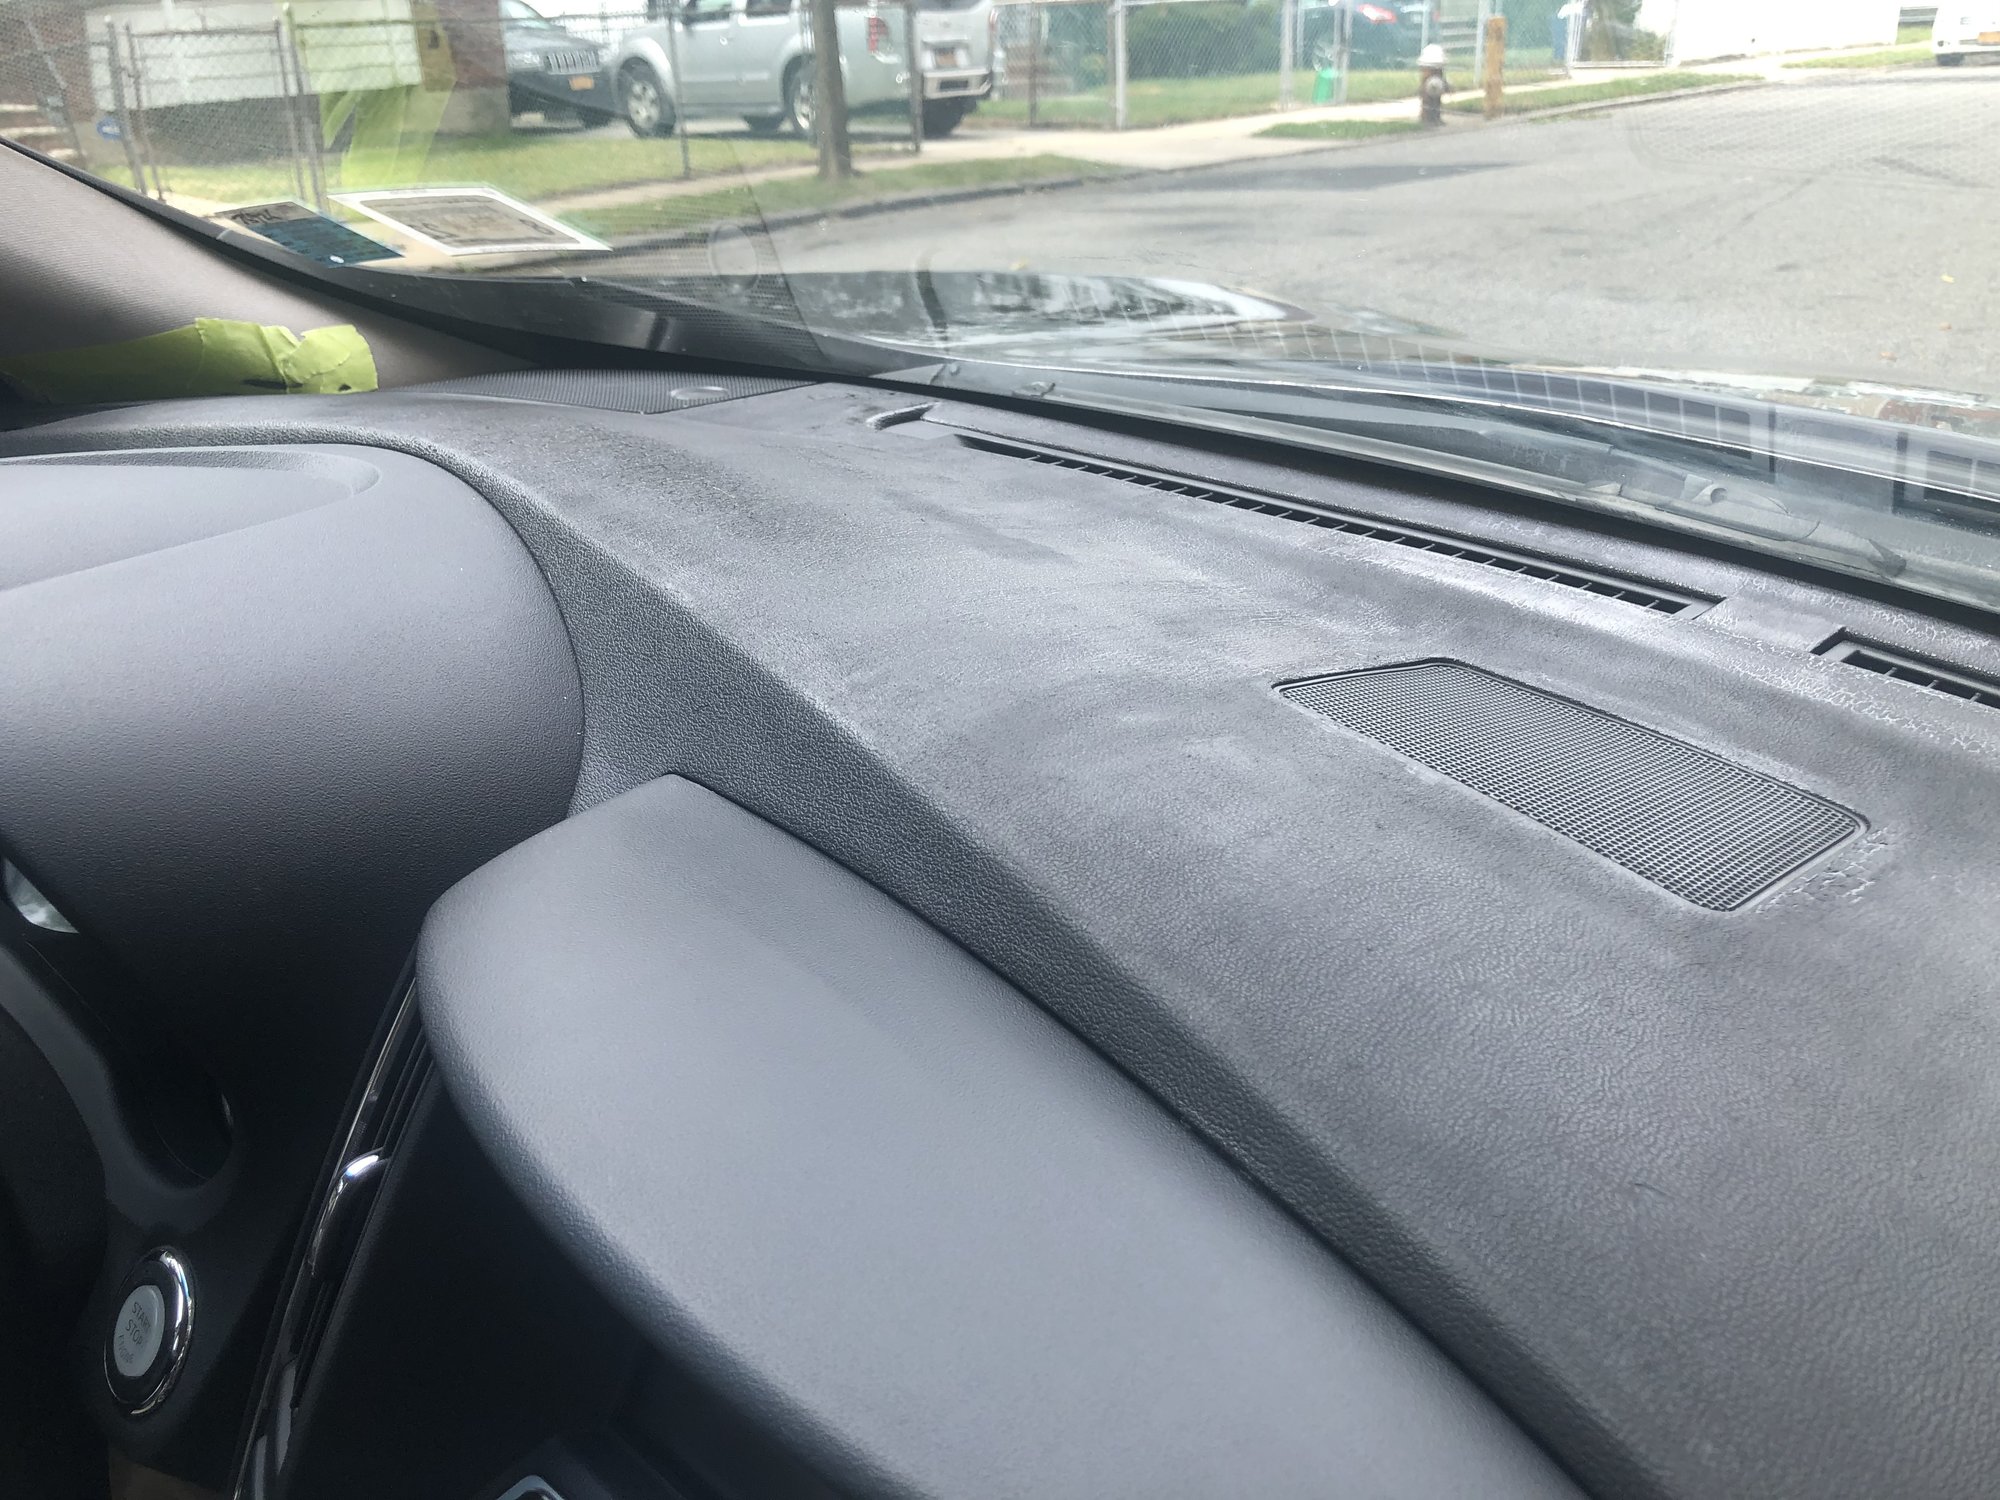


That crocodile skin texture occurred on the stickiest/most deteriorated parts. They suggested getting some rubbing alcohol and trying to smooth it out with a finger, but I just put on more coats in those areas. I was left with some rough texture in the end so I might do the alcohol thing later on if it bothers me. I ended with 2 coats on the whole dash, 3-4 on the crocodile parts. Still had more than half the bottle left. The only area I had trouble with was the side of the vent facing the windshield. I did what I could but some of it is still slightly sticky. If this is like rust and starts spreading, I’ll just go in again, but I’m not getting glare from that area so it wasn’t worth the hassle/risk of getting coating all over that hard-to-reach vent.
Step 4 is optional, but wipe the dash one more time with the surface cleaner. I think it helped a little bit to blend in the streaks and uneven spots. Final results:

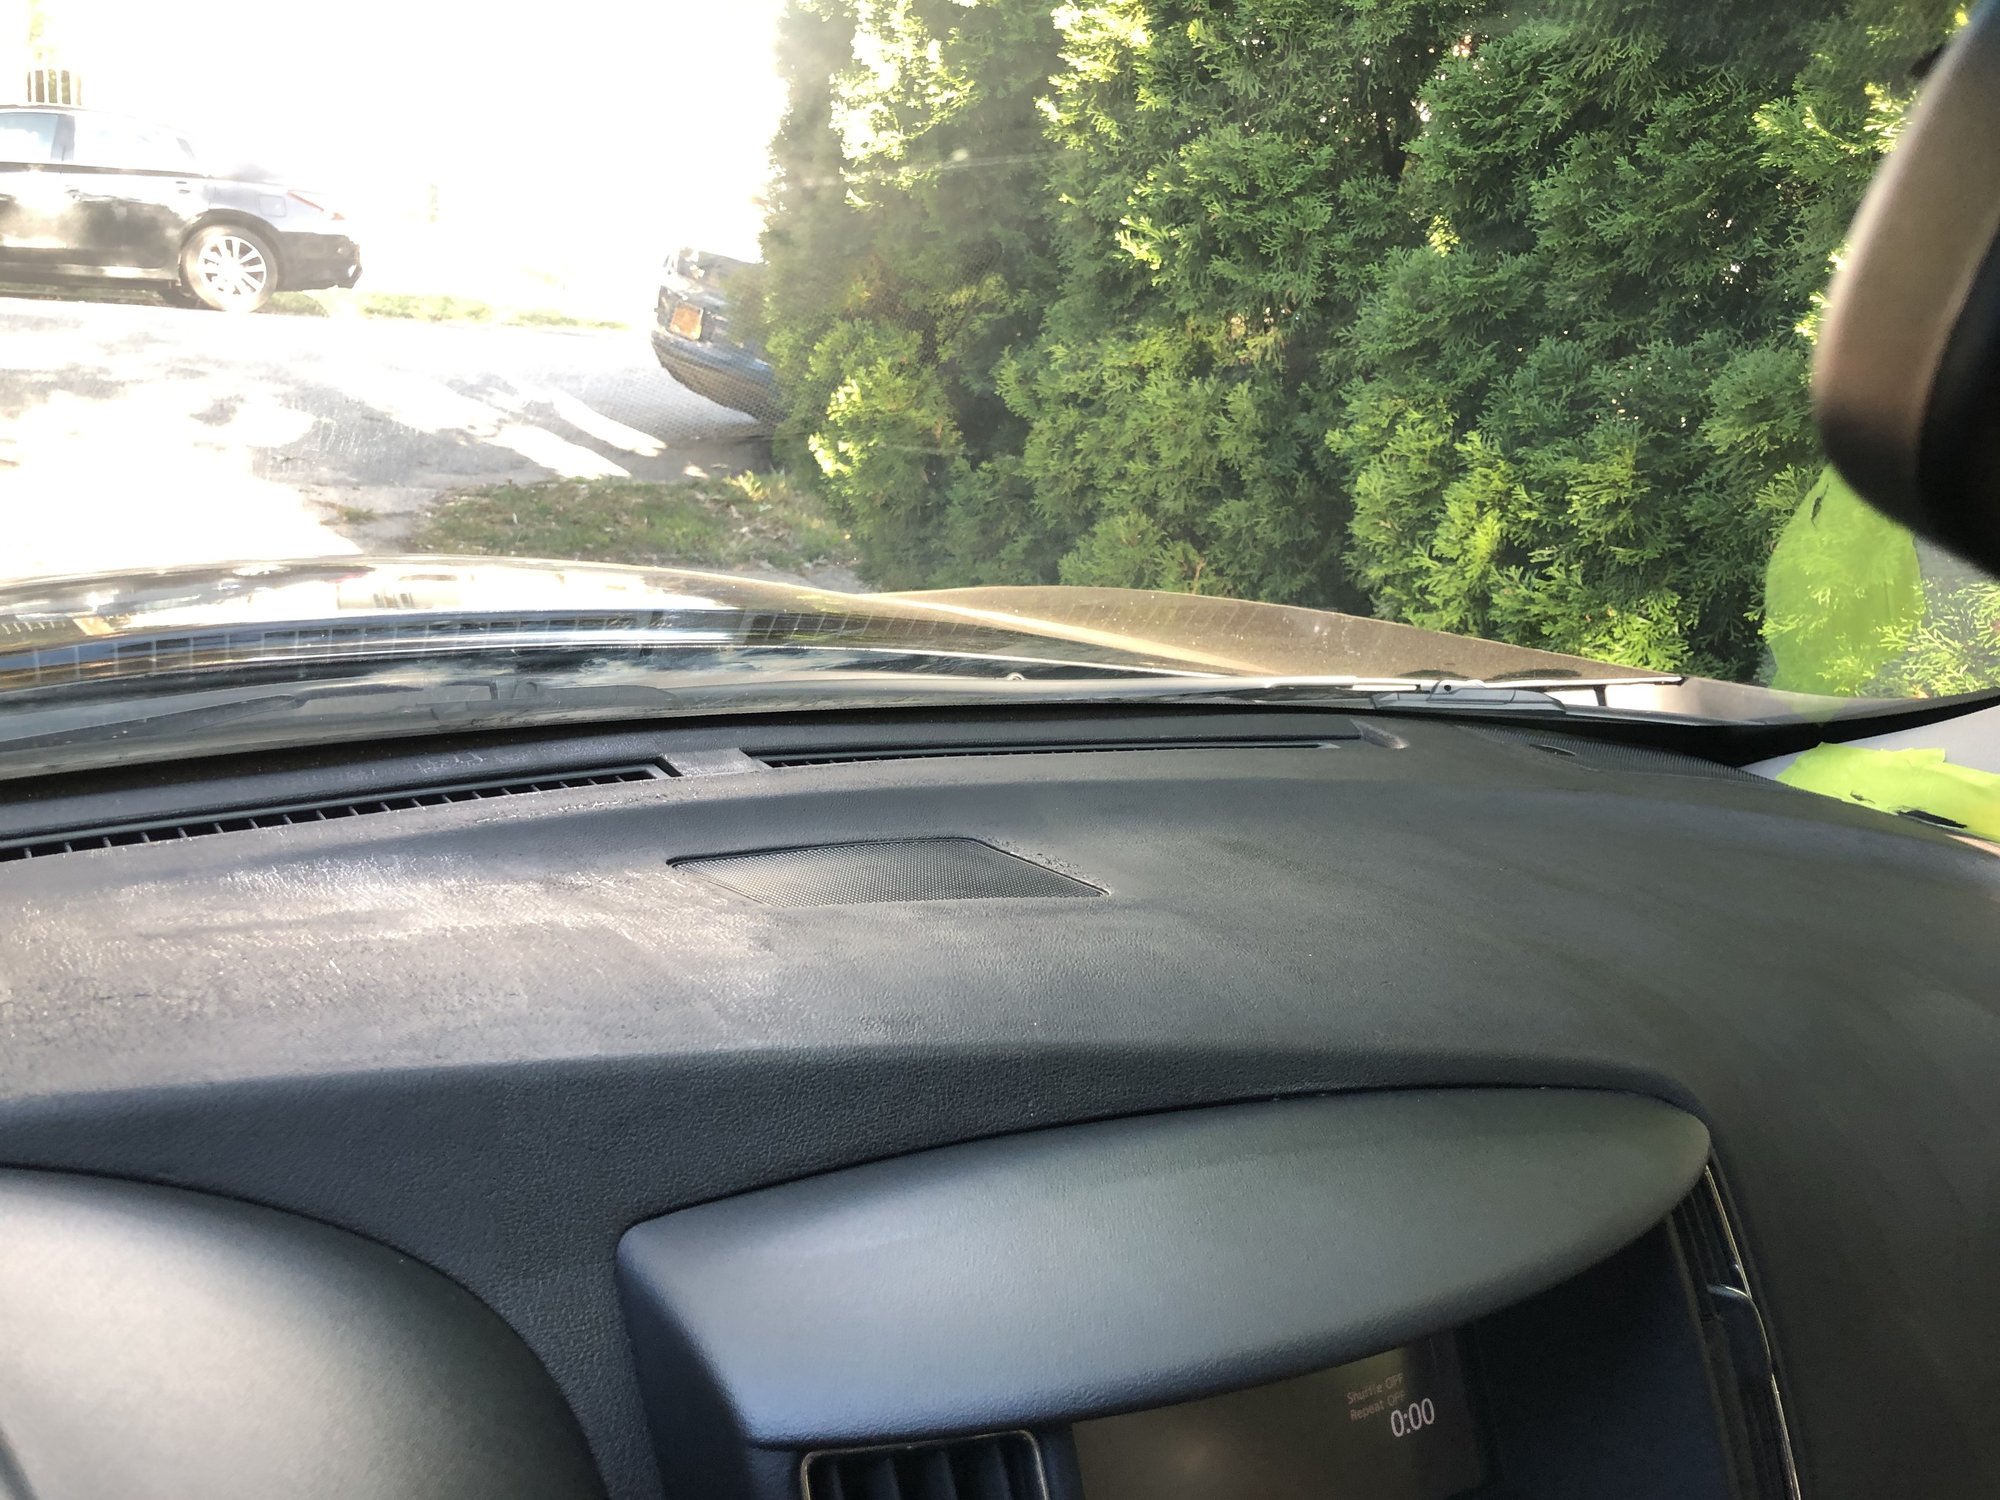
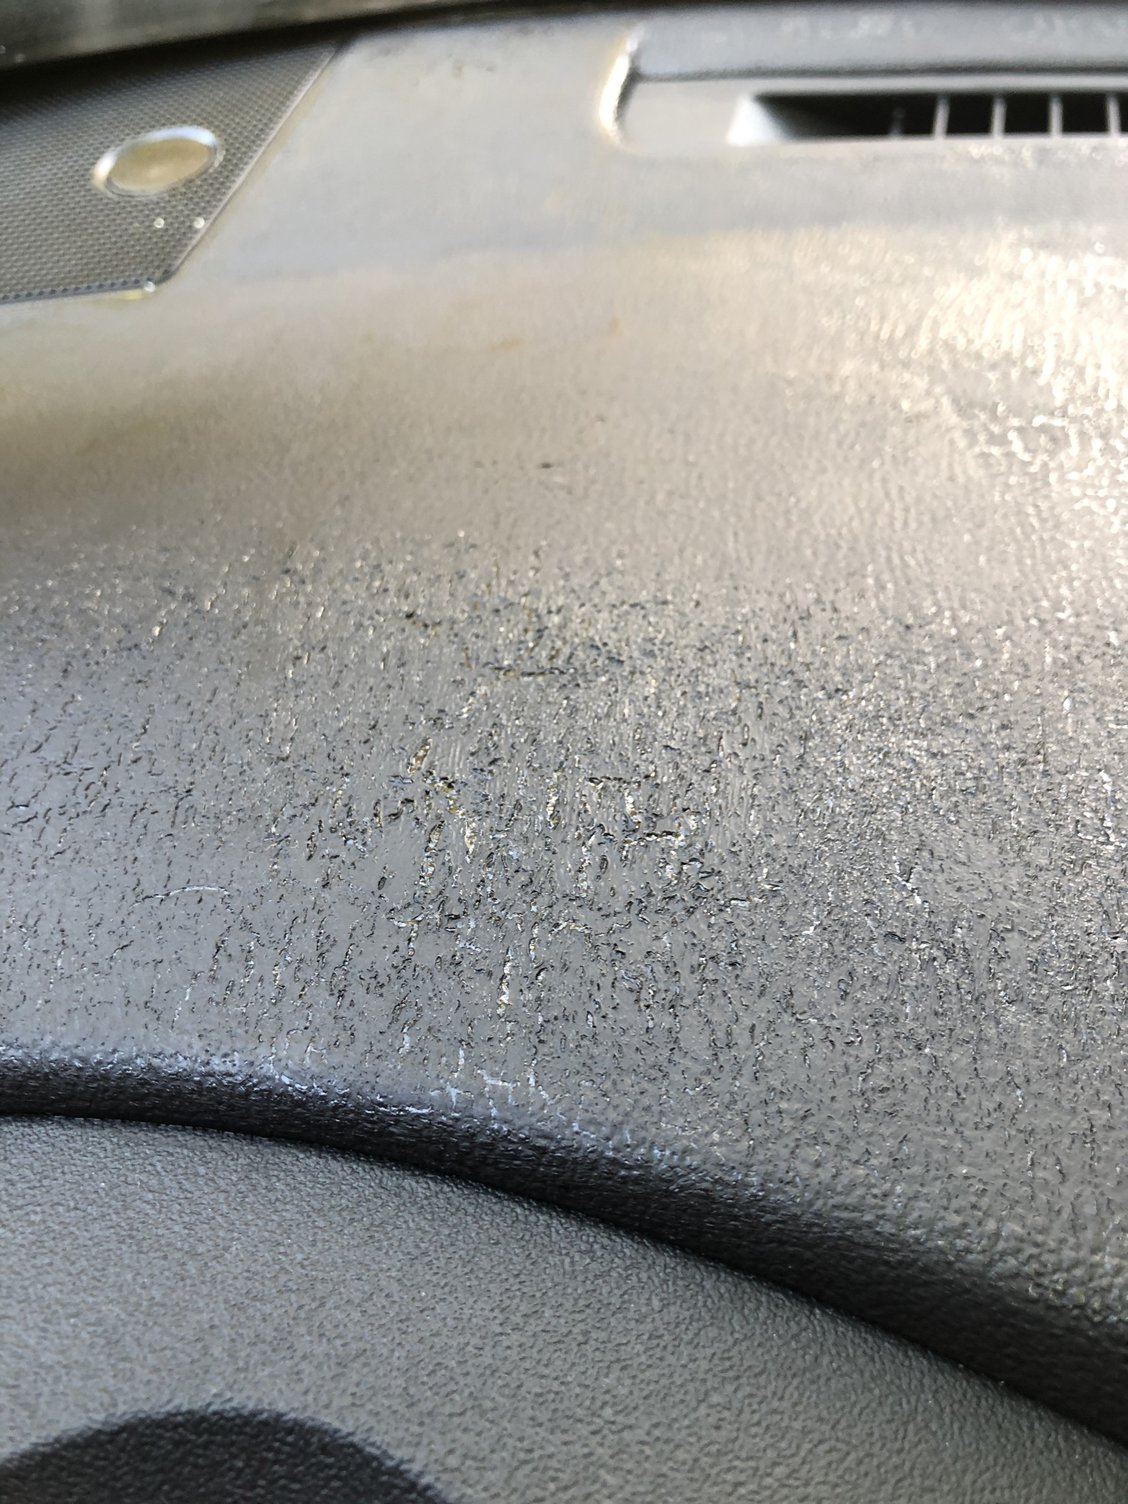
(this was the previously crocodiled section)


Overall, the results were better than I expected and well worth the price. The dash looks pretty much like a lightly-used stock now. There’s some streaks, which I think the paint roller would’ve helped with, but only noticeable if pointed out. The crocodile spots were on the driver side, so a passenger would never know there was ever anything wrong. No residue to the touch. No more glare and no more stickiness, which was ultimately the goal. Like I said, I did this across two days, but including prep & wait time between coats, I’d say it’s a 3-4 hour job.
The manual they provide is very clear and thorough, but just wanted to share my experience. If you have any questions, their R&D rep Derek (derek@3dformulations.com.au) was super helpful before and after I ordered and cared more about my dashboard than Nissan did.
Hopefully someone like me searches and finds this thread helpful.
![]()


Comments are closed.