

Last Updated: 01/31/2018 @ 10:06 pm
Member Credit: lanzer
The power door lock on the front passenger side had been having trouble unlocking for months and it seemed to finally stopped working. The degrading performance is a good sign, meaning that it should to be the motor dying and not something like a gear mechanism problem, which would have been much harder to fix.
I’m a bit surprised that there isn’t already a lot of guides or threads talking about fixing power door lock, so I hope that whatever info I share is in fact useful and not just repeats of what’s been posted years ago. If so, please ignore my post.
If your power door lock is having issues, it only takes $5 to replace the door lock’s actuator motor. Don’t spend that $95 bucks on a new one. If you DIY you also save another hundred on labor.
Tools Needed
- Medium sized flat screwdriver
- 10mm socket wrench with extension
- T-28 screw bit on a wrench or electric screwdriver
- Wire cutter with a flushed side
- Needle nose pliers
- Brake cleaner or alcohol
Parts needed – Actuator motor with a dimension of 30mm x 24mm with 18mm flatsides, and a 2mm diameter shaft. Search for “actuator motor” on eBay.
Step 1 – Follow the video on how to access the power window assembly
But keep your window rolled up and taped in place when doing this, since you don’t need to take the power window assembly apart.
TIP – remove the wire clips/retainers after the inside panel had been removed. You can then access the back and remove them properly by pinching the retainers. Video shows the guy spending minutes trying to remove them with a screw driver, which risk breaking them and damaging the foam padding.
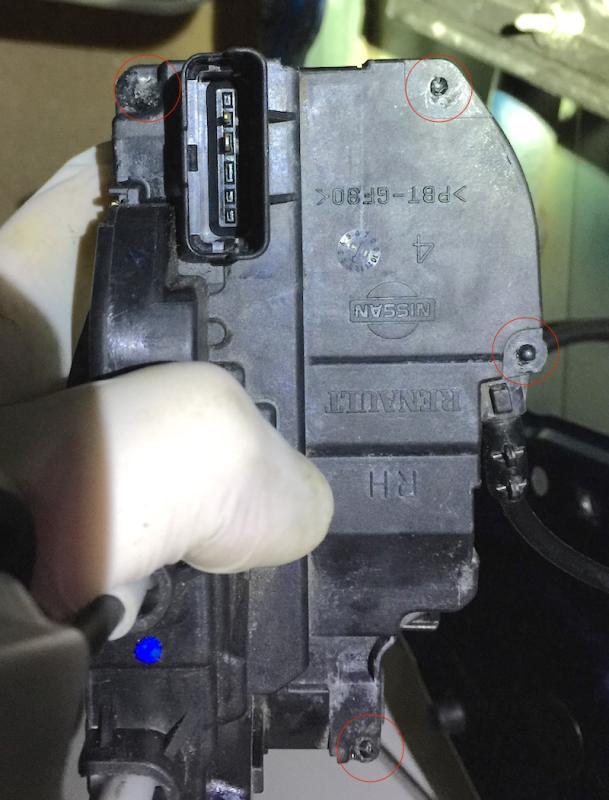
Step 2 – Once you have removed the inside panel, you should have access to the door lock actuators. Unscrew the three screws that told it in place:

Step 3 – There is a wire connector on the actuator, remove it by pulling, NOT PUSHING the connector tab


Step 4 – You can immediately take the actuator apart even though there’s still a cable connected to the door handle. Start by removing the heat sealed pins with a wire cutter but DO NOT cut the whole pin off. Just squeeze lightly at the plastic around the pin then pry upwards, and the melted plastic should pop off as a ring.
Now use a screw driver and carefully pry open the retainers on the sides of the actuator. Takes a bit of elbow grease to pull the cap apart, but there’s no trick to it. Even if a tab or two breaks, you can still glue things back in.
Step 5 – Once the cover is off, confirm that the door lock in in fact working by pulling and pushing the cable that connects to the door lock. The end of that cable has an L shaped pin, not the ball shaped joint.

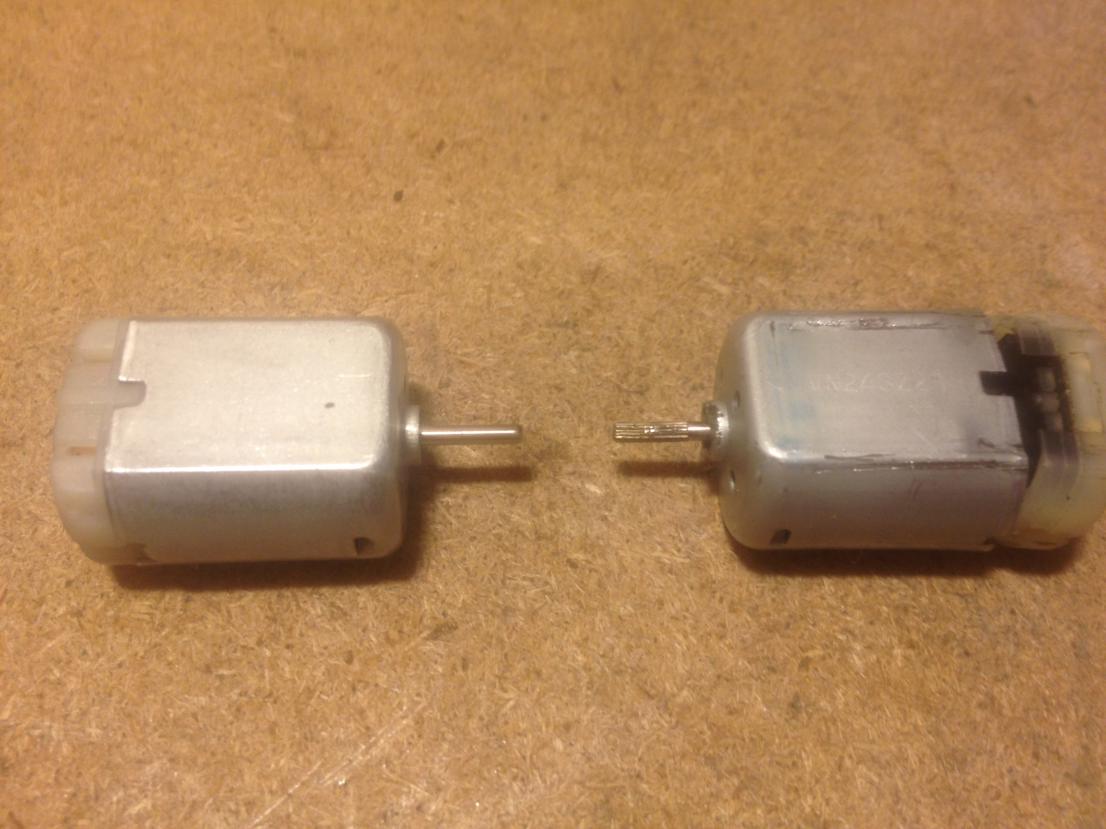
Then it’s time to replace the motor. You’ll see the motor that’s attached to the actuator’s cover. It comes off easily by prying with a screw driver. The trick now is to pry off the worm gear from the motor and attach it to the new one. You might need to cut the shaft off the new motor to make things work. Sorry I did not perform this step as I ended up fixing the motor itself.
Step 6 – (optional) Fix the motor if you’re a cheap bastard and don’t want to spend the $5.  With your pliers, pry open the side tabs that are holding the end cap. It helps to mount the motor on a vise.
Once the end cap is off, clean the brushes with brake cleaner or alcohol, then remove and wrap the thermo protection plate with aluminum foil. This will make the motor work again, but now the motor can potentially burn up if the lock is stuck. I didn’t know the motor’s size until I opened the actuator, and now I don’t want to wait for one to ship, so I went with this cheap route. For the rest of you, I highly suggest spending that $5 and have a new motor ready before you start.

If you have a 12v power supply, feed 12v directly to the motor on both polarities and make sure it’s working.
Step 7 – Time to put everything back together. I suggest using some glue on the pins of the actuator, or even on the sides of the casing. Try flexible glue like Goop or Gorilla glue.
Step 8 – Test for functionality. Connect the wire harness to the actuator and try locking/unlocking with the remote. The wire that goes to the door lock should pop in and out. If it’s not happening, chances are the white plastic tab inside the actuator is out of place and it’s a simple fix.
Step 9 – Install the door lock actuator back. REMEMBER TO CONNECT THE WIRE HARNESS!
Step 10 – Install door panels. In the door panel removal video, the tech installed the power window unit before installing the inside door panel, but you can save time by just putting the inside door panel in place and then screwing the power window unit back on. Start with the power window motor. Put one hand behind the panel to guide the motor so the holes align. After you screw the bolts in by hand, guide the power window rails in a similar fashion. Might take a bit of pushing but it’s very straight forward. As soon as the inside panel is installed, test your window and make sure it’s working.
FINISH
Hope this help whoever’s having problems with their locks. Compared to fixing that damn transmission issue with the valve body, this is a cake walk. Big thanks to all the people who committed to those threads by helping me fix my transmission without having to spend thousands!
Cheers,
-Derek
Additional Specs & Photos of Actuator Motor by EddyMaxx
Specification:
-MPN: FC-280PC-22125
-Model: FC-280
-Dimensions (not including shaft): 30.5mm x 24.2mm x 18.3mm
-Round shaft dimensions: 9mm long
-Operates on 12 VDC nominal
-No load speed: 13,100 RPM
-No load current: 110 mA
-Recommended operating voltage range 8-16V DC
-Quantity: 1 pc
Full load (maximum efficiency @ 12VDC) performance characteristics:
-Speed: 12,500 RPM
-Current: 780 mA
-Torque: 49 g-cm (4.76 mN-m)
-Power output: 5.71 Watts
-Stall torque: 393 g-cm (38.6 mN-m)
-Stall current: 5.56 Amperes


![]()


Comments are closed.