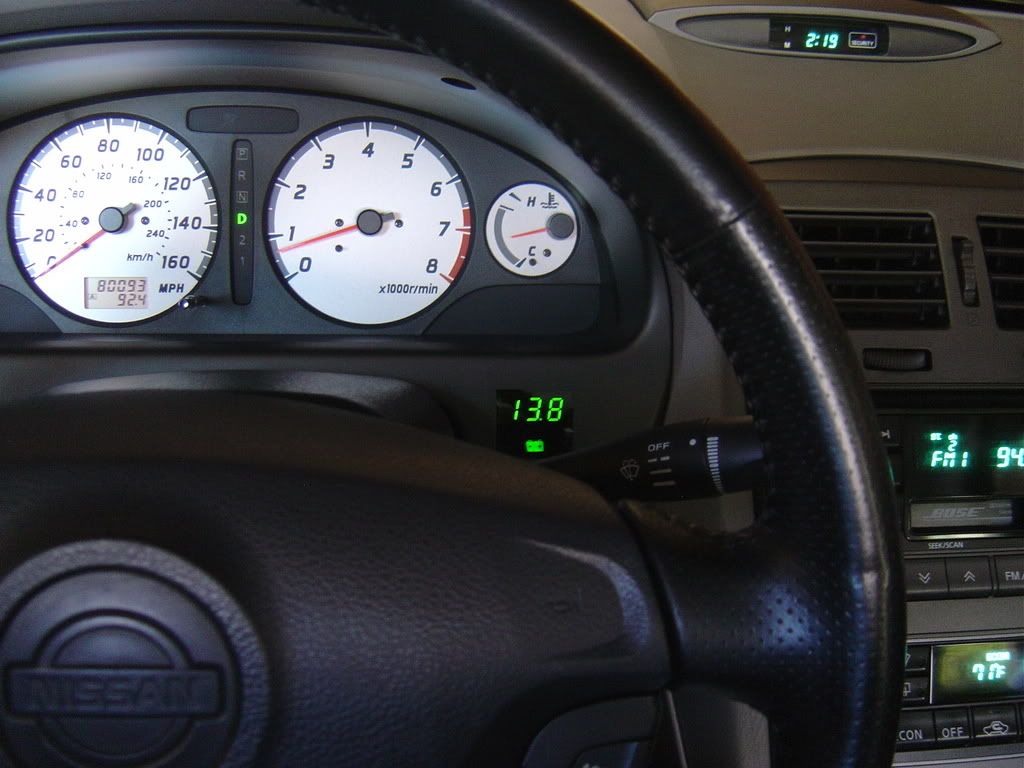
Community Member Credit: AJ~
I love voltmeters. They tell you if the alternator died and you are running on the battery. Or in our case, the voltage regulator died and the car’s electrical system was seeing 18.6VDC. Luckily, the ECU survived. All cars should have a voltmeter, and since El Maximo didn’t, DIY to the rescue.
Car is 2001 SE AE with AT. Gauge is Cyberdyne A000E160N green LED digital voltmeter with adjustable hi/ lo warning, about $40 online. I saw no need to adjust the hi/ lo flashing display set points. This particular gauge would dim when the running lights were turned on, but would not go back to the full bright display if the running lights were turned back off. So, I simply ran the gauge on full bright and used a small piece of window tint I picked up off the floor at the local window tint shop. Drove over there, saw a small piece on the ground, asked if I could have it, and it was mine.
It all starts here:

Back of the gauge. Black is ground, red is positive, purple is for dimming (didn’t use):

Cutting the gauge case open:

Pull:

Disassembled; only the circuit board and the green lens get used:

Thin!

Mask it:

Paint it:

Now the fun part. The green plastic lens was warmed on a teflon pan in the oven, then quickly removed and allowed to cool off on the instrument cluster cover to form to the cover’s shape. Mild pressure was used to keep the lens on the cover. A square hole was measured and transferred to the instrument cluster cover. Using a drill, exacto knives, files of various sizes and tooth shape, and sand paper, a perfectly square opening was made in the instrument cluster cover. Then the lens was cut to fit, taking a tiny bit off at a time to insure a perfect friction fit. Super glue was used to permanently attach the lens to the cover. Capillary action draws the glue into the tight joint. The water-thin super glue dries, shrinks, then more super glue is applied. Did this three times. Rock solid and it is perfectly flush, better than what is seen in this picture:

Hot glue gun is your friend:

Concluded: Finished!

If I did it again, I would use dark tinted 3/16″ thick acrylic plastic. Other than that, I am very happy with the results!
While I was in there, I removed the clear plastic cover from the instrument cluster and removed the dust that made it’s way inside through the hole that the trip meter reset button passes through. You know, this dust:

![]()


Comments are closed.