

Member Credit: Scrambler68
Note: Dealing with suspension components are very dangerous, please use cautious when handling a loaded spring as harm may occur.
1. Jack up the vehicle and support with jack stands.
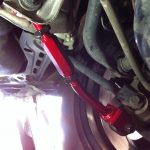
2. Remove the front wheels and you will see this:

3. Remove the sway bar end link from the strut (1)
4. Remove the brake line clip (2)
5. Remove the ABS line from the strut (3)
6. Remove the two bolts holding the strut to the knuckle (4)

7. Lift the hood and remove the trim above the top of the strut tower.
8. I had to remove the nut from the strut tower bar (1) to access the nut on the strut.
9. Remove the 3 nuts that hold the strut in place (2) and the strut will drop out of the vehicle.

10. Use a set of strut spring compressors to pull the spring down (1).
11. Remove the nut from the top of the strut and remove the top plate (2).

12. Remove the dust boot and cut off the stock bump stop.

13. Slide the new bump stop onto the strut shaft then slide the dust boot over that.
14. Put the Progress spring on the strut and reverse the removal process to install.
Difference between stock and Progress front springs:

For the rear springs:
1. Jack up the rear of the vehicle and support with jack stands.
2. Remove the rear wheels.
3. Remove the bolt that holds the lower control arm to the spindle.

4. Once the bolt is removed, lower the control arm with a jack. You will have to push it down by hand to remove the rear spring.

5. Install the Progress spring using the stock rubber isolator.
6. Jack the control arm up and replace the bolt.
7. Reinstall the rear wheels.
8. Go get an alignment
![]()

Comments are closed.