Last Updated: 12/29/2017 @ 12:27 pm
Member Credit: Greg
1.I bought the Hayden model 404 from Pep Boys for $49.99 plus tax. There were other smaller models, but I figured I would get the largest one practical. The 404 is considered “Heavy Duty” and is 7.5 inches tall by 15.5 inches wide, by 0.75 inches thick. It is supposed to lower your transmission fluid temperature by 70 degrees Farenheit. I would not recommend getting a cooler any larger than the 404, as it will be too big and difficult to install. In fact, the 403 would probably have been easier, as it is the same height, but 2.5 inches shorter.
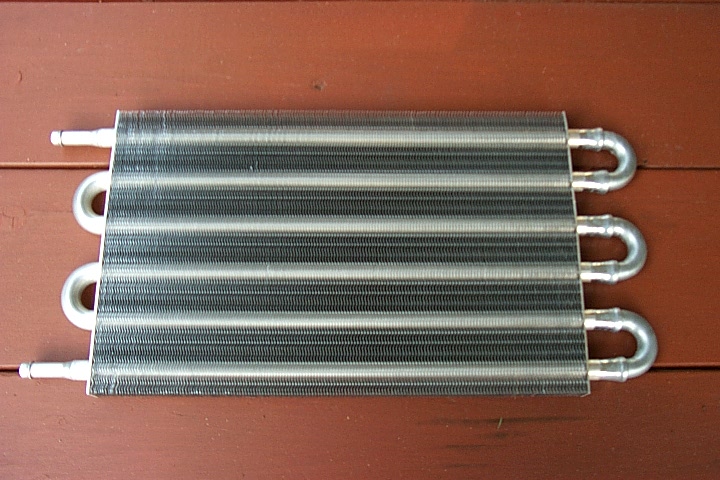
2.Here is everything that came in the kit. I bought an extra 4 feet of transmission cooler hose (not pictured) to use as the return line back to the transmission. The 4 feet of hose that comes with the cooler is not enough, since you will have to replace the stock transmission return line entirely. When you get the extra hose, DO NOT get fuel line, it is not the same. Ask specifically for transmission fluid hose!

3.The picture below shows the A/C condenser before installation of the cooler. For optimal cooling effect the auxiliary transmission cooler should be mounted in front of the A/C condenser.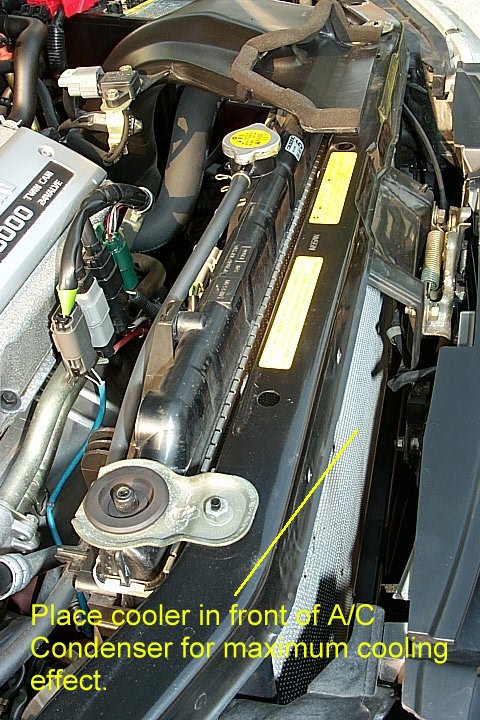
4.The cooler should be installed in “series” with the stock tranny cooler. To do this you have to locate the fluid return line. On the Maxima this is the upper line (without the “banjo” bolt). The two pictures below show the location of the transmission fluid lines before installation.
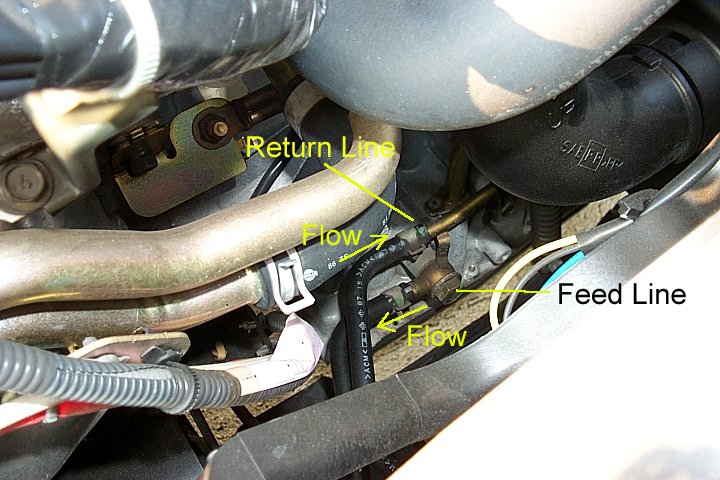
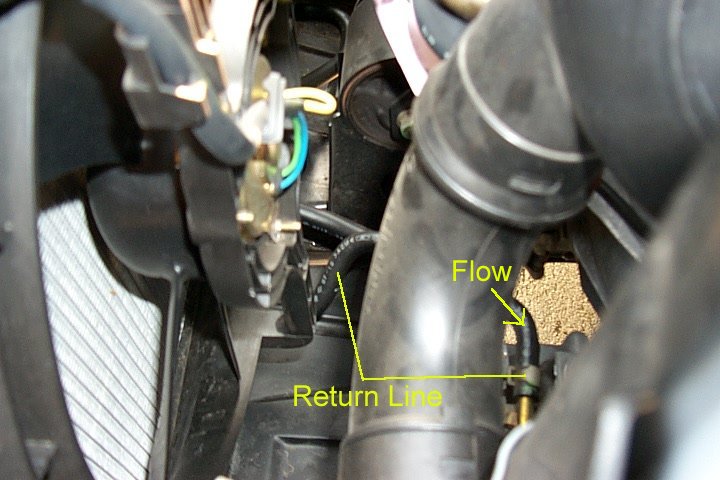
5.It is necessary to remove the Driver’s Side Engine Undercover to expose the transmission fluid return line. The undercover is held in place with 7 bolts and one pop-on clip. I sacrificed the pop-on clip when I removed it. Casualty of tinkering with your car.

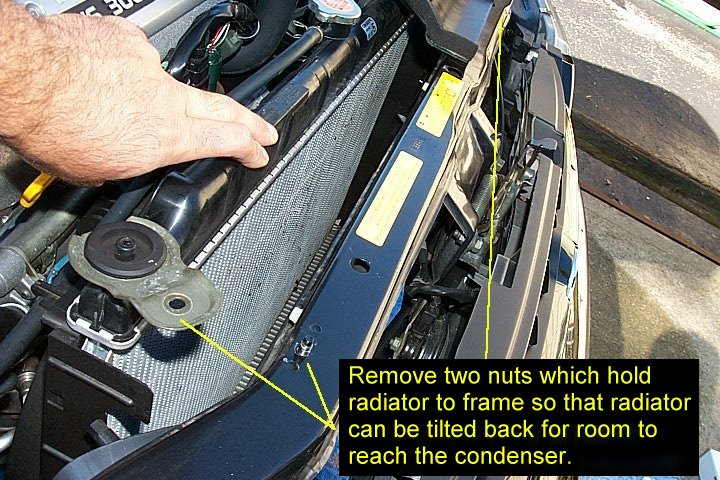
6.Remove the two nuts which hold the radiator to the car frame. You need to be able to tilt the radiator back so there is room to work.
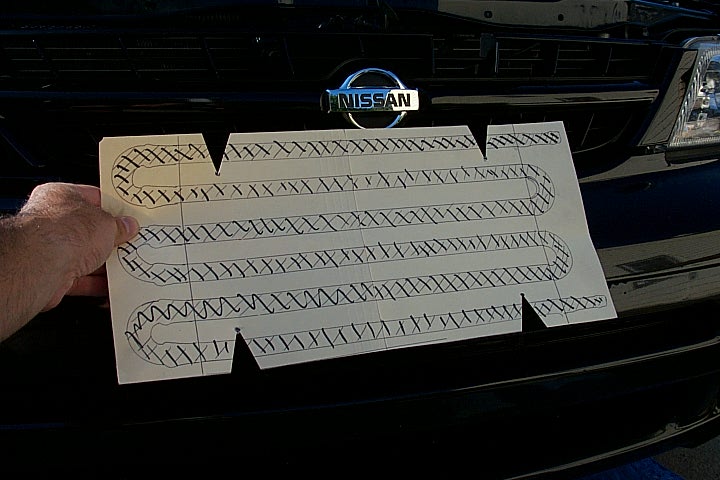
7.I traced out a template for the cooler on a piece of plain folder paper. The purpose of this was simply so I could line everything up and get an idea of how things were going to fit, how the hoses would hang and where, etc., before committing. It was also helpful in aligning the 4 holes where the zip ties would pass through the A/C condenser.
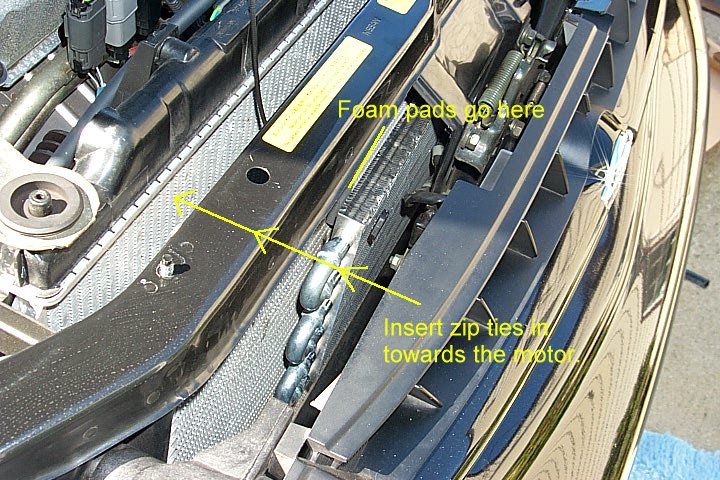
8.The next step is to take each 4-foot piece of transmission hose and secure it with the clamps provided to the cooler. Then carefully slide the cooler in place in front of the A/C condenser. You can slide it in from the top or bottom, it really doesn’t matter – just be very careful not to bend or damage the fins on the cooler or on the car’s radiator. They are very fragile and will bend easily.

9. My personal recommendation is to insert the 4 zip ties through the cooler and the condenser from the grill side in towards the motor. It is much easier to do it this way and you will have a lot more room to insert the plastic cover caps in-between the condenser and the radiator than between the condenser and the grill. Trust me on this. Make sure to secure the 4 foam pads in between the cooler and the condenser before you insert the zip ties all the way through. This part takes a little bit of coordination, and a second hand wouldn’t hurt either.
10. Once the cooler is secured properly to the condenser the next step is to remove the stock transmission fluid return line. The line is pre-bent and specialized for the stock setup and cannot be reused. The line is held in place at both ends by simple pressure clamps. I put a pan under the return line to catch about an ounce of transmission fluid which leaked out of the hose.


11. Take one of the lines from the Hayden cooler and cut it to length. Run this line to the radiator output port and secure with clamp provided. Make sure that the line is not bent or kinked and that it is away from the transmission pan. I bought some 3/4-inch (19 mm) heater hose from NAPA and wrapped it around certain parts of the hoses that I thought might rub or chafe. It is an added protection and a good idea, in my opinion. Secure the second line from the cooler back to the top of the transmission. I secured all of the lines with wire ties to ensure that they would not droop or move around too much.
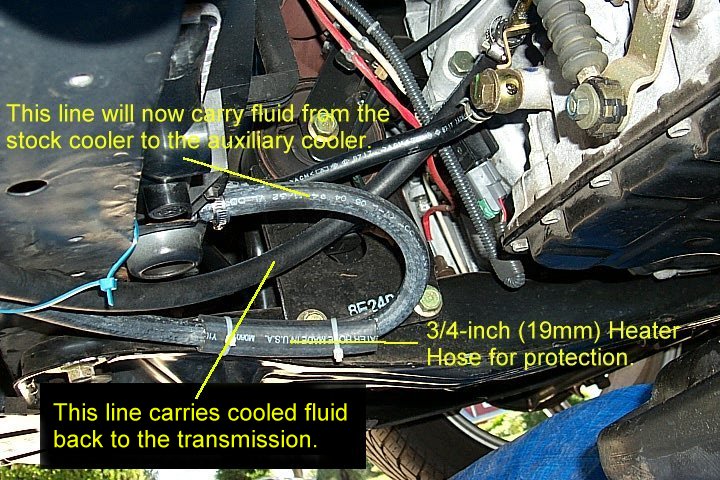
12.Here is a different view of how the hoses are routed from the cooler to the transmission.

13.I used a heavy duty zip tie to hold up the top line and keep it from sagging. I later changed the zip tie to black for looks.
14.The transmission cooler is barely visible through the front grill and is in an excellent location to receive high airflow. The cooler will help out if you do a lot of stop and go driving or “spirited” driving that tends to heat up a transmission. In any case, it certainly won’t hurt anything, and is fun for about a 3 hour job. After driving the car around for a day I had to add about a half quart of ATF to make up for the added volume the cooler provides.
![]()


Comments are closed.