Member Credit: CRiME
What’s up guys,
Following up from 95maxrider’s awesome door lock actuator thread. So My ’99 developed an issue wherein all of the locks would only lock / unlock halfway. The problem got worse with the cold weather, to the point where the rear passenger side door wouldn’t unlock at all. I got tired of reaching around to manually lock all of the doors before exiting the car, so I decided to do something about it.
I figured the actuators were failing – no problem, right? I’ll just grab some from RockAuto. Well, I soon found out that the prices for our actuators have become ridiculous. The cheapest prices for the rears were about $150 each, and the fronts were about $85 each, while the 5th gen actuators are about $10-$15 each. I didn’t want to take the chance on a used JY / ebay part, so I began to look at other options. I found a set of four universal actuators on amazon for $13 shipped, and I took a chance. What’s the worst that can happen, right? if they didn’t work well, I was only out $13. Link to the actuators I purchased is here: Amazon Amazon
They arrived a few days ago and I began the project. I started with the rear d/side door. The universal actuators came with no instructions of any kind. Thankfully, the install for these things is fairly straightforward, and I’ll do my best to recap what I did. If you can install a radio / amp, you can definitely do this.
1) First, you need to remove the rear door panel. If you’ve never done this before, here is a video tutorial, thanks to pmohr:
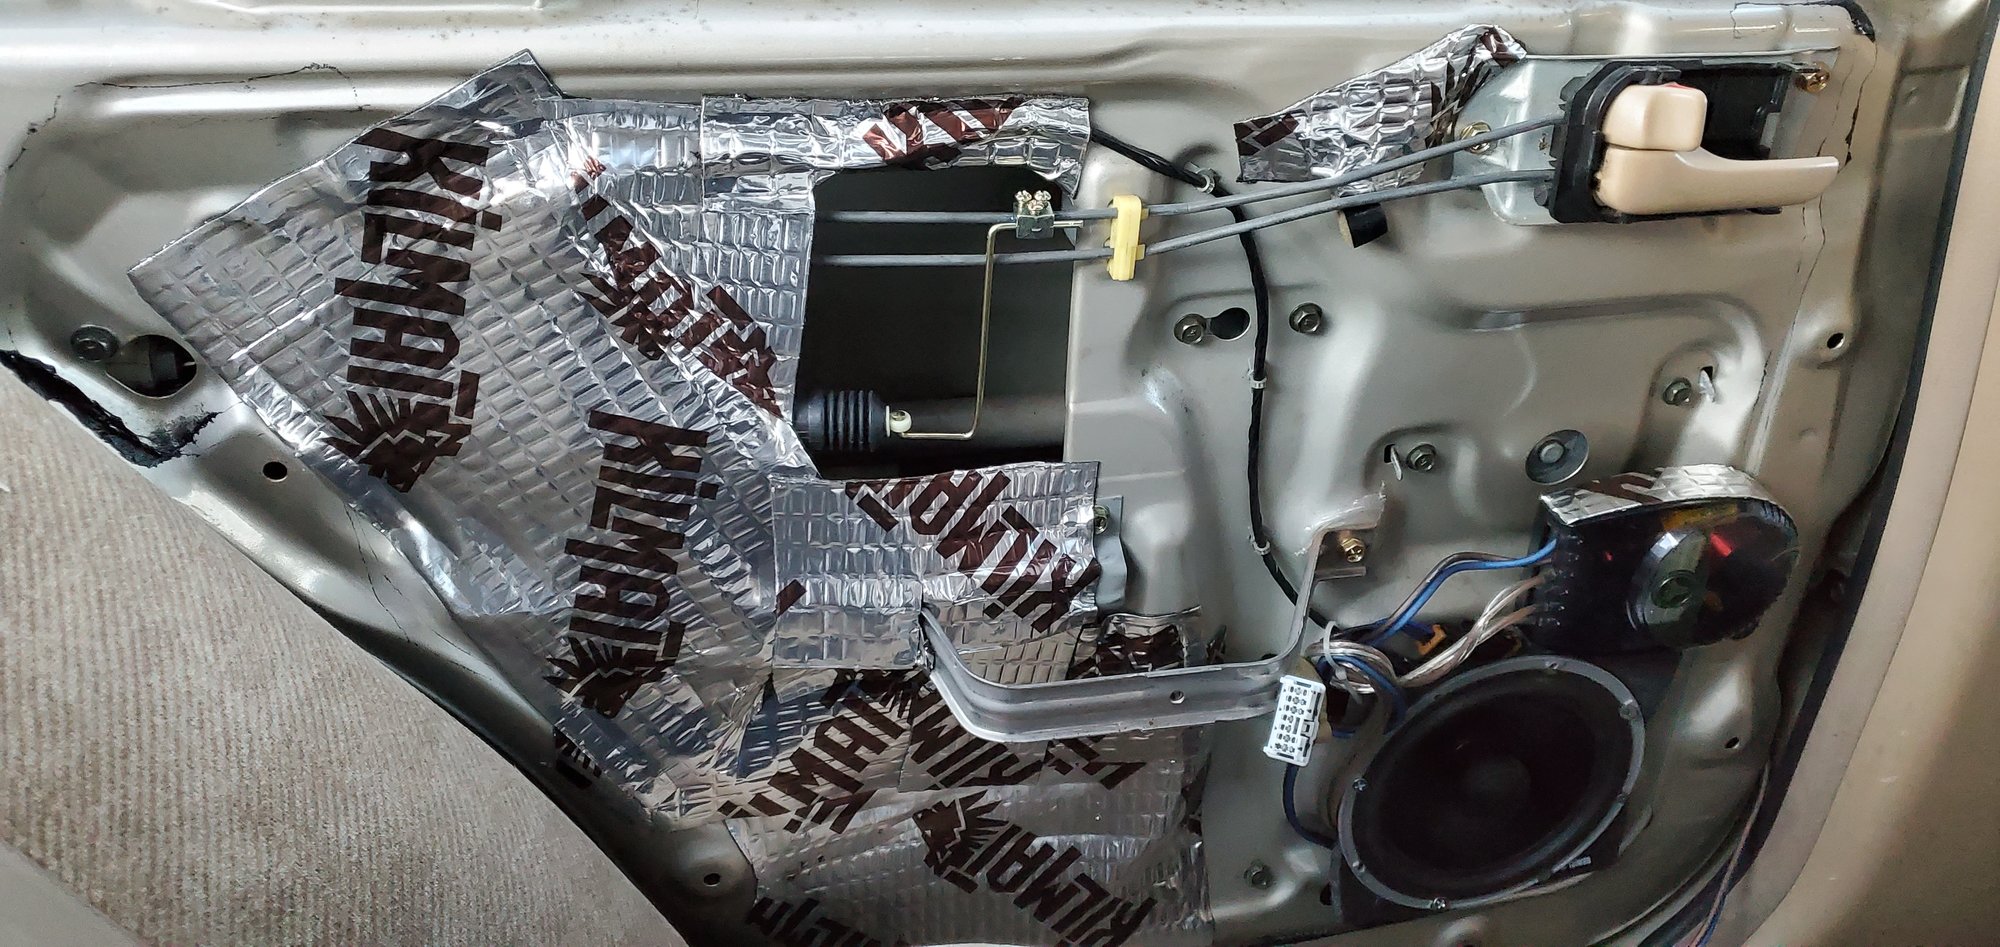
Once you have the panel off, you’ll be looking at this (I removed the factory plastic moisture barrier):
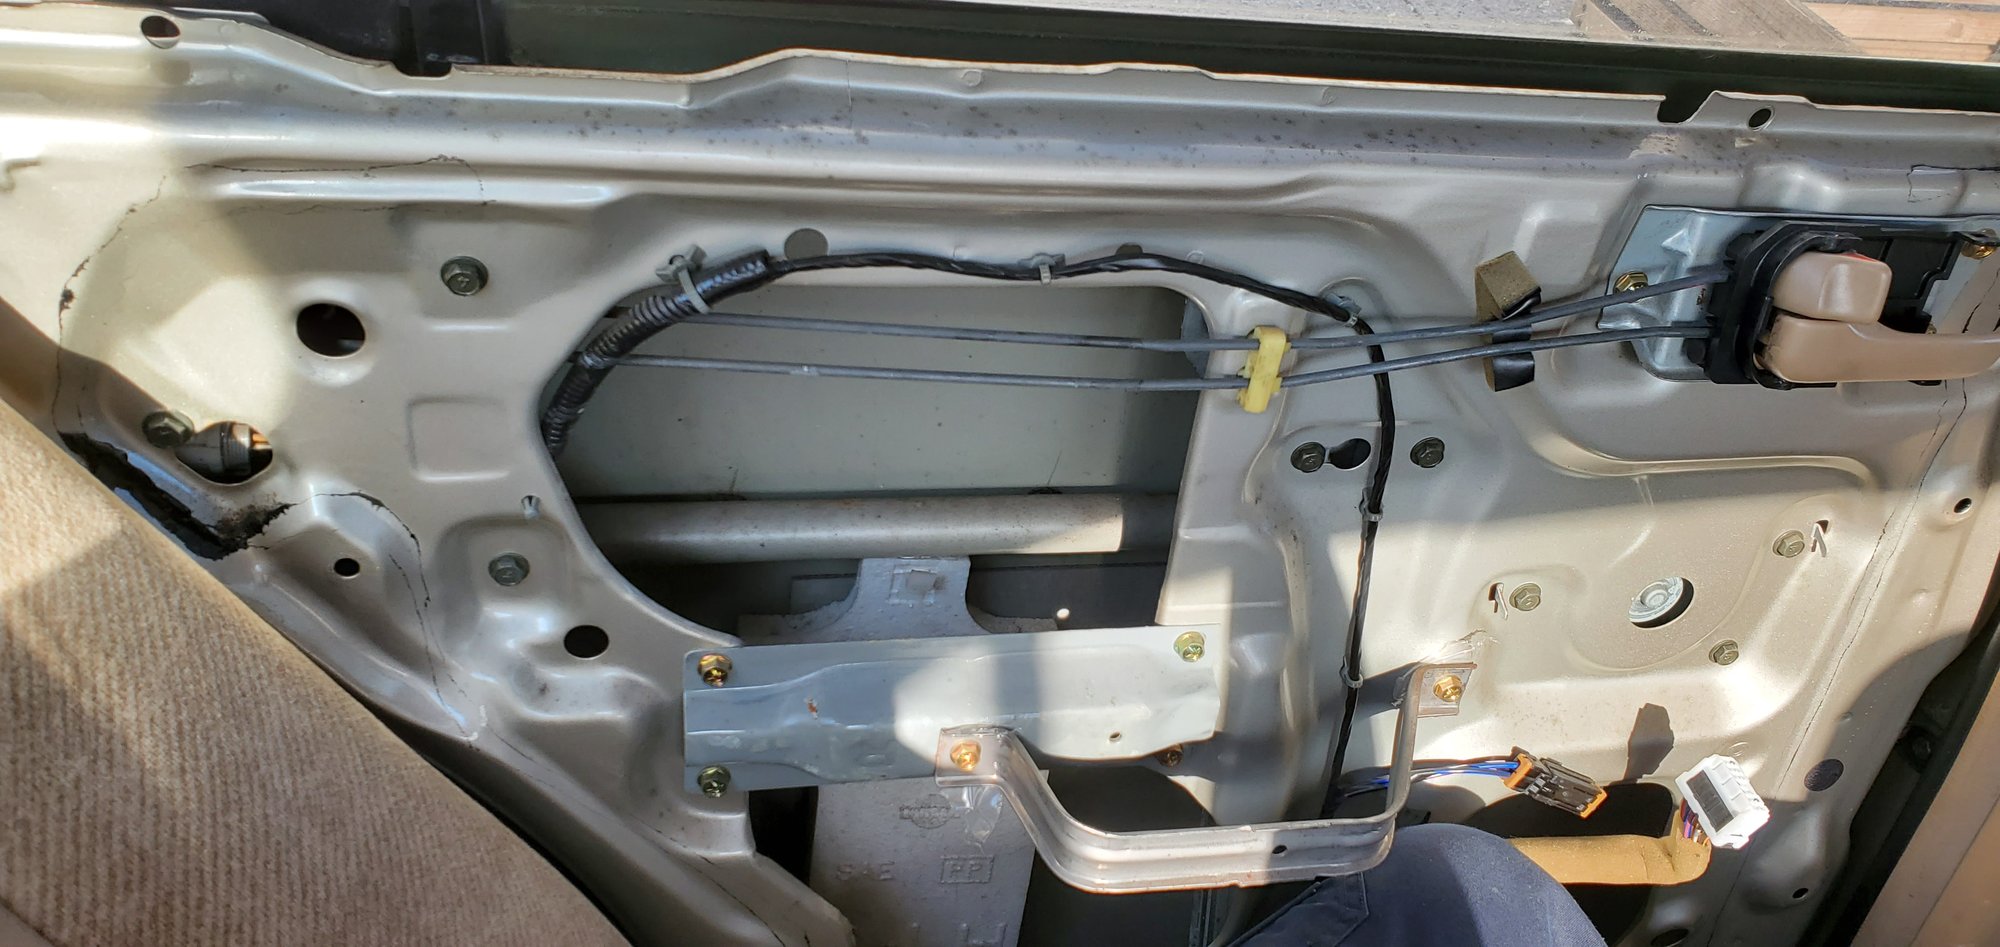
2) The actuator is hidden behind the door frame. You can see its harness through the hole near the seat. I removed the harness by pushing a flathead screwdriver through the hole, to release the clip. Then I used a second screwdriver to pry the harness out while pressing on the clip with the 1st screwdriver. Once I had the harness out, I bolted the actuator into this spot. To get this to work, I had to break the mounting bracket that it came with. This is a great spot for the actuator, because you don’t have to drill any new holes in the door frame. You can attach it to the existing bolts in a V orientation:
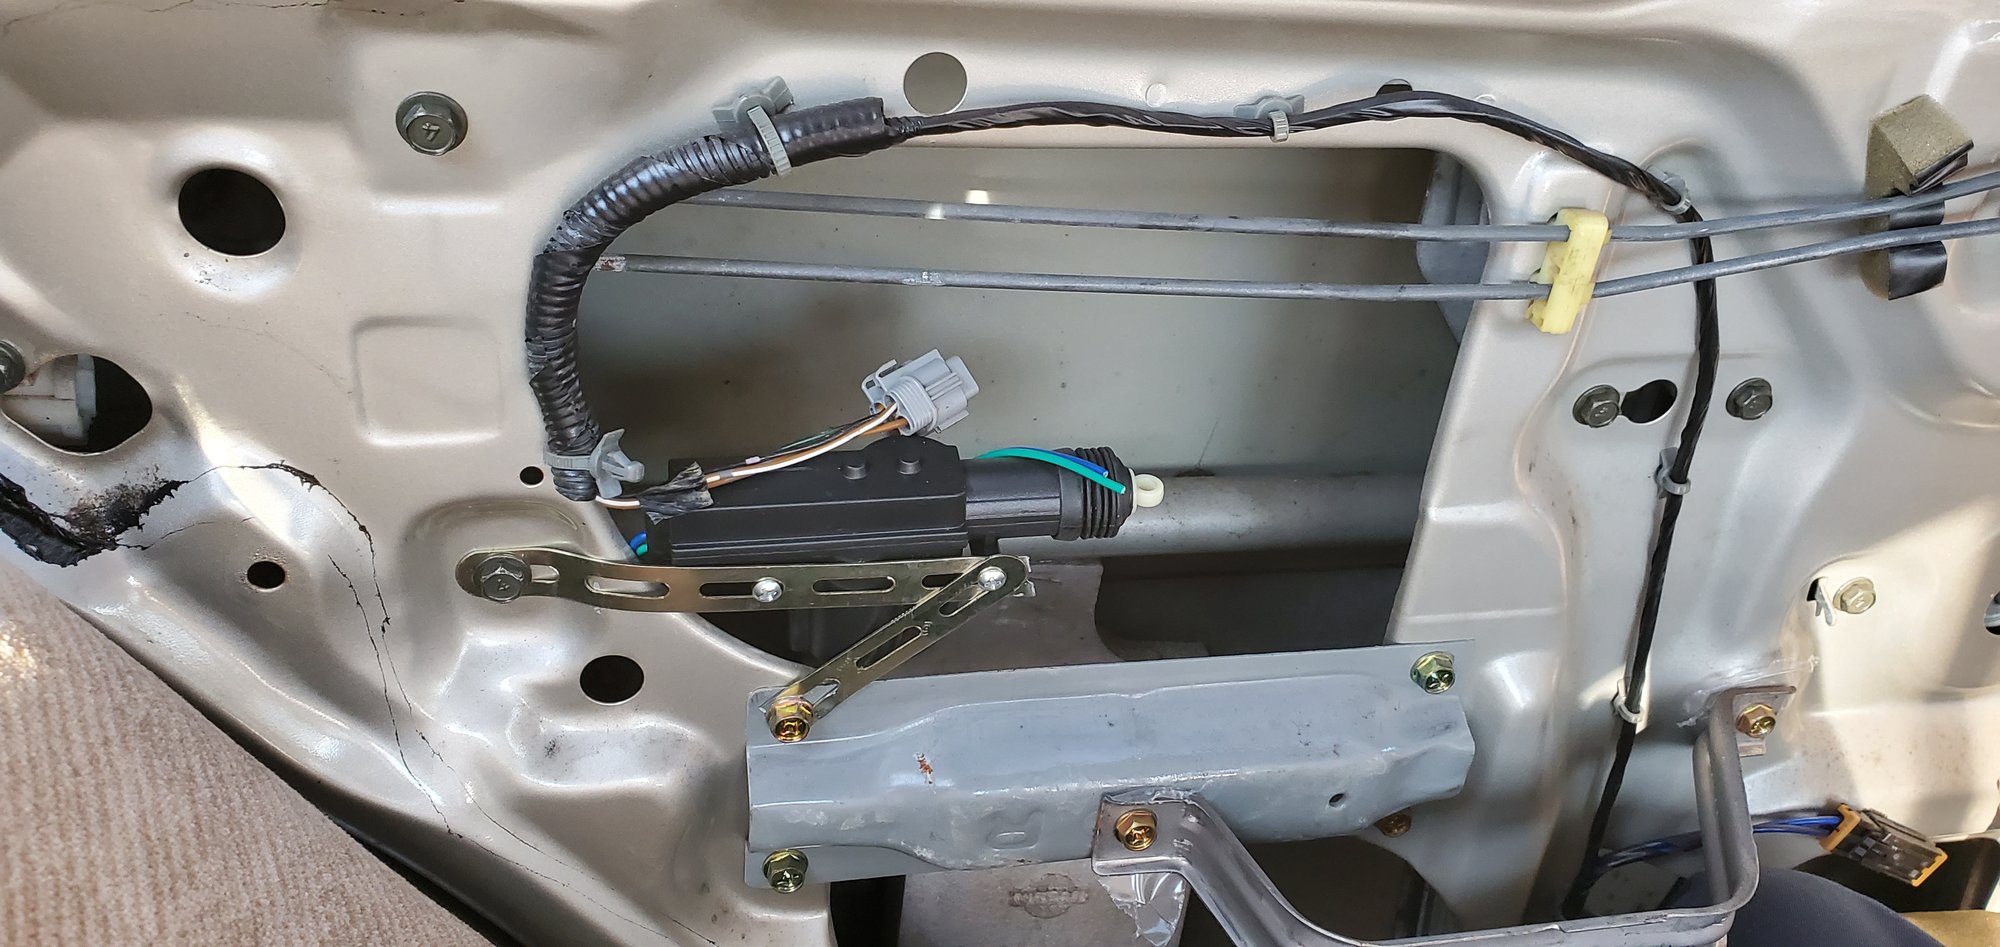
4) On the factory harness, the wires that you’ll want to tap into are the brown / white and solid brown. Connect the brown/white to green, and the solid brown to the blue wire of your universal actuator. The blue wiretaps work great for this
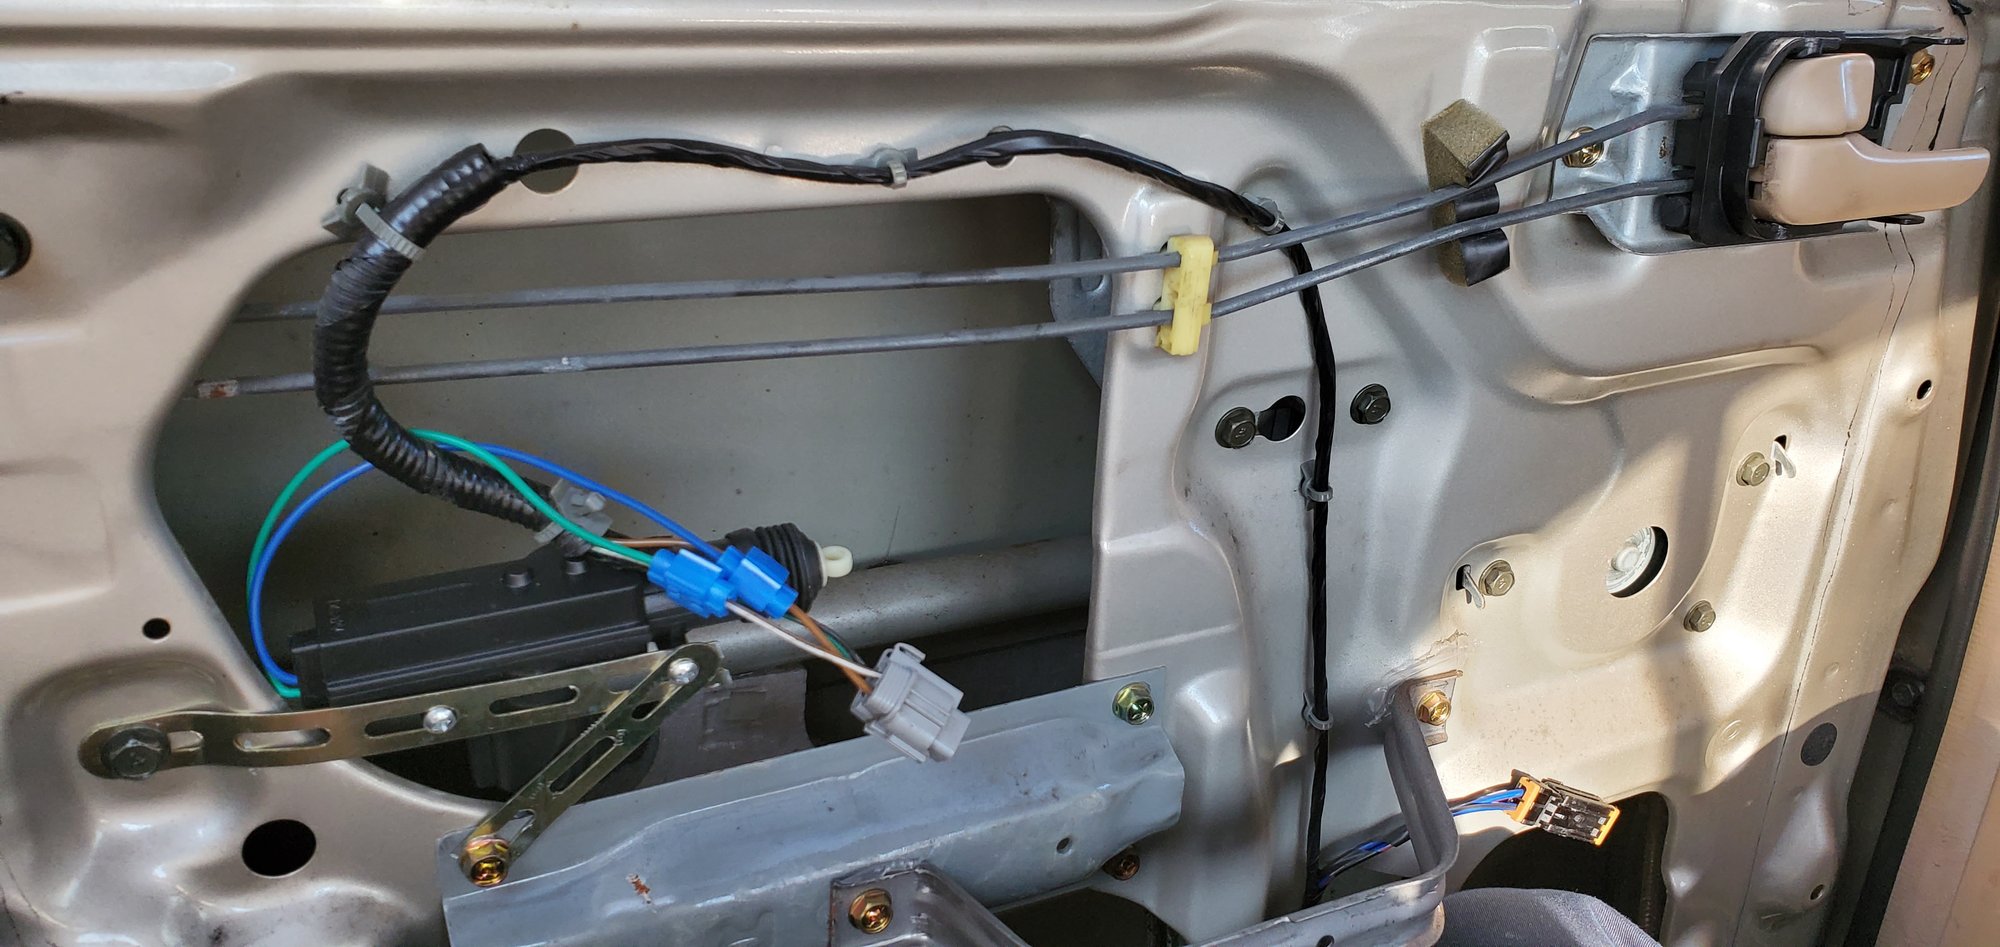
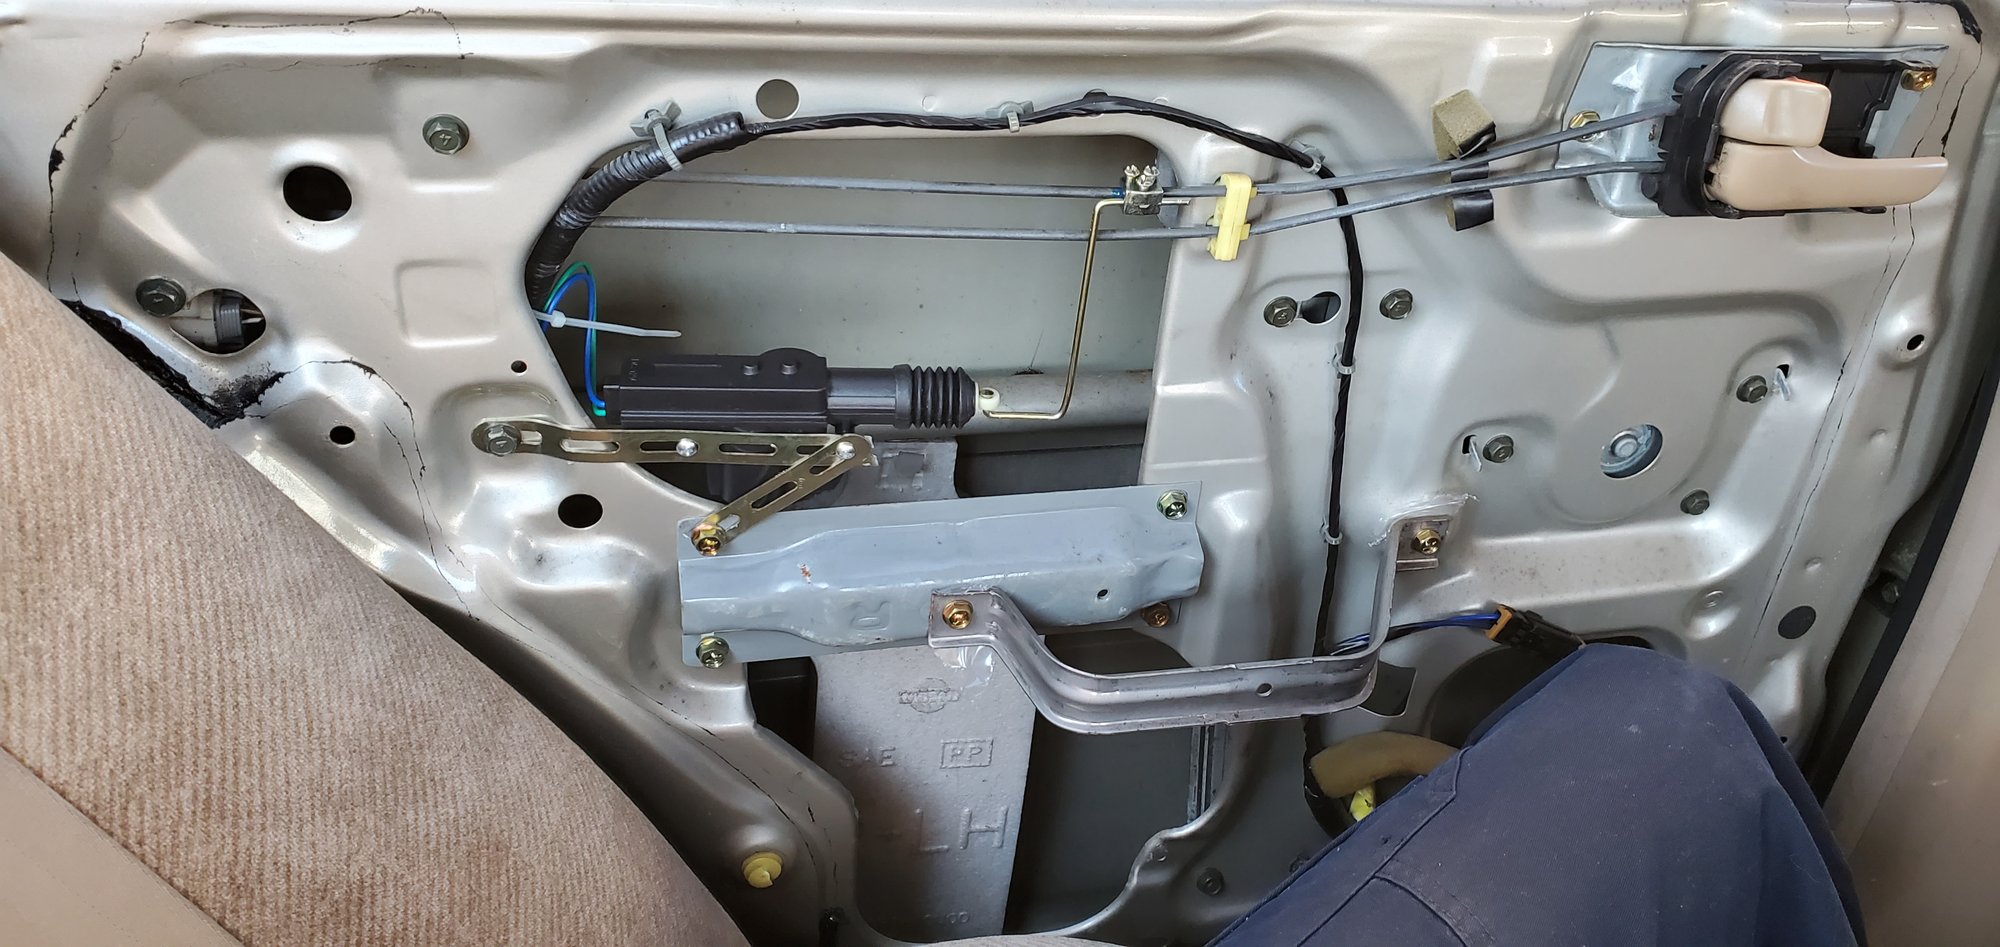
5) Once the wires were tapped, I plugged the harness back into the OEM actuator. This was not even necessary, because the universal actuators are more than sufficient to push / pull the rods, but I insulated the taps with electrical tape and reconnected it anyway. Once your wiring is done, you’ll need to connect the universal rod to the factory rod. I bent it into this shape, fed it through the actuator, and connected it to the factory rod with the supplied clamp and screws. **IMPORTANT** – before you bolt the new rod in, make sure that the orientation is correct – if the lock is OPEN, you want the new actuator to be EXTENDED. if the lock is closed, you want the actuator to be fully retracted. I added some blue Loctite to the clamp threads as well, in the event that the screws somehow loosen up over time.
7) While I had the panel off, I decided to add some speakers to the rear doors, to give my audio some rear fill. I had some coaxials that I had taken out of my previous car, so I decided to throw them in. Slipped a 6.5″ Boom Mat baffle into the hole there to create a tighter seal and also to protect the speaker. I cut out the rear of the baffle to allow for airflow. Bolted the speaker up, wired up the crossover, and fed the input wire out of the existing door grommet, and down through the B pillar into the car. adding the rear speakers made a HUGE difference in sound! The rear speaker doesn’t interfere with the operation of the window either, since our windows only go down halfway anyway.
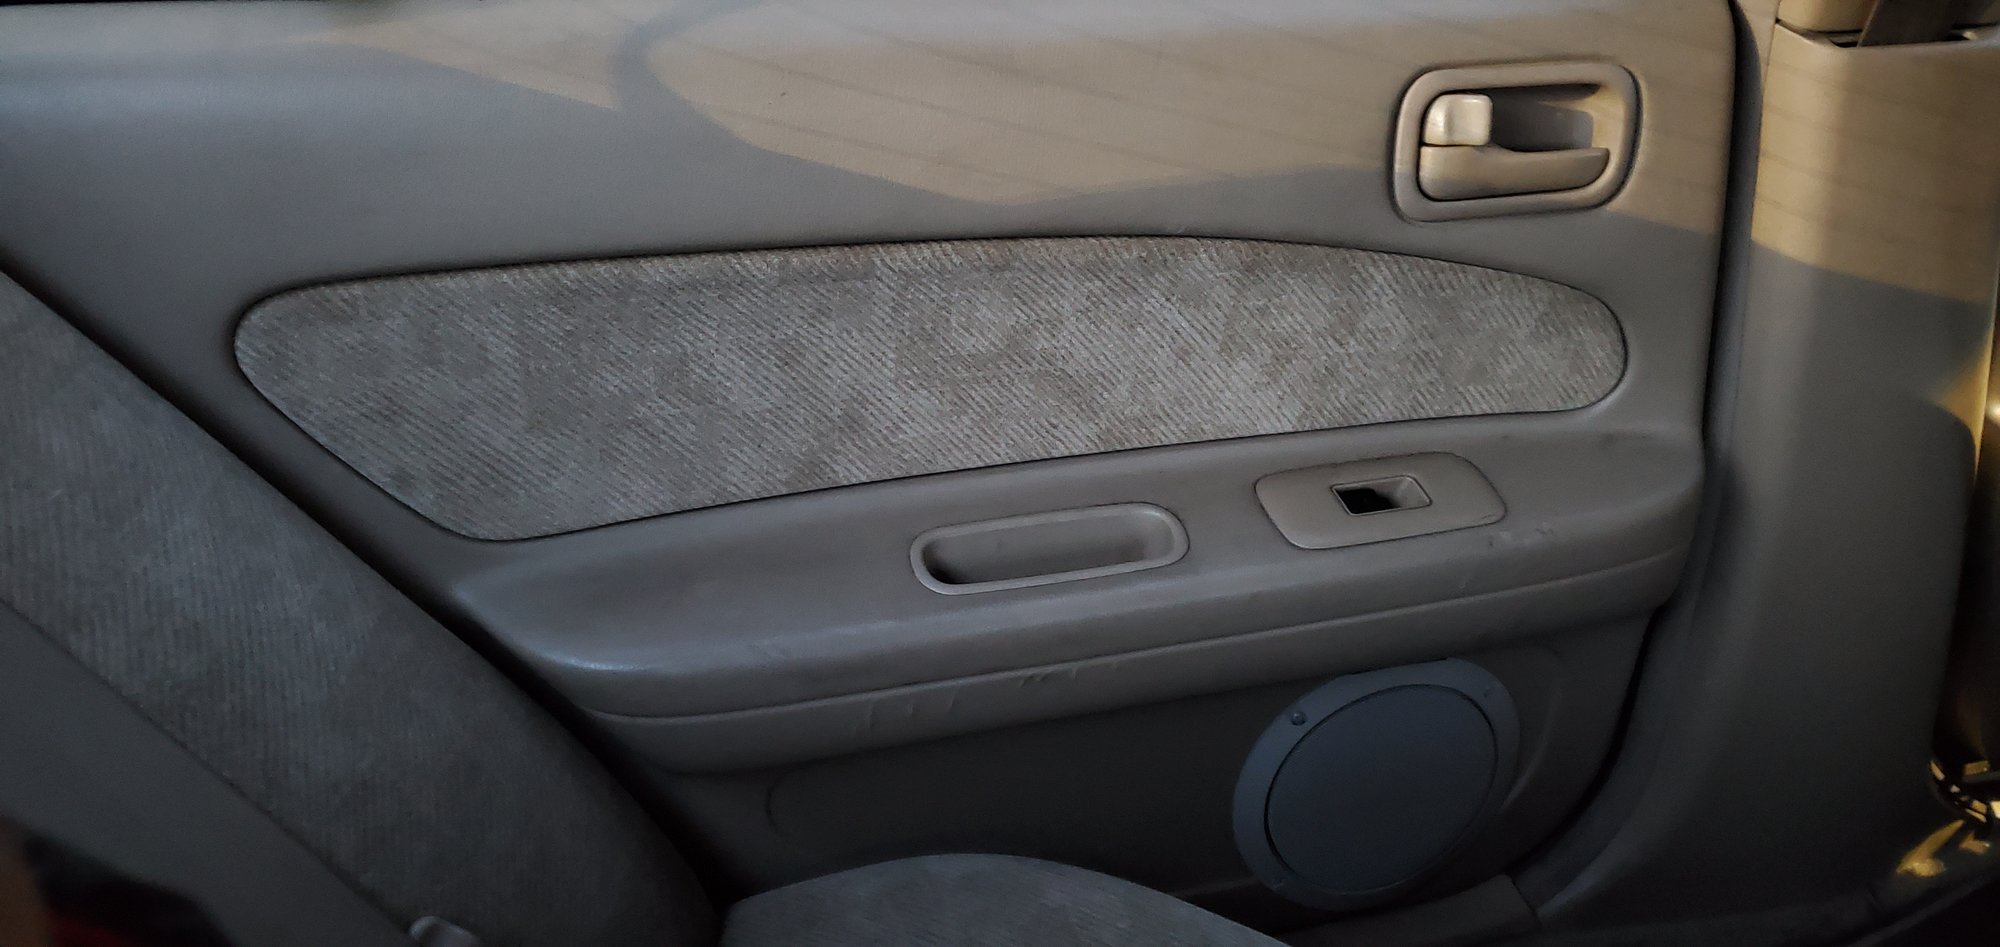
8) I re attached the door panel, after using a 6″ hole saw to create an opening for the sound to come through. I covered it with a grille that I spray painted. The paint dried lighter than the representation on the cap, but I was more concerned about function over form… I didn’t really care about putting a hole in the panel, because the panel was already in rough shape anyway…
9) The lock now works perfectly! Video attached:
So that was the rear. Today, I completed the front. Similar process. Here is what I did for the driver’s side: 1) Remove the front door panel (thanks again pmohr)
2) I chose this spot to mount the actuator. Before I screwed it in, I made sure that the panel would clip on properly without being obstructed by the actuator. It did, so there it went. Be sure to measure the new rod before you bolt it in place, because I had to clip off about 2 to 3″ of it for this application. Once I had the correct length, I fed the rod through the actuator, pushed the rod through the clamp, and then I snapped the clamp onto the factory rod. Applied some loctite and screwed it down. Of course, I managed to lose one of the screws. There are supposed to be two screws securing the new clamp to the factory rod, and one screw securing the clamp to the new rod. It held fine with one screw, so I proceeded.
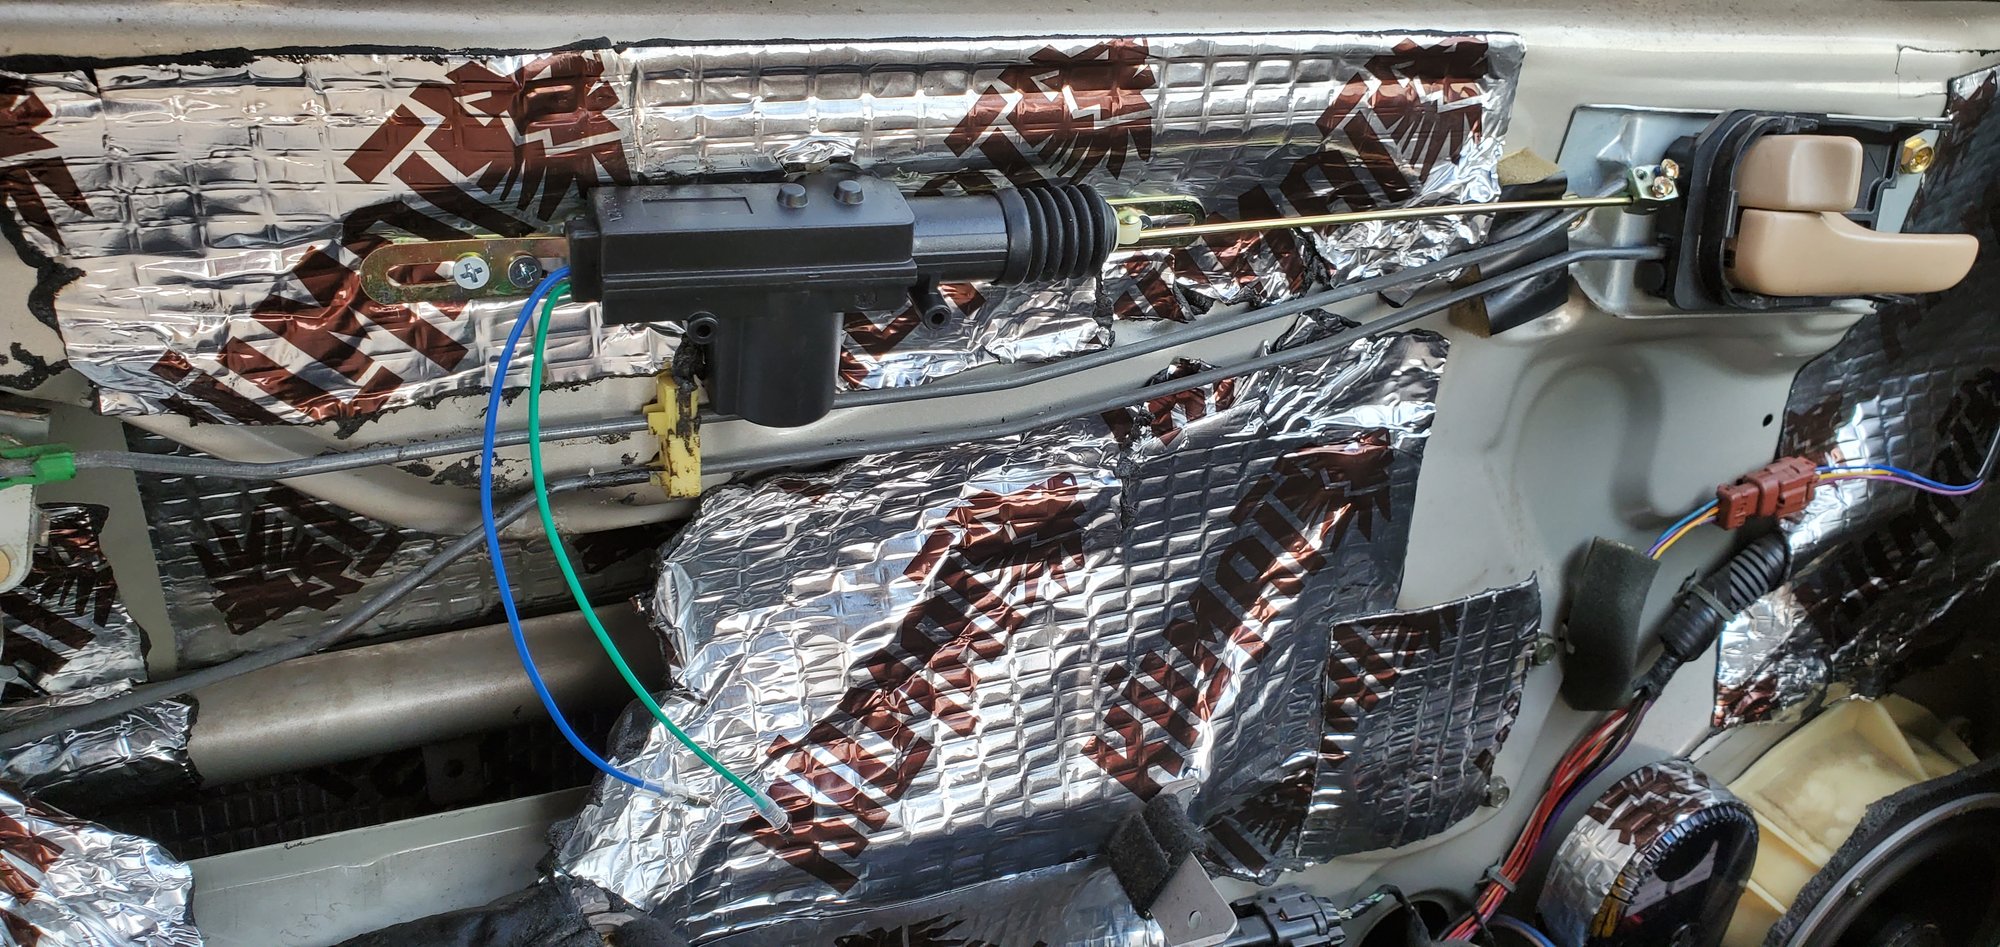
3) I already had some sound dampening material on my front doors, so I had to peel some of it back to access the wiring harness for the front actuator. It runs along the bottom of the door. I pulled it inside of my kilmat, and stripped away some of the plastic conduit to expose the wires. Same deal here as the rear, you want the brown / white and solid brown wires. Since the new actuator is at the top, and the wiring is at the bottom, I had to extend the wires. I crimped on some 14ga cable, wrapped it up, and ran it down to the factory harness. Used the blue wire taps again, wiring done!
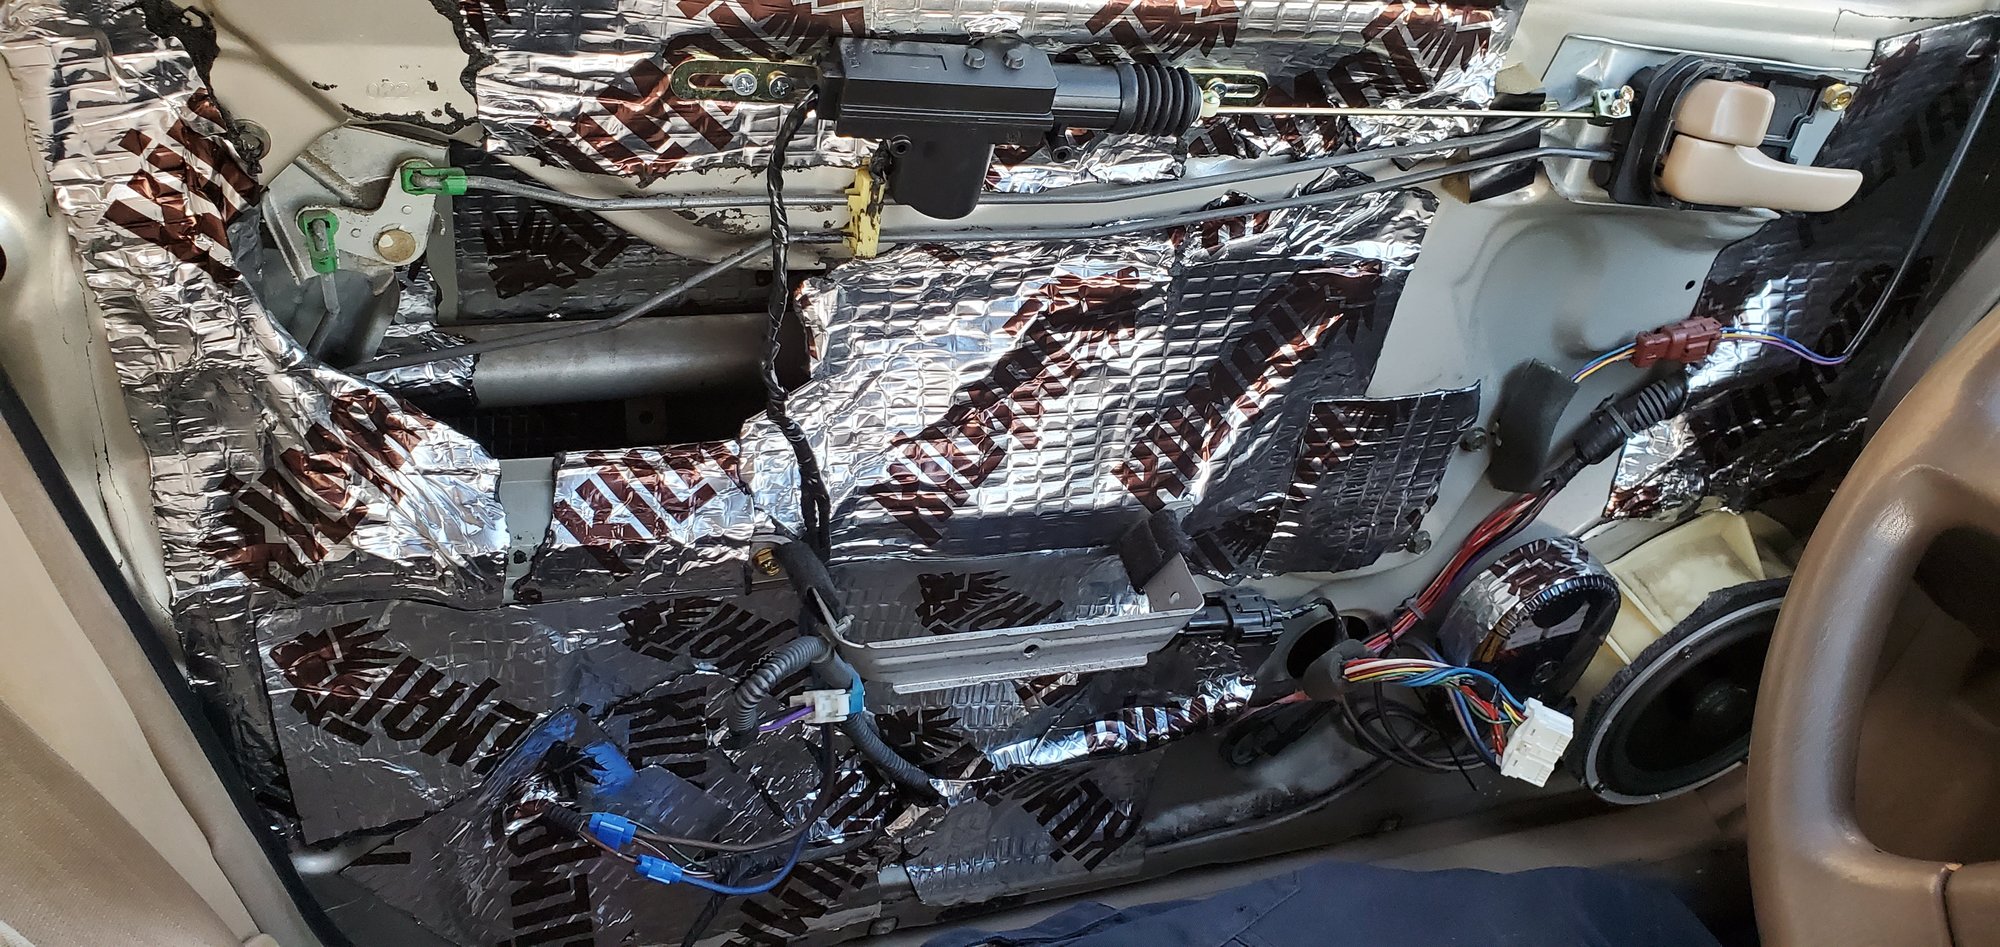
4) Tested the new actuator, works perfectly! The lock snaps open and closed as if it were brand new. Video attached:
https://vimeo.com/user104171777
5) Wrapped everything up with tape, put some kilmat over the new actuator to help protect it (probably not necessary, but didn’t hurt anything).
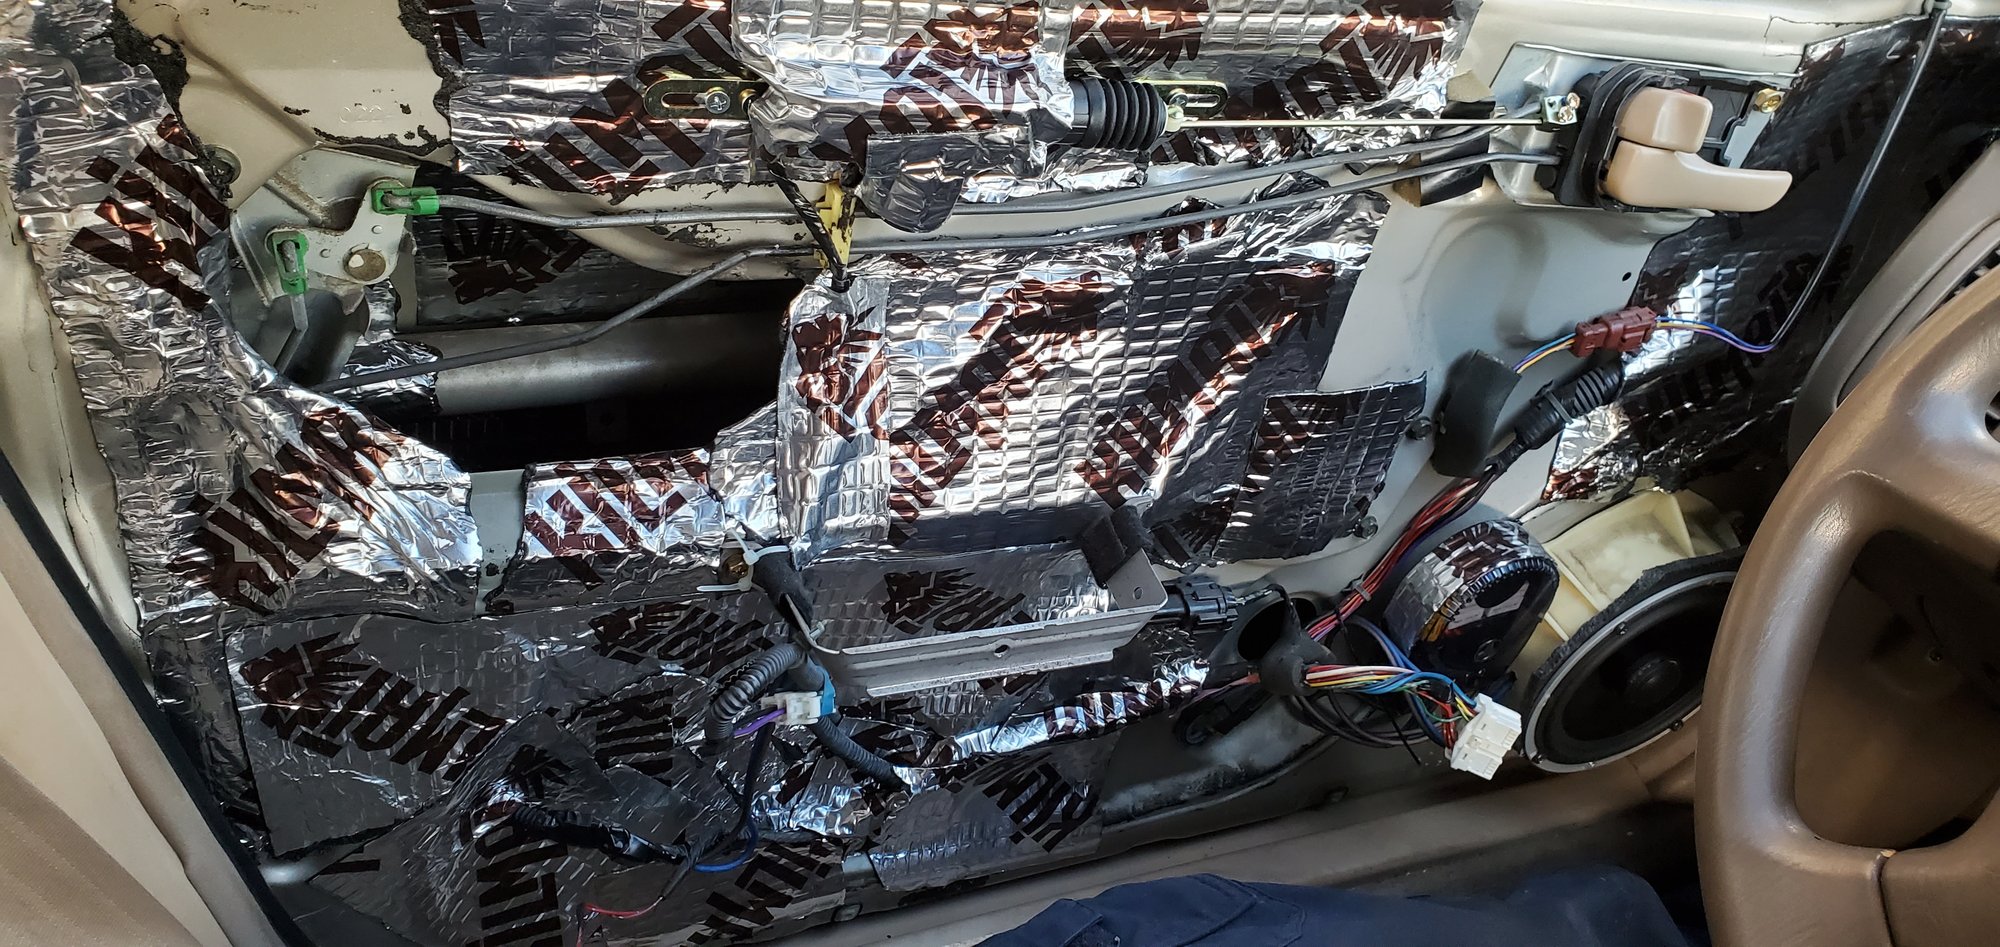
6) Once I confirmed everything was working correctly, I put the door panel back on. It snapped right back into place. No resistance or snags of any kind. Well guys, the verdict is that these actuators are a definite hit for $13. I mean, that comes out to about $3.25 per door. So if anyone out there is in a similar position, I definitely recommend giving this a shot if you’d rather not drop about $500 on replacement bolt-on actuators. I hope that this thread can be helpful to some. Hopefully I didn’t leave anything out. If anyone has any questions, feel free to ask.
![]()


Comments are closed.