

Member Credit: Chickan
I searched around for a bit today, and was unable to locate a guide detailing how to remove 4th gen door panels (most likely similar for other years). This is useful when installing new speakers, fixing window switches, installing car alarms, etc.
This was done on my 95 GXE (5speed Cali if you really want to know) on 3/21/04 while it was snowing outside (Ohio weather is crazy).
First off, locate small tray pictured here:
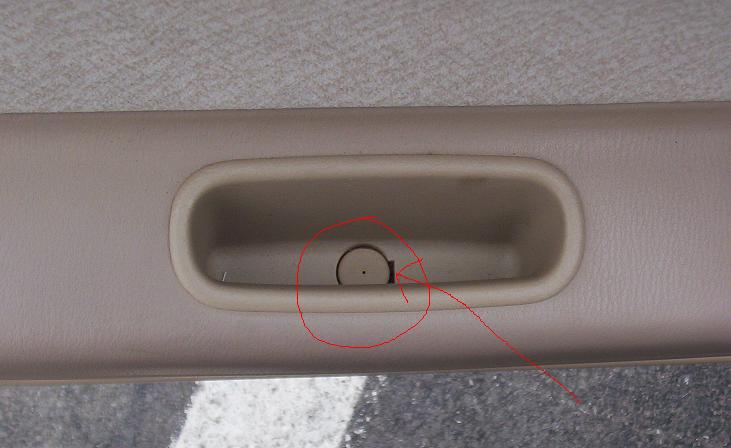
Pop off that screw cover, then take the screw out.
You can take out the whole tray if you need to (useful for keeping track of screws), though not nessesary.
Next locate the two screws on the bottom of the door panel pictured here:
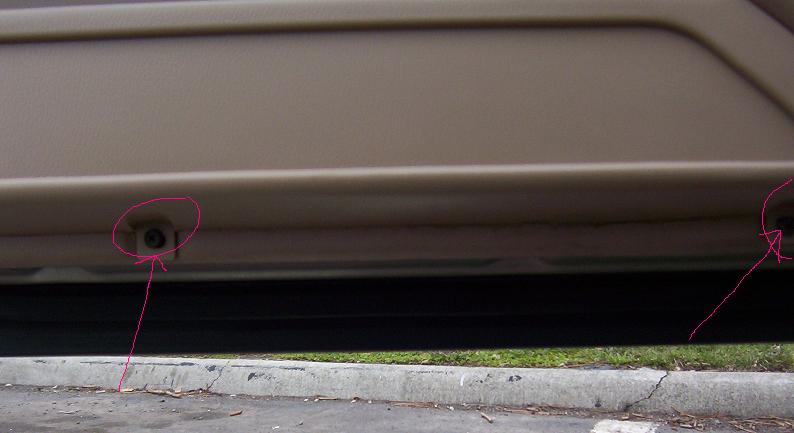
Take both of those off as well.
Locate your door light, pictured here:
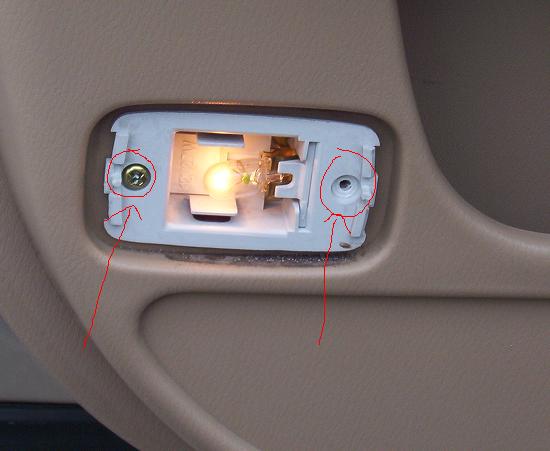
There is a small conector that attaches to it, and I popped off the plastic cover (take a small flat head to either left or right side of it), and removed the two screws holding it in place. This allowed me to pull it out, giving easy access to the attached connector. Alternatively, you can probably reach your hand under the door after you have completed the next step.
Next, apply pressure all along the door panel, start at the bottom, then do the sides. There are several pop-screws that will pop out with a bit of force. Also, having the window down helps a bit with removing the whole door panel.
The last thing to remove is the doorlock/window switch connector, which can be a little stubborn, be gentle so as to not break it.
Removing this black piece may also be of some use in particular projects, it easiy pops out with a flathead, shown here:

To reinstall, just reverse the steps. Pop the black panel back in place (if you removed it). Reattach both connectors. Align the door panel on the window lip, then pop the tabs back into place. Attach the bottom two screws, then attact the center screw & tray, replace screw cover, and you are done!
![]()

Comments are closed.