

Credit: DennisMik
I would like to start by thanking JNCoRacer for his motivational pep talk. He was smart enough to know that I could do it, even though I didn’t think I could. Thanks man.

You will need various standard tools: screwdrivers (Phillips for screws & flat for prying), wire cutters and a ratchet, extensions (I found that my 24 inch was very useful), a U-joint, and a 10 & 12mm socket. I strongly recommend a 6 point socket for the 12mm.
You will need one special tool, a T50 Torx, 6 point security wrench. I didn’t have a security Torx but got lucky and was able to modify my standard T50.
Cliff notes version –
1 – Remove the glove box.
2 – Remove the radio/heater control cluster.
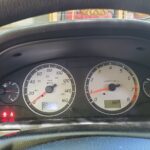
3 – Remove the speedometer cluster.
4 – Remove the dash.
Easy smeezy, right?
Let’s get started and find out.
Move the driver’s & passenger’s seats forward and remove the 2 screws that hold down the rear of the center console.
Move the driver’s & passenger’s seats all the way back.
Disconnect the battery. You will be messing with the passenger airbag and it is recommended to wait a half hour after disconnecting the battery.
Remove the glove box (6 Phillips head screws) and disconnect the 2 wires. You will also have to cut the zip tie that holds the wire harness to the glove box.

While you’re down here, remove the kick panel in the foot well. There is a plastic nut on the top front corner that you can most likely remove by hand. Then there is a snap along the top edge just before the panel curves to meet the door. Pull the panel towards the driver’s side to unsnap it.

Remove the radio and heater controls. Start by removing the trim plate around the transmission shift lever. If you have an auto trans, you need to move the shift lever out of park. I’m guessing that you’ll need to do the same with a standard trans. Pry up the 2 rear corners of the trim plate to pop the snaps free. Actually, pry on the sides by the corners, not the bottom edge. Lift up by hand to pop the forward snaps that are near the curve. When free, disconnect the wire for the cigarette lighter.
Remove the ash tray. Remove one screw at the top left corner. On the right side there are 2 snaps, one top and one bottom. Pry the ash tray straight back towards the rear. Did I mention that a 1 inch putty knife works better than a screwdriver for this? Disconnect the wire to the ash tray.

Now finish removing the center console. In the opening created by removing the ash tray, there are 2 screws in the corners where the center console meets the dash. Remove those screws, pull the parking brake handle up as far as you can, unsnap the boot around the parking brake handle and remove the center console by lifting up.

Remove the dash center vents. Pry up on the lower corners, the sides, not the bottom edge and pop the snaps free. There are 4 snaps across the top edge. Using moderate level swear words, free the top edge. While it is difficult to do, the vents need to come almost straight back with a little downward motion, not tilted up from the bottom. Once you have the vents free, disconnect the wires for the hazard flasher, clock and the rear window defroster switches.

Now you can remove the radio and heater controls. This is one unit held in by 4 screws, one in each corner, 2 screws down where the ashtray was and 2 on top above the heater controls. Have your transmission shift lever towards the rear of the car and lift out the radio/heater controls. Disconnect the wires from the radio and heater controls.

Remove the speedometer cluster. Since the goal is to remove the dash, this procedure will do things not needed if all you wanted to do is remove the speedometer cluster.
Start by dropping the steering column. Remove the lower dash trim panel that runs underneath the steering column. Remove the 2 screws in the bottom edge at the corners. There are 2 snaps on top edge, again at the corners. Pry the snaps free. *** Caution *** The chime that sounds when you open the door when you have the keys in the ignition is attached to the backside of this panel by the fuse panel. Disconnect this wire.

While you’re down here, remove the kick panel in the foot well, just like on the passenger side. Remove the metal plate that runs underneath the steering column. There is a 10mm bolt on each end. The plate will stay in place after you remove the bolts. Slide the plate towards you about a quarter inch and it’s off.

Now you can drop the steering column. Two 12mm nuts. Mine had Locktite on them and my 12 point socket was starting to strip the one nut, so I changed to a 6 point socket. The steering column is kind of heavy, so you are forewarned. I was concerned about the steering column hanging by itself, so I found a 10 inch length of 2 inch PVC pipe that I rested the steering wheel on.

Now for the speedometer cluster. There is a finishing bezel around the cluster that also has the cruise control on/off switch, the security led and the dash light dimmer switch. You have to disconnect the wires from these switches. You have 2 choices – before you remove the bezel or after. If you choose before, then you have to pry the switches out of their holes and then disconnect the wires. I chose the other option, after I had the bezel loose. This way I didn’t have to pop the switches out.
Start removing the bezel by removing 2 screws in the top curve of the bezel. Then there are 4 snaps along the bottom edge. Pry/pull them free. If you hadn’t done so earlier, disconnect the wires from the switches.

Finally, the speedometer cluster itself. 3 screws, 1 at the top and 2 along the bottom. There are 3 connectors on the back of the speedometer cluster that need to be disconnected. I would suggest you get something soft to lay the cluster face down on while you disconnect the wires so you don’t scratch the face plastic. It costs about $35. You will also have to cut a zip tie that holds the wire harness onto the back of the cluster.

Now disconnect the wires from the side view mirror switch. Either pop the switch out or reach in from behind the dash.
The final phase, remove the dash. There are 5 10mm nuts, 2 Torx head security bolts and a pair of screws to go.
Remove the trim pieces from the windshield pillars by grabbing the trim at the top edge and pulling the snap free. Then lift it off.
Pry off the defroster vent grill plates. There are 4 snaps spaced along the back edge. Pry the back edge of the grill up.

When the grill is removed, you can see a 10mm bolt at the end closest to the outside of the car. Remove this bolt. This is where my 24 inch extension was useful.


In the bottom left and right corners of the dash is a 10mm nut that was revealed when you removed the kick panels. Remove these 2 nuts.

In the opening where the speedometer is a 10mm nut.
In the opening where the radio was there is a screw.
In the opening where the glove box was is a screw.

OK, last 2 fasteners and one wire harness connector. Looking in the glove box opening at the top, you will see a yellow wire harness connector. This is for the passenger air bag. It looks like you could pull either end out, but you have to pull the right side out to disconnect it.

Now for the Torx bolts. Look up through the glove box opening and you will see 6 Torx head bolts. You only need to remove the 2 that are by themselves, not the pairs.

Once you have these 2 Torx bolts out, the dash is free and ready for removal. I did it by my self, but if you can get a helper, it is no doubt a lot easier. You have to pivot out the bottom edge a little bit and then pull back and up. There are guide pins built into the top front edge of the dash that require you to pull the entire dash back evenly. Because of the airbag, the right side has probably 75% of the weight.

For what ever it’s worth (in the category of useless trivia), I weighed the dash on my bathroom scale. It was 25.5 pounds. Most of that is the airbag.

![]()

Comments are closed.