

Last Updated: 11/01/2021 @ 02:48 pm
This content was submitted by supporters (social media and/or online forums) to help inform and educate others. If you would like to request removal click here. For additional info, please visit our Legal Terms & Conditions.
Community Member Credit: Rochester
Part: Shifter Stabilizer Bushings – Nissan Maxima – 7.1115
Order Link: https://www.energysuspensionparts.com/7.1115
Here are the notes on removing the shifter trim and center console. Pictures follow.
- Remove the ashtray and the screw behind the ashtray. (picture)
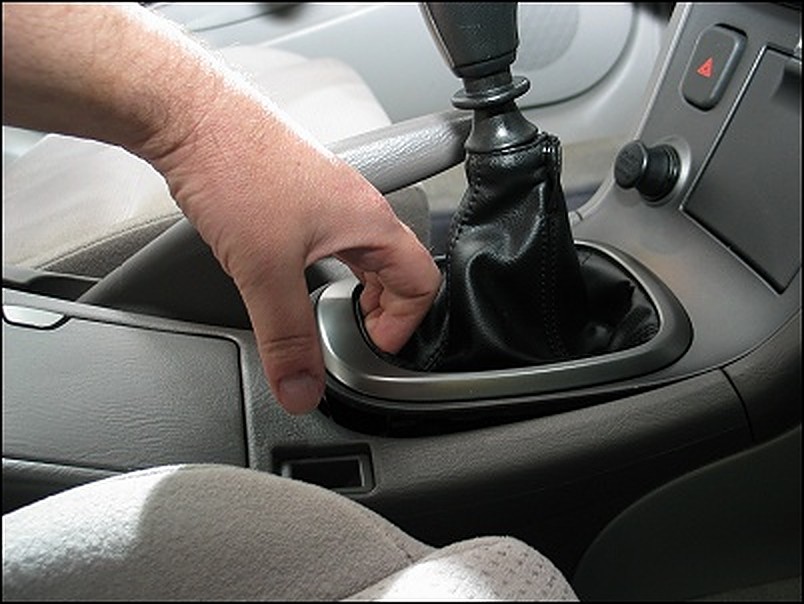
- Unsnap the shifter trim by gently pushing your fingers into the leather on the back end for grip, then pull upwards to unclip it. (picture)
- Lift the shifter trim from the back end, and wiggle it down from the front end. The shifter trim fits under the climate controls and will slip free with a little effort.
- Once the trim piece is free, unclip the power connectors that go to the hazard lights, ashtray light, and cigarette lighter. (Yeah, there’s an ashtray light. Who knew?) Use a small flat-head screwdriver to help unclip these connectors.
- Unsnap the leather boot and slip the entire trim piece off the shifter. Set it aside.
- Now on to the center console. Unscrew the 2 console screws made accessible now that you’ve removed the shifter trim. (picture)
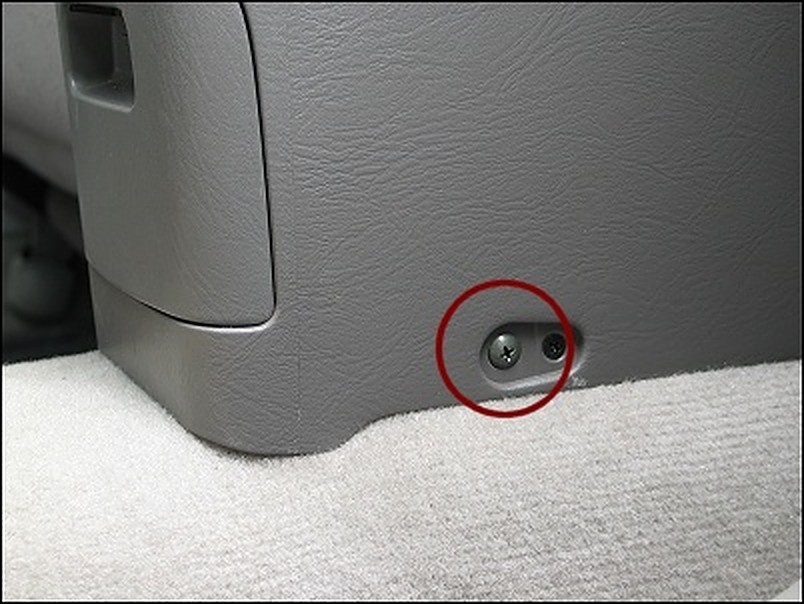
- Unscrew the two (large) screws that are on the bottom sides of the console, accessible from the back seat. There are two screws here, you want the larger ones. (picture) I’m not sure what the other one is, but it’s not the one you want.
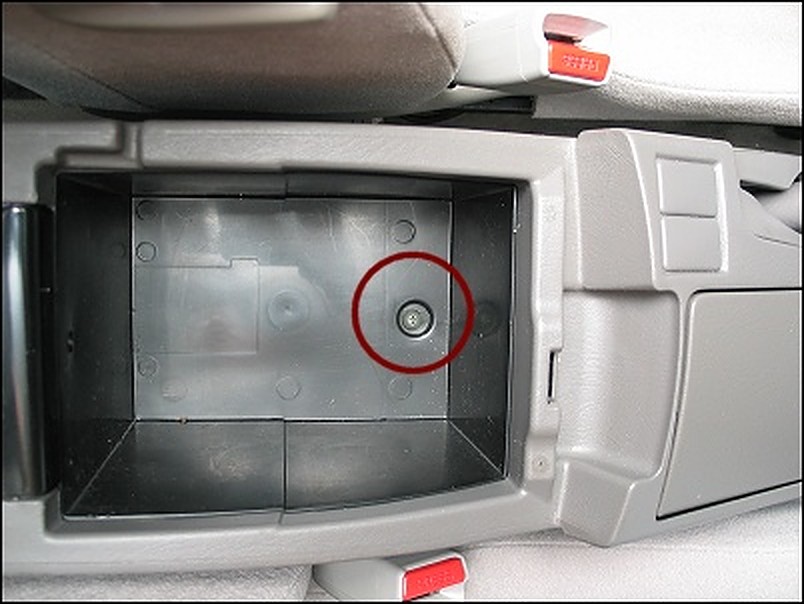
- Unscrew the single screw inside the center console glove box. (picture)
- Find the clips inside the front of the center console that attach the console to the side trim. (picture) Unclip the center console from the front-side panels, and lift the console up and out. It’s not a smooth process the first time you try to pull the console away, so take your time. Figure out how to remove it safely by adjusting the position of the hand brake.
- Once the center console is free, unclip the power connector to the back seat cigarette lighter. Set the center console aside.
Next up are the steps I used to replace the bushings underneath the shifter assembly. eclid98 suggests wearing mechanics gloves for certain things. I don’t have any, and yes, I cut myself.
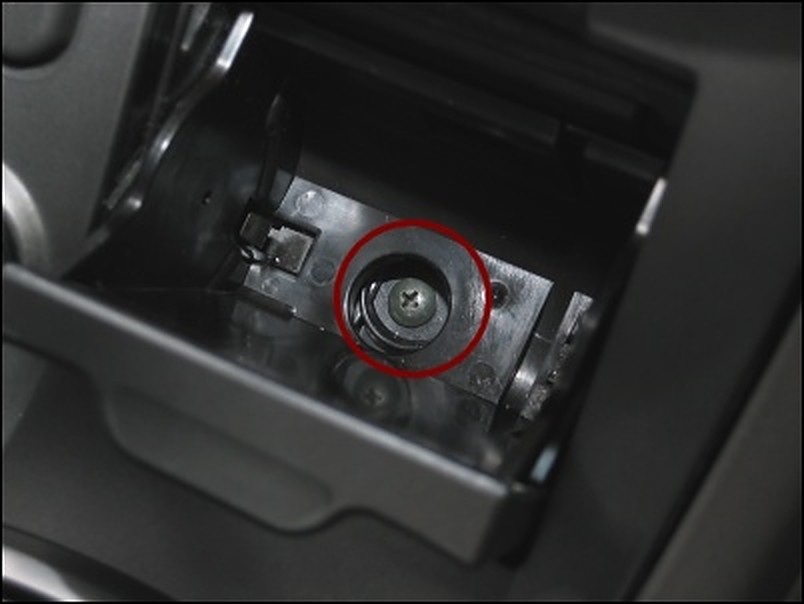
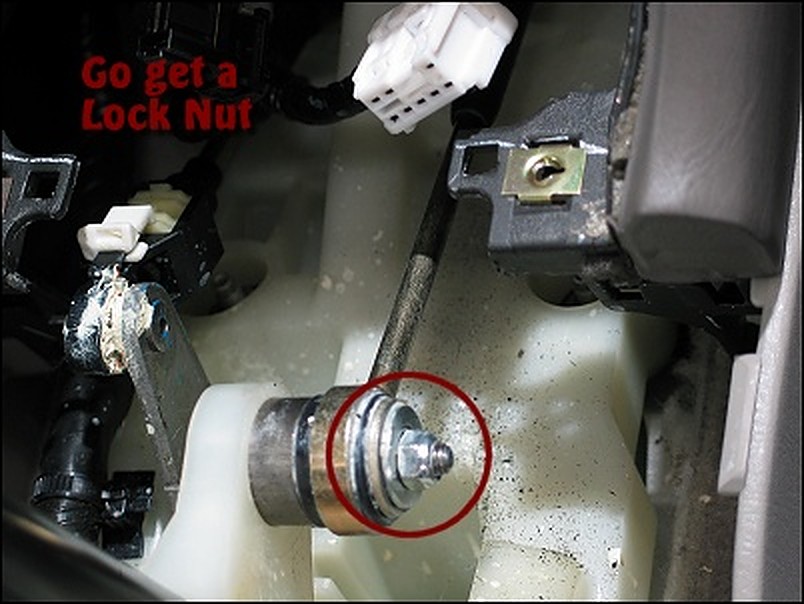
- Disconnect the shifter cable from the shifter arm by removing the nut over the OEM banjo bushing. (picture)
- Take out the OEM banjo bushing and replace it with the new ES banjo bushing. It can be difficult putting the new bushing in — use channel locks, or a couple of fat washers, a nut and bolt, screwing the washers together until the banjo bushing slips in. Do the same at the transmission end, under the hood. (I’m brushing past this part, because I already did this a while ago, and my playtime today consists of the bushings underneath the shifter assembly.)
- Don’t put the cable back on the shifter arm just yet. However, when you do, do not use the OEM nut. Go buy a replacement lock-nut… the kind with plastic in the threads. You see, now that you’re loosened it, the OEM nut will just back off again in the future, and it’s been known to do so on a number of people. (Me included, but I was lucky and felt it getting sloppy before it completely fell off.) Use a lock-nut so you don’t have to deal with that worry.
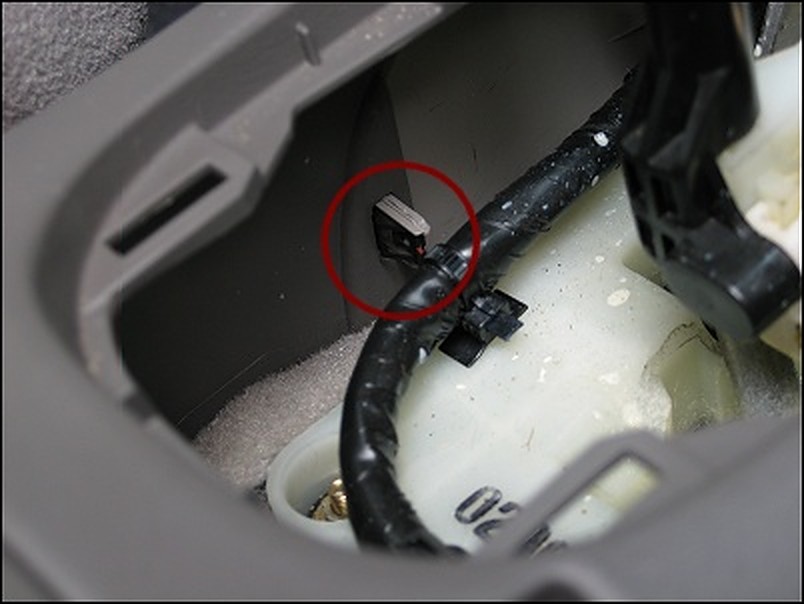
- Unclip the side-to-side articulating arm on the left side of the shifter. You do this by pushing it off its post, NOT by unclipping the white retention piece. That piece holds yet another plastic clip in place below it, who’s purpose is for fine-tune adjustment to the centered placement of the shifter’s left-to-right position. Play with it if you want to figure it out, but it’s not part of these instructions.
- Now… you think there would be some kind of retention washer on this connector. The post is designed for it, but there wasn’t anything there. I’m thinking that was a manufacturing-line SNAFU on my car, so I bought an E-washer for that purpose, and used it when everything went back together. Go figure.
- On to the shifter assembly. Use a 10mm socket to remove the 4 nuts that are holding the shifter assembly to the floor.
- Wiggle and lift the shifter assembly off those four bolts. You don’t need to remove the entire thing; you just need to establish clearance one bolt at a time.
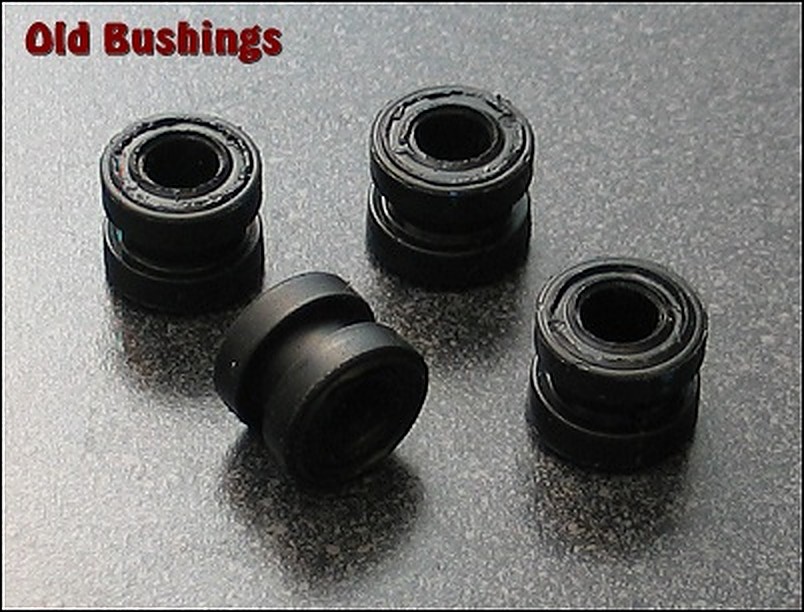
- Working on one corner at a time… start by slipping the OEM metallic washer-tube-thingy (hereafter referred to just as the “washer”), off the OEM rubber bushings. Use a small flat-head to do this, prying the washer downward from the underside of the shifter assembly. Be careful you don’t lose this thing into the floorboards. That would be bad.
- Once the washer is removed, use pliers or a big screwdriver to force the OEM rubber bushing out of the hole. You can pull it upward (difficult), or push it downward (easier).
- Take the normal looking ES bushing and push it over the washer’s post (with a little force.) It’s probably easier to do this in your hand now, rather than after you re-install put the washer. (Thanks to eclid98 for that tip.)
- Now slip the metallic washer back on the bolts. Note, you’re still working on the underside of the shifter assembly.
- Repeat this step on the other 3 corners. You’ll probably cut yourself, bleed and swear a lot. It’s all part of the fun.
- Now slip the shifter assembly back down over the four posts.
- With the assembly back on the floor flat, slip the other ES bushing piece into the one of the holes, small end downward. Select one of the 2 more accessible corners as your first one. Don’t worry about forcing it down into the hole… that will happen next.
- Put the OEM washer/nut over the bushing and screw the bushing down into the hole. Don’t tighten it all the way just yet, just enough to push the bushing down into the hole. (Thanks again, eclid98.)
- Repeat this step on all four corners.
- Last step — tighten down all four corners evenly.
Reference Photos

Additional Insight from: AWeb80
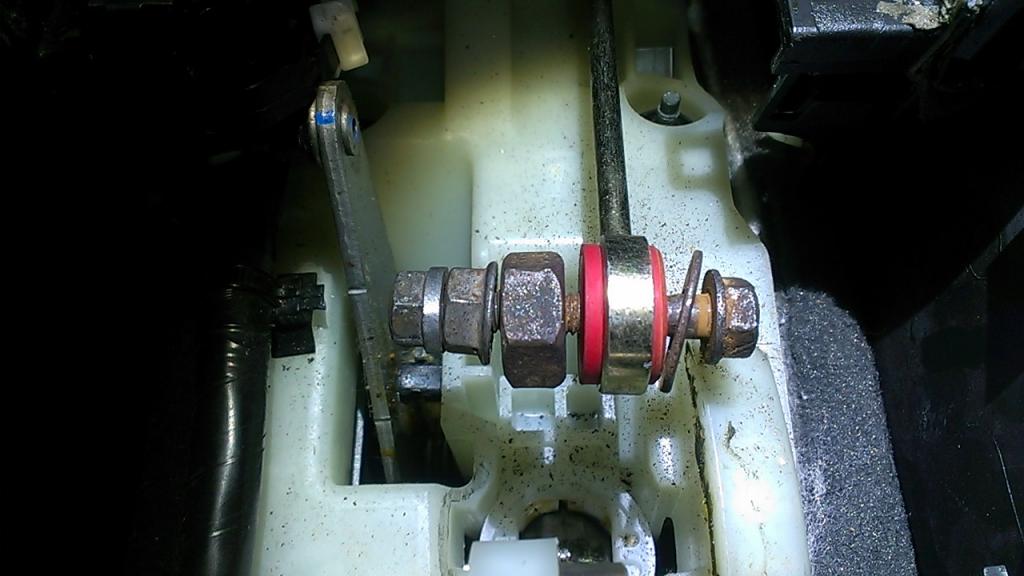
I do have a tip to put the banjo bushings in. Put a bolt that is smaller, not snug, through the bushing and use a nut to tighten it in place. I think the pictures explain themselves. It took all of 2 minutes per bushing. It pushes it in square and is MUCH easier than trying to squeeze it in w/ pliers.
*don’t mind the extra nuts I have on the left side….they are just there as spacers so I didn’t have to thread the actual nut on so far. *


![]()

Comments are closed.