

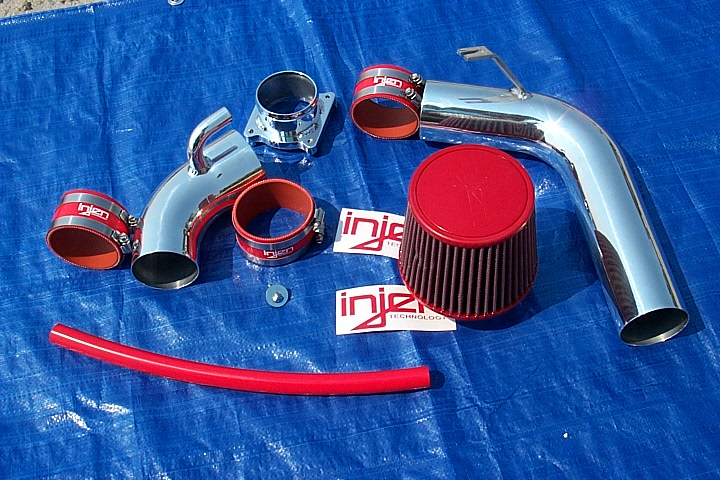
Member Credit: Greg
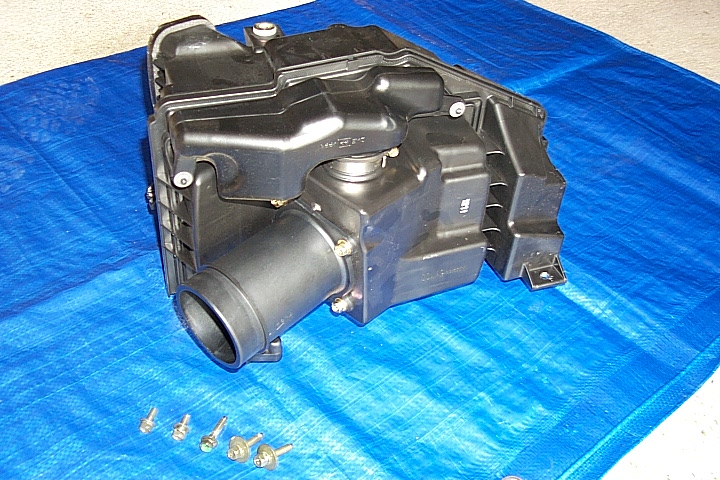
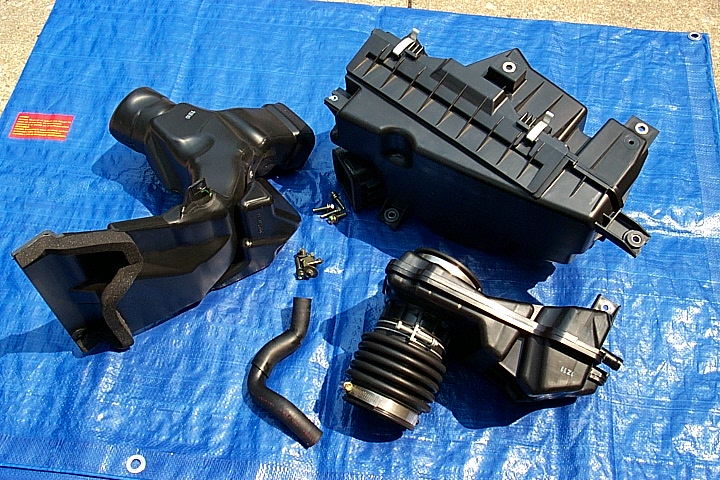
I ordered the Injen Cold-Air Intake from Adventon.Com for the price of $238.56, which included UPS 3-day shipping. If you don’t need it in 3 days, knock $13.75 off that price. I found Adventon a pleasure to deal with and would highly recommend them to anyone interested in this (or any other) intake. Pictured at left are all of the parts that come in the kit. Injen also includes an excellent set of clear instructions. My only complaint is that they are not in color, but that is minor.
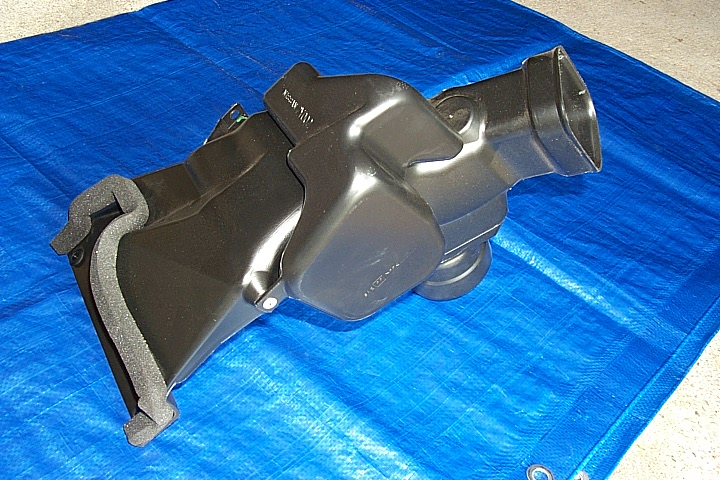
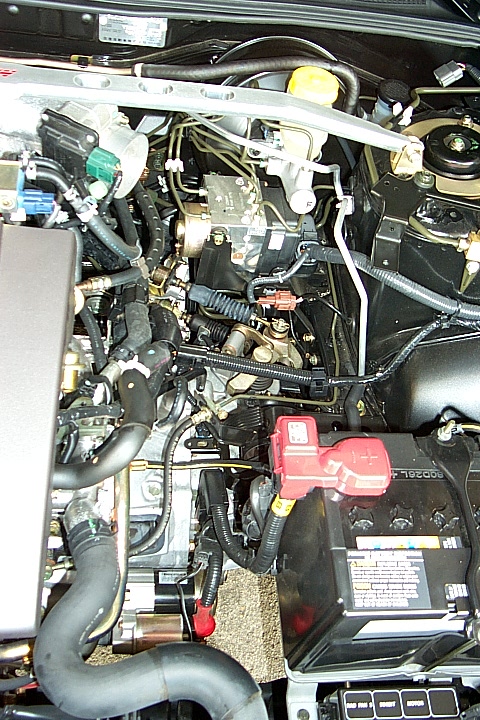
Shows the stock intake plumbing. It’s pretty complicated and has lots of pieces, but it does an outstanding job of completely silencing all intake noise.
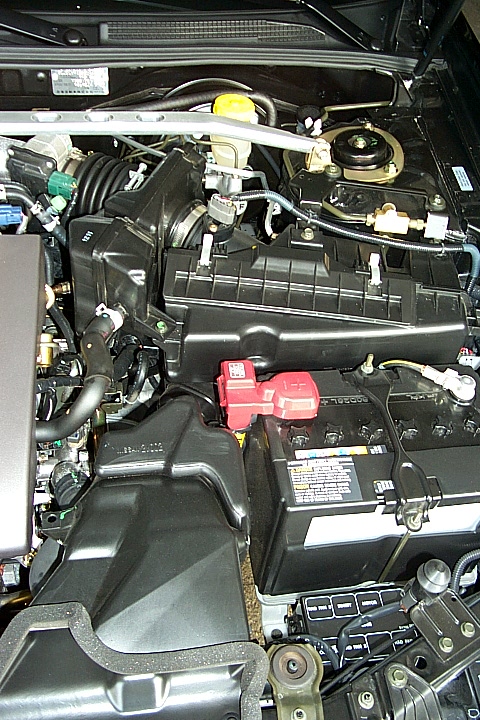
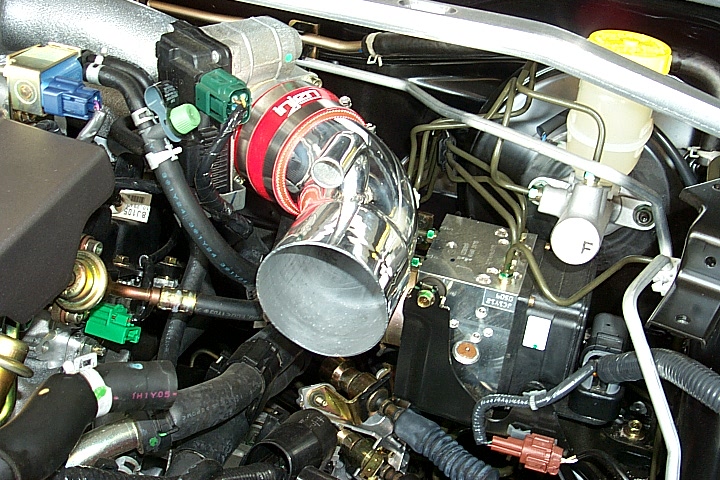
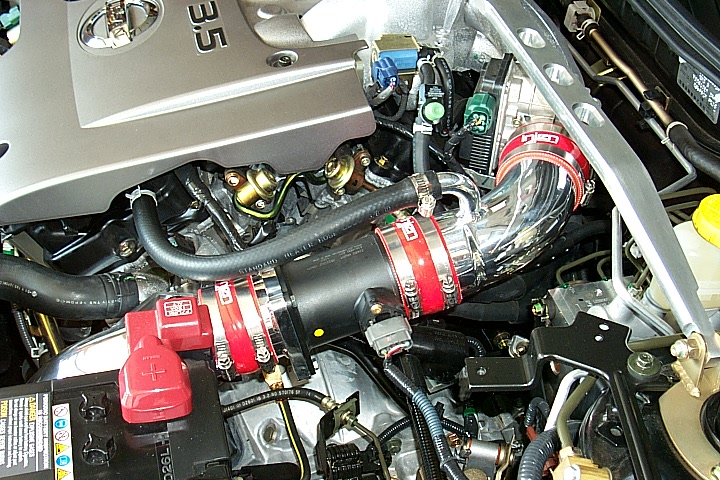
Shows the completed Injen intake installation in the engine bay. Now let’s see what’s involved…

Step 1. Remove the stock intake scoop. 3 screws, a tug and it comes right out.
Step 2. I don’t believe all 5th-gen Maximas are exactly the same, but on my car (a 2002) I had to remove this short piece of metal on the driver’s side shock tower in order to lift out the large filter box. I put it right back on after removing the box. 2 screws are all that hold this piece on.
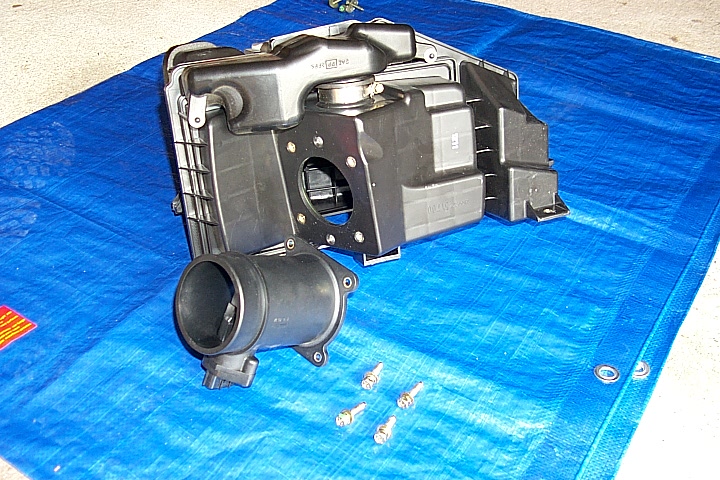
Step 3. 5 machine screws hold the filter box to the chassis, and must be removed in order to lift the box out. The clamp on the other side of the MAF sensor must also be loosened. Note the MAF sensor is still attached to the box and must be removed next.

Step 4. Remove the MAF sensor from the filter box and attach the Injen aluminum billet adapter and rubber sealer hose. The combined assembly will be used in the Injen intake tract.

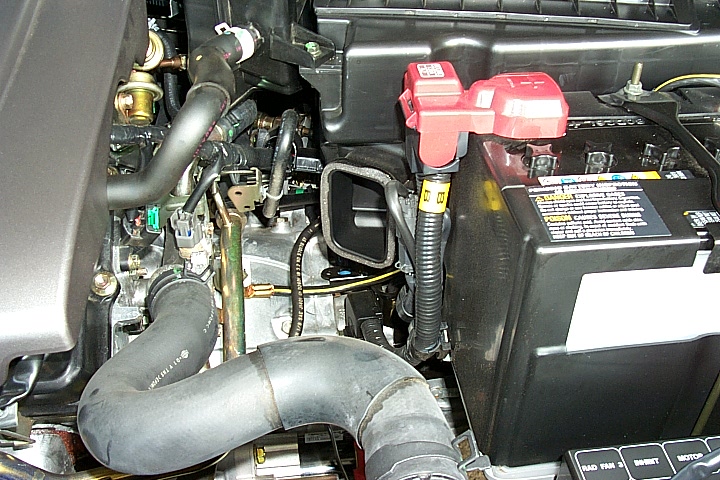
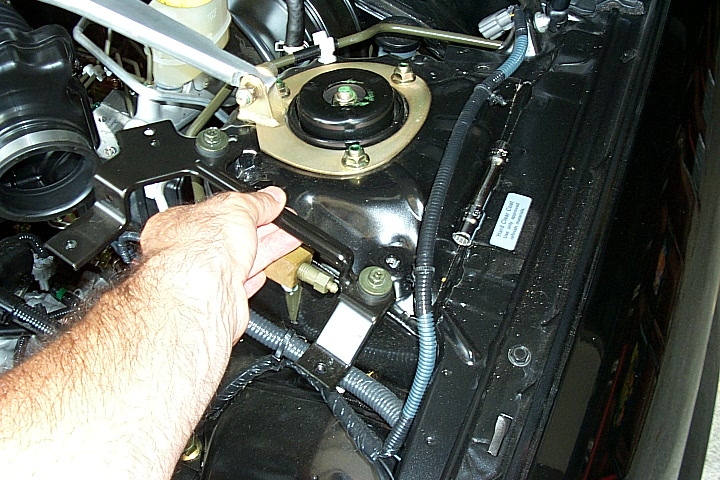
Step 5. The last piece to be removed from the stock intake plumbing is the small intake resonator. This exposes the throttle body and completes the disassembly process.
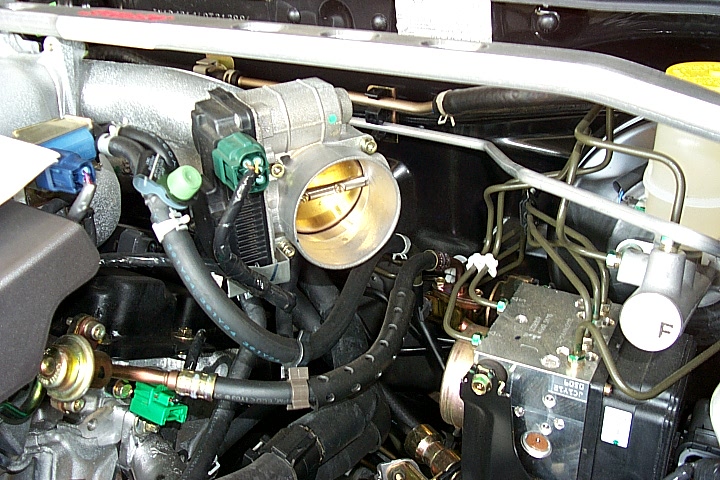
Here is the engine bay with all components of the stock intake tract removed. It is quite amazing how much space is taken up by something as simple as an intake!
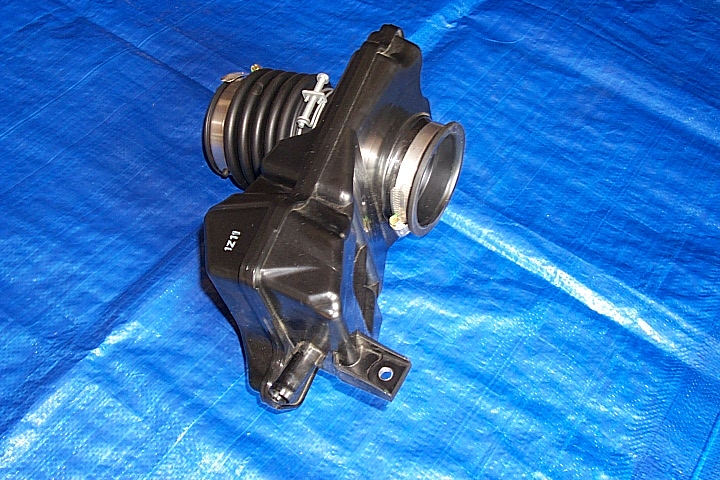
Step 6. Assembly of the Injen intake plumbing is straightforward from this point on. The elbow piece is the first to go on, attached directly to the throttle body. I recommend snugging the clamps but not tightening them all until the end, when the intake is positioned properly.
Step 7. MAF sensor assembly.
Step 8. The last piece to go on is the long filter tube plus filter, which is a little bit tricky to maneuver within the confines of the engine bay. A little patience will get you through. Last step is to reattach the red breather line. The red line seems a little bit incongruous against all of the other black hoses in the engine, and I may replace it with a black one from a local auto parts store. It is a 16-inch long 15mm line, and should not be difficult to find.
For interest purposes, here are all of the pieces of the stock intake which are removed during the Injen intake installation.
Impressions so far: Fit, finish, fitment, and ease of installation of this intake rank very high in my book. All of the pieces fit the car like they were made by Nissan, which is not always true with aftermarket parts. I like the idea that there is no cutting or drilling involved with this cold-air intake, and the filter is not inaccessible (like in the wheel well). If you want to sell the car, everything can be put back to stock easily.
Since the intake resonator is removed, I had thought this intake would be a lot louder than the Stillen high-flow I had on my ’99 Maxima, but I actually found the opposite to be true – possibly because the filter element is located far away from the passenger compartment, and this is where most of the “whoosh” from the Stillen intake came from.
Low-end power does not seem to be affected at all. Similar to the Stillen intake, the Injen is well-behaved until you stomp on it, and then it sounds, well – “interesting”. Not obnoxious or anything, but it is obvious there is something unusual under the hood. Injen claims 12-13 wheel horsepower increases, which I can neither confirm nor deny, but the butt-dyno can definitely feel the difference this intake makes.
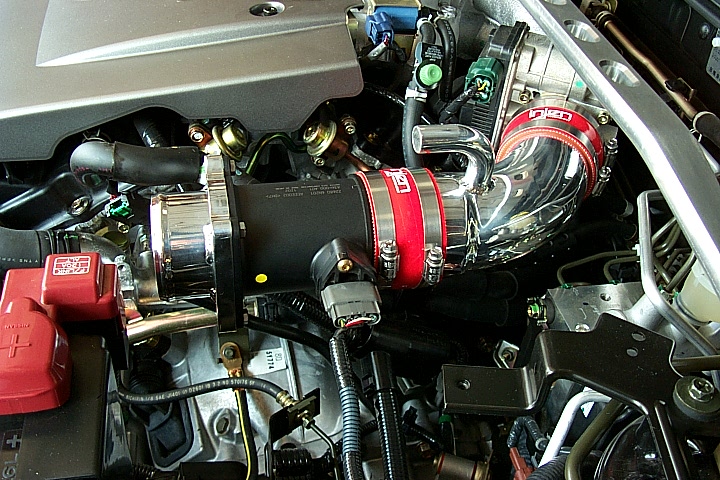
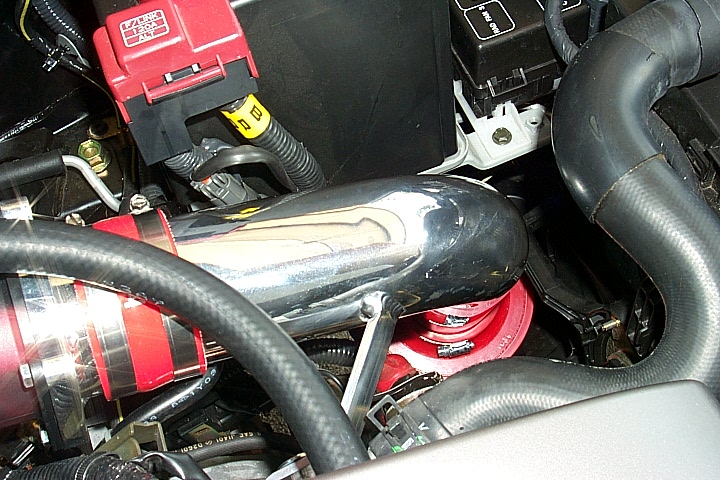
Here are a few more pictures of the completed intake. Note, the breather hose has been changed from red to black, and I secured it with a regular adjustable clamp instead of the Nissan squeeze clamp, which is really too small for the Injen. This shot shows the tubing from the throttle body, through the MAF sensor, and up to the main intake tube.
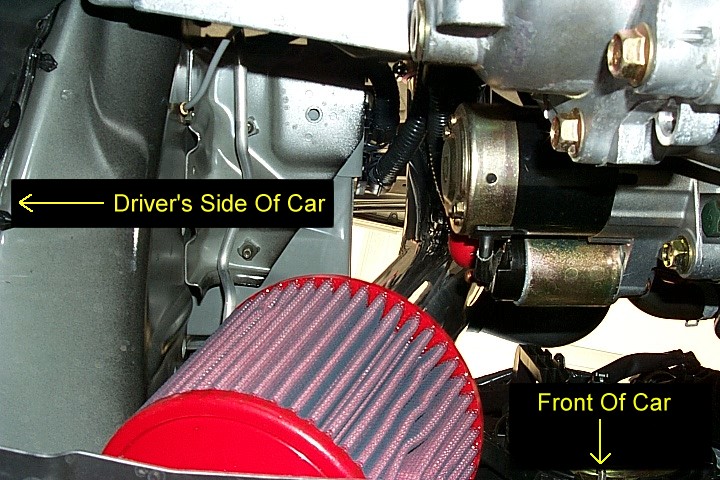
Here is a view taken from the passenger side of the car, looking to the left and down, showing the location of the filter element.
I had to break out the hydraulic jack to get this shot. It was taken from underneath the car looking straight up from the filter to the main intake pipe. The photograph is labeled for orientation purposes. As I was exploring around underneath the car, I realized that fabricating a makeshift air opening out of the existing undercover would not be difficult and would provide a direct flow of air to the intake. I will be working on this as a future project. Coming soon….
![]()
 Pulley Comparison-150x150.jpg)

Comments are closed.