

Member Credit: hamzer11 & Ghozt
1. Remove the carpet lining. This involves removing several “push pin” things. It’s pretty straight forward if you look at it.

2. Remove the wire holder clips from the bolts:

Once removed, shift the light out a little from that side
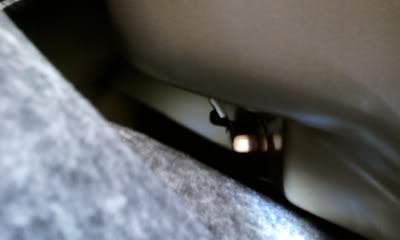
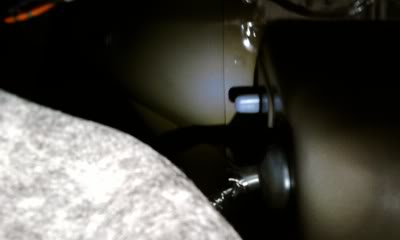
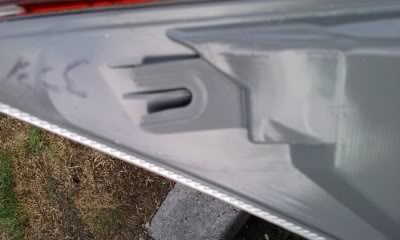
4. Carefully place a dulled (I have one that I rounded from the front for things like this) flat-head screwdriver in a towel or cloth. Wedge that near the clamping points on the light. There are two. The pictures below show the clamping pints from inside so you get an idea of where they are. There was enough space for me to get the screwdriver in and pull back while also pulling the light with my other hand. (Having someone to help pull the light is great too).
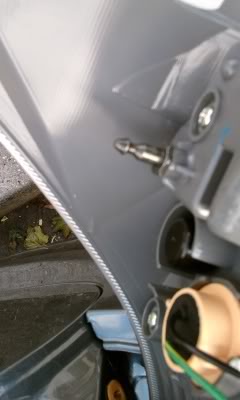
These are pins you are trying to loosen out
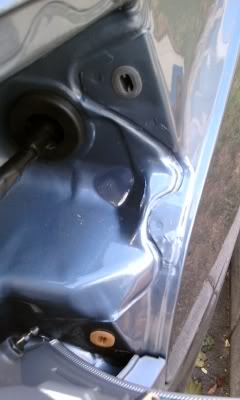
Here is where they go into the body
My passenger side light came off real easy but the driver side took some more effort. Don’t just wedge the screwdriver in one spot and pull. Keep creating a little space then wedge the screwdriver at a higher or lower spot and slowly loosen out the light.
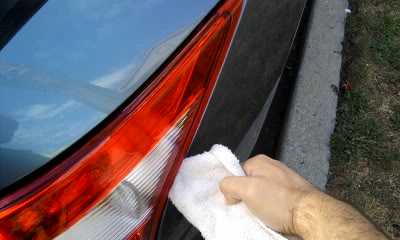
5. Pull the light out and rest it in the empty space

6. Remove and replace the bulbs you want. (no pictures – very straightforward)
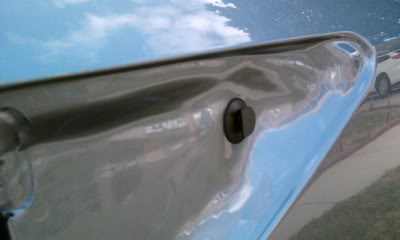
7. When replacing the light make sure to slide the guide at the corner of the light on the the pin. Here are pictures for clarification.
Additional Tips by: Nbpatel44
Make sure you remove the carpet floor and cardboard covering your spare tire. Fold any un-removable carpet into the front corner. Then, you have to remove the two big “push buttons” as I call them, for the entire rear plastic plate that hugs the back bumper on the inside. Then remove the three smaller push buttons along the edge of that same plastic piece. You’ll notice some bolts right here the trunk latch is, don’t touch those. Then to remove the actual plastic cover, you need to LIFT the pins out of their slots (there are four flat pints that point down into the ground). Then the cover should come off. I had to really rip this thing off by pulling towards myself. It seems the pins are slightly angled. You might need to pull hard to get the pins to release. You’ll see that these things aren’t really pins as they are like “stakes” that grab onto the metal frame.
For these push buttons that exist all over the carpet lining, they should involve taking a screw driver and prying up the “pin” and then the entire button afterwards. For installing, the pin cannot be pushed in when trying to push them. I used my thumb to create a small gap as I push the base of the button in. Re-installing is super easy, so shouldn’t have to force it too much.
After taking off the plastic cover hugging the rear bumper, start removing the push buttons around the edge of the carpet lining. I removed enough that I could really peel it back and gain access. There is a major plastic rivet I believe that points directly up on the trunk ceiling. That one was the hardest one to remove by far. It isn’t the same as the others, and mine was grey (if that makes a difference)
Then once you have access, pull off the plastic clips holding the wires to the bolts. Should be easy with a screw driver. On those same bolts, there should be a black nut with a wide flange, take those two off.
*Important part*
You need to unplug the wiring harness from the car. It is farther back towards the front of the car. Depress the “tongue” on the wire connector as best as you can with a screw driver as you pull (if you depress really hard it should be easy to remove – just wiggle). Sort of like an ethernet cable. The wiring connector that is not originating from the tail light should be fastened to the metal part of the car, so don’t rip that off.
Now that the wiring connection has been taken off, you’ll notice there is a rubber seal around where the wire enters the metal frame of the car from inside the tail light housing. You need to use a screw driver (or your hands) to push that rubber seal completely into the hole, making it disappear so the entire wire can be removed with the tail light. Otherwise, when you pull the tail light out, the rubber seal will stop the cable from exiting and pull on it unnecessarily.
Now you’re ready to pull the tail light out. The two bolts that are closest to the trunk opening (the ones you removed the nut and wiring clips from) can be hammered on (moderately hard) so the tail light starts to push out just slightly. I just placed a folded towel in front of the bolts and used a regular hammer. Without the towel might be okay, but it is super loud obviously. These two bolts are actually your tail light assembly so they need to be completely pushed out. I actually couldn’t hammer them out completely. I got about halfway.
Then I took a screw driver and wrapped a towel around the edge. It was a sharp screw driver so I didn’t press it too hard around the tip. Because the tail light was already slightly removed, I was able to go to the very front corner of the tail light and just lightly push it out and pull on the tail light assembly. It came out so easily. The trick to not cracking the light is not to pull with the screw driver until you’ve made progress with the hammer.
First thing I did was feed the wire from the new tail light into the car and pushed the rubber seal back through (you’ll know what I’m talking about once you see it).
Then I lined up the tail light with the two bolts, one corner slider slot, and two metal pins that are completely hidden the whole time until you remove the tail light.
I pushed in, it mounted well, I screwed the nuts back on, connected the wiring harness, did a quick lighting check to make sure I didn’t receive a faulty product. Then I peeled the carpet lining back, did the top ceiling rivet first, then the two buttons near the wheel well, then the rest near the trunk door. Then I popped on the plastic piece that covers the entire rear part of the car. Remember to line up the four flat pins that face down. Once they slide into the pin slot (you might need to pull towards you as you push down), then put the five push buttons back on (remember two of them are huge).
Done! Now that I know how to do it, it seems really easy to replace bulbs/entire tail light. I actually saved the wiring part of my old tail light (cracked) and will trash the housing.
![]()


Comments are closed.