

Member Credit: Ghozt
Here are instructions for how to remove your front bumper fascia, or what many of you simply know as the front bumper of your car.
One note: if you have the Stillen lip installed 2 of the screws on the bottom will be covered and only accessible by a small 90 degree bit set or if you drill holes through the Stillen lip. Luckily for most things that you need to remove the bumper for (like replacing bulbs or taking your headlights out) you don’t need to completely remove the bumper. You can just mostly remove it and do what you need.
Tools:
10mm socket set, Phillips bits, small 90 degree socket set (if completely removing), Flat head screwdriver, large pieces of cardboard (big enough for front bumper to sit on)
How To Remove Your Front Bumper Fascia:
Step 1. Place your cardboard underneath your front bumper so that if it were to “sag” it would touch the cardboard and not the ground.
Step 2. Pop the hood and remove your left plastic engine cover. This is held in by a small plastic “screw” up near the windshield, once you remove this you slide the plastic piece towards the front and it comes out.
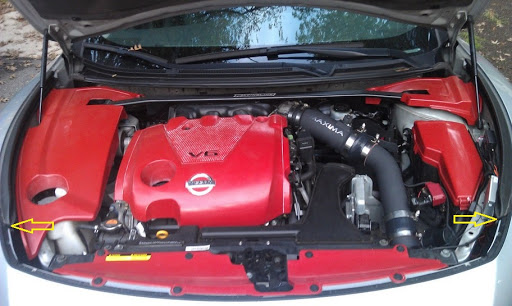
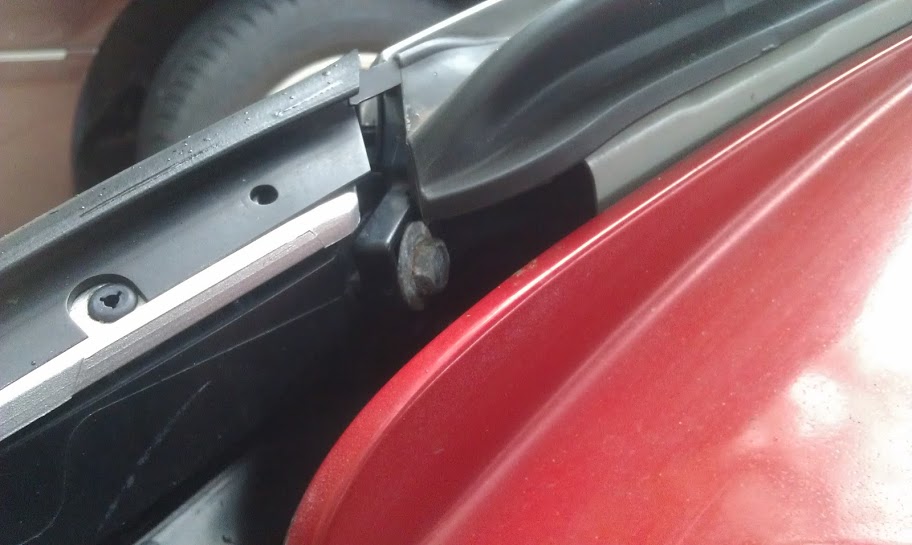
Step 3. Remove the two bolts on the top corners of the front bumper fascia. You can see where the bumper piece ends and meets the front quarter panels (about halfway down the length of the headlight). The bolts are right below there under the hood. Remove the small black plastic pieces they were holding on. Take care to note how the small black plastic pieces are oriented.


Step 4. Remove the 10mm bolts holding on area in front of the wheel. For the left side you’ll need to cut your wheels all the way to the right, for the right side cut to the left. Pull the black plastic fender liner back to expose the bolt, pointed upwards. You can just hold the fender liner to the side and undo the bolt. Do both sides and remove these bolts.

Step 5. Using your flat head screwdriver, remove the front 4 plastic fasteners holding the front engine bay cover on.

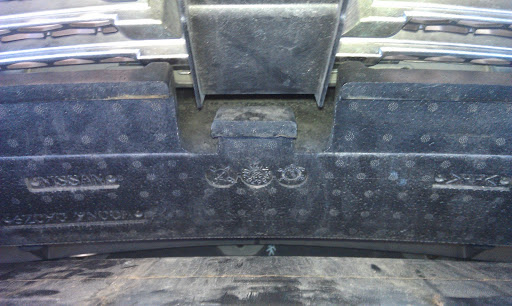
Step 6. Underneath the bumper, use your flat head screwdriver to remove the 6 plastic fasteners holding the black plastic to the bumper. You may or may not have to jack the car up for this step depending on how well you can get underneath your car. If you need to completely remove your bumper there are two additional phillips screws you need to remove. Note: if you have a Stillen lip they are difficult to get to and require a small 90 degree socket set.

Step 7. Pull off the side pieces by just popping them off, they’re held on now by clasps.


Step 8. Push down on the upper arms of the bumper fascia to release a plastic latch, then pull the bumper forward a little

Step 9. Pull the side pieces forward more and they should pop off from their clasps underneath the headlight. Do both sides.

Step 10. Slide the bumper forward, making sure to push down on the upper part slightly so the plastic tabs won’t lock the bumper into place. A good place to hold it is right underneath the top edge of the lower grill as you pull it out and set it down gently on the cardboard pieces you placed underneath the bumper in step 1.
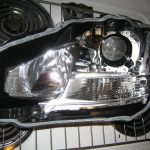
That’s it you are done. You should have access to remove the headlights now to replace bulbs, or to open them up. Follow the first part of the following open and bake your headlights DIY to see how to remove the headlights :
How To Re-install Your Bumper Fascia:
Step 1. Look down into the bumper fascia, you will notice a styrofoam piece that lines the width of it. Make sure this piece is pulled forward and in place as it can fall out when removing the fascia. It needs to be in place for the bumper fascia to fit back on the car.
Step 2. Lift the bumper up and rest it onto the front edge of the engine bay with the plastic engine cover above it, a good place to grab is the top edge of the lower grill area. and fasten the 4 plastic fasteners you you removed from the engine bay cover. Use the plastic fasteners to hold the bumper in place.
(updated pic coming)
Step 3. Push on the body lightly beneath the headlight so the clasp locks, then push on the sides of the bumper so the clasps lock on the side as well so the bumper is basically back on the car minus all the bolts and plastic fasteners from the bottom. If you are having trouble make sure the foam block inside the bumper is in place and the plastic hooks at the top of the bumper fascia are inserted correctly
Step 4. Re-attach all the plastic fasteners underneath the bumper fastening the black undercarriage cover to the bumper.
Step 5. Re-insert the two small black plastic pieces that came out of the engine bay. You’ll notice they have a very specific orientation in how they go. Insert them and then attach the 10mm bolt to hold the plastic in place. Push forward on the bumper fascia in this area while tightening the bolt.
Step 6. Re-attach your last 2 10mm bolts in the fender well to secure the last of the bumper to the car. Push your black fender liner back into place.
![]()

Comments are closed.