

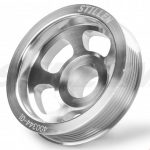
Member Credit: Stillen
Tools/Materials required:
- Assorted wrenches/sockets
- Pulley puller
- Pry Bar
- Torque wrench
- Anti-seize
- Factory repair manual
- New belts (Gates K070653)
Notes: Please refer to the factory service manual for additional information on removal of additional items.
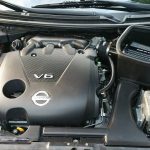
Remove the crankshaft pulley as follows:
Step 1. Disconnect the battery, raise the front of the vehicle and support with jack stands.
Step 2. Remove the passenger front wheel
Step 3. Remove the splash shield covering the crank pulley and remove drive belts per factory manual.
Step 4. Remove starter motor and lock the ring gear in place.
Step 5. Loosen crankshaft pulley bolt until it is ¼” from the surface of the pulley. Do not remove crankshaft pulley
bolt completely as it will be used as a supporting point for puller.
Step 6. Using a suitable puller, remove the crank pulley.
Install your new crankshaft pulley as follows:
Step 1. Lightly coat the inner diameter of the crankshaft pulley with anti-seize. Install crankshaft pulley, taking care not to damage front oil seal.
Step 2. Holding the ring gear, initially tighten crankshaft pulley bolt to 33 ft-lbs.
Step 3. Place a paint mark on the crankshaft pulley (a) aligned with the one of the angle mark on the crankshaft bolt (b). Tighten the bolt until it has turned 90 degrees and the next mark on the bolt is aligned with your paint mark.

Step 4. Reinstall starter, new belts (tightened per factory manual), splash shield and wheel. Lower the vehicle and reconnect the battery.
Step 5. DONE! New belts will need to be re-tightened after a couple of hundred
miles.


![]()
Comments are closed.