Member Credit: BlackSpeed
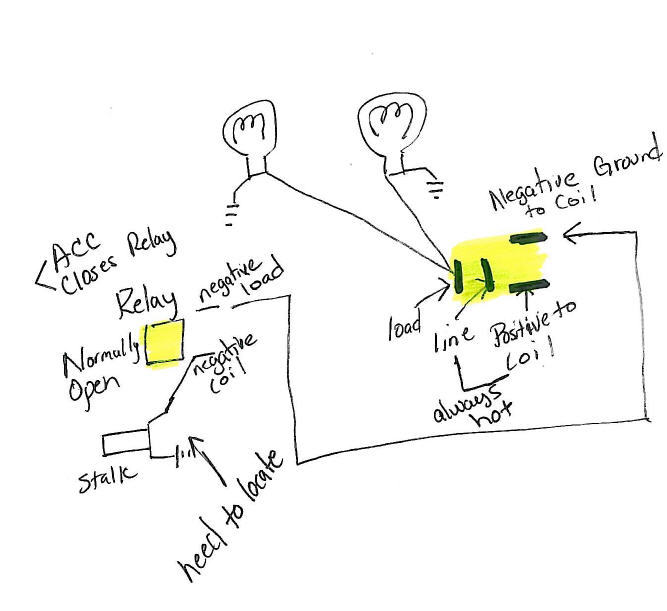
The key to this install is find the wire (negative ground) on the stalk that controls the lights. Here is the deal, the ground isn’t active until the headlights are activated in return provides the ground for the coil on the relay. The two positives on the relay are always hot. We can get past that by putting a relay on the stalk that activates ground when the driving/fog light switch on the stalk is activated. (Please beware that the lights will be on when the high beams are activated).
Relay Location
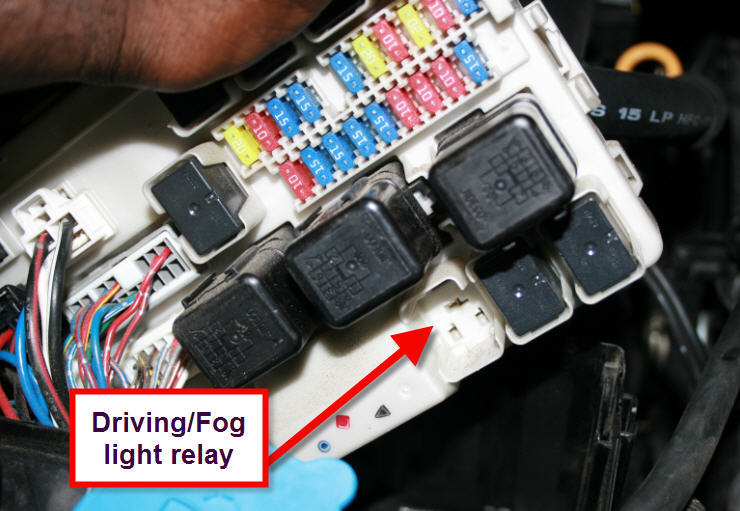
Next, the relay layout.
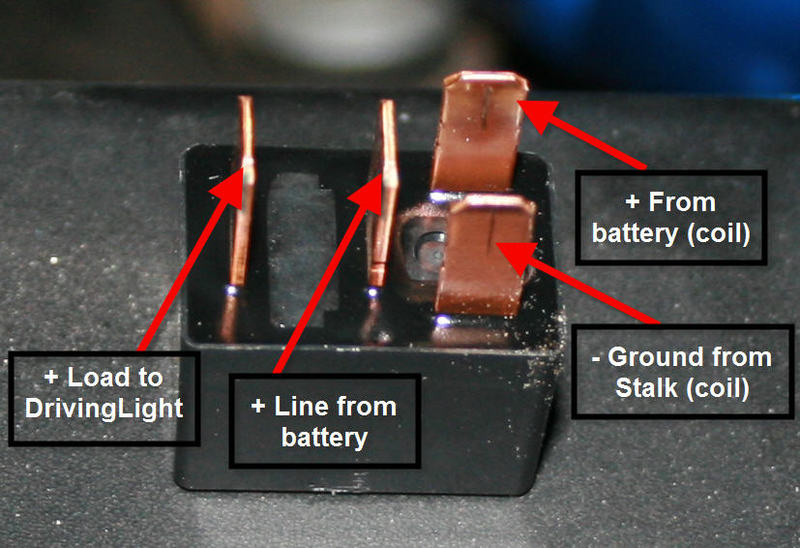 Here is a small outline of what has been and will be done:
1. Locate the Relay (Done)
2. Fab a 1/2 (Heat shrunk) wire extension from the relay to the original
socket (with female recept connected to the relay and male that plugs
into the original relay socket. The relay holder is soldered into the
board so you cant snip or tie a wire into the ground peg of the coil
(Done)
3. Find the two wires on the stalk that goes to/from light controller. Snip
those two wires and ground one. Connect the other to the negative
(Coil) of the relay that will be placed between the ground of the stalk
and main relay.
This is what will happen:
a. You turn the ignition on. The ground is closed going to the
main relay but not activated until you twist the stalk,
grounding the coil of the main relay which inturns
make the fogs pop on. In that moment, you will then clean
your pants after all the excitement that you will experience
for completing this project
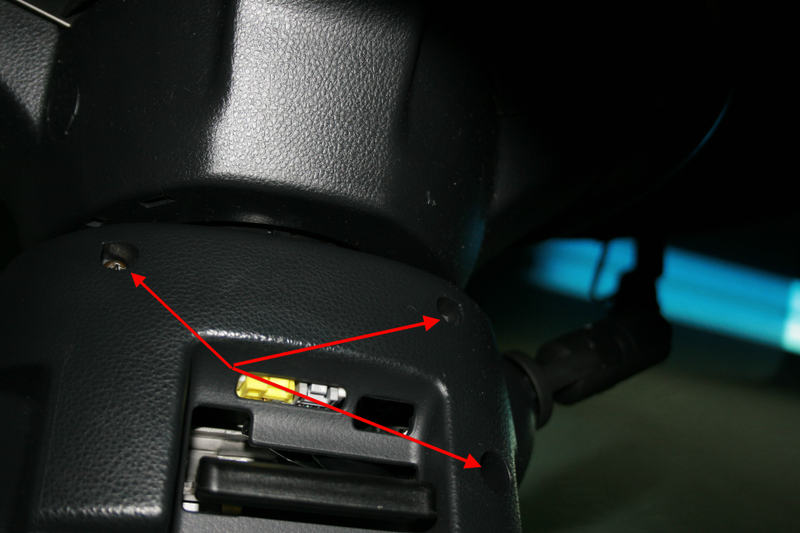
1. First, remove the three screws from underneath the steering column cover
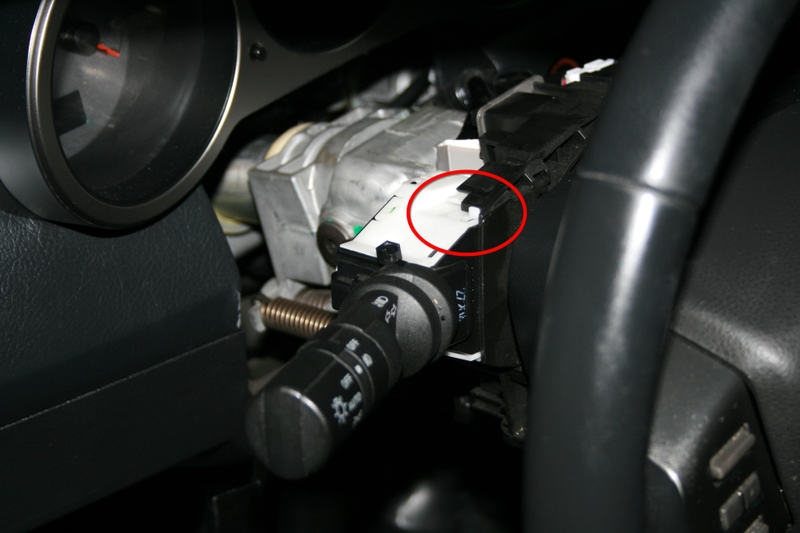
2.Next, press the tab on the top and bottom of the stalk and pull towards the door
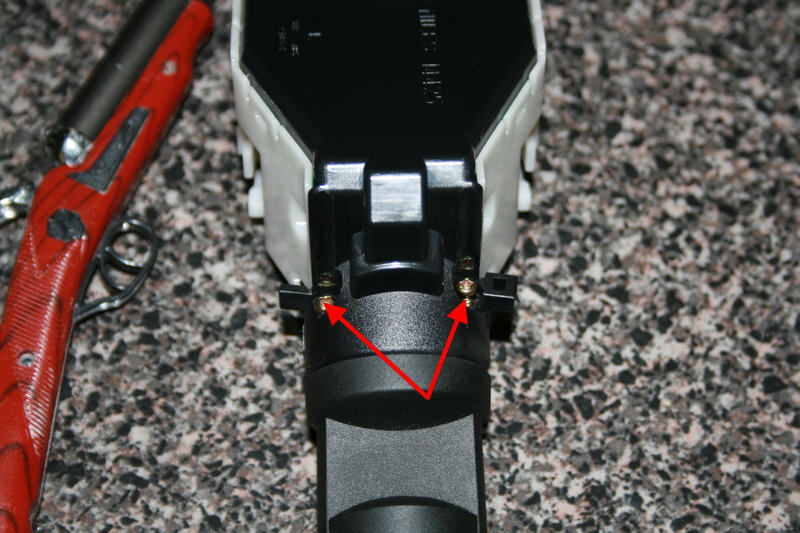
3.Remove the two screws from the stalk cover and lift the cover from the stalk
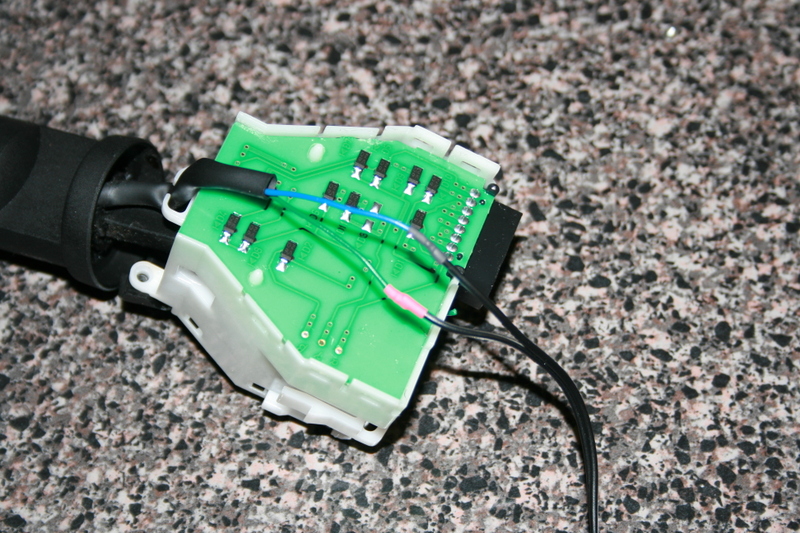
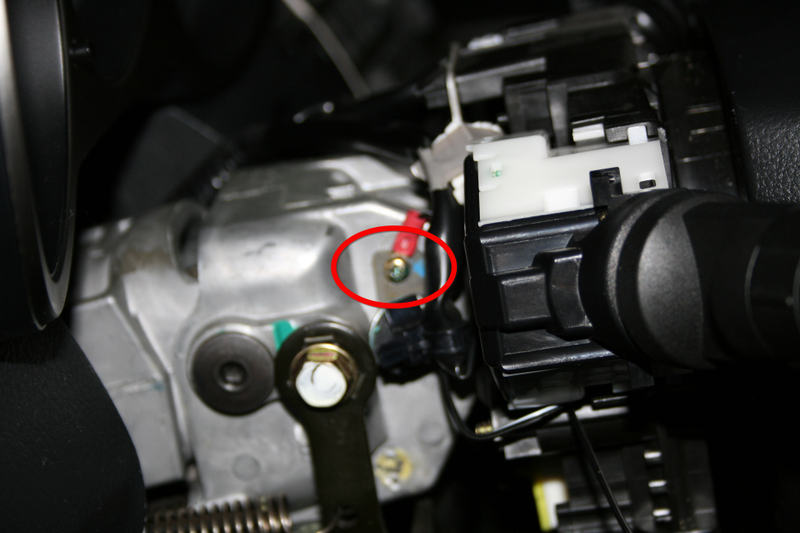
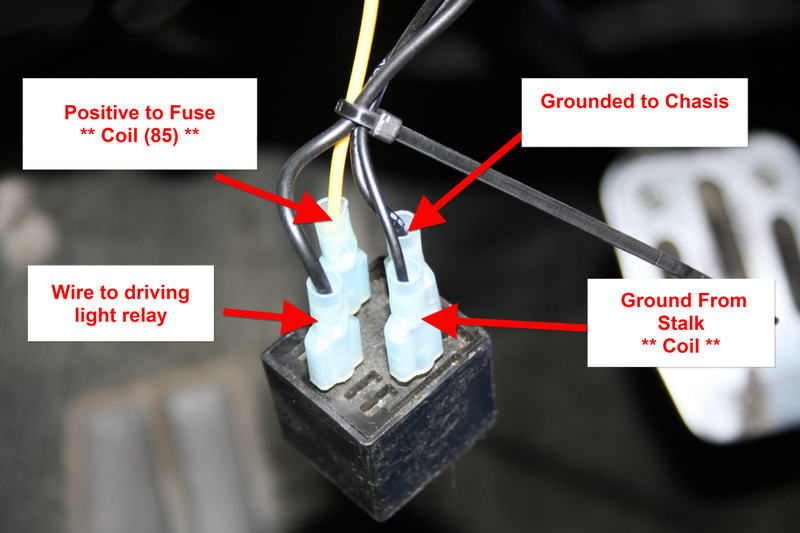
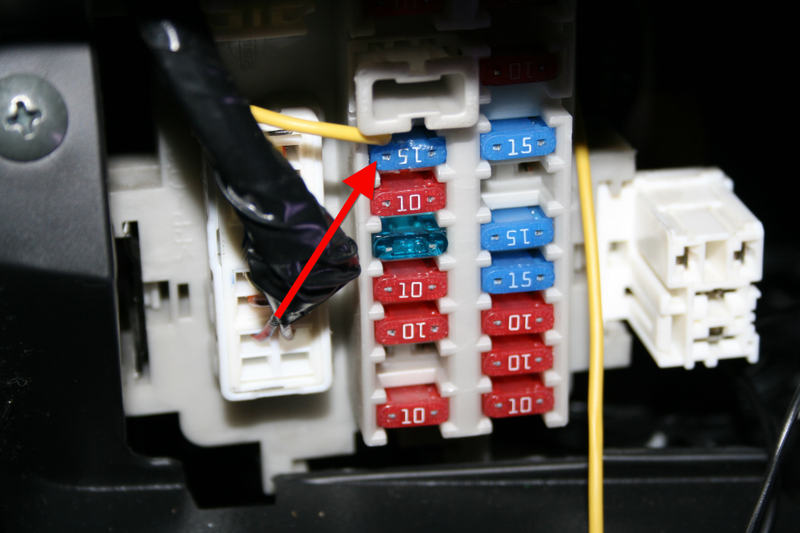
5. Next, you would stage your internal relay and attach wires as illustrated. I used a relay to only allow me to turn the fog/driving lights on while the key was switched to either the ACC or the on position due to the fact there is no alert to let you know if the lights are on if you turn the car off (drained battery)

6. Here is a picture of where the fog/driving lights relay is located in the fuse box under the hood.
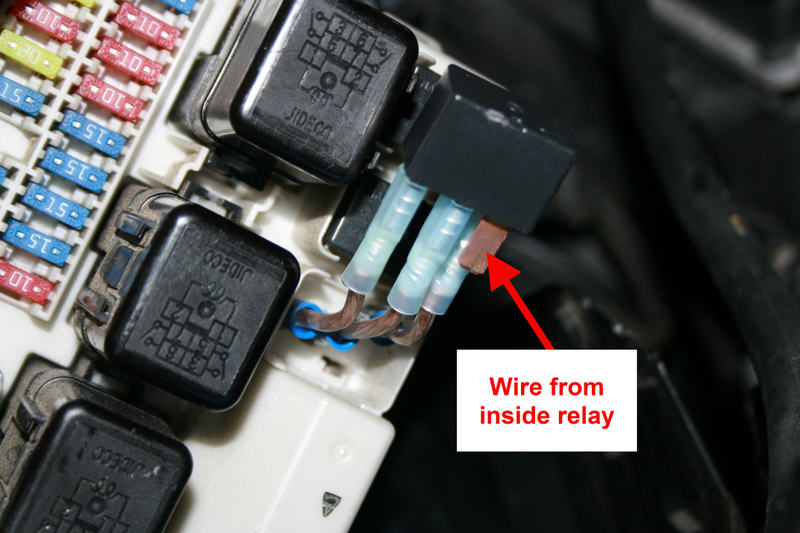
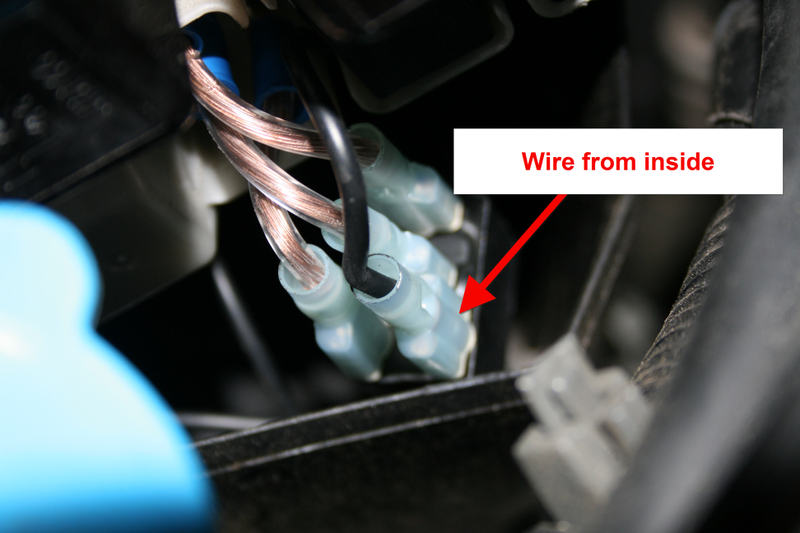
I attached extensions that stretched from the relay to the relay holder. I did this because unlike the other generations, the fuse holder is soldered on the circuit board, not allowing you to tap into the wires.
4. Snip the Blue and green wire (04 6th gen) and solder one wire that will reach the relay in the fuse box and another that will be grounded to the column (shown in second picture.
![]()


Comments are closed.