

Community Member Credit: Robert Mandru
Important Note: These brackets for only for the front calipers. The rear Akebono calipers are plug-n-play but only for the 04+ Maximas/ 05+ SE-R Altimas.
Installation Instructions
Each kit comes with the following:
- Four M14x45mm long bolts (Note: these bolts will stick out beyond the adapter to mount M14x1.5mm nuts if desired [recommended].)
- Four M14x55mm long bolts
- Four washers (if nuts are being used with the kit)
- A pair of Grade 6 aluminum calipers
Tools you will need:
- 22MM sized socket or wrench
- A fine file or fine burr drill bit (if modification required)
- Torque wrench
STEP 1
Due to casting variation of the Akebono calipers, some slight modification may be required to the adapter in order for it to clear the body of the caliper.
Using your 55mm long bolts, thread the adapters to your Akebono caliper until seated. The adapter is mounted to the caliper with the bottom of the “L” shape of the adapter oriented to towards the bleeder while the machined notch sits towards the caliper.
Verify that the notched portion clears the body of the caliper. If it does not, mark the area of contact and remove the appropriate amount of material until cleared. (Take away about 1-2mm of material at a time at approximately a 45-degree angle to match the caliper body angle. Re-mount to verify clearance. Repeat if necessary).

STEP 2
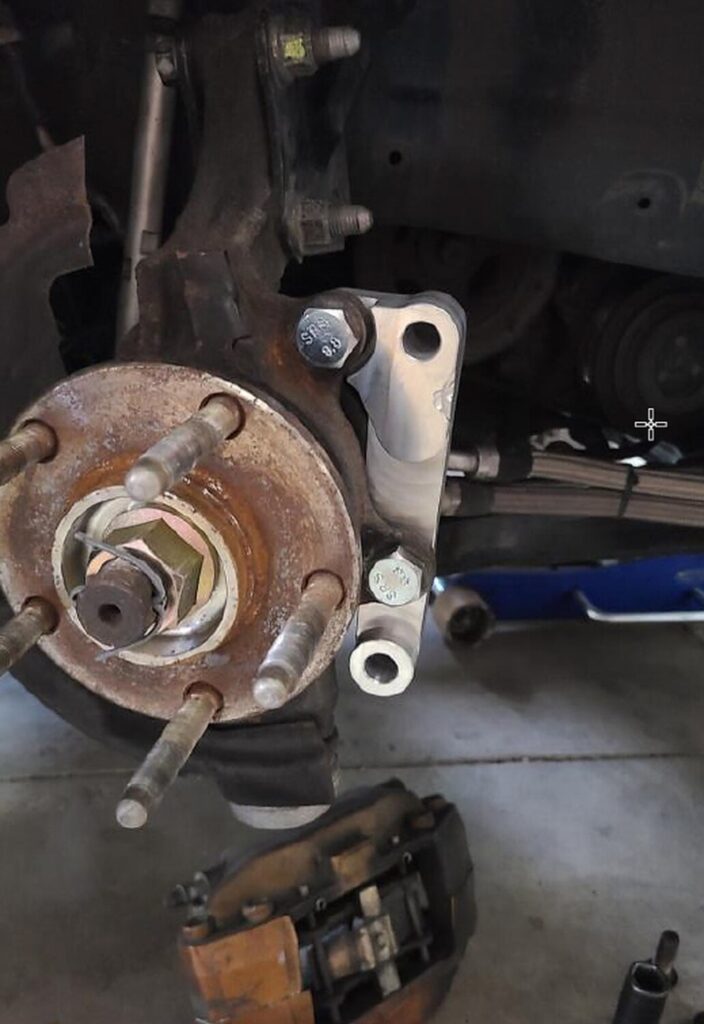
Mount your adapter to your spindle. The adapter sits outside of the spindle mounting holes while the 45mm long bolts mount from the inside of the spindle towards the body of the car. Hand thread one 45mm long bolt by only a couple of rotations. Take your other 45mm bolt and repeat for the other mounting point while extending the adapter away from the spindle. This will allow for extra pitch and play to align your second bolt to the threads of the adapter.
STEP 3
Once both bolts are comfortably thread-started into the adapter, fully thread both bolts through and tighten to OEM specifications.
NOTE: DO NOT FORCE BOLTS ONTO STARTING THREADS OF THE ADAPTER! This may result in damage or cross-threading to the aluminum adapter.
Your bracket will look like this mounted to the vehicle:
STEP 4
Repeat all steps to the opposite side of your car. Mount your Akebono calipers using the supplied 55mm long bolts. Tighten to OEM specifications. NOTE: Part of the dust shield will need to be trimmed in order for the caliper to be mounted. Use metal shears or a cut-off wheel with the appropriate tool to complete this step.
STEP 5
Double-check all fasteners for tightness prior to driving your vehicle. Test drive and enjoy!
 *** This kit is to be used for off-road use only. No warranty is implied or expressed. Purchaser assumes all liability. Tighten all fasteners to OEM specifications. ***
![]()

Comments are closed.