Tag

Electrical

Browsing

Community Member Credit: Eddy

Both my AC and heat stopped blowing air at the time same. Since I had NO AIR blowing at all, I suspected it was the blower motor itself. Usually, when it’s the resistor, you can get air blowing on speed setting #4.

I ordered an OEM-used blower motor off eBay for $30 bucks vs aftermarket. Upon inspecting the blower resistor itself, it was very corroded and dirty. So I decided to order a new blower resistor as well.  Also, you need to ensure you get the correct resistor as there are differences between Digital Climate and Manual Climate controls.

I replaced both and everything started working again. I really only needed to replace the blower motor. But since I saw the condition of the resistor, I decided to change that as well. Now have cold air and hot air. Also, while you’re at it change the CABIN FILTER too. 

Important Note: You should check the 2 blower motor fuses under the engine bay to ensure they are not blown.

2000-2003 Manual Climate Control Blower Resistor

  • Part #: 27150-2Y910
  • Nissan OEM Price: Approx. $30.00 (RECOMMENDED OPTION or USED OEM WORKING PART)
  • After Market Price: Approx. $35.00

Manual Climate Control Reference Photo

2000-2003 Digital Climate Control / Navigation Blower Resistor

  • Part #: 27761-2Y000
  • Nissan OEM Price: Approx. $80.00 (RECOMMENDED OPTION or USED OEM WORKING PART)
  • After Market Price: Approx. $15.00

Digital Climate Control Reference Photo

Digital Climate Navigation System Control Reference Photo

Difference Between OLD Blower Resistor vs eBay (Old on Right)

New Blower Resistor

2000-2003 Blower Motor Fan Assembly Unit (Same for Manual / Digital / Navigation)

This is what turned out to be my issue.

  • Part #: 27220-2Y910
  • Nissan OEM Price: Approx. $145.00 (RECOMMENDED OPTION or USED OEM WORKING PART)
  • After Market Price: Approx. $35.00

Helpful Video

Reference Photos

Loading

Community Member Credit: Eddy

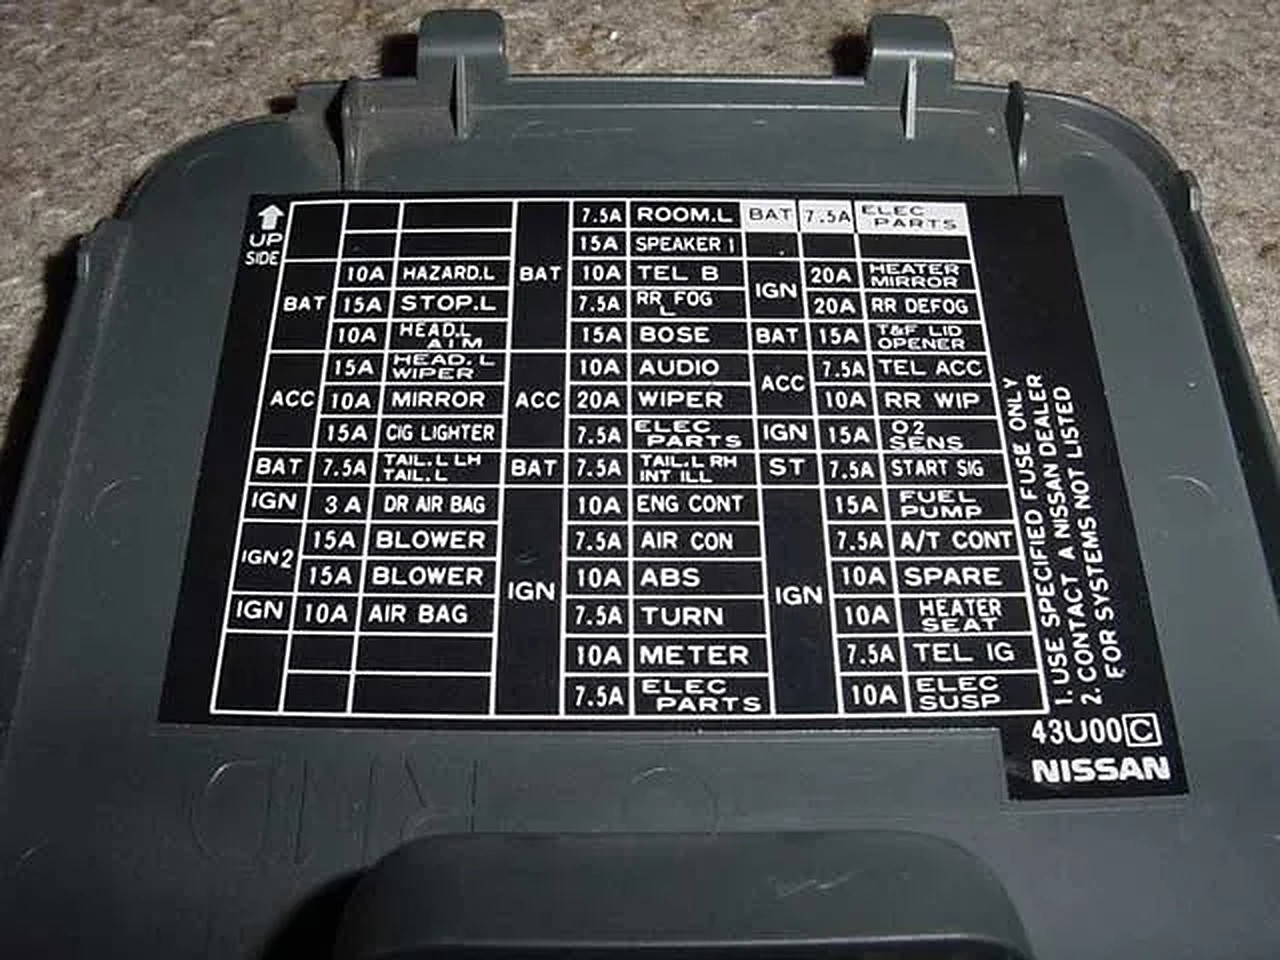
I started having issues with my rear trunk latch life gate on my 2004 Infiniti FX35. It just wouldn’t open. For some time, I was just removing the trunk 15A fuse where it would reset the latch. It would eventually open. But this ultimately got worse. I got tired of taking the fuse in and out whenever I wanted to open the trunk. Also, I really didn’t want to spend $100+ bucks on the part to fix it, so I figured I’d try whatever was out there.

So I tried the solution in this write-up. I won’t take all the credit because I found some info on one of the FX35 forums (member Jim Lee). It took me about 20-30 minutes to do and WOW, everything works again. It’s been a few days now and all works fine. Basically, you turn your motor back to brand new again by following this how-to. The motor has something called a ‘commutator’. It needs to be super clean. When I took my motor out, it was very dirty and black. It is the common issue of the brushed motor. You can Google “Commutator” to learn more about it. 

Update 4/9/2021: This officially resolved my issue. All is good and saved me a bunch of $$$. 

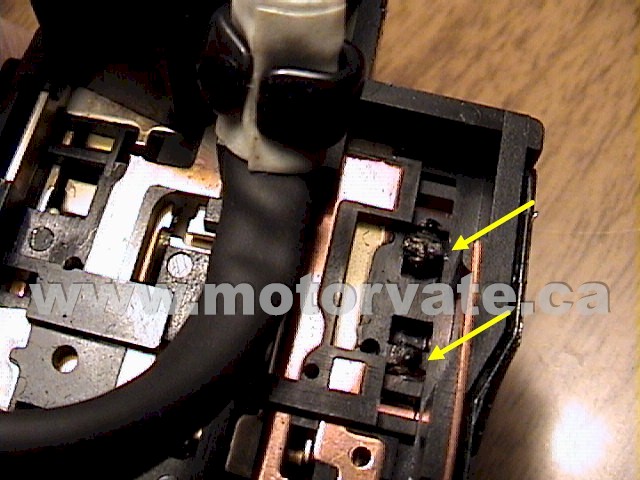
Commutator Reference Photo:

Summary: I would recommend try this how-to. It will save you a lot of money and it’s very simple to do. The part is about $100 bucks and labor may be another $100 bucks. This was FREE to me and just took 20 minutes of my time. Plus you learn a little about how these things work.

Nissan OEM Part Replacement Information

If you are looking to just replace and not attempt this how-to, below is the information you need to order the correct part for your FX35. Please cross-check the part number to ensure it works for your generation FX35.

Part Description: Motor-Closure, Back Door
Part Number: 90554-AQ000
Price: $124.03

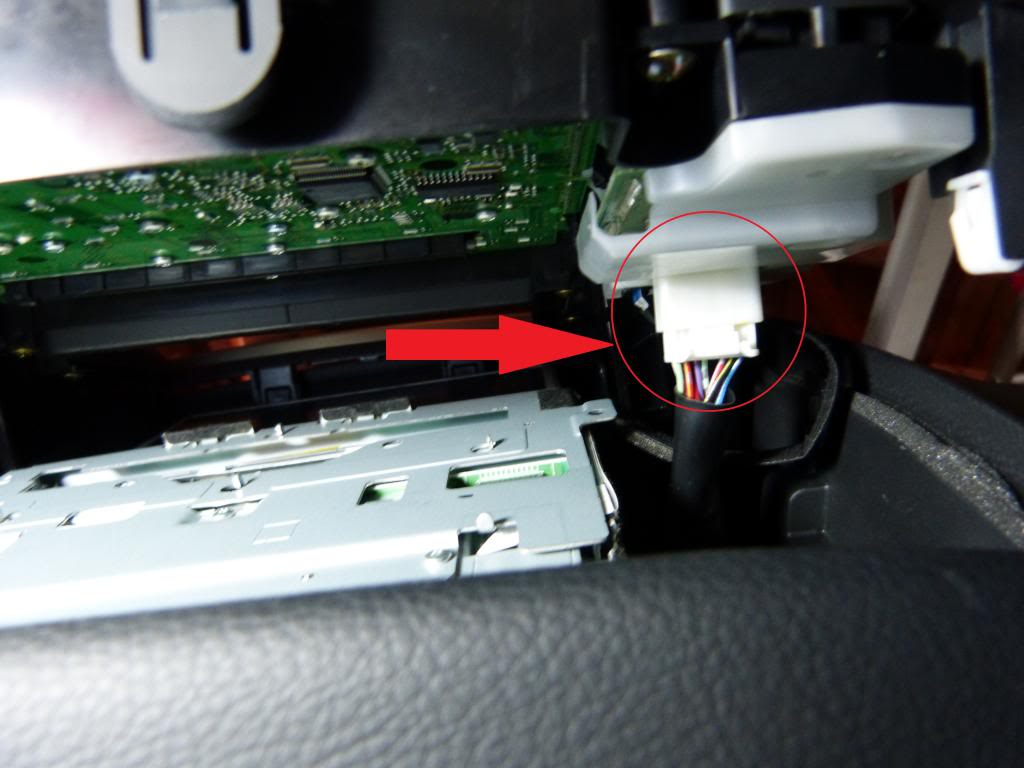
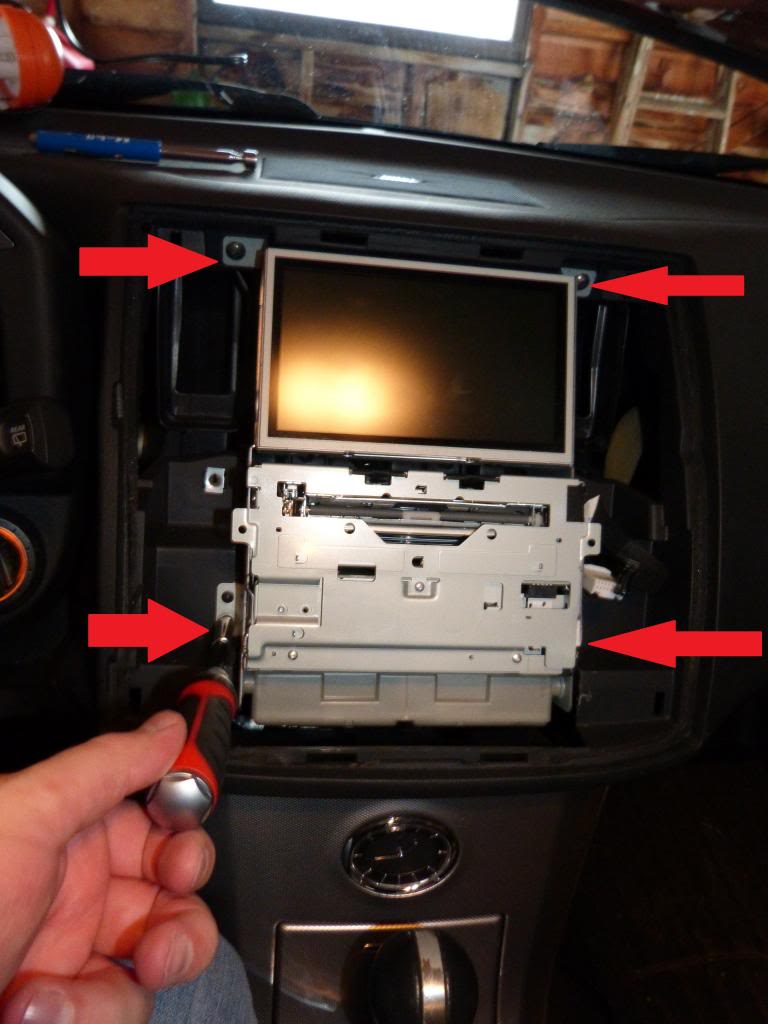
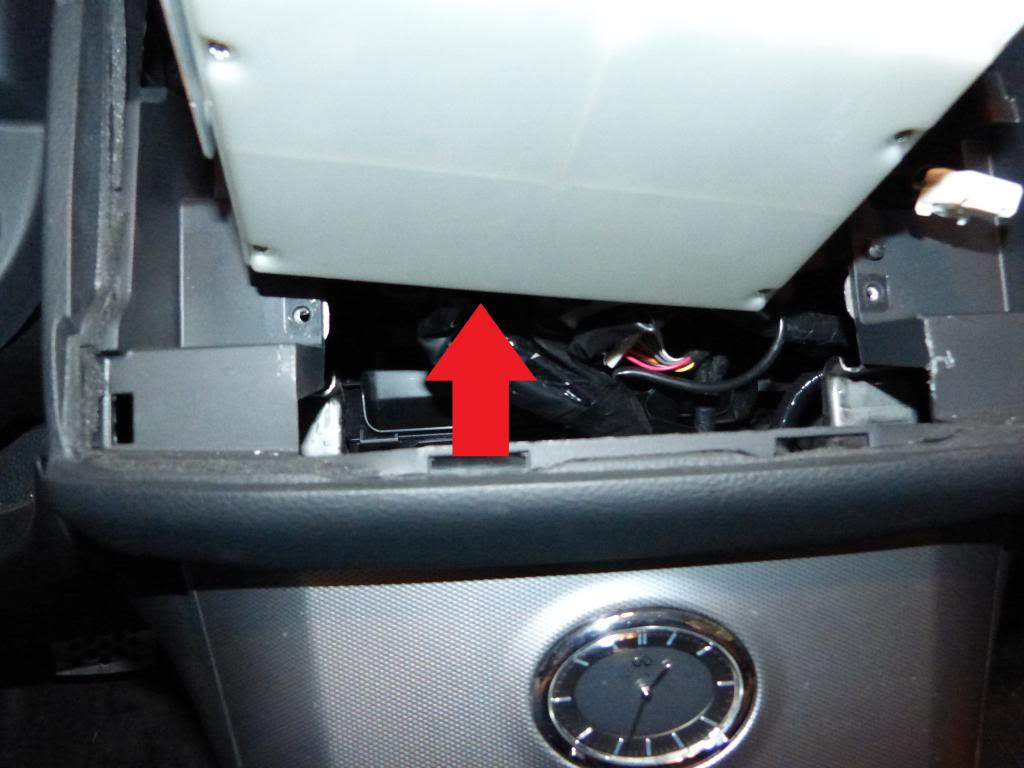
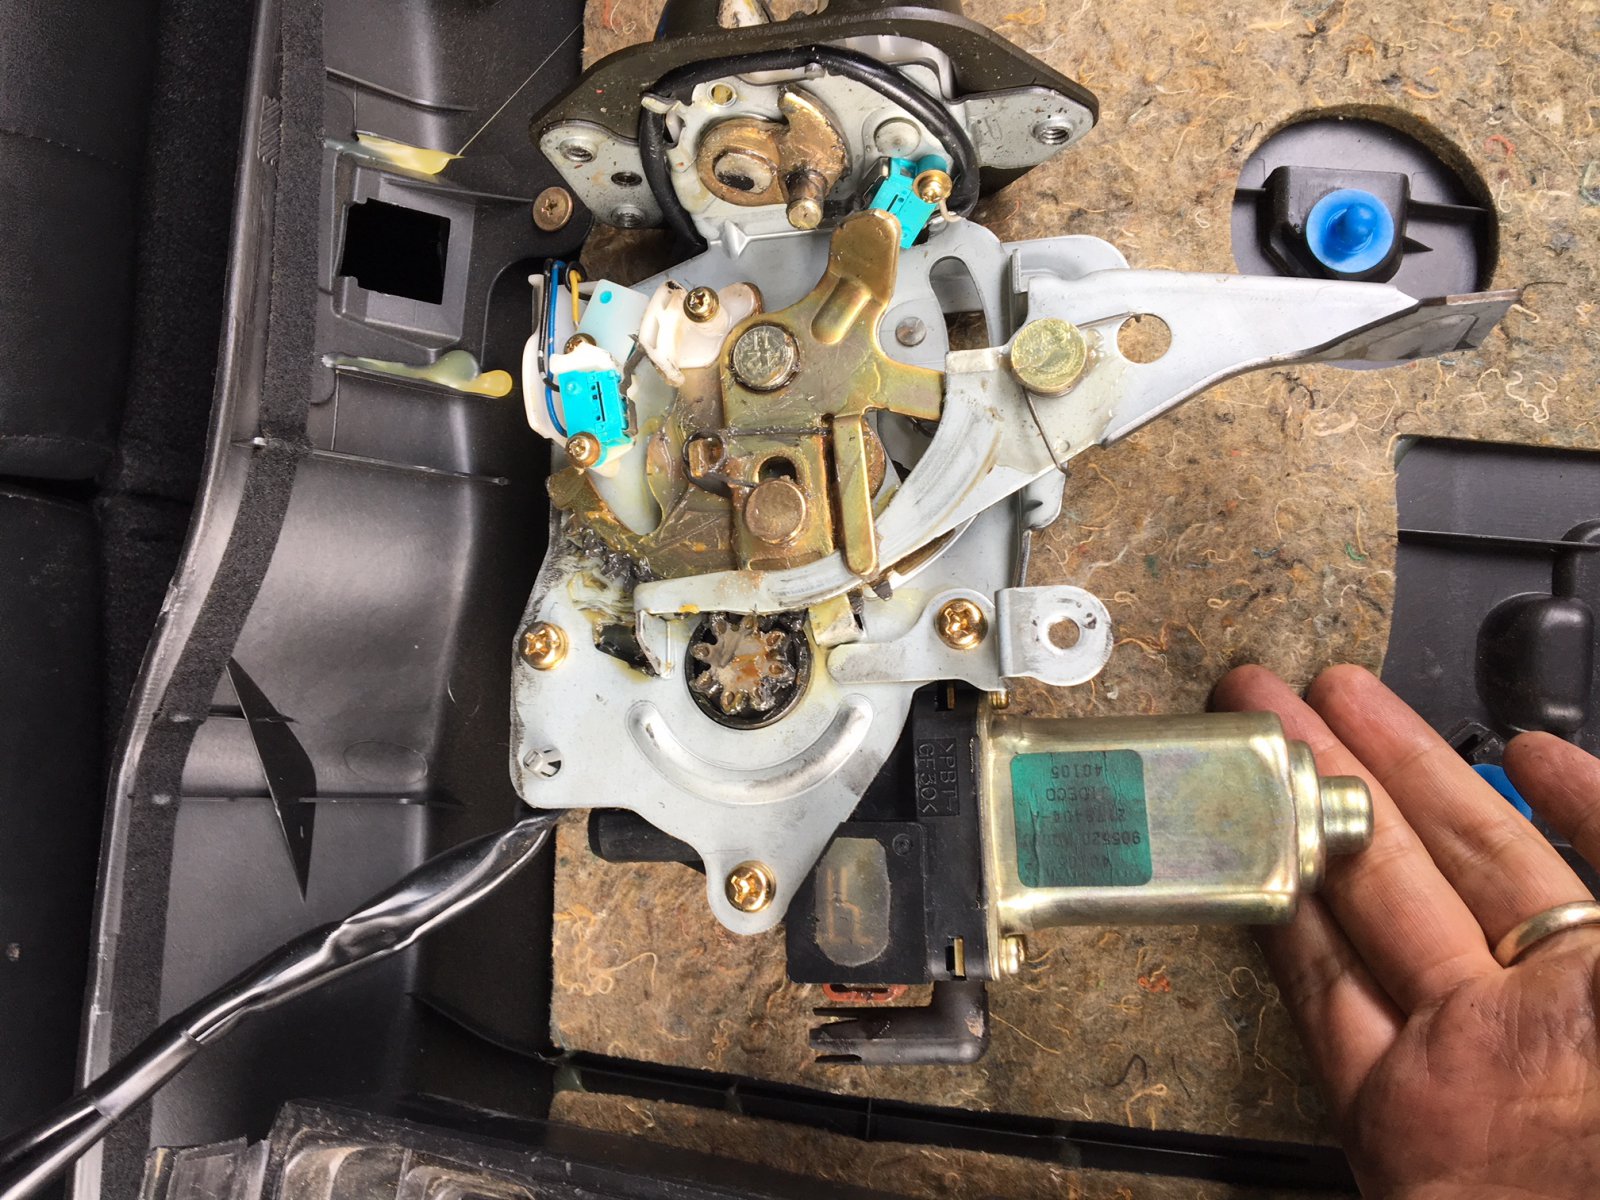
This video below will show you how to remove the plastic covers to expose and take out the latch motor.

How to Fix and Clean Motor “Commutator”:

Original Photo Credit: Jim Lee via FX Forums

After doing the above and taking out the motor, you can follow the steps below:

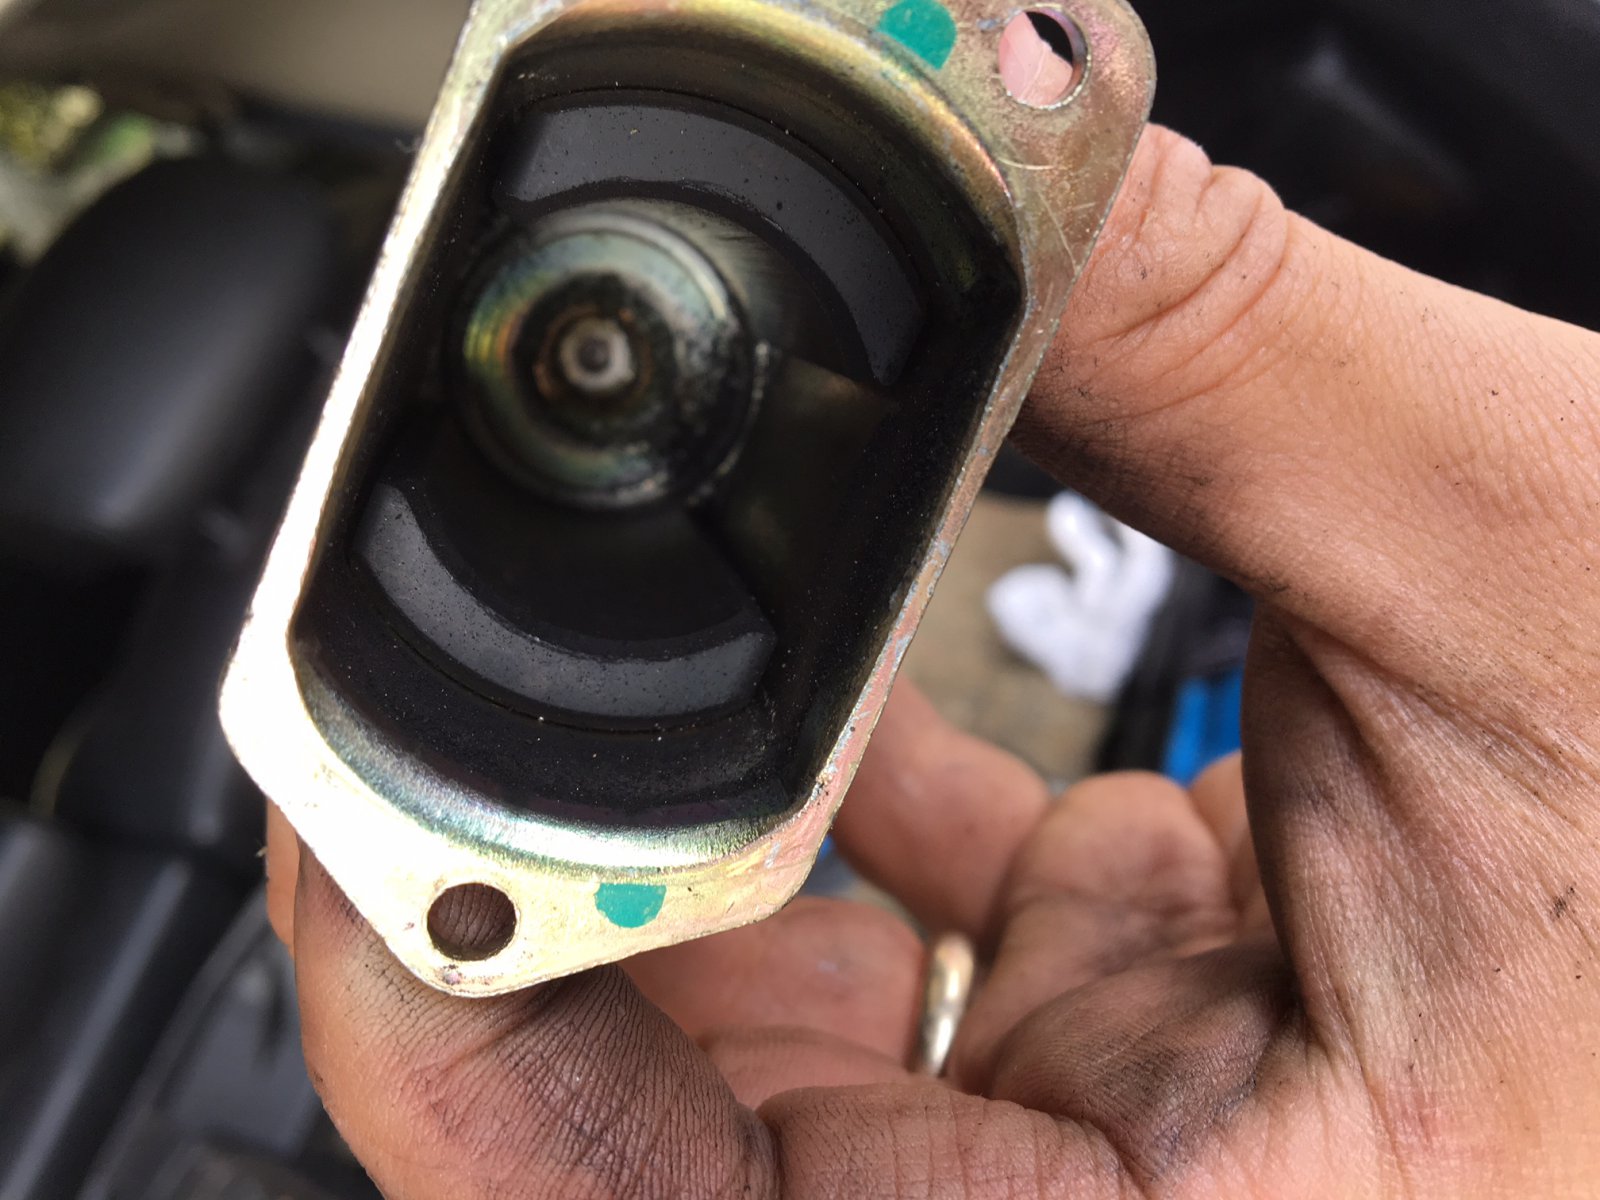
Take off the 3 screws on the motor.

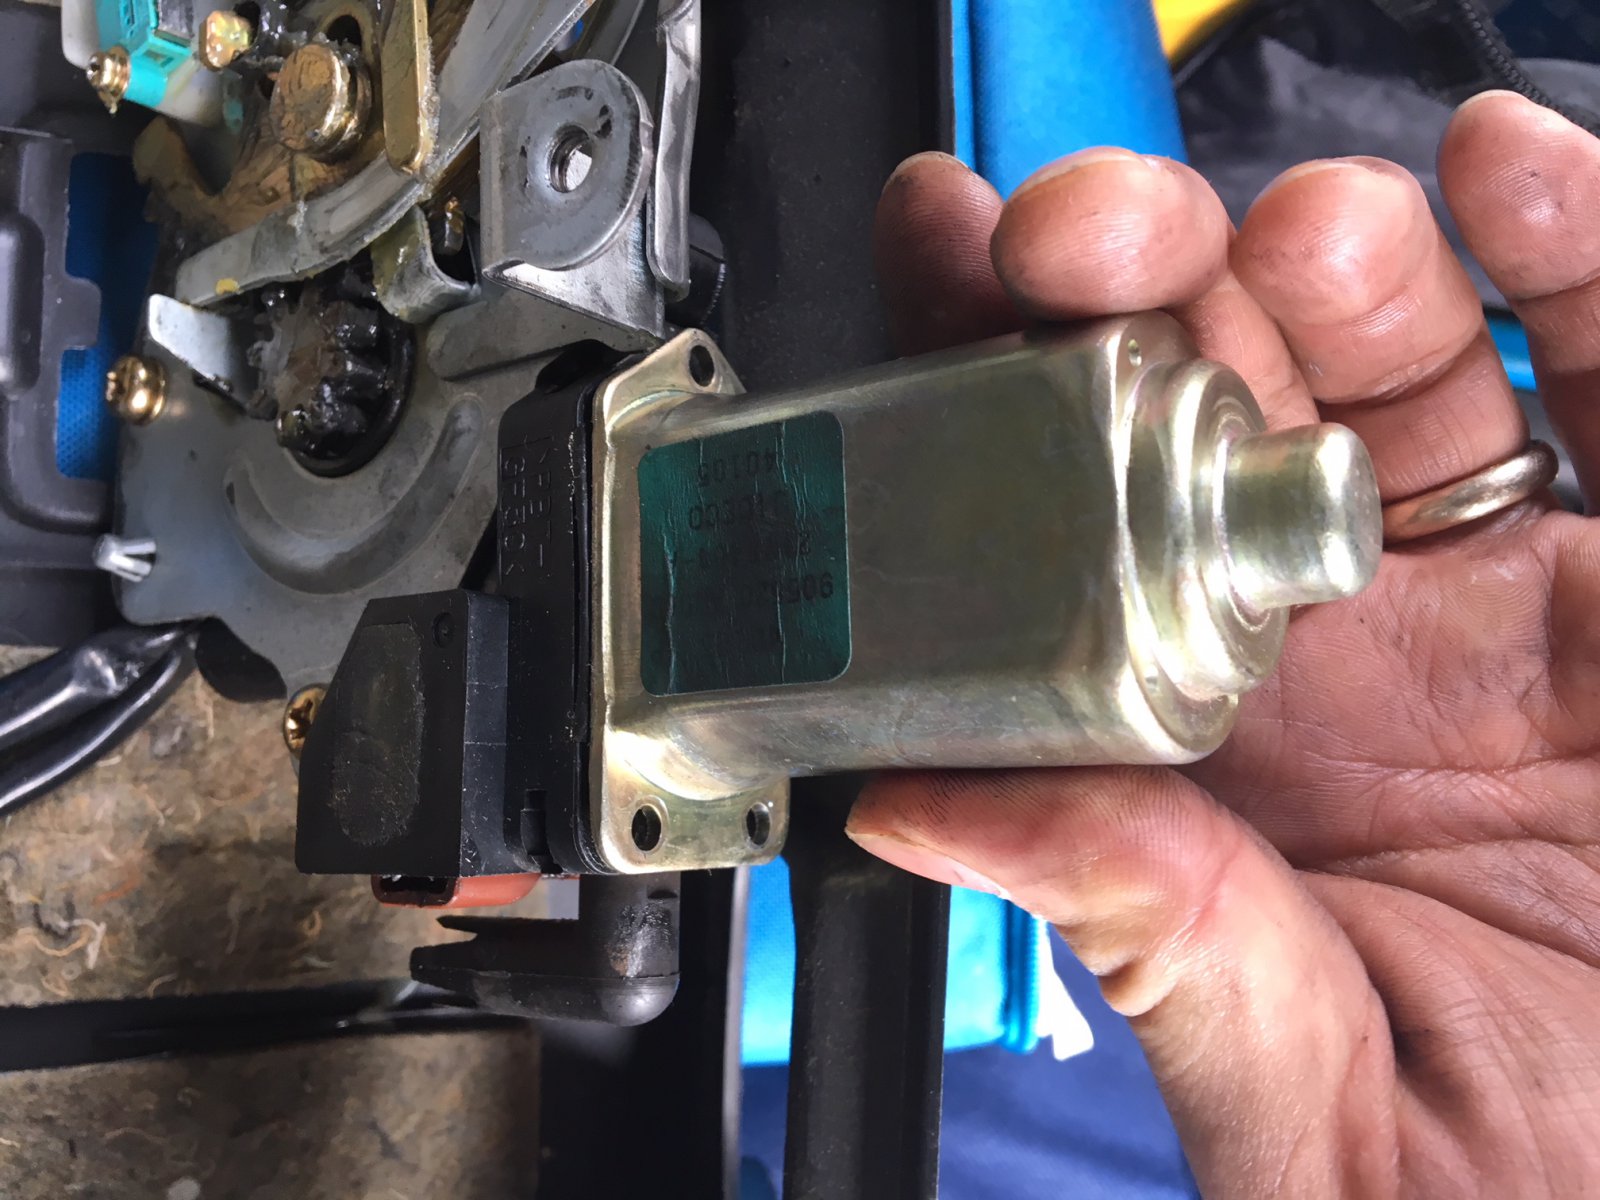
Pull the shaft out of the housing.

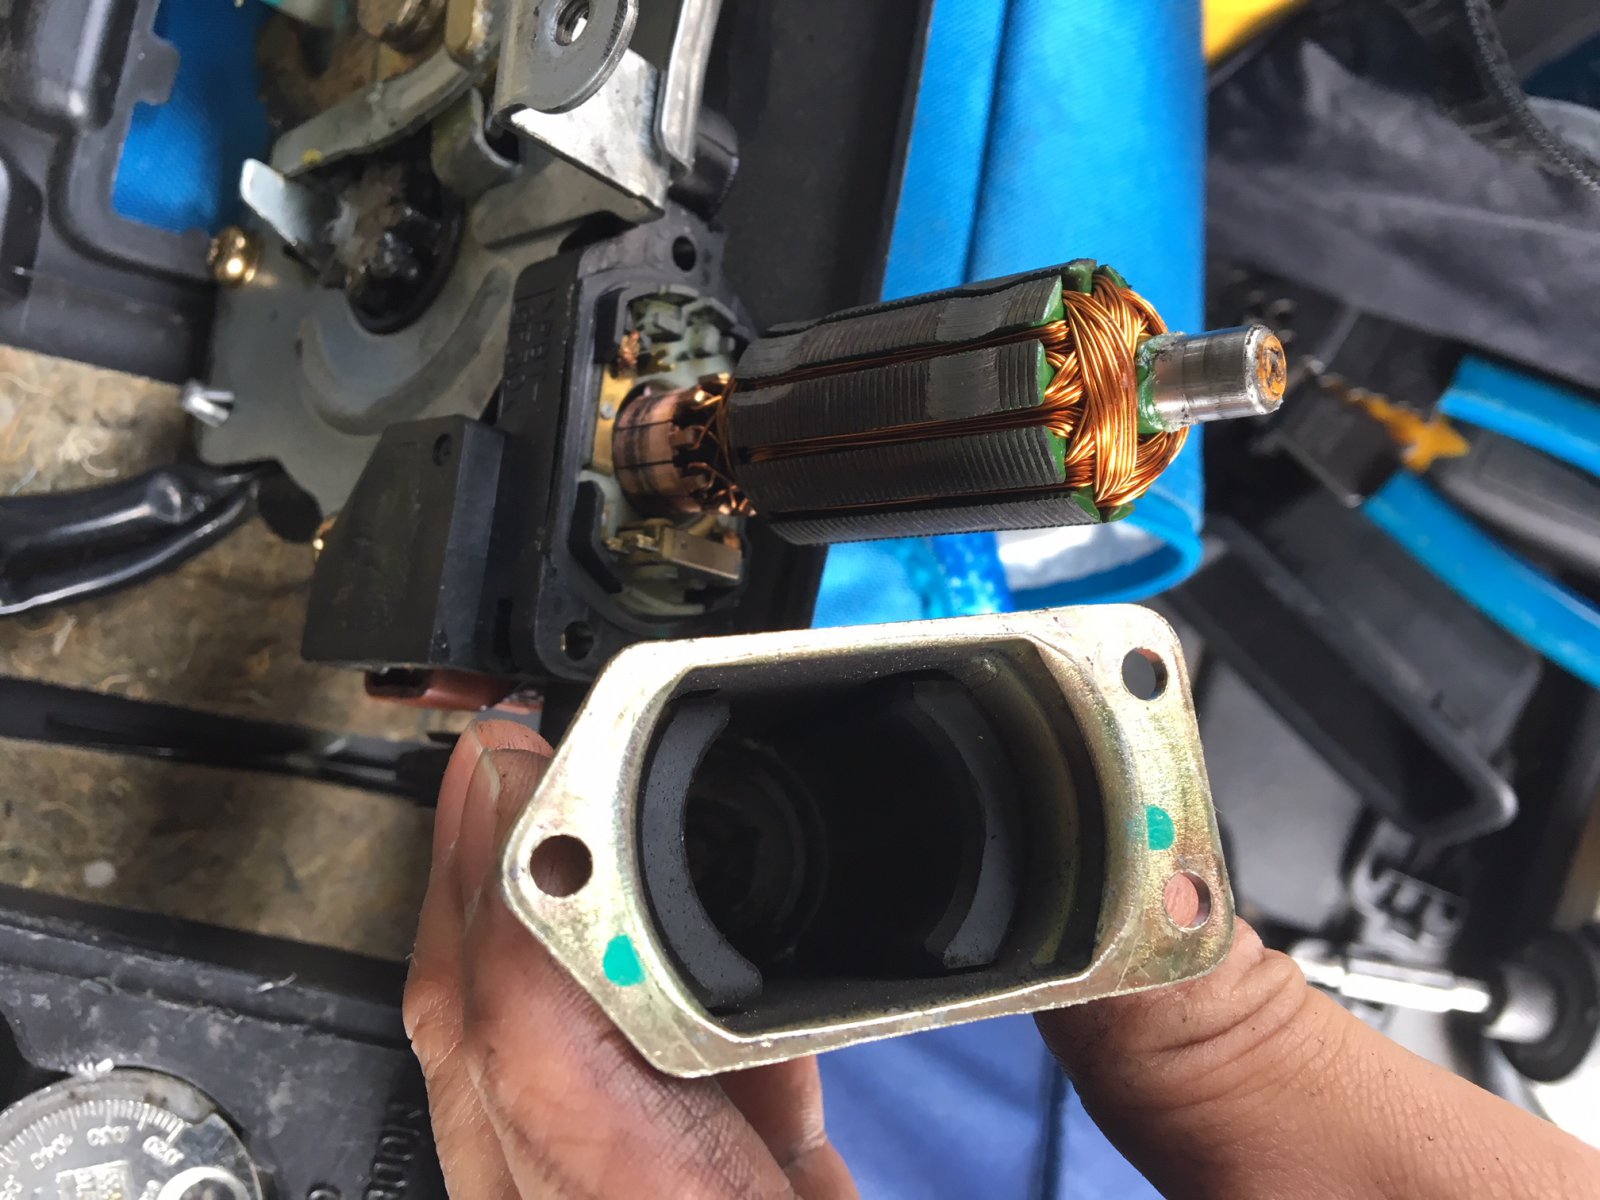
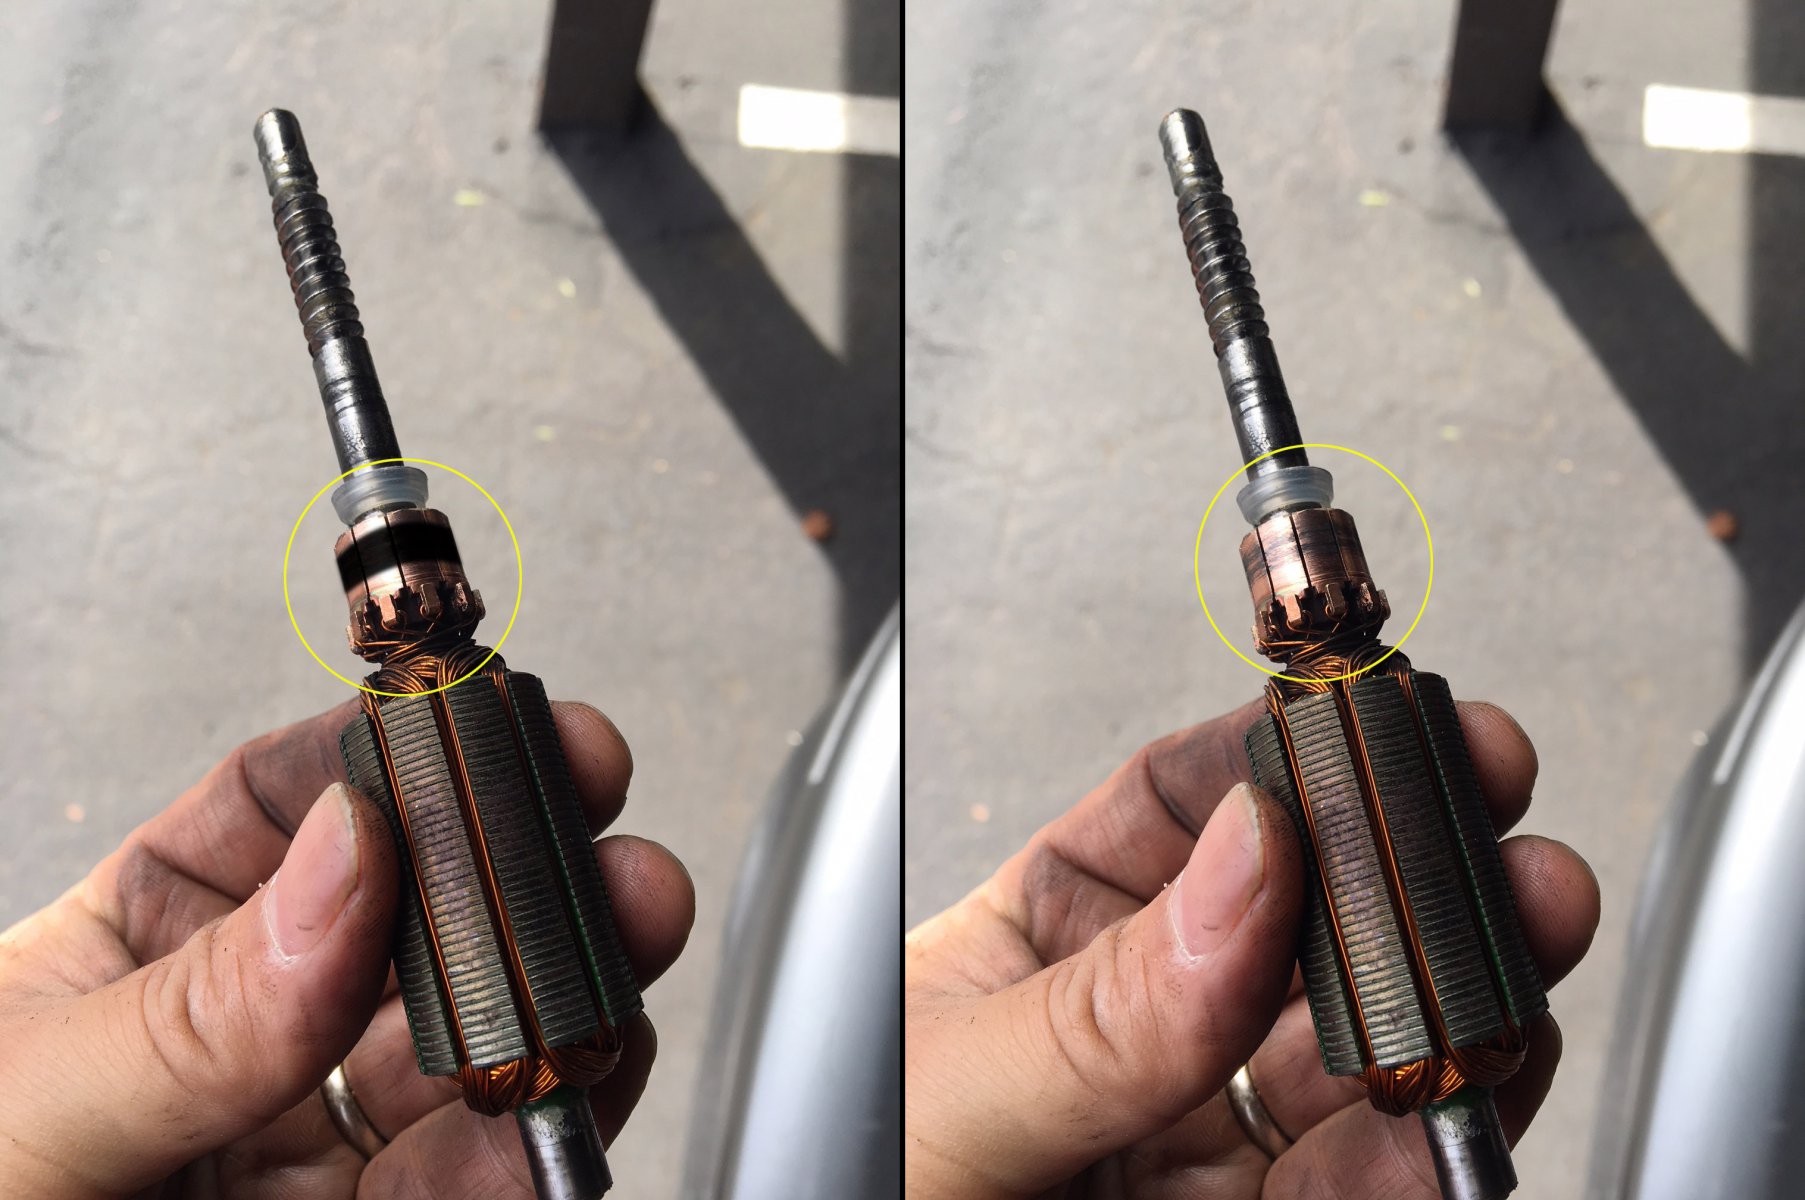
Simply use a terry cloth rag and apply some elbow grease back and forth to clean it.

These were actual pictures of my FX35. You can see how dirty it was as seen above. You can see the green cloth I used.

After cleaning it, it looks like this. Literally brand new again!

Put everything back together. AND NOW EVERYTHING WORKS AGAIN! Before I would have to take out the trunk fuse in order to reset it and hoped it opened. Now it opens consistently with no issues at!!

Motor Reference Photos:

Loading

Community Member Credit: Eddy

I just installed this little LED Battery Voltage Display Reader on my Infiniti FX35. In order to test or check the battery, you normally have to pop open the plastic cover for it. This makes it easier for me to check the actual battery itself and confirm the voltage reading.

Description: 12V 24V Digital LED Display Voltmeter Voltage Gauge Panel Meter Car Motorcycle
Price: $8.00
Order Link: https://www.ebay.com/itm/12V-24V-Digital-LED-Display-Voltmeter-Voltage-Gauge-Panel-Meter-Car-Motorcycle/112243510428

Loading

Community Member Credit: smijus

So I was having some cold start problem. I knew that my battery was good so I did some research and it seemed like the AC Amplifier was the best culprit. So here is the process of replacing the AC Amplifier.

First off, the AC Amplifier is the most expensive plastic box that I’ve ever bought and this is what it looks like.

The only explanation I could find was that the AC amp gathers climate information( outside temp, humidity, etc), sends it to the ECU and that determines the fuel/air mix on start up.

2003-2005 FX35 / FX45

Part Number: 27760-CG000, 27760-CG700, 27760-CL000, 27760-CL01A
Part Description: AMPLIFIER – CONTROL, AIR CONDITIONER
Price: $650.97

 2006-2008 FX35 / FX45

Part Number: 27760-8Y71A
Part Description: AMPLIFIER – CONTROL, AIR CONDITIONER
Price: $650.97

P1000587_zps45457d03.jpg

There are three cable connections at the back of the unit.

P1000588_zps7c018c67.jpg

The AC Amplifier sits immediately behind the AC Controls under the main display stack in the middle of the dashboard.

To replace your AC Amplifier, do the following:

1. Take a plastic pry tool or something non-scratching and slowly pry around the bezel of the center display panel.

P1000586_zpse3f94515.jpg

2. You’ll need to slowly make your way around the entire bezel until it starts to pry up, before you pull the center stack out, there are two cables that need to be disconnected. One white connector, seen here from the bottom.

P1000585_zpscd16d916.jpg

…and one black ribbon cable seen here from the passengers side.

P1000583_zpsd1e675d2.jpg

Once these cables are disconnected, you can remove the entire center stack and set aside for the time being.

3. You will now see the guts of your center stack, and the AC Amplifier, the gray plastic box at the bottom. You will need a Philips head screwdriver to remove the 4 screws holding the center stack in place.

P1000582_zpsdbf45088.jpg

4. Now you can pull the entire center stack slightly out of place so you can access the 2 Philips head screws that hold the AC Amplifier in place. There is one on either side of the unit, remove them both.

P1000578_zps77b26a69.jpg

5. Once these two screws are out, you should be able to pop the box out of place and more easily access the 3 cables at the rear of the AC Amplifier.

P1000580_zps44eadfbd.jpg

6. Remove the three connectors, replace with the new AC Amplifier and reconnect the 3 cable assemblies.

7. Put the AC Amplifier back into place and return the screw on either side of the unit.

8. Slide the Center Stack back into place and return the 4 mounting screws back into place.

9. Before returning the faceplate, re-attach the white cable and the black ribbon cable.

10. Place the bezel back into place and slowly push firmly around the entire outside of the bezel, you’ll feel the face click back into place.

11. Start up your car and go through all of the functions on the center stack to ensure that everything still works.

12. You’re all done.

Loading

Credit: Diyma Slaking

Got the front done for the battery relocation.Left wires a bit long a little disorganized because this isn’t the forever version. I’m going to fab a solid bar to replace small wire from the factory bundle to the distribution block. I will likely replace that distro block with a T-Spec as well. Not that this Amazon clone is bad I be just already a T-Spec one for the rear.

Distribution Block Order Link: https://www.amazon.com/dp/B078SCQJNM

Loading

Community Member Credit: Frank / motorvate.ca

About one year ago (2000), I was driving back from work, and I saw a single streamer of smoke coming up from my steering column. I immediately tried all the switches on the steering column, thinking that I will find out which switch has gone bad, and maybe I will make it stop.

Well, everything worked just fine, and the smoke did stop. A month later the same thing happened, a single streamer of smoke.

After the first time I parked my car in the garage thinking “I hope that I don’t set my garage on fire if she lights up.” It never happened again.

In August 2000, when I signaled to turn left, after the turn was completed the signal would cancel, but the turn signal relay would click about twice the usual speed, “click-click-click-click-click” Luckily for me the turn signal light did not flash, it was just the relay.

I removed the relay, and opened it up. It is not your typical relay. It is a relay with printed circuit board on the side. I noticed that the circuit board was cracked, and it looked like a few traces may not be in full contact. I added a little bit of solder, thinking that it was now fixed. I was wrong.

Now it is March 2001, and I noticed that my turn signal was not “smooth” like I remembered it. It was very notchy. I removed it from the steering column, and saw this:

The YELLOW ARROWS point to some melted plastic. The RED ARROWS point to what the contacts should look like. The yellow arrows in the right picture above, show little plastic “parking” islands are melted. This made the contacts sit lower, and they were only touching a little, causing a little current to flow through the relay. The relay senses current, via the built in IC, and makes the relay pulse, but because the current is very small, it flashes faster. (just like when you have a burned out turn signal bulb, the flasher goes faster)

Anyways, this is where the smoke came from. YEA! I found it. My car is not going to burn down!
I tried to “file & fix” the contacts, but it did not work.

I called up North End Nissan, and 1 day and $71 later I had my turn signal back to where it was, nice and smooth, with no harsh clicks.

Problem solved in 10 minutes, but it took over a year to figure it out.

Loading