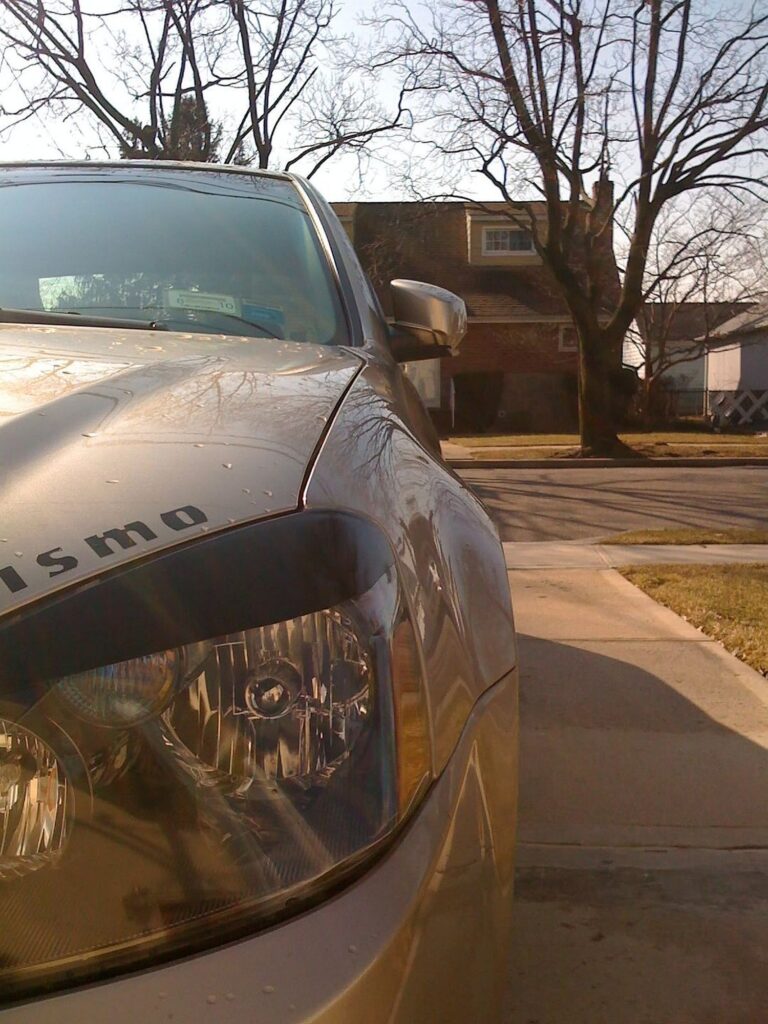
Credit: Richard Spencer
Order Link: https://www.ebay.com/itm/193778575530
Price: $26.88


![]()


These clear markers are currently discontinued.
Replacement Original OEM Part Numbers:
Features:
Specs:
In the Package:


![]()
")
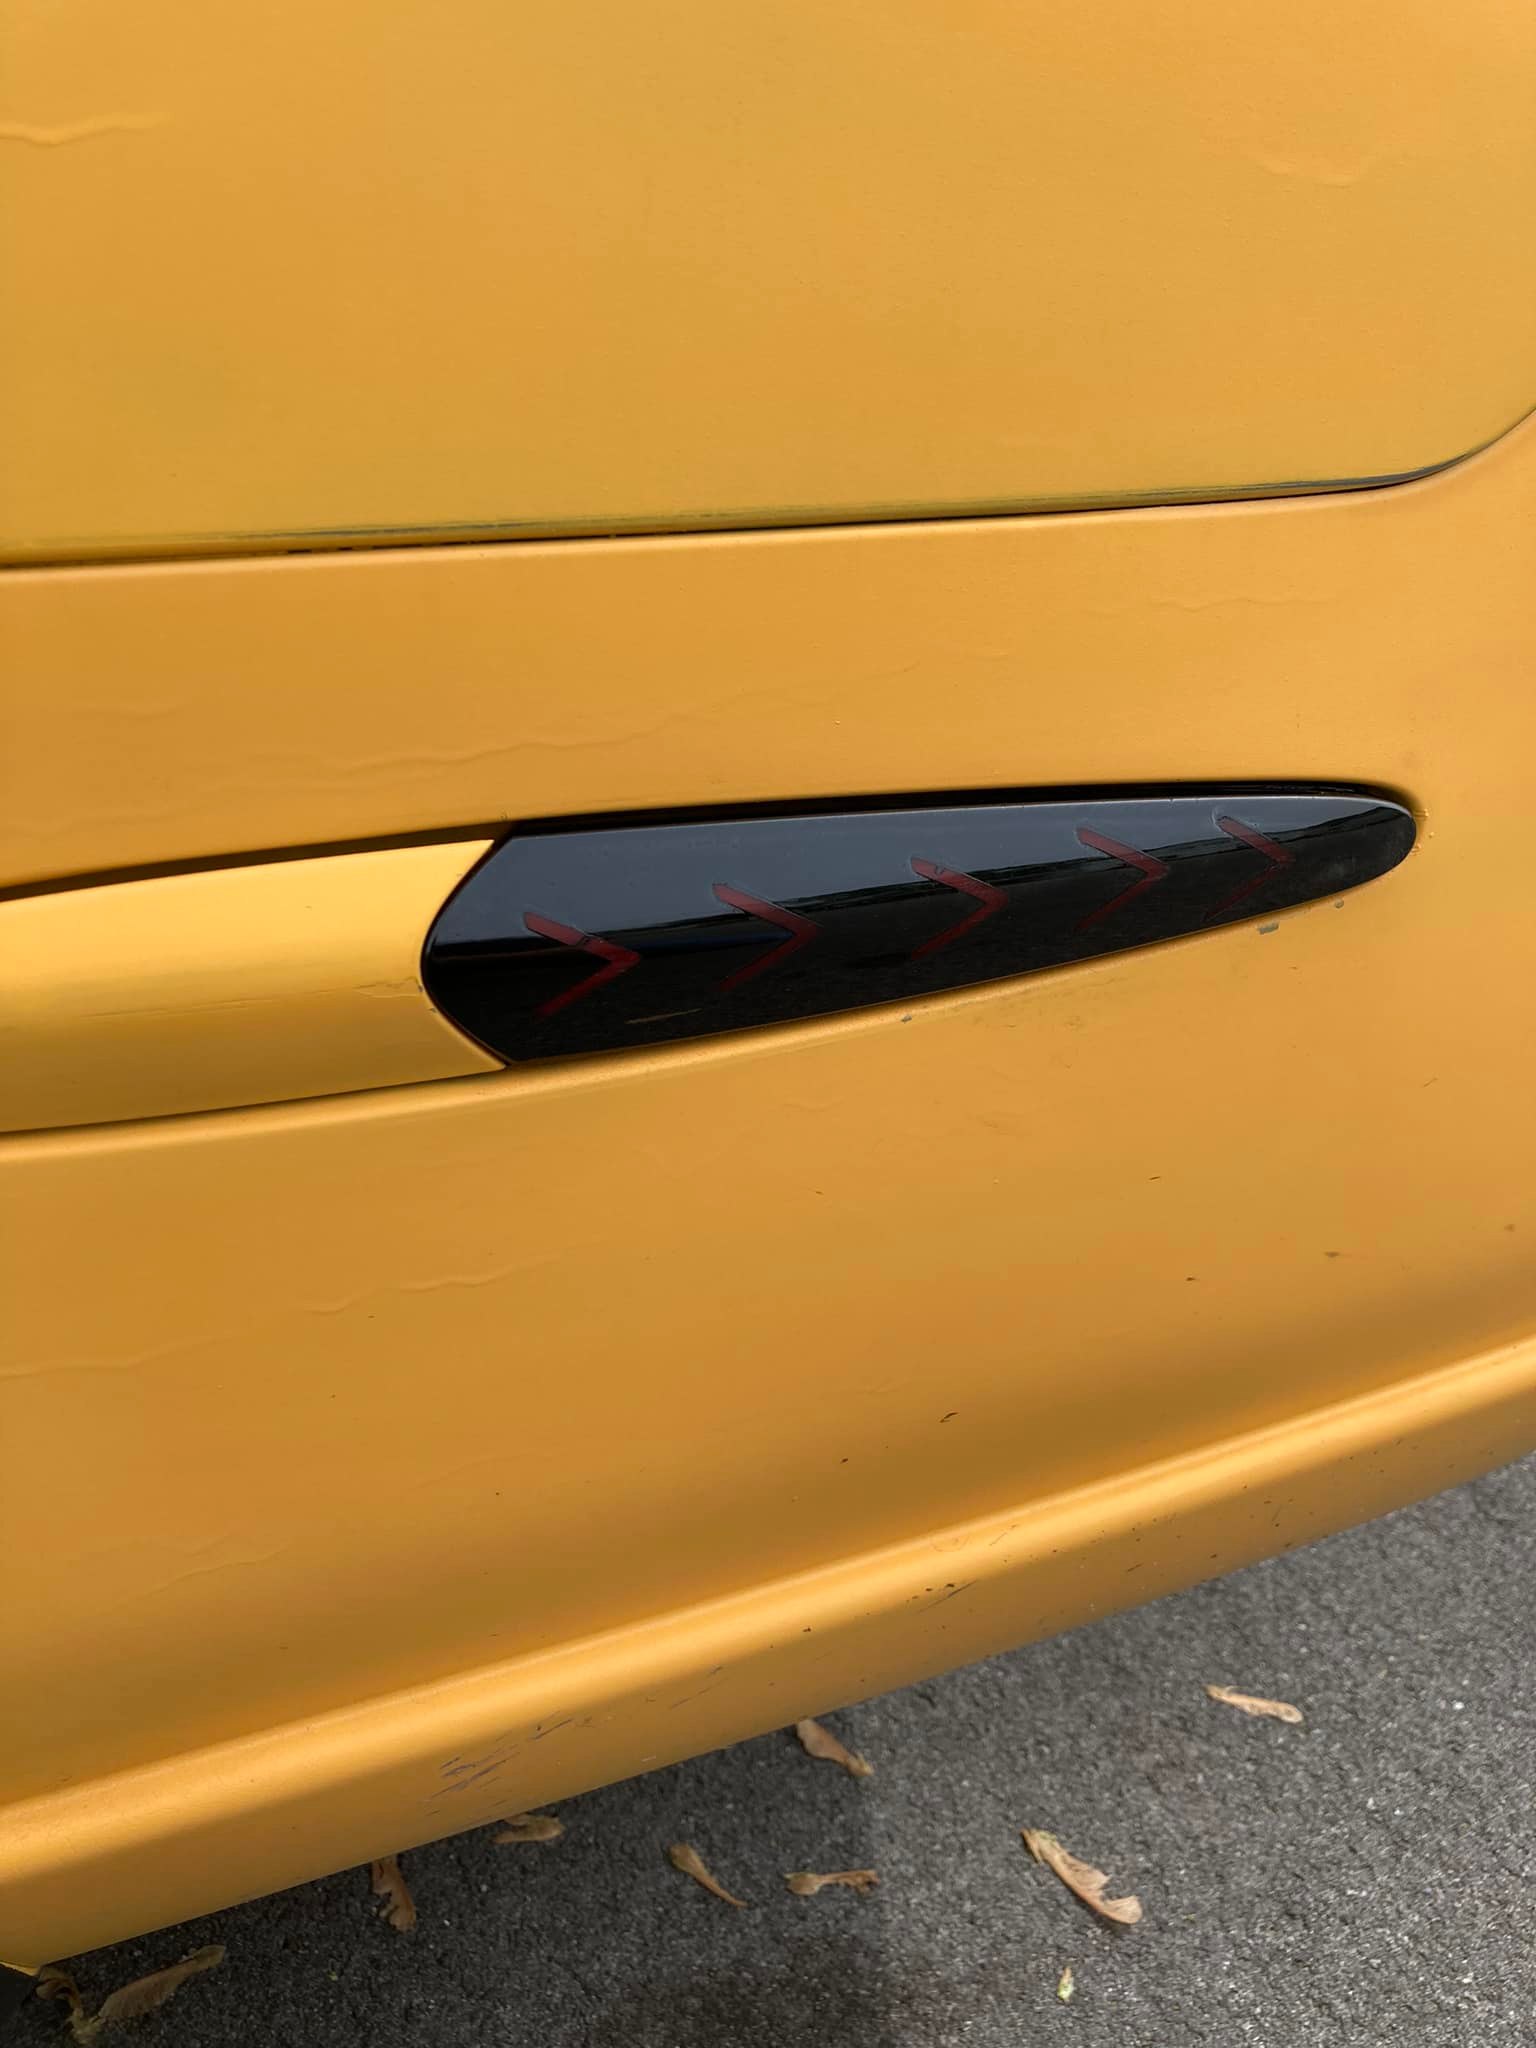
This curved roof spoiler design measures at 2 5/8″ wide & 1 1/4″ high. Spoiler is made from high quality polyurethane material and will sit flush against the edge of the windshield of the vehicle. It includes self adhesive tape for easy installation. Spoiler is UNPAINTED with a flat black finish. Painting will require flex paint to be used. All Spoilers are aftermarket and manufactured in the USA.
Order Links:
Price: $98.10


![]()


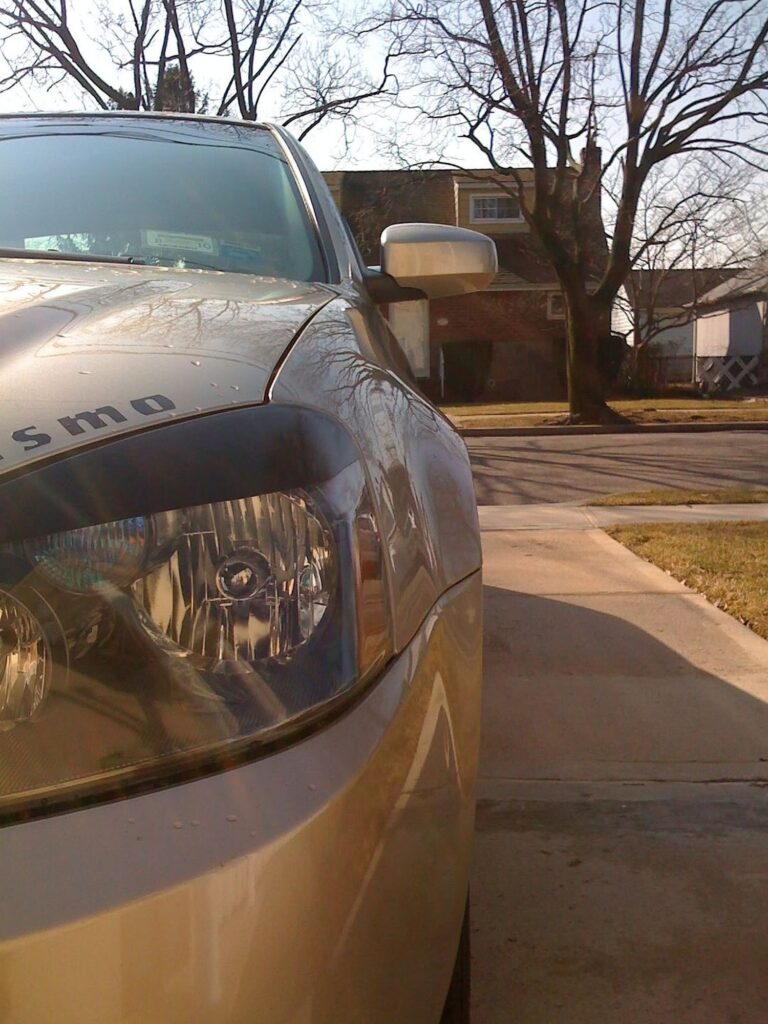
Credit: BestPCReviews
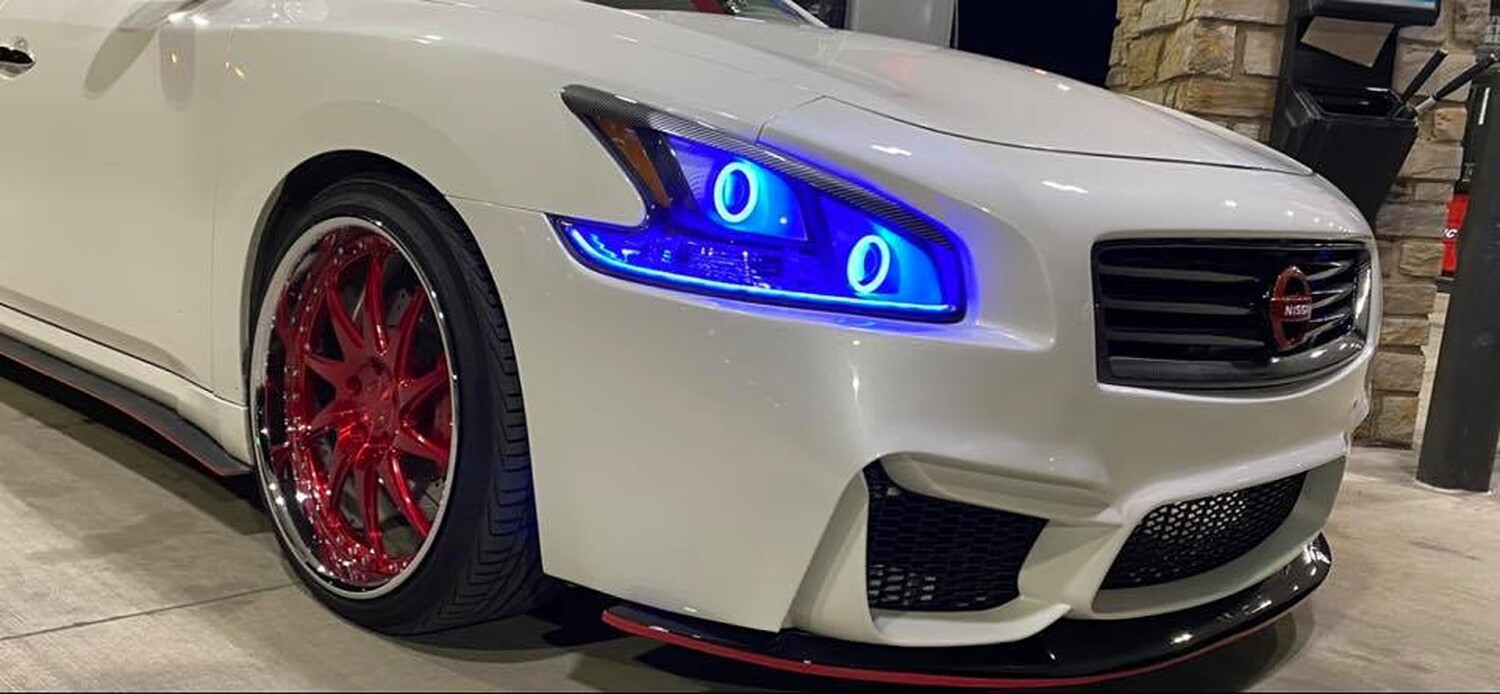
LED Side mirrors are a nice luxury looking upgrade for any car, well, most of cars. If you put these kinds of mirrors on an old corolla or a civic, it’s gonna look like your mirrors cost more than your car. The mirrors are pricey, but definitely better quality than $30 led mirrors you can find on eBay. Read the full review. I’ll explain you more about the mirrors, and how to install these or any other mirrors on Infiniti i35.

I’ll start by where I ordered it and how much it cost. I ordered the mirrors from www.thespeedline.com , for now you won’t be able to find the mirrors in the catalog. You have to actually e-mail them and tell them what car you have, code of your car color (if you want them to paint your mirrors), and what mirrors you want. As far as I know, they have auto folding mirrors and manual folding mirrors. Manual folding mirrors are $60 cheaper and since I live in Florida, I don’t deal with traffic that much and I don’t think my mirrors will ever be hit in parking lots here. I believe auto-folding mirrors are better for cities like New York where it’s tough to find a parking spot and even if you will find one, it will be too small.


Now the prices:
By the way, you can find your paint code on the firewall under the hood of your car.


When I ordered my mirrors, I had to wait about a month. TheSpeedLine.com told me that it was first time they ordered the manual folding mirrors, so I had to wait for someone to make them. I am still not sure who exactly makes the mirrors, they are not OEM and not Cefyro based on my understanding, however, the quality is good. The glass in the mirrors is great, its little blue and tinted so that you won’t be blinded from cars behind you, but if you have tinted windows, the tinted side mirrors won’t do much help, may be it will be even worse. On top of the tinted mirrors, the glass was made so that there won’t be a blind spot. Both of these functions are good, but it took me about a week to get used to them.

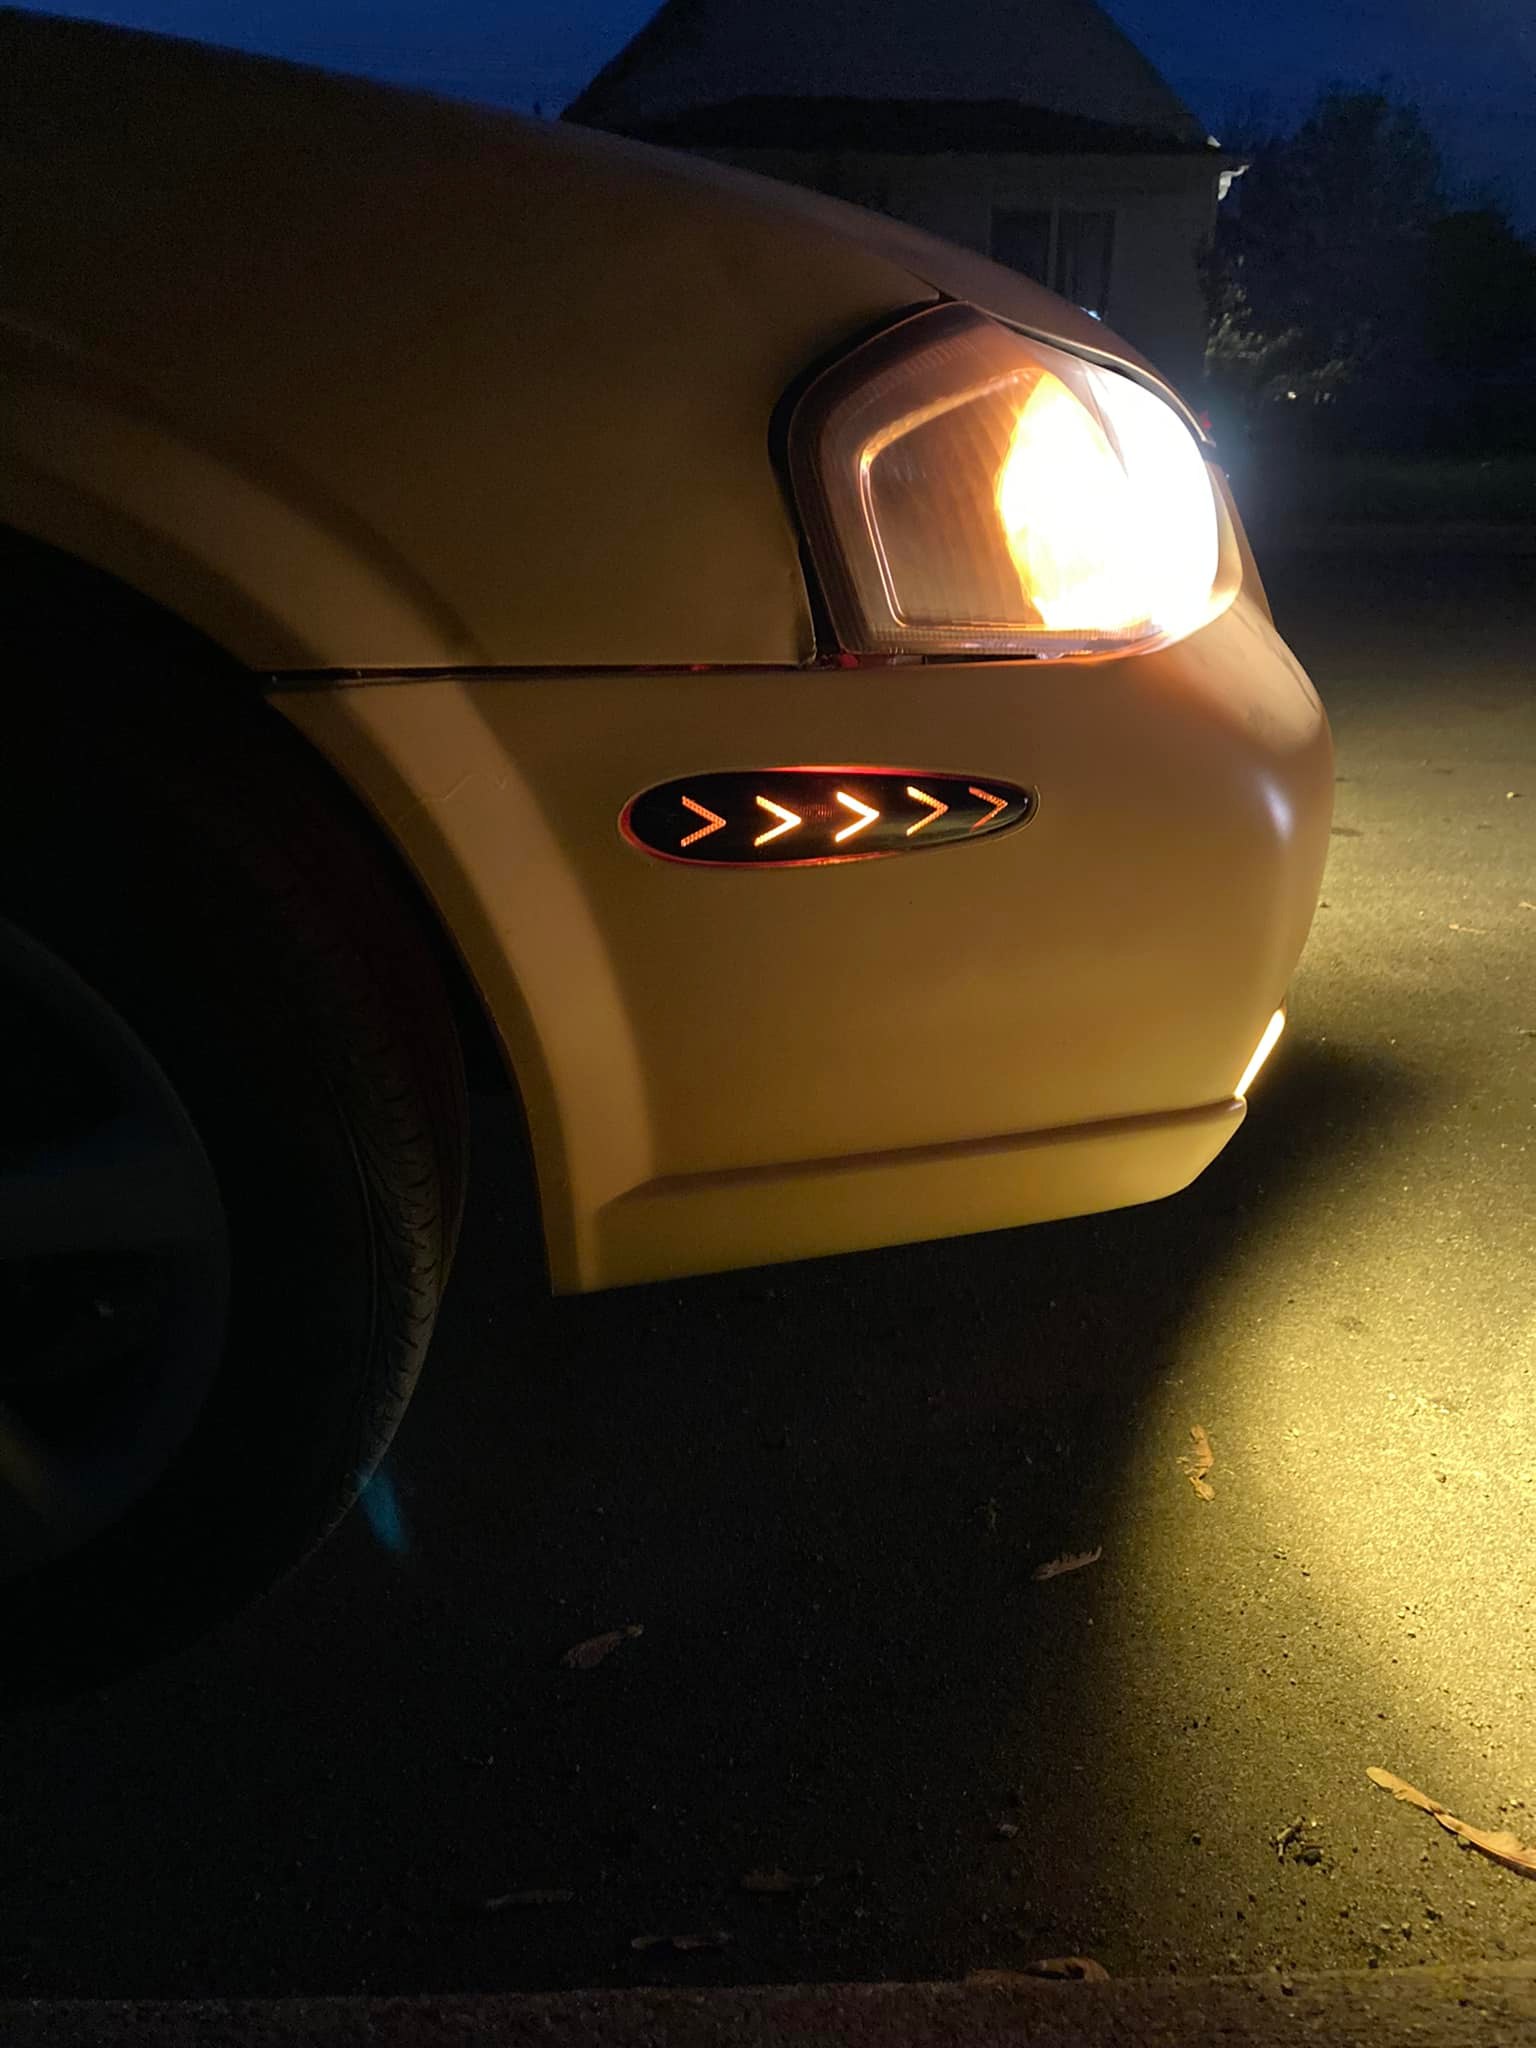
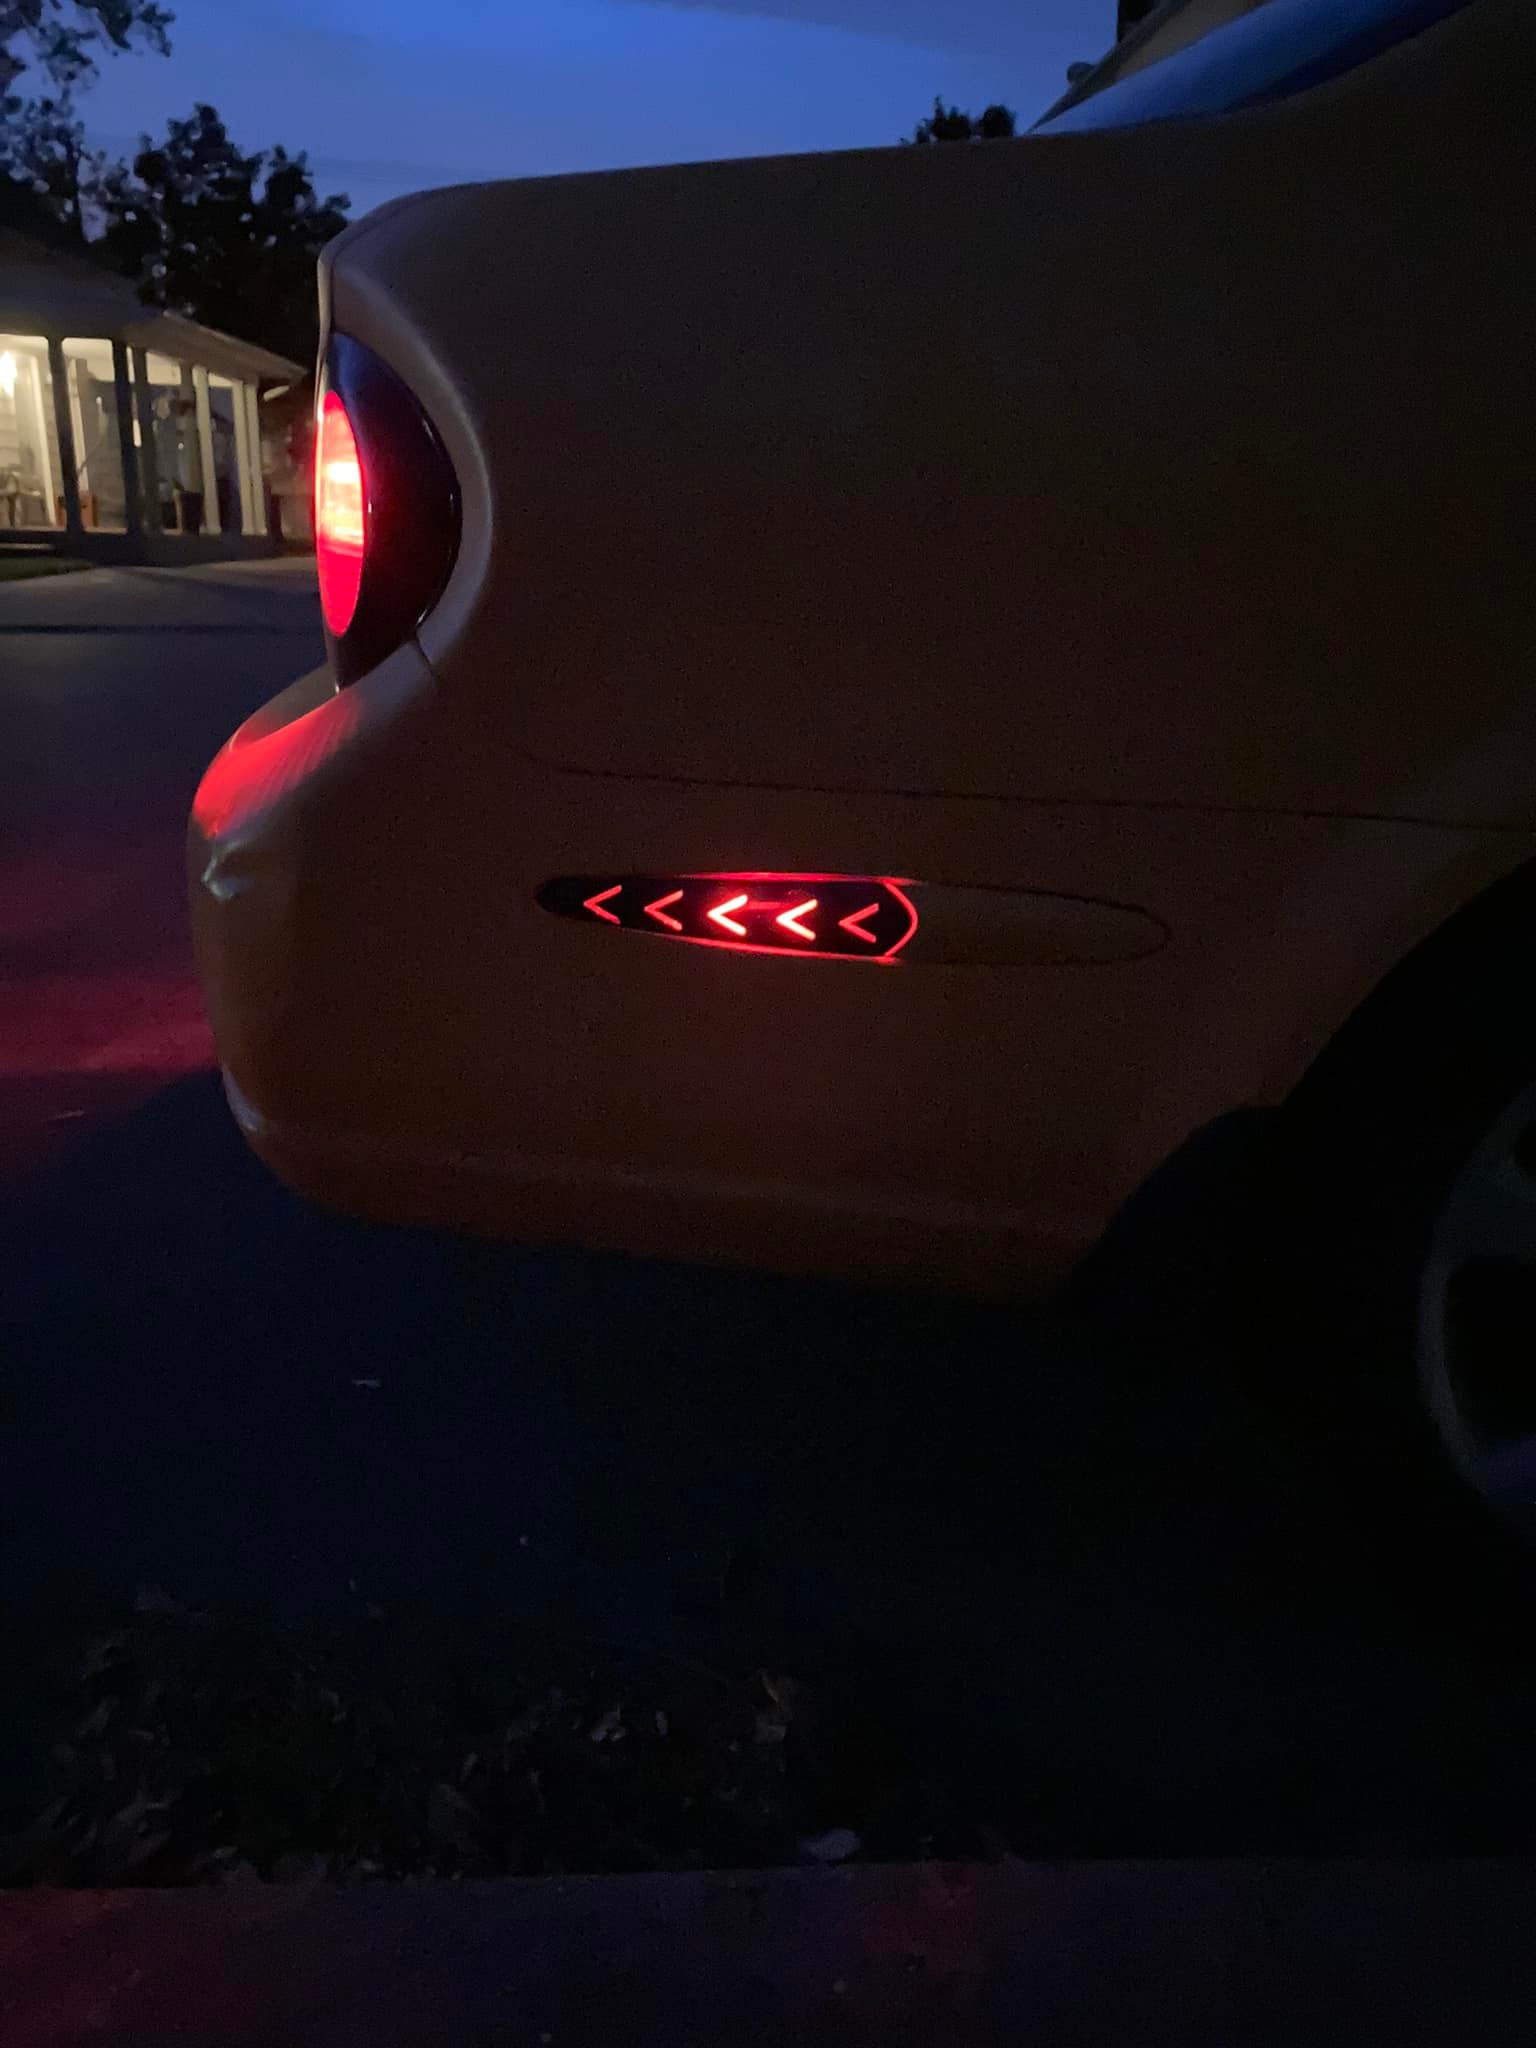
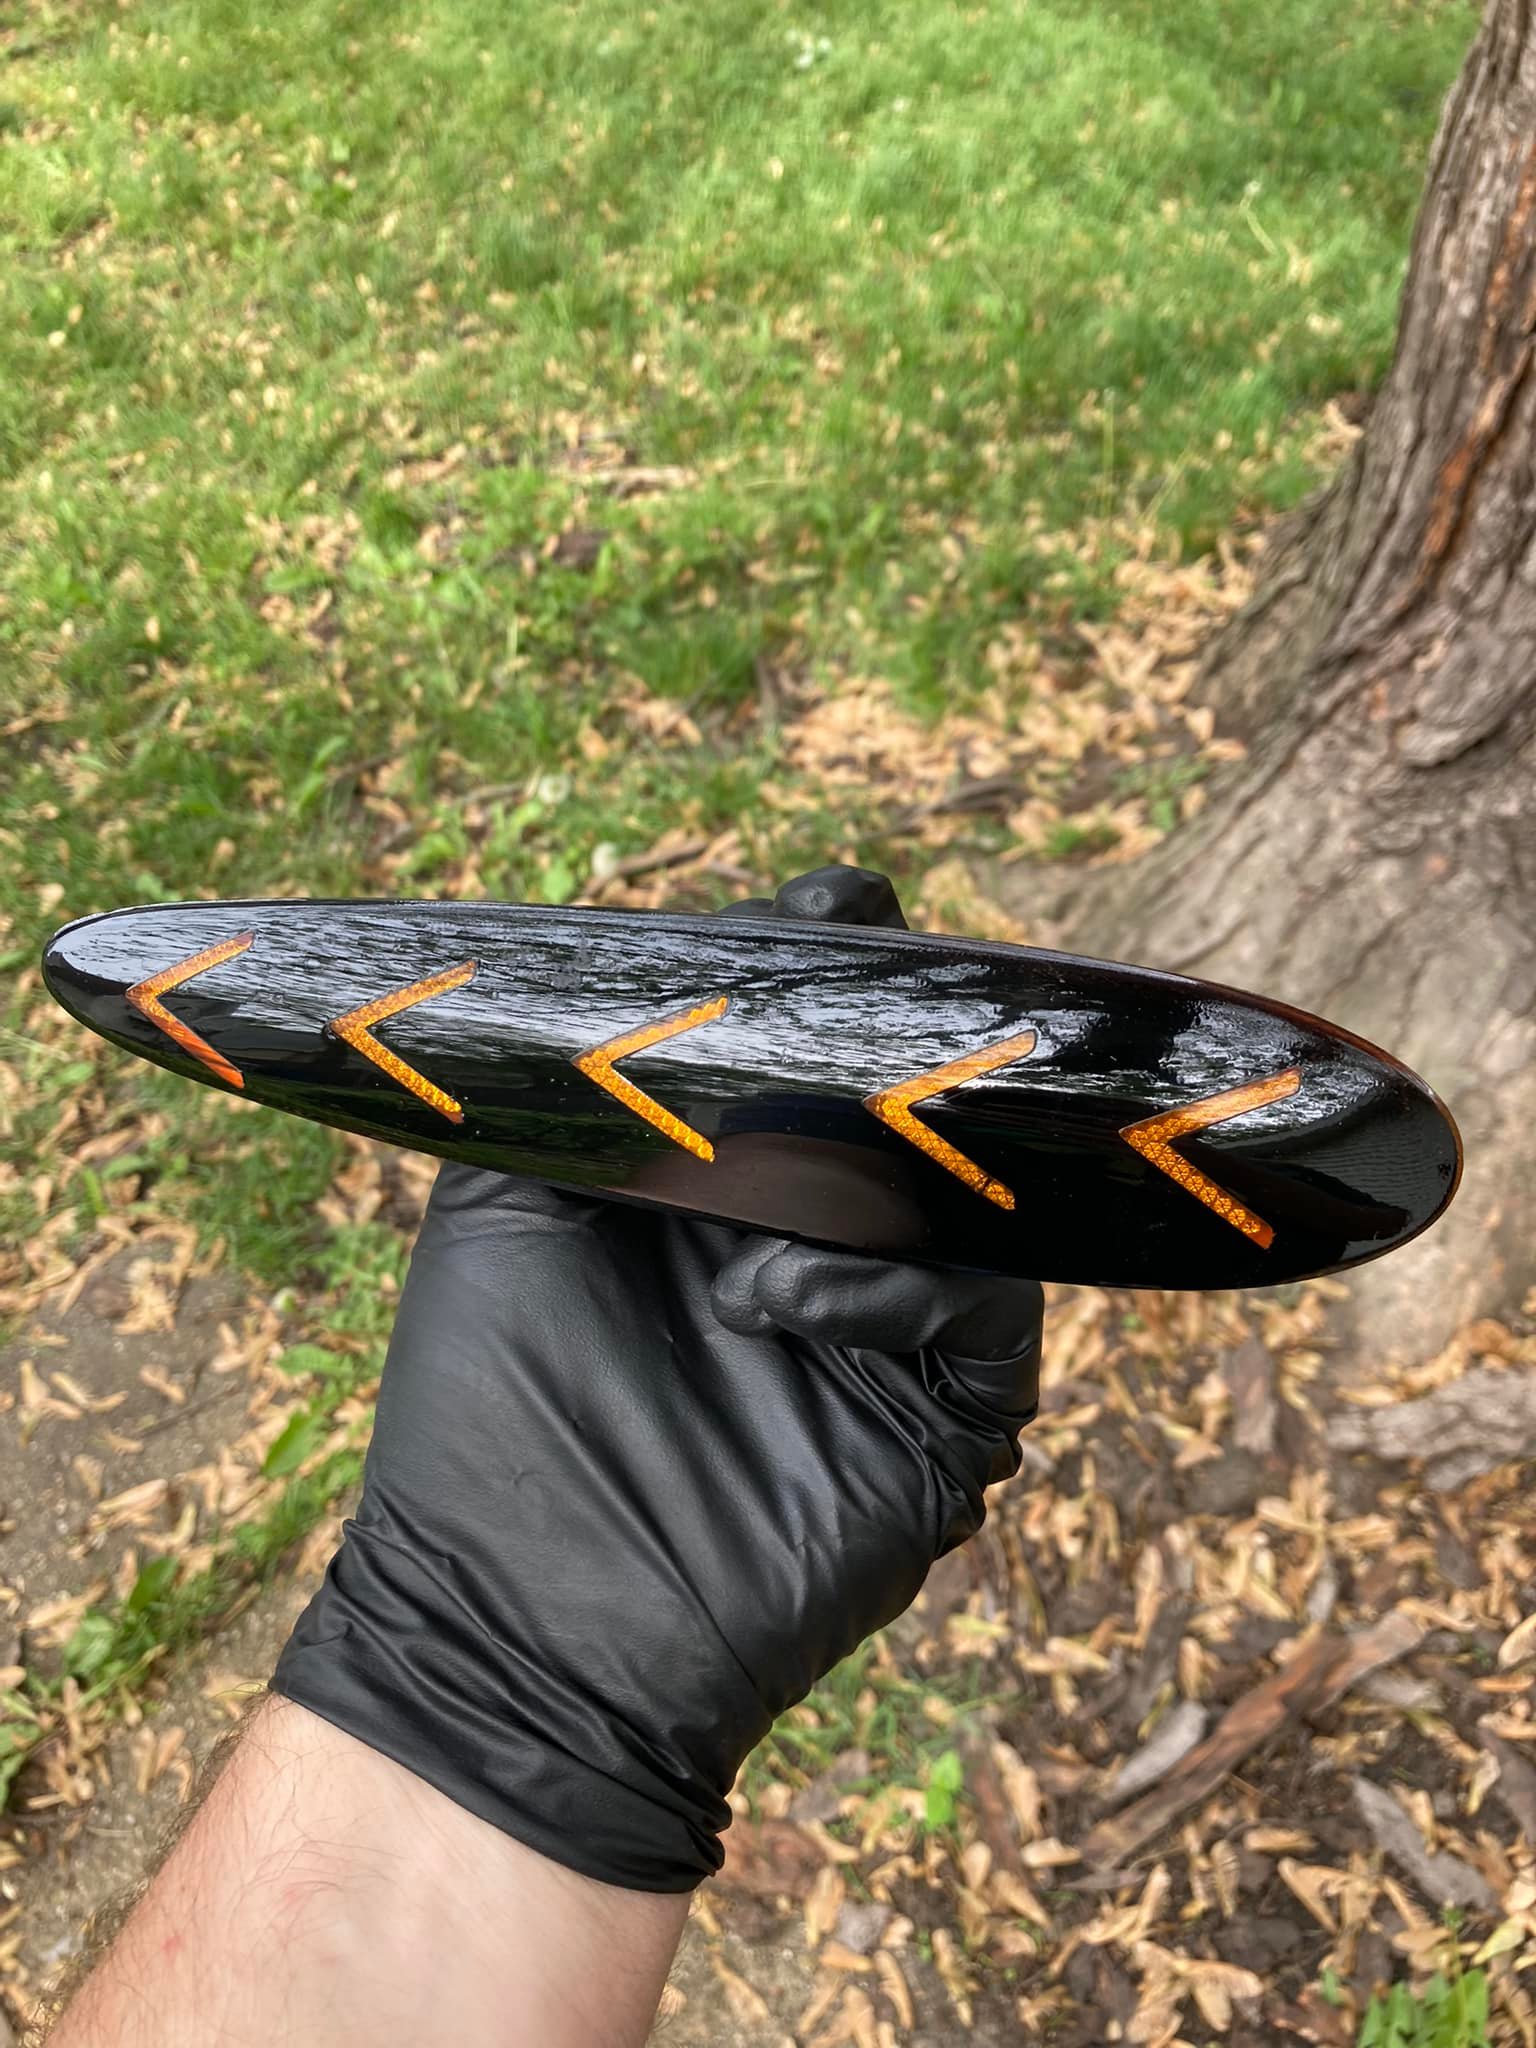
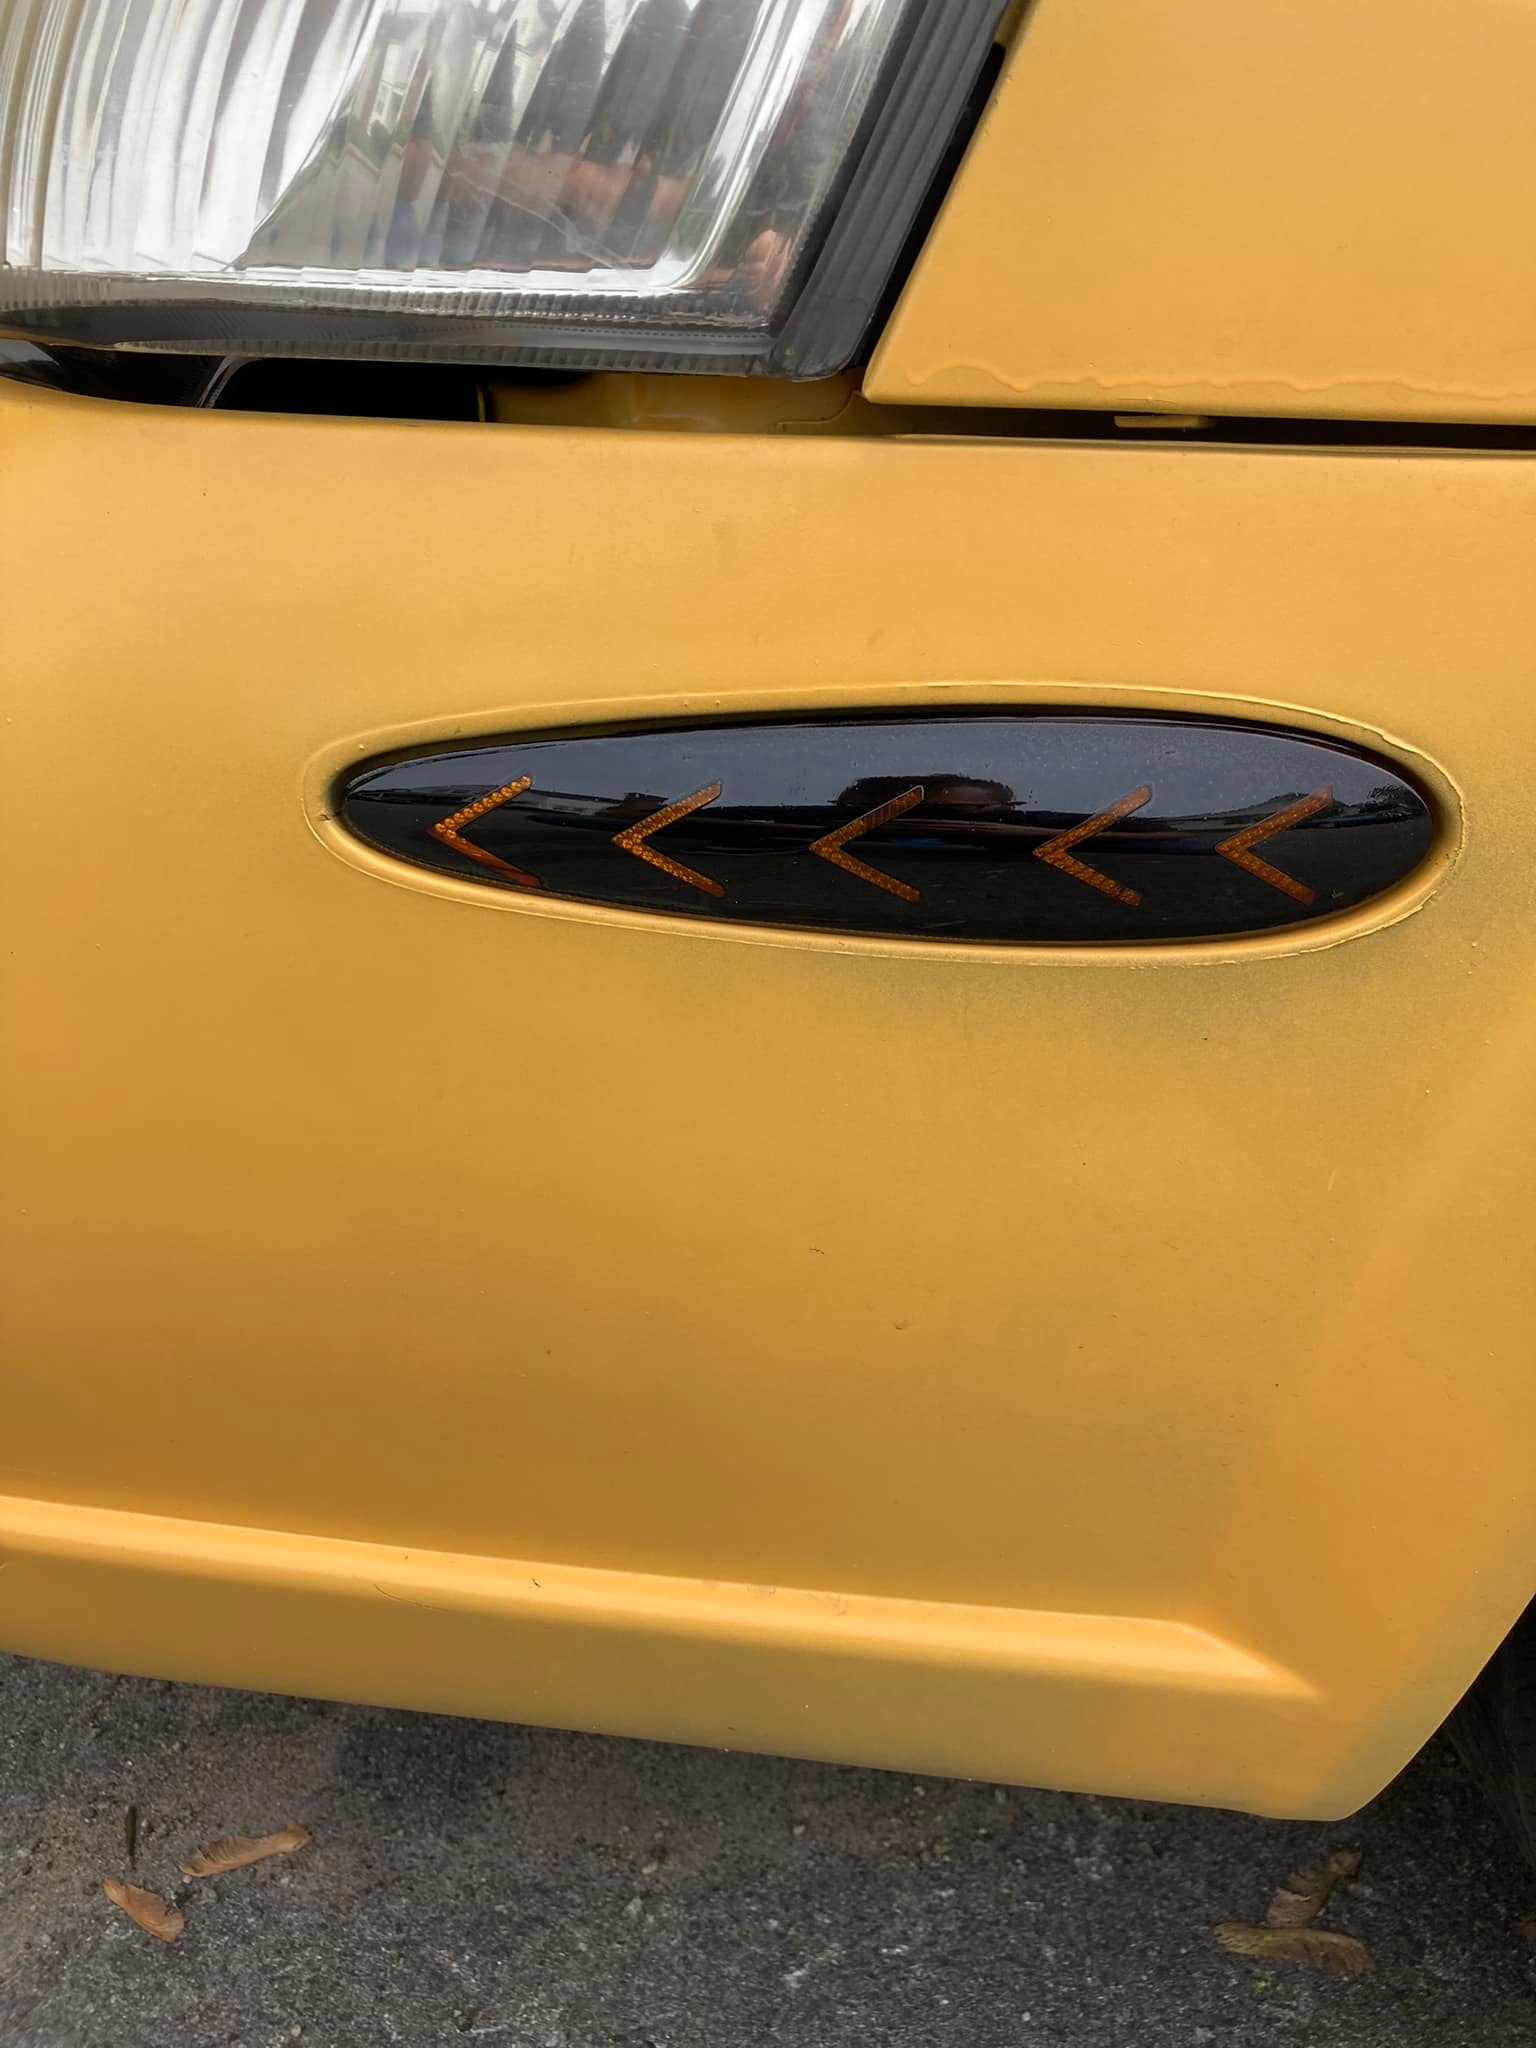
Turn signal and ground light are the reason why I brought the mirrors. I like the way the look, it gives the car even nicer luxurious look, however, you will not notice ground light on daytime at all. When it’s light outside, turning lights are definitely dimmer than stock turn signals on a car, but are still visible. At night the turn signals and ground lights look great.

By now you should know the price, quality, and how the mirrors look in action, so you should of made up you mind if you want those or not. If you not, thanks for reading this far. If you do, you have to install them too, and it’s not an easy installation. It took me about 4 hours, but I had to figure everything out. You will have complete installation guide with pictures, what a lucky guy or girl you are!


One of the easiest steps in the installation is to install the mirrors. The hardest part is pushing the wires around. Now you have some idea of troubles you will encounter. I’ll explain the driver’s side installation first. Open the driver’s door. You have to take out the door trim. Take out door handle, windows switch, and other parts shown in the pictures.


After all that is removed, pry out the door trim. You will have to disconnect about 3 connectors once you take out the door trim. After you disconnect them, leave your door panel somewhere to rest.

First disconnect connector that goes to the mirror. On the other side of your stock mirrors, you will see a plastic wall. Pry out the wall, inside you will see three bolts. Take them out with 10mm socket. Once all bolts are removed, just take the side mirror out of the door. Take the brand new led mirror and put it in the place where stock mirror used to be. Secure it with three bolts. You will see that LED Mirror have another 2 black wires hanging outside of a plug, I contacted SpeedLine regarding that, but did not get response. I did not use the wires at all and just left them at the location.


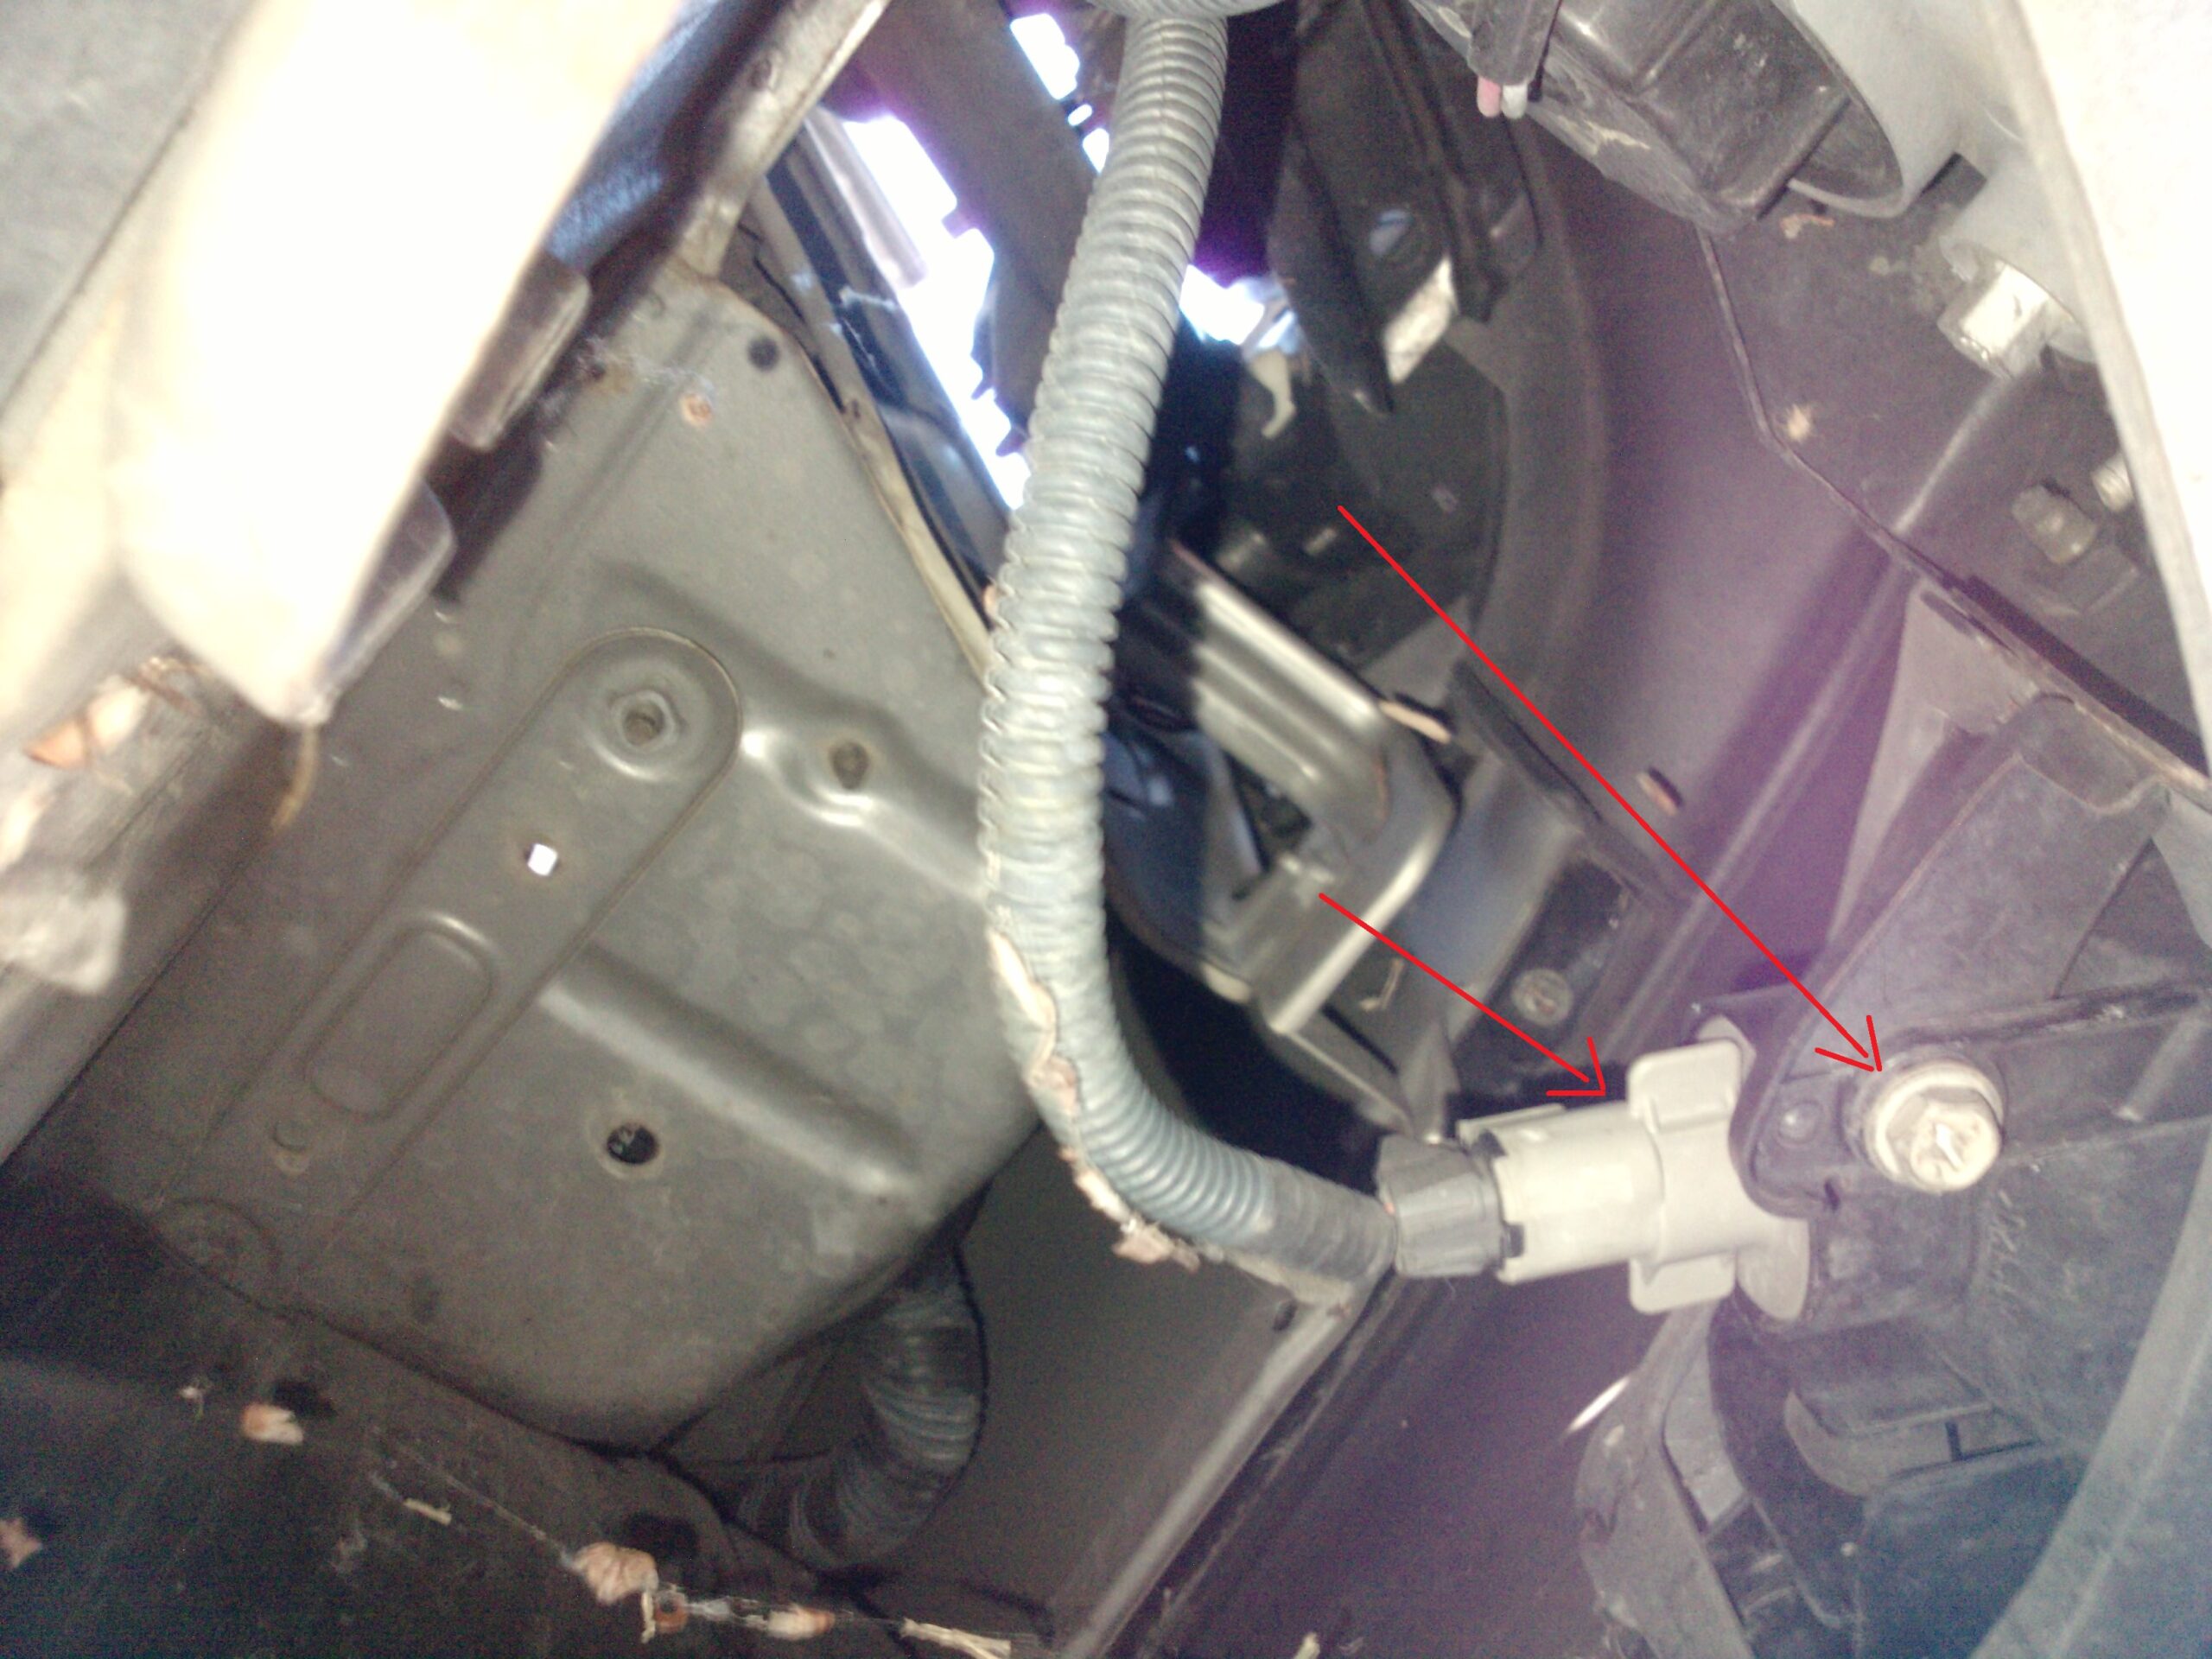
As you can see, putting in the mirror is extremely easy, now the hard part. The new mirrors came with four wires that you need to push in the car’s interior. You probably think that all you have to do is remove the flex that goes to the car from the door, but you will be disappointed to find out that it’s not just a flex. From door to car goes a flex that turns into plug where it hits the body of a car. That’s sad, but don’t give up. You will need 10mm (I believe) wrench tool to take the flex/plug out. Do it. It will take forever, but you have to do it.


Once you take it out. Look at the body of the car where the plug was. Little further away, you will see grommet. Take the grommet out with a flat screwdriver. Don’t drop the grommet, if you, you will have to look for it somewhere close to fender, but I dropped two when I was working on it so don’t worry. It will just take a little longer to do the job if you gonna spend couple minutes getting the grommet out. Once you got the grommet, drill a hole in the middle, make sure its tight but good enough to push four wires through it.


Take the flex/plug and next to the plug make a hole with strippers or whatever you have. Make sure its big enough to push four wires. Now the tough part, find somewhere strong wire, I used 12awg wire. Put it in the flex/plug and send it to the door. Make sure the wire is long enough. Once the other side coming from the door, take the four wires for the mirrors and attach them to the 12awg wire. I used electrical tape and turned the 12awg wire so that it’s securely attached to the four wires. It’s called fish tape, if you never heard of it before. Pull the 12awg wire back so that from the flex/plug there will be four wires coming out. On the other end of the four wires there is a plug, attach it to your led mirror


Disconnect the 12awg wire from four led mirror wires and push four wires through the grommet. Once you do that, attach the 12awg wire again and push it through the hole next to the plug at the body of the car. Find the wires inside the interior and pull it all in. Close the grommet and lock up the plug. That’s it, I believe that was the hardest part.


Do exactly the same with the passenger side. Everything will be about the same, except that you will have to take the glove box out to pull the wires all the way to the driver’s side. Take out glove box is pretty easy. There are two screws under the glove box and four on top. Take it out, push all the wires through to the drivers side. By the way, you might want to take out the driver’s side wall. I am talking about the wall under steering wheel. There are two screws at the bottom, take them out and pull the wall, it should come out.
Ground light
The best place to attach the ground light is to dome light. That’s what we gonna do here. Take black and yellow wires and push them to a driver’s side pillar. Connect yellow to red/green wire and black to a red wire. After the connection, close the pillar. Your ground lights should work now.
Turning signals
Push red and white wires under the hood. There is a big grommet between drivers side and engine. If you don’t want to have messy looking connections next to your turn signals, do the following.
Ground the white wires through the battery negative terminal. Connect the red connections to the stock turn signals using Posi-Tap connectors.

That’s it. You might want to buy some type of flex and more wires because it’s not enough of red wire to go from passenger side mirror to driver’s side, then to the battery and then to the passenger side turn signal, so definitely get more wires. Also, you don’t want to push little wire around the engine, I would recommend you to buy some plastic flex and put the red wire inside.
Now, if you want to contact the seller, here is e-mail to get in touch with them
service@thespeedline.com.
Quick update:
In case any of you did those mirrors before, if you want to wire the signals under the steering wheel, connect negative wires (white) to terminal 64 , left positive mirror wire to terminal 47 (green black), and right positive mirror wire to terminal 48 (green yellow).
There is possiblity that you will have to switch 47 and 48 around incase it will work opposite way.
That way you’ll take four wires away from your under your hood.
![]()

Community Member Credit: 96i30azn
I had to change mine yesterday and had the devil’s own work trying to find out how to change it. 2hrs and lots of swearing, dirt, and scratches later, I figured others would appreciate a picture tutorial so here it is:
Supplies you need:
– Phillips screwdriver
– Flat screwdriver
– 10mm hex (socket would be best)
– H3 55w bulb
1. Turn your wheel towards the side you’ll be working on.
2. In your wheelwell, find 2 clips that secure the fender lining on and pry out their “stems,” they look like this:
3. Unbolt the 10mm bolt right behind your tie-down tab.
4. Unscrew the phillips screws along the lower edge of your bumper
5. Push the lining back into the wheelwell to access the corner light/fog lamp
6. Unbolt the 10mm bolt and remove the corner light shown below:
*caution – do not mess with the 8mm hex/phillips bolt – that secures the fog lamp reflector inside the housing
7. From the outside, take your flathead and pry the corner light forward (of the car)
8. This exposes the bolt that holds the fog lamp housing to the bumper shown below, unbolt this:

9. Pull the fog lamp assembly forward then out (from centerline) to remove
10. Unclip the harness found at the pointy end of the fog lamp to remove it from car
11. There is a wire clip (partially outlined) that secures the clip, undo this wire clip to remove bulb from fixture:
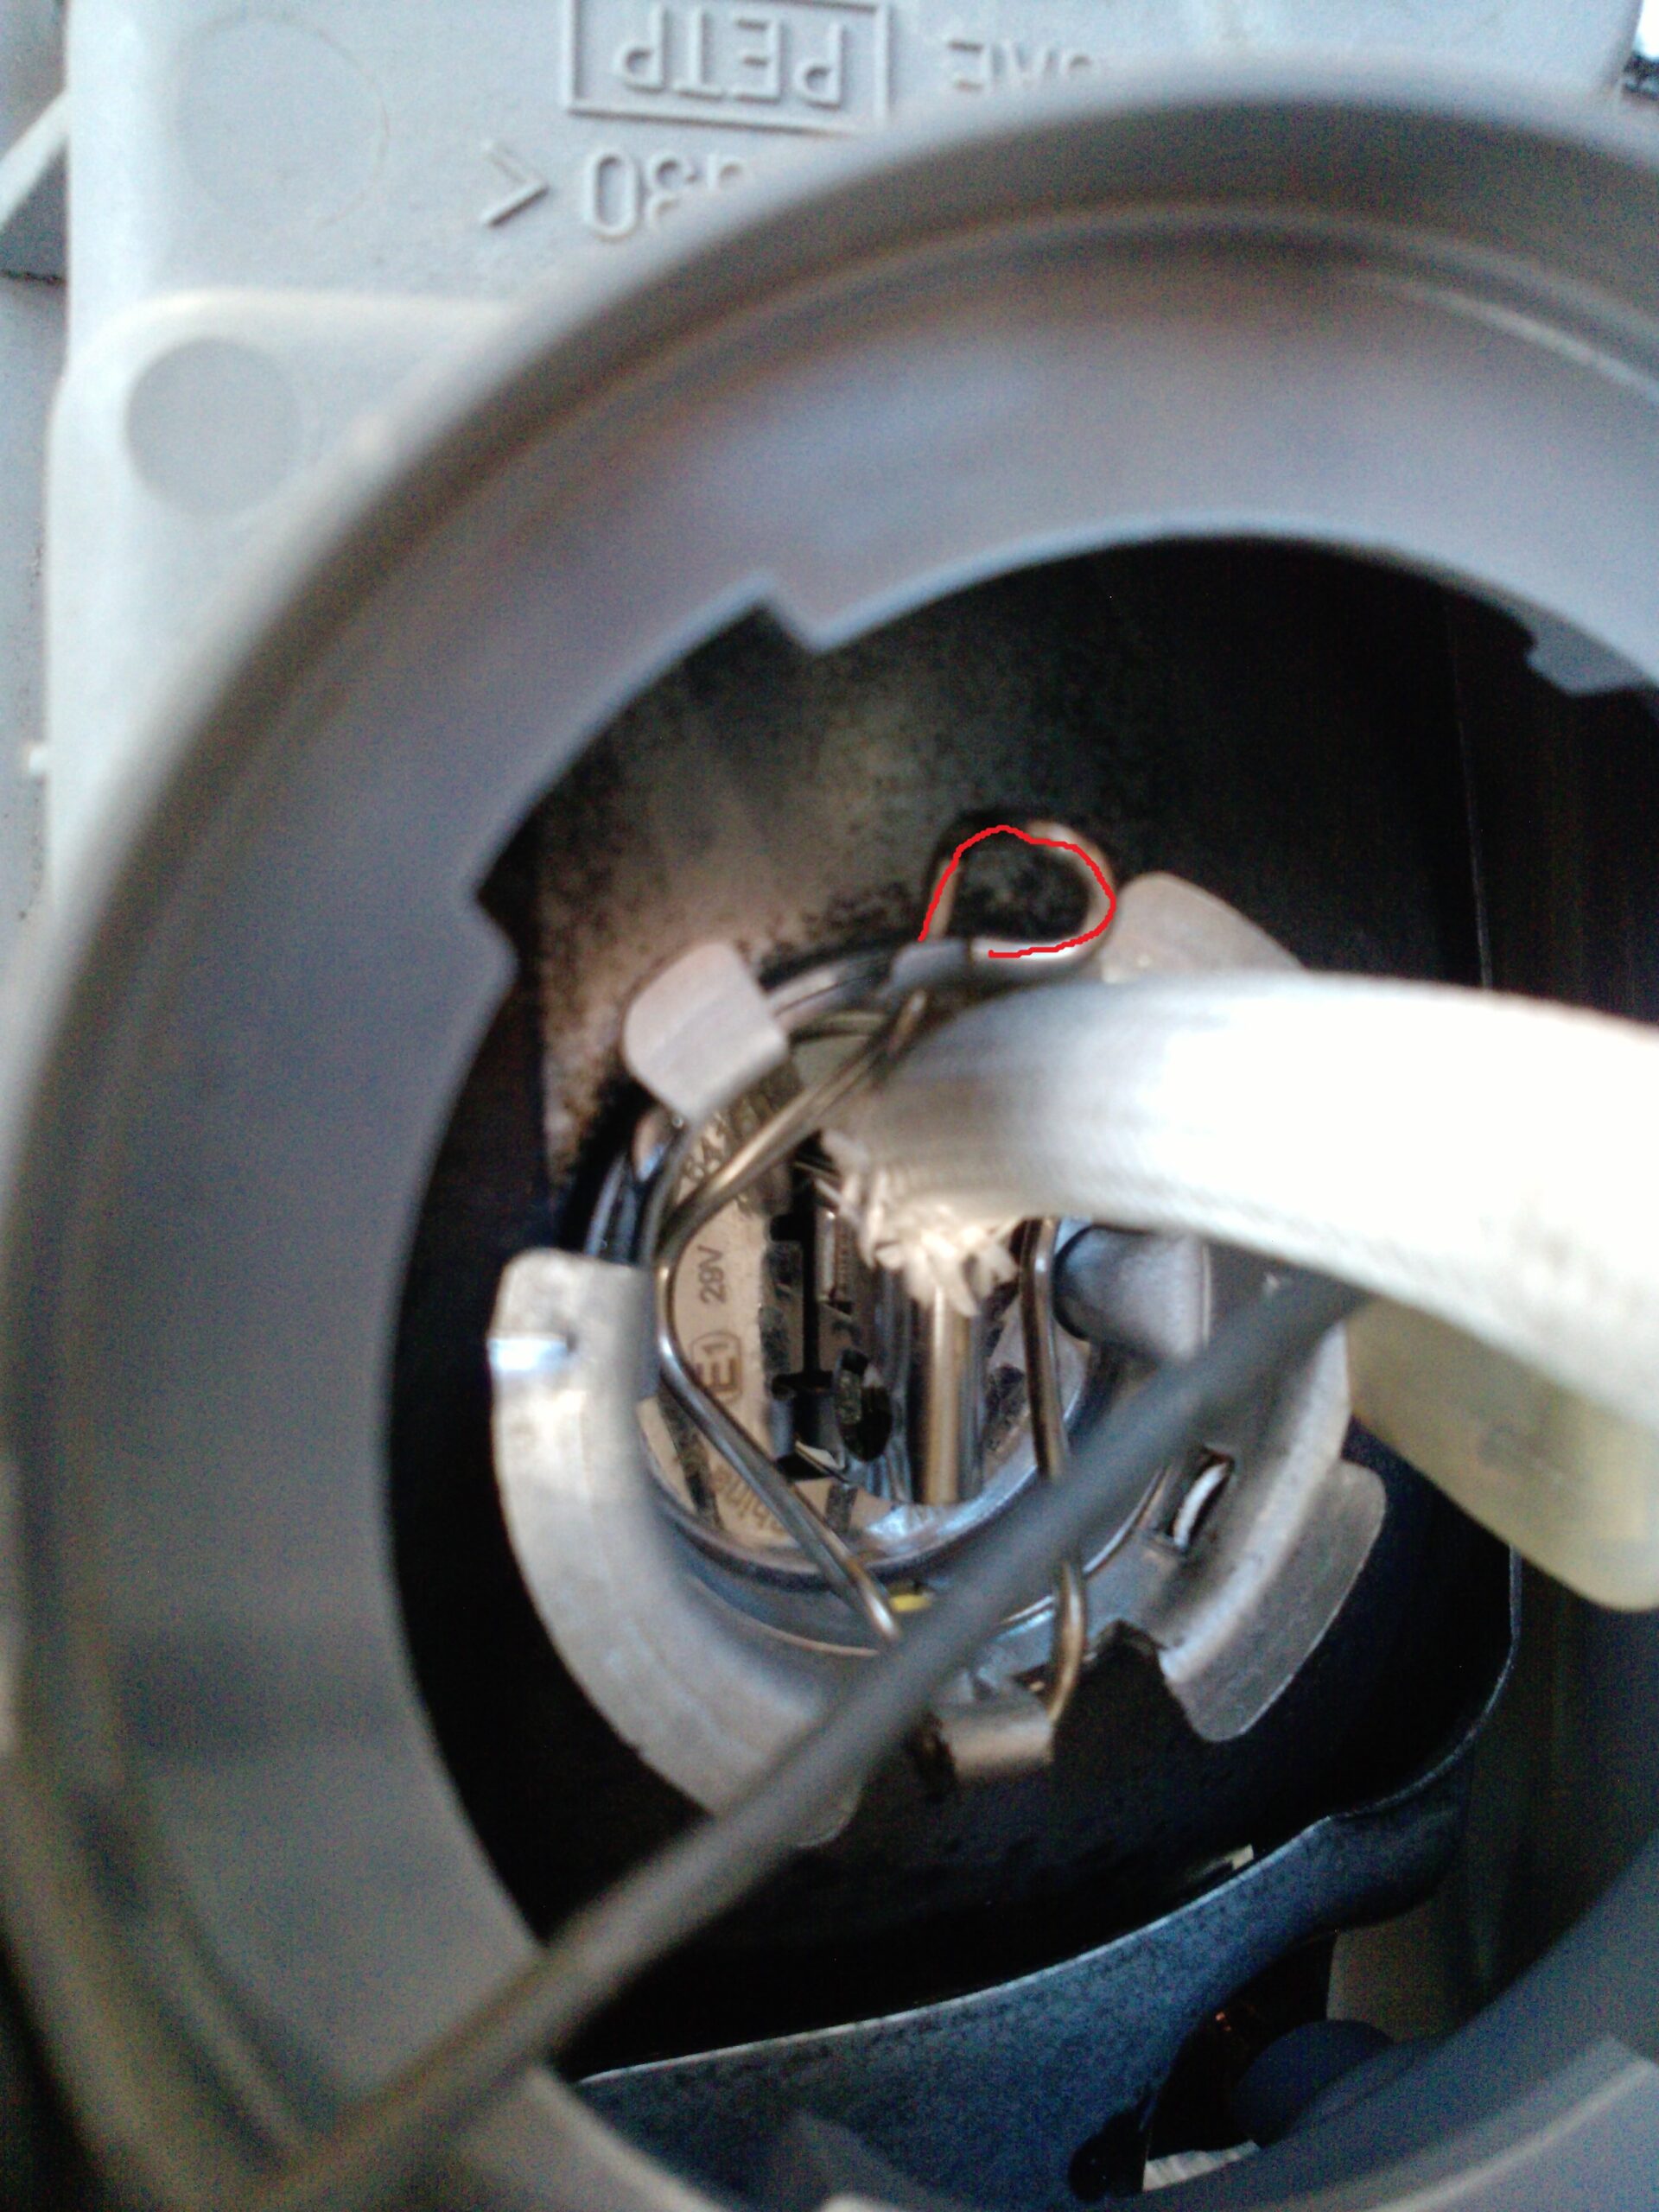
12. Push back the rubber sleeve and unplug the bulb Installation is reverse of removal
![]()

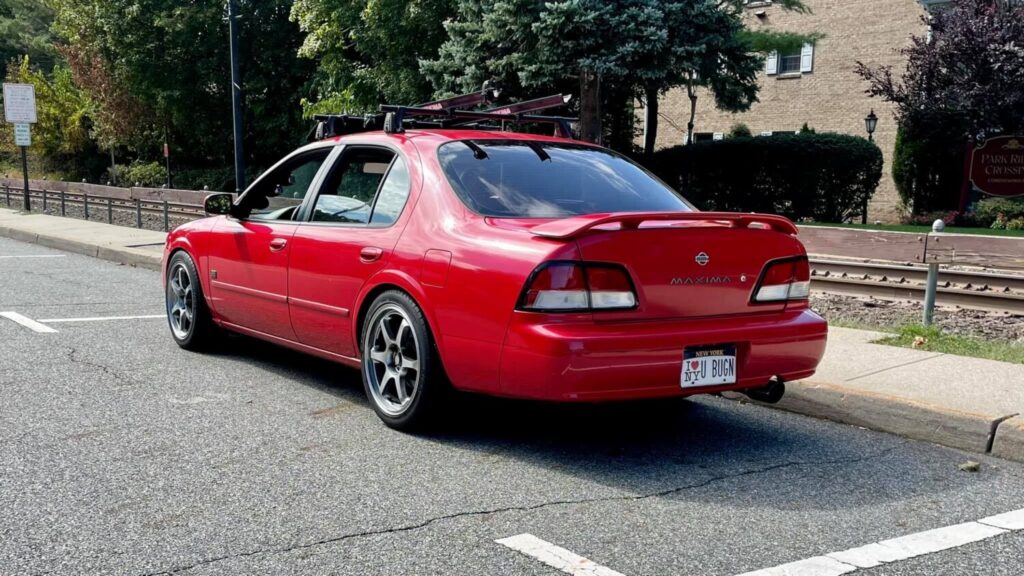
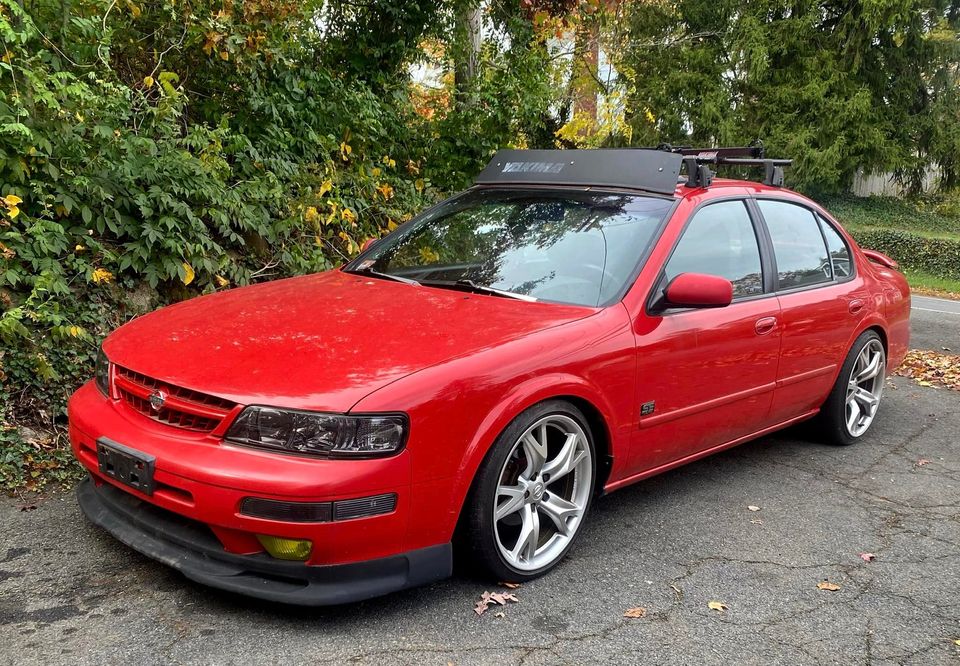
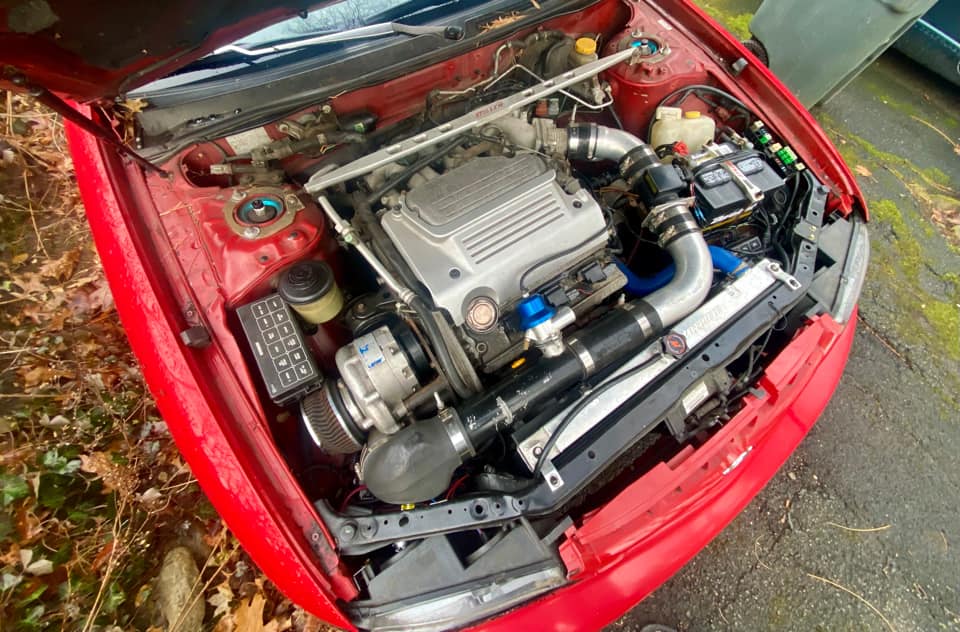
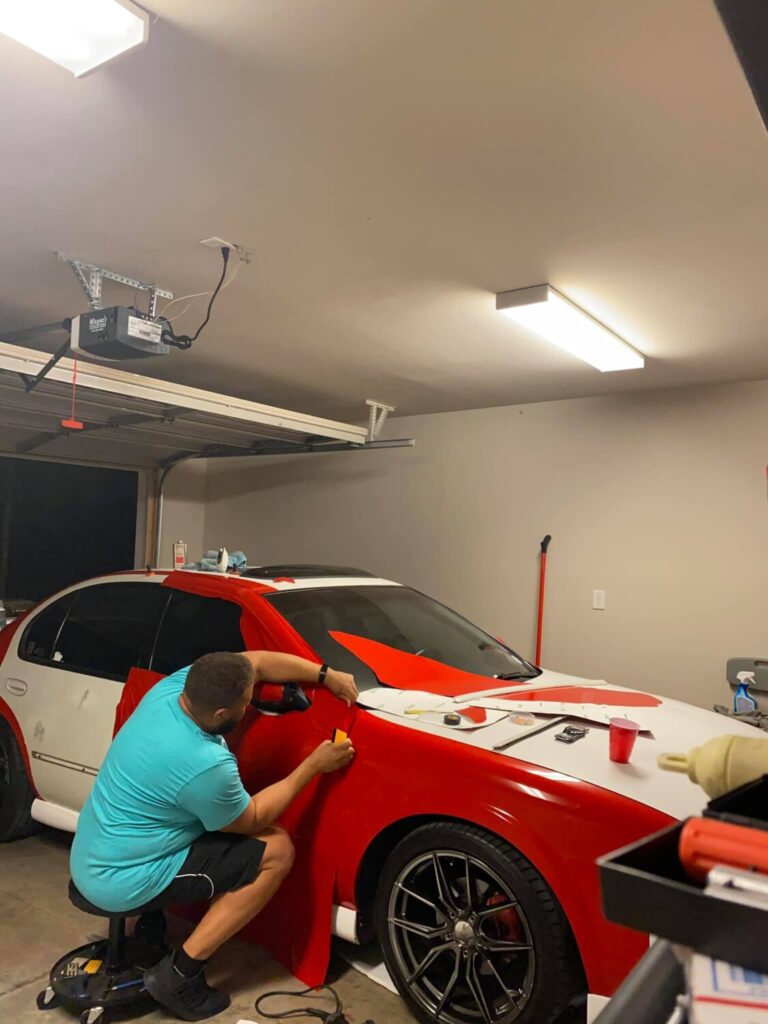
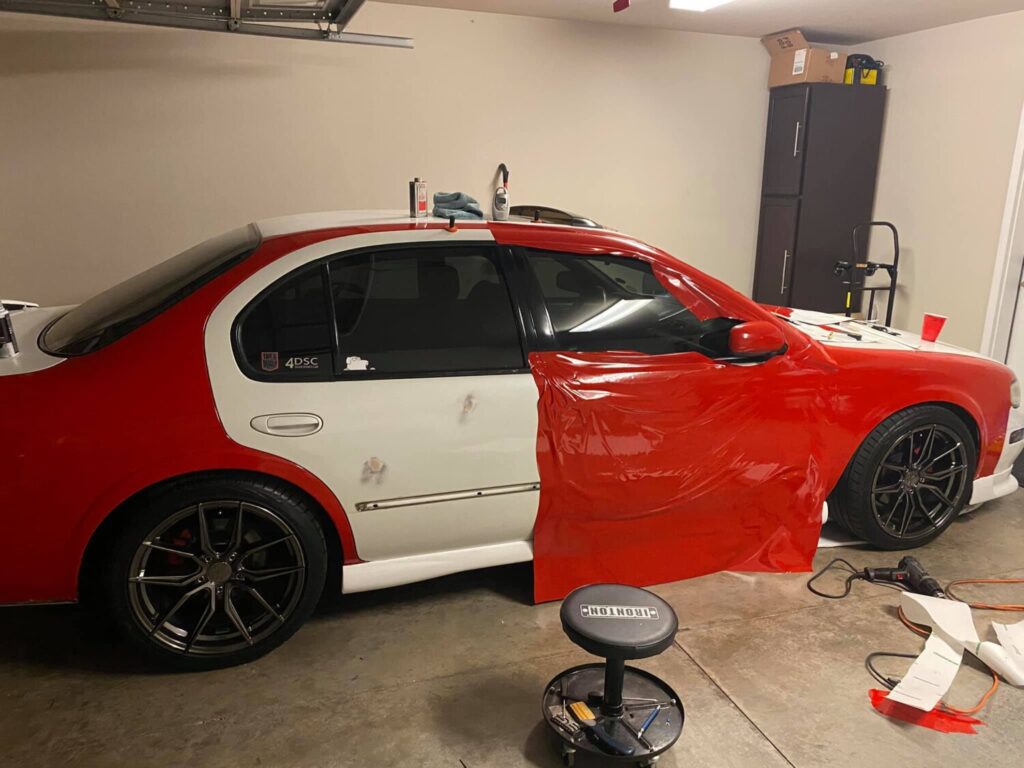
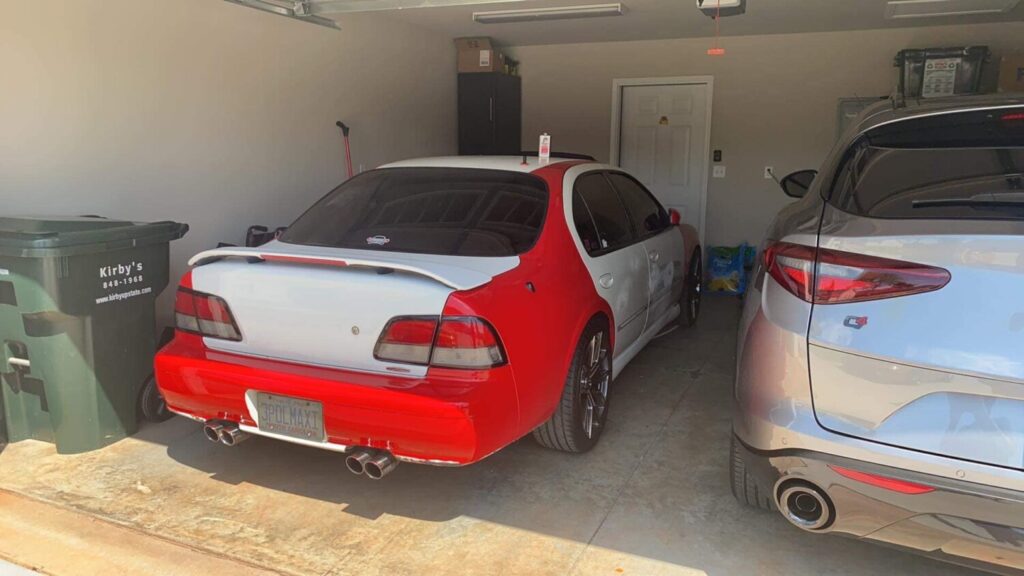
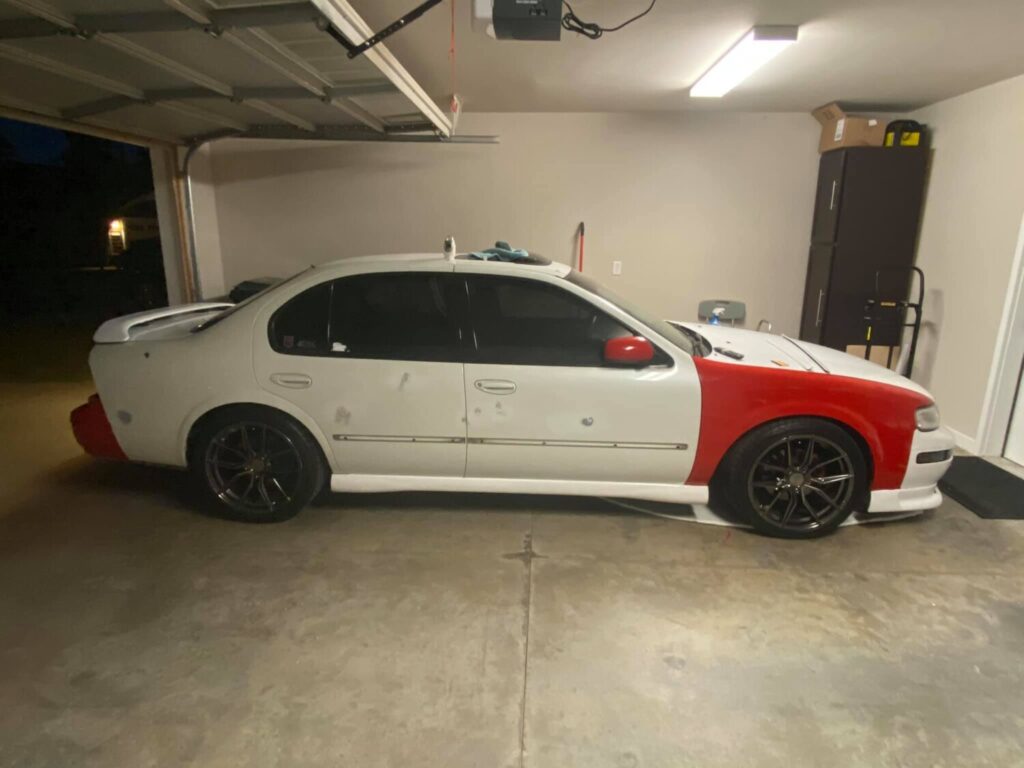
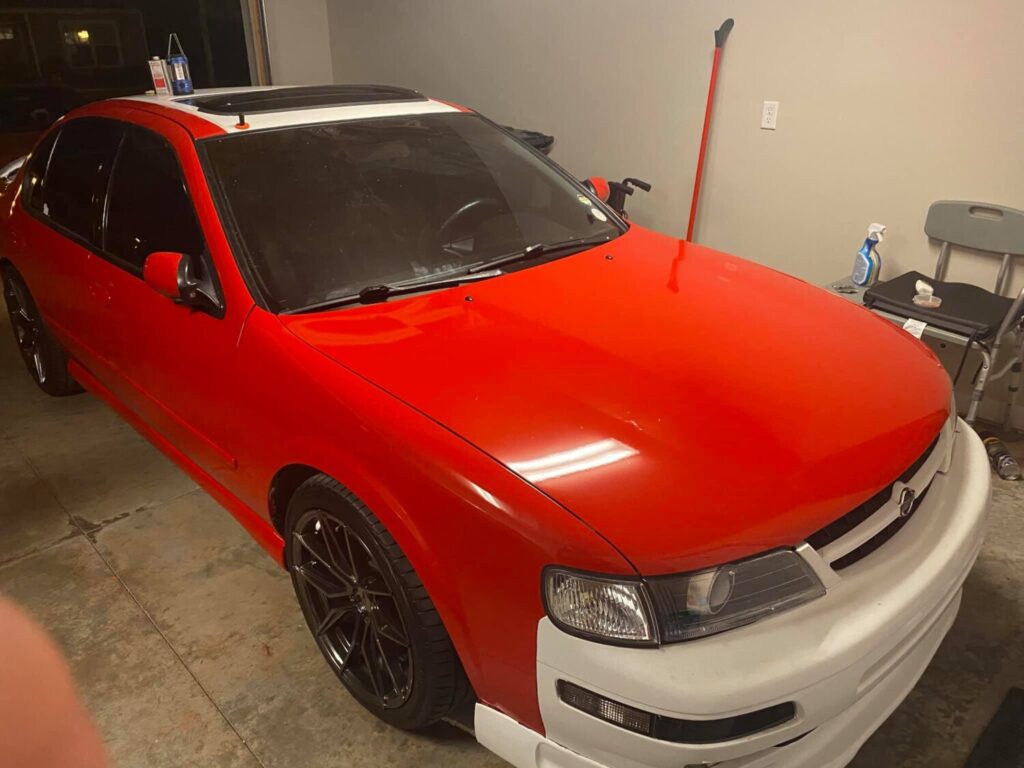
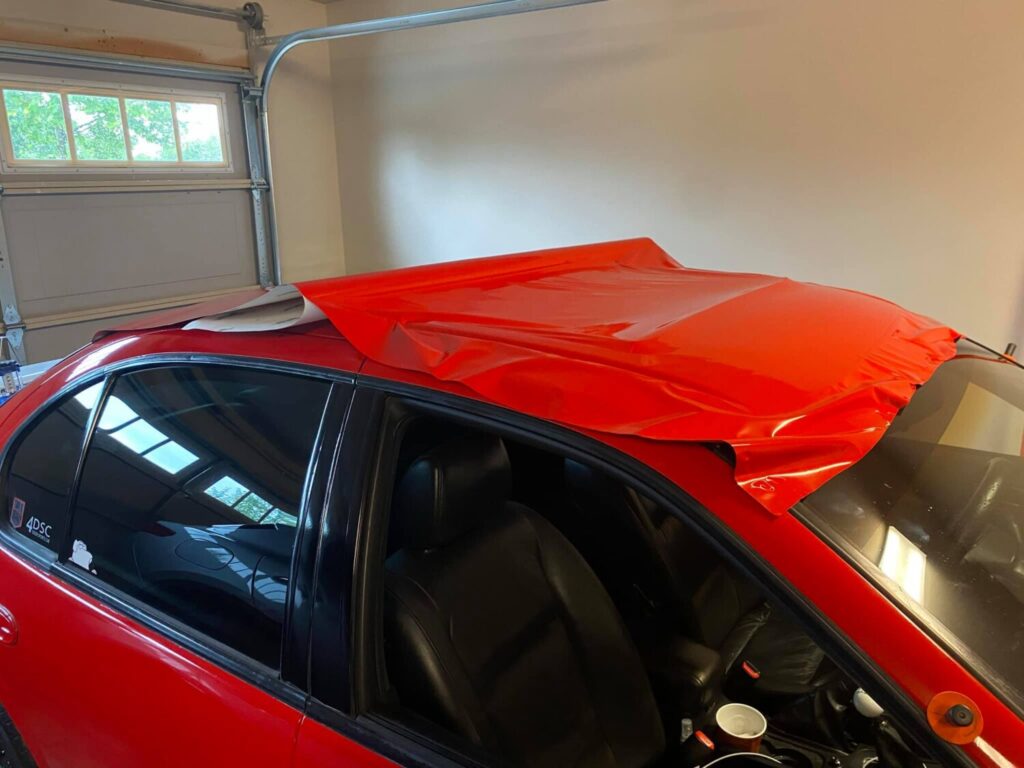
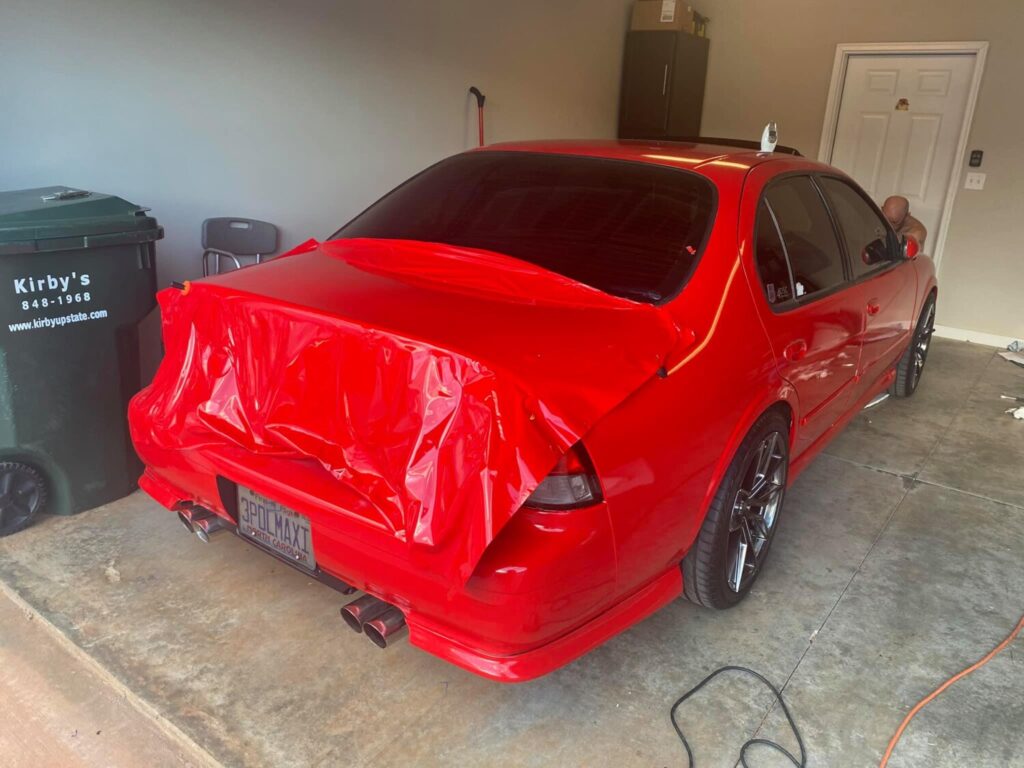
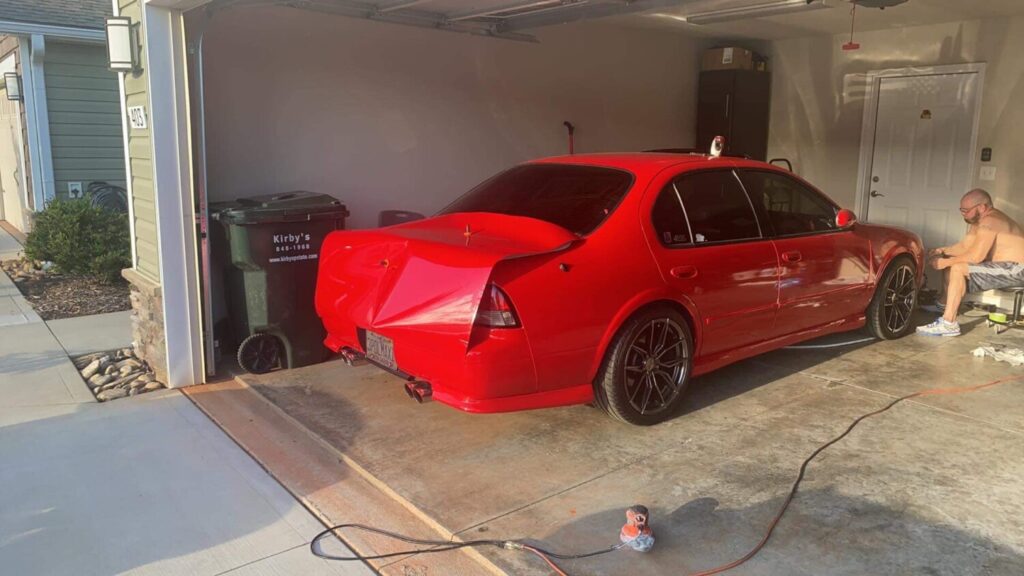
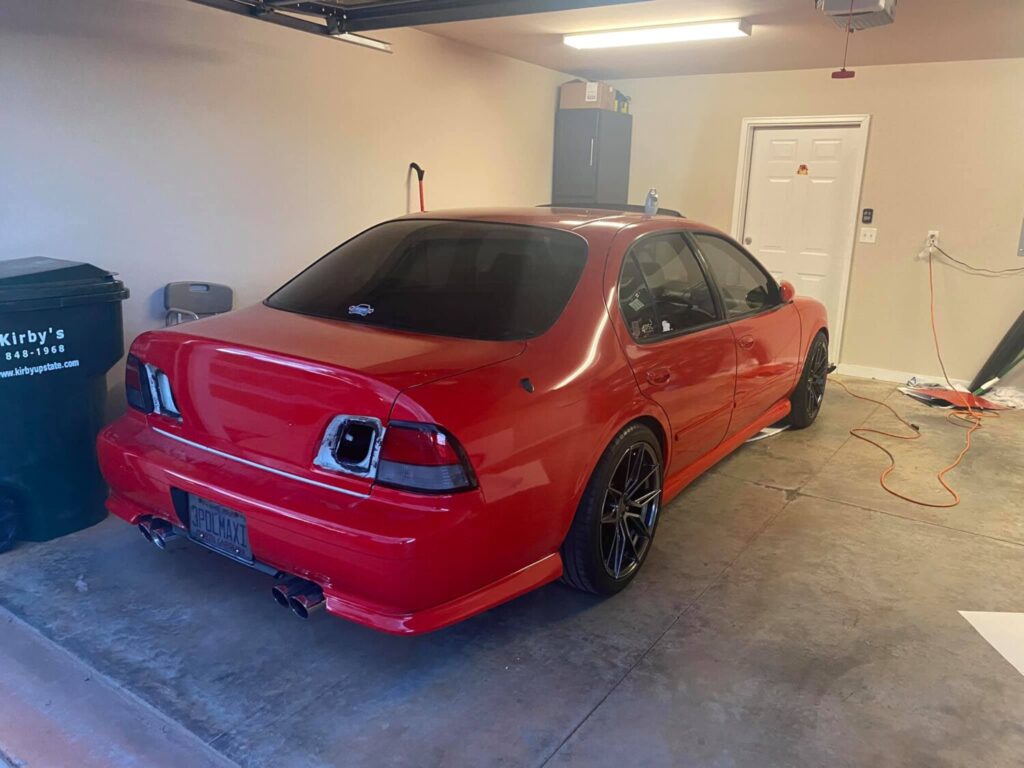
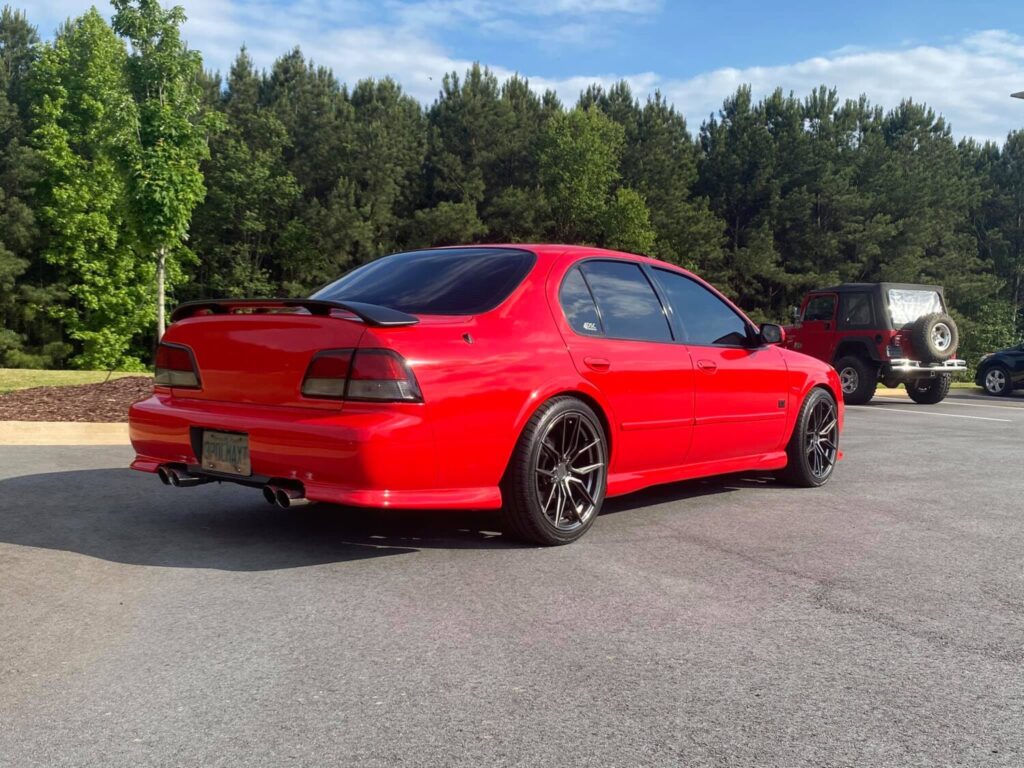
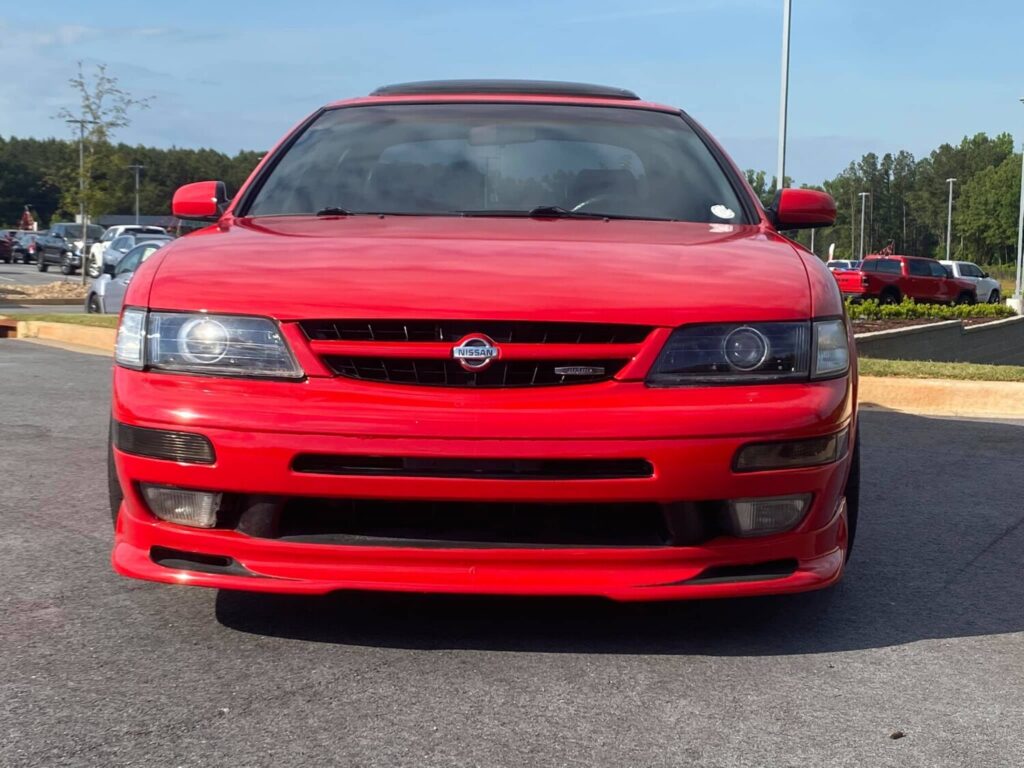
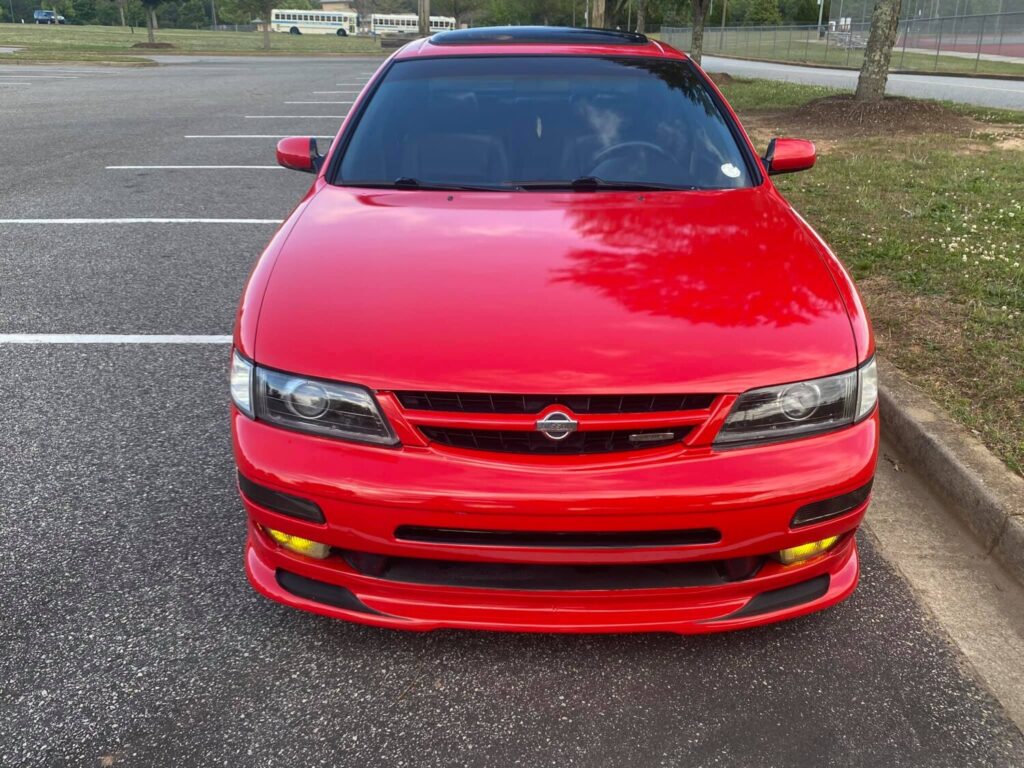
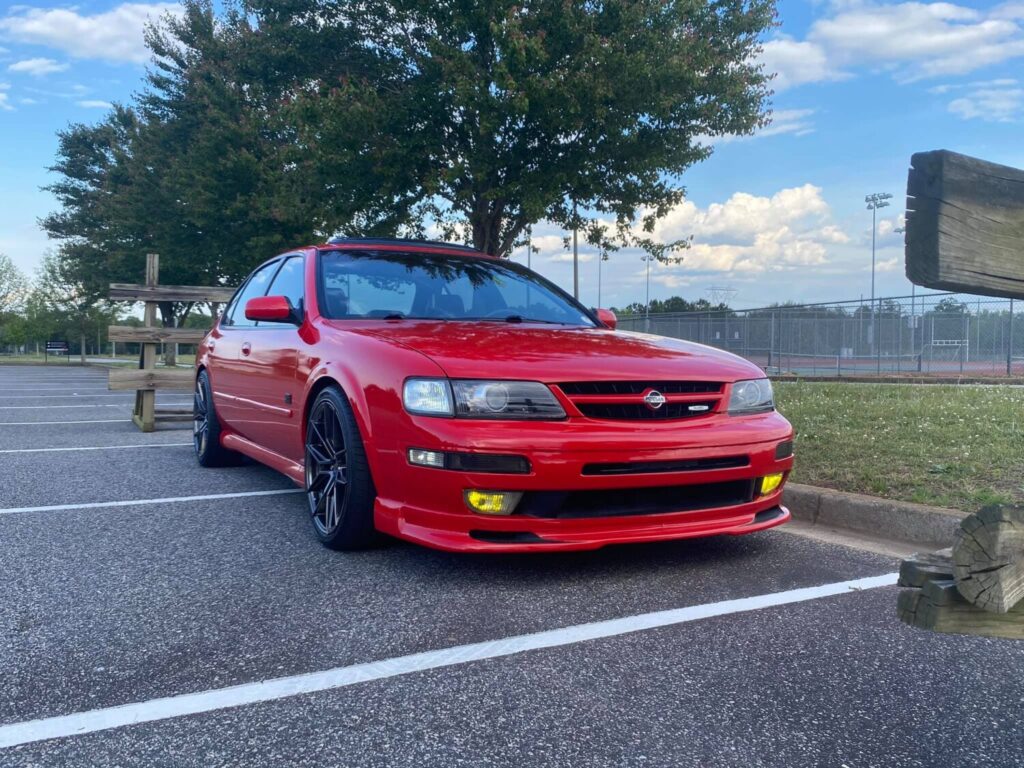
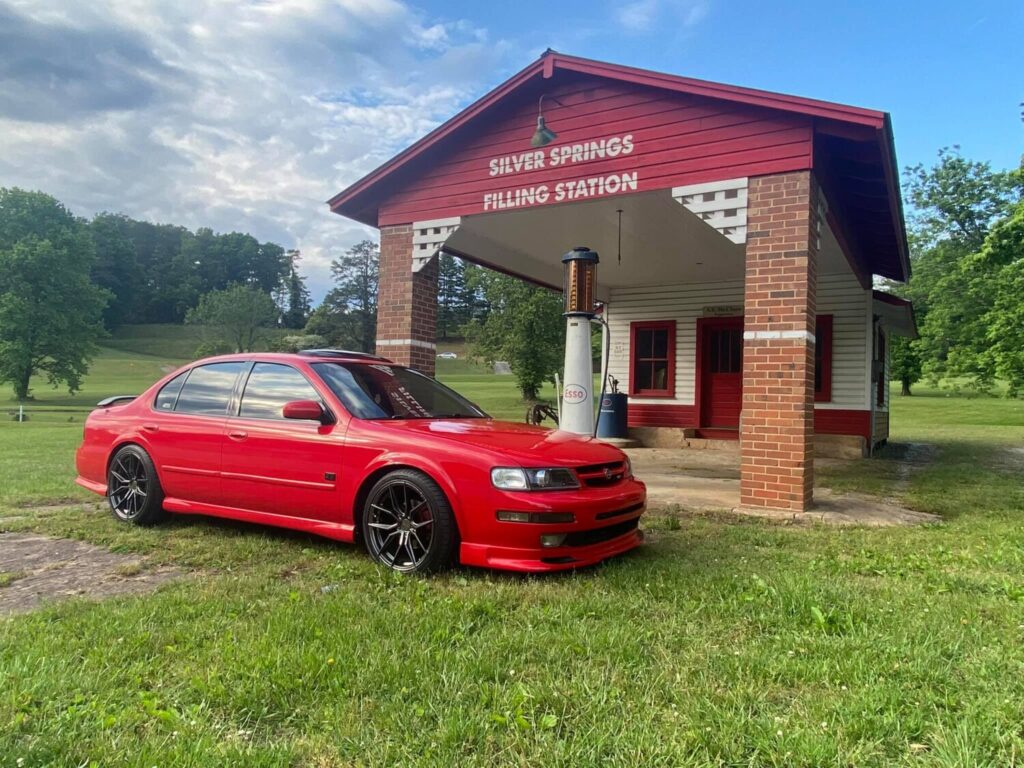
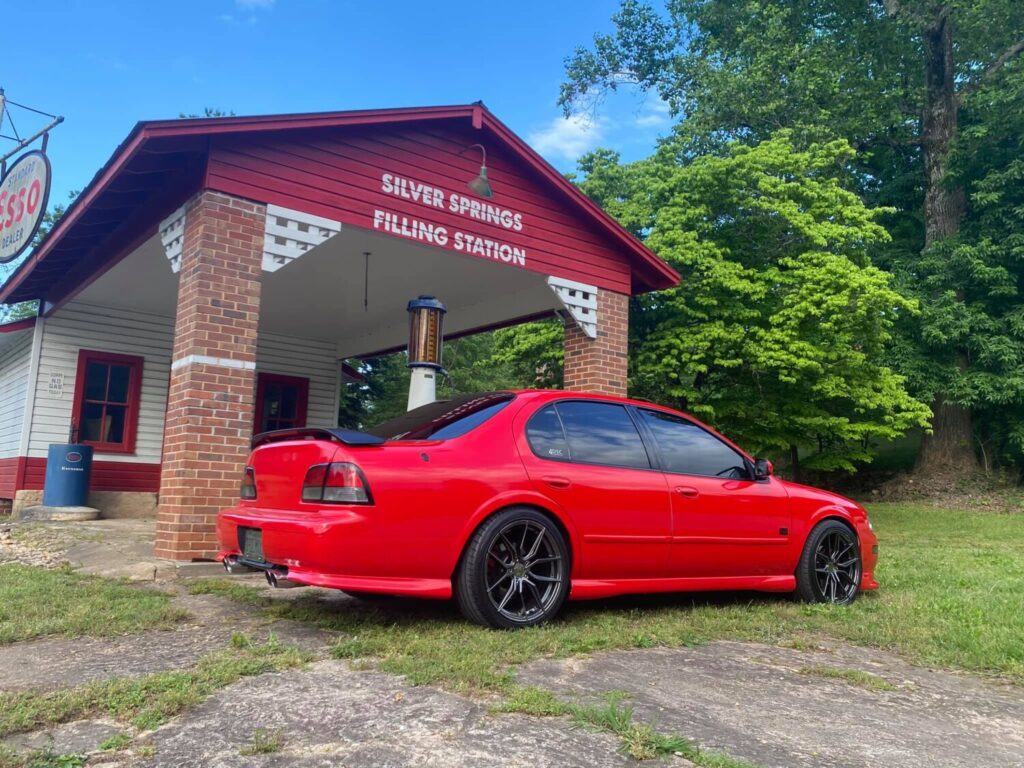
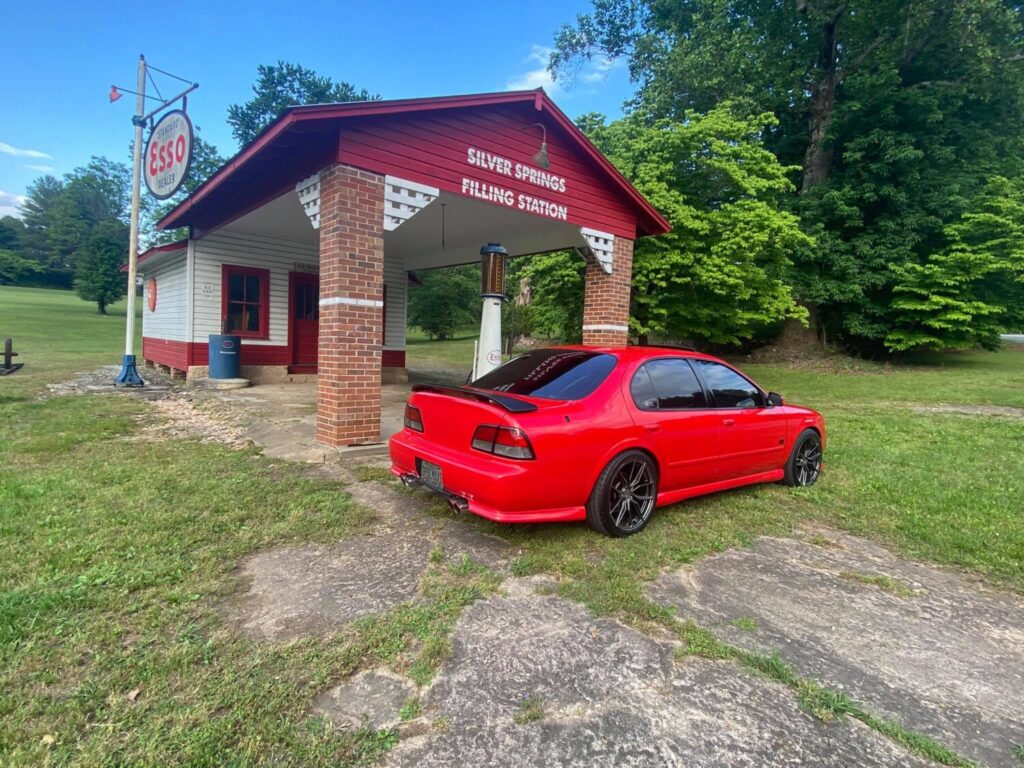
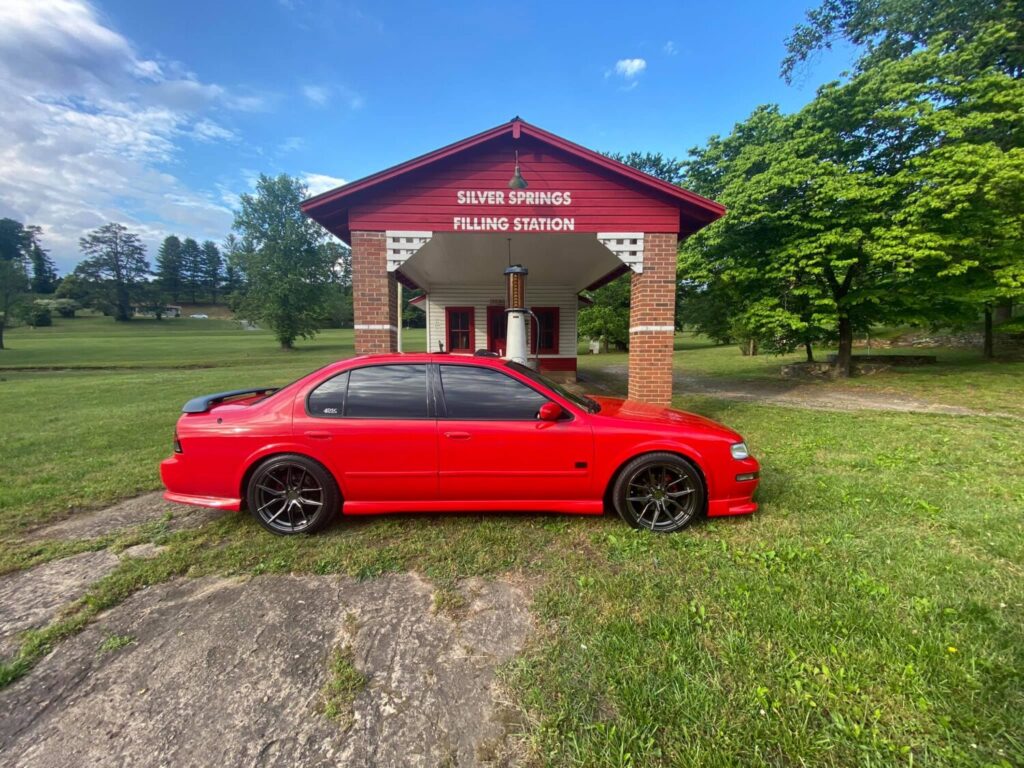
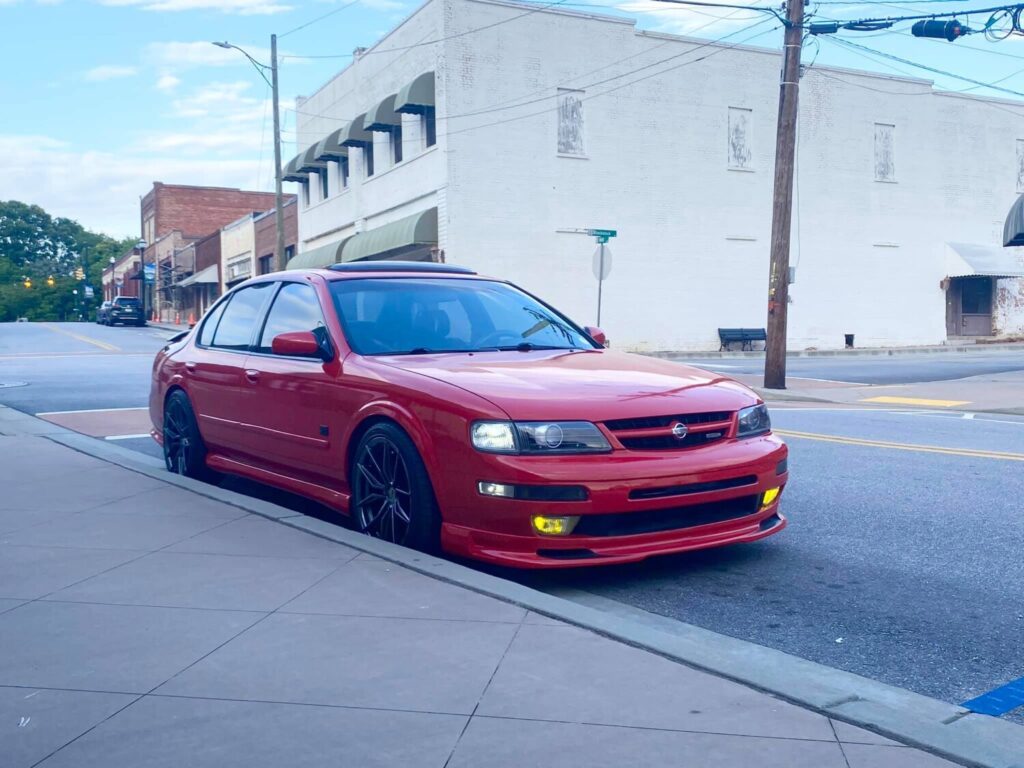
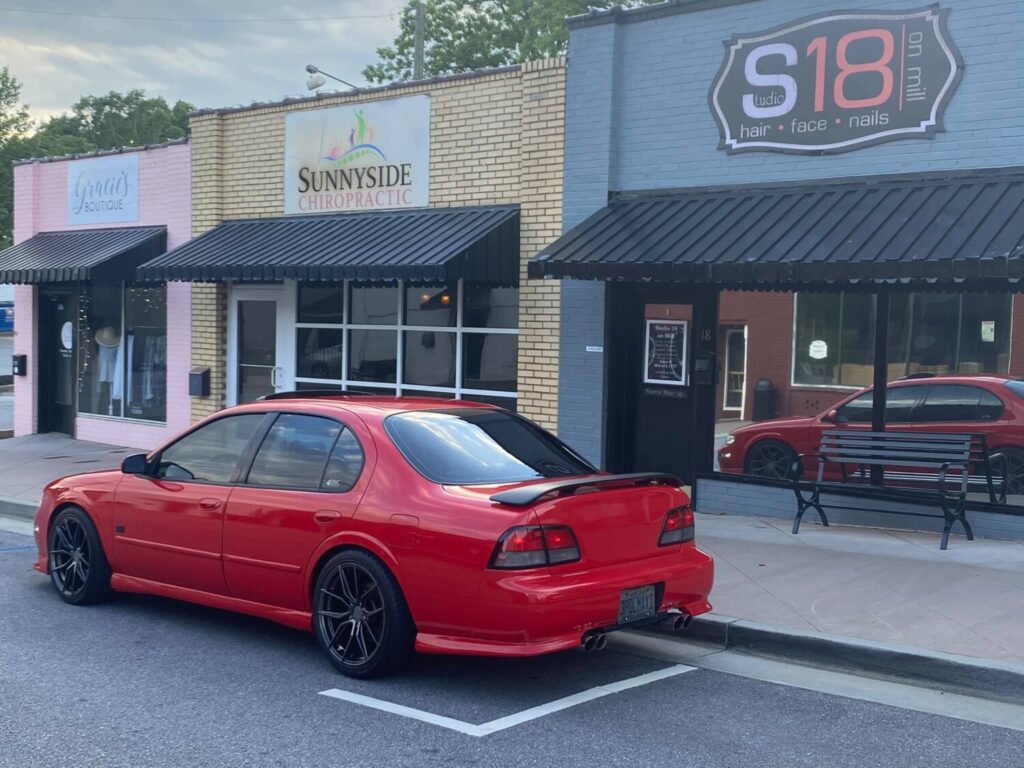
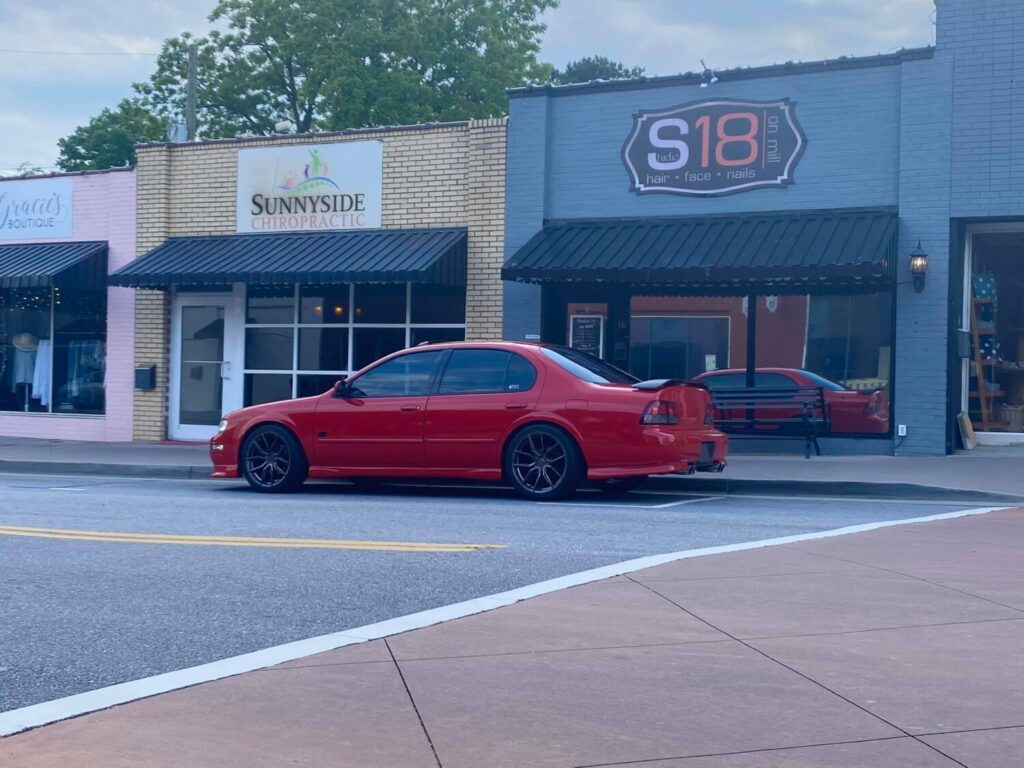
Owner: Brandy Duncan-Whillock
Year: 1999
Model: Maxima
Color: Wrapped Red
Engine: VQ30DE
Transmission: 5-Speed Manual


![]()


Community Member Credit: spike228
Highlights:
Details:
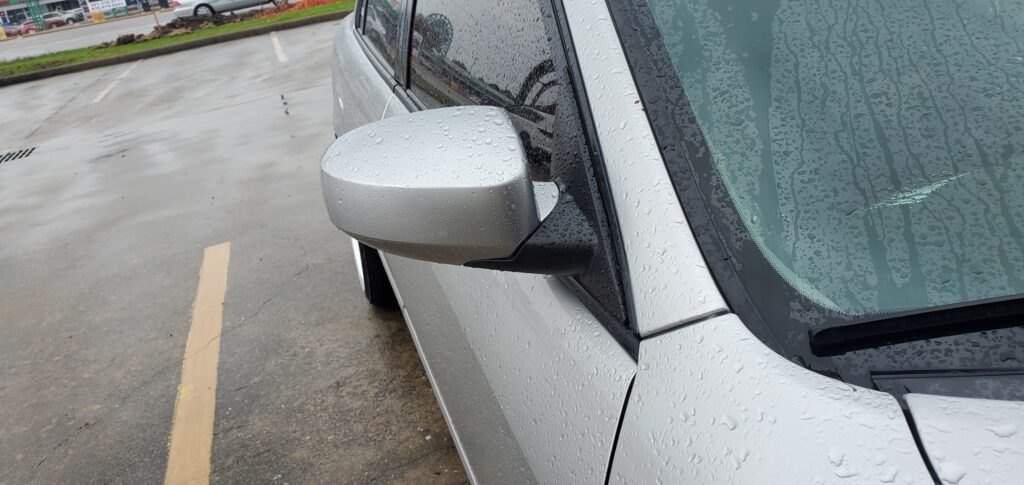
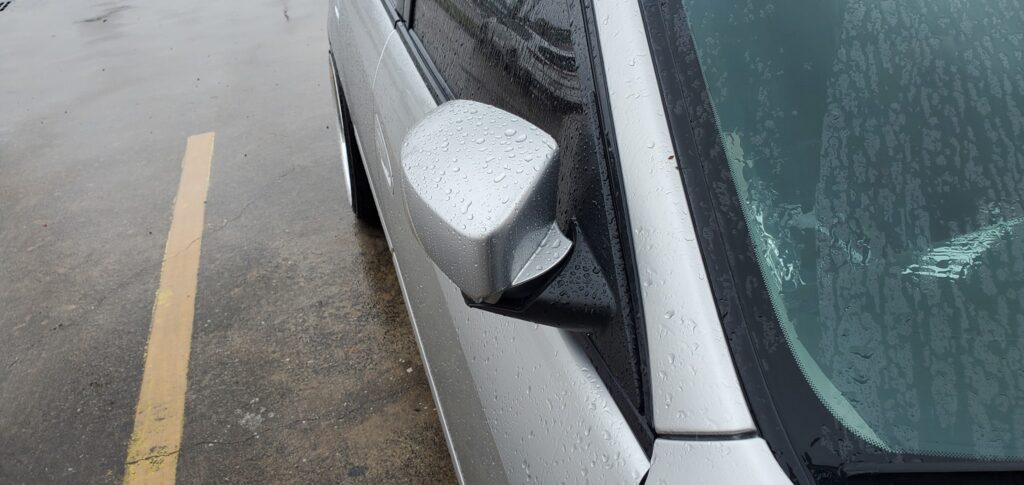
The wiring harness is a direct fit for the 05-06 Altima. I’ve read that the 02-04 Altimas have slightly different harnesses, so the harness will require modifications for 02-04 Altimas ONLY.
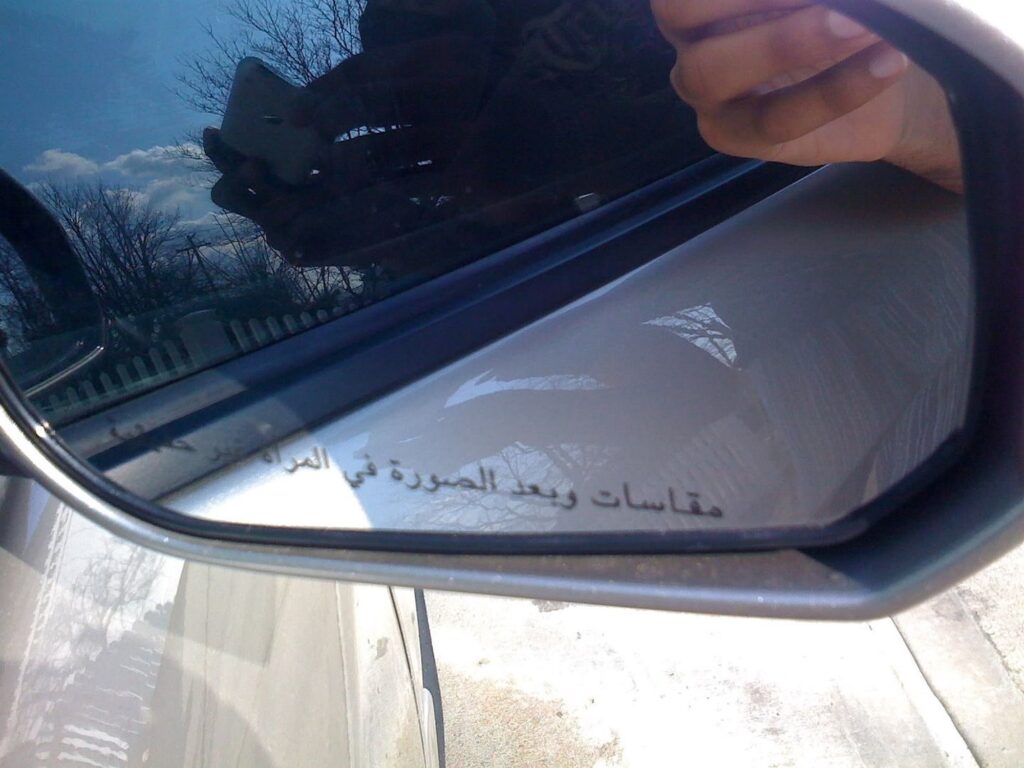
The folding mirrors are noticeably heavier than the standard non-folding mirrors. Just to get a feel for it, I would say that the folding mirror weighs as much as one and a half times the weight of the non-folding mirror.
The folding mirror appears to be of a much higher quality than the standard mirror (although there is one minor aesthetic flaw which I will mention later). The reflection in the mirrors seems to be a bit easier on the eyes. It’s almost like there’s an anti-glare coating on it. The power mechanisms sound a lot more expensive. The plastic used to make the mirror also seems to be of a higher quality.
The one aesthetic flaw that I found was the felt material that is used to cushion between the folding parts. The felt is slightly exposed even when the mirrors aren’t folded. This is only noticeable if you look up close, otherwise, it can easily be disregarded.
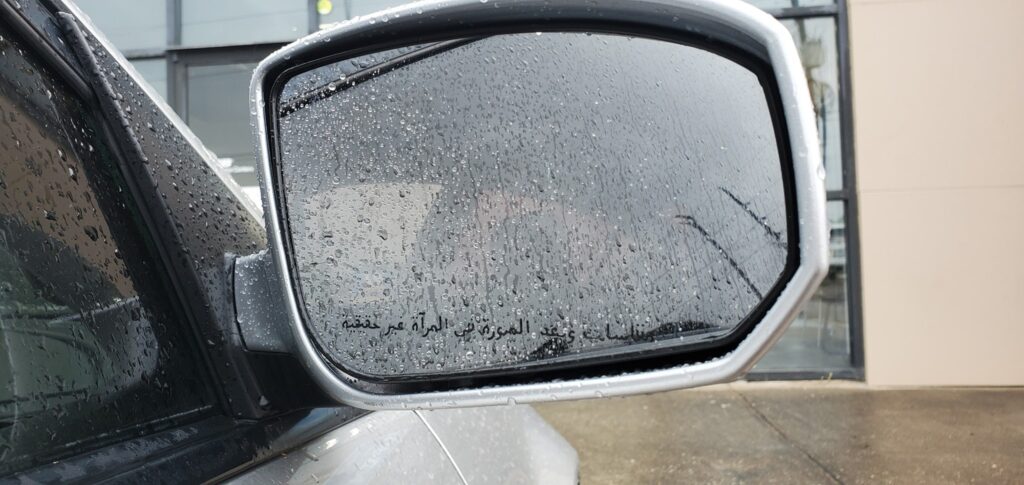
Also, I’m not sure if it was intentional, but the Arabic writing (which btw I think is really cool) on the passenger mirror is printed crooked, but maybe it’s to compensate for the angle that the mirrors will be at when they are mounted.
Another drawback is that they will probably be expensive to paint. I can only imagine what a nightmare the prep work would be. For the record, I don’t think the white Altimas could get away without painting them. They seem to be a different shade but I could be wrong.
Lastly, here are the confirmed part numbers for the mirrors:
![]()