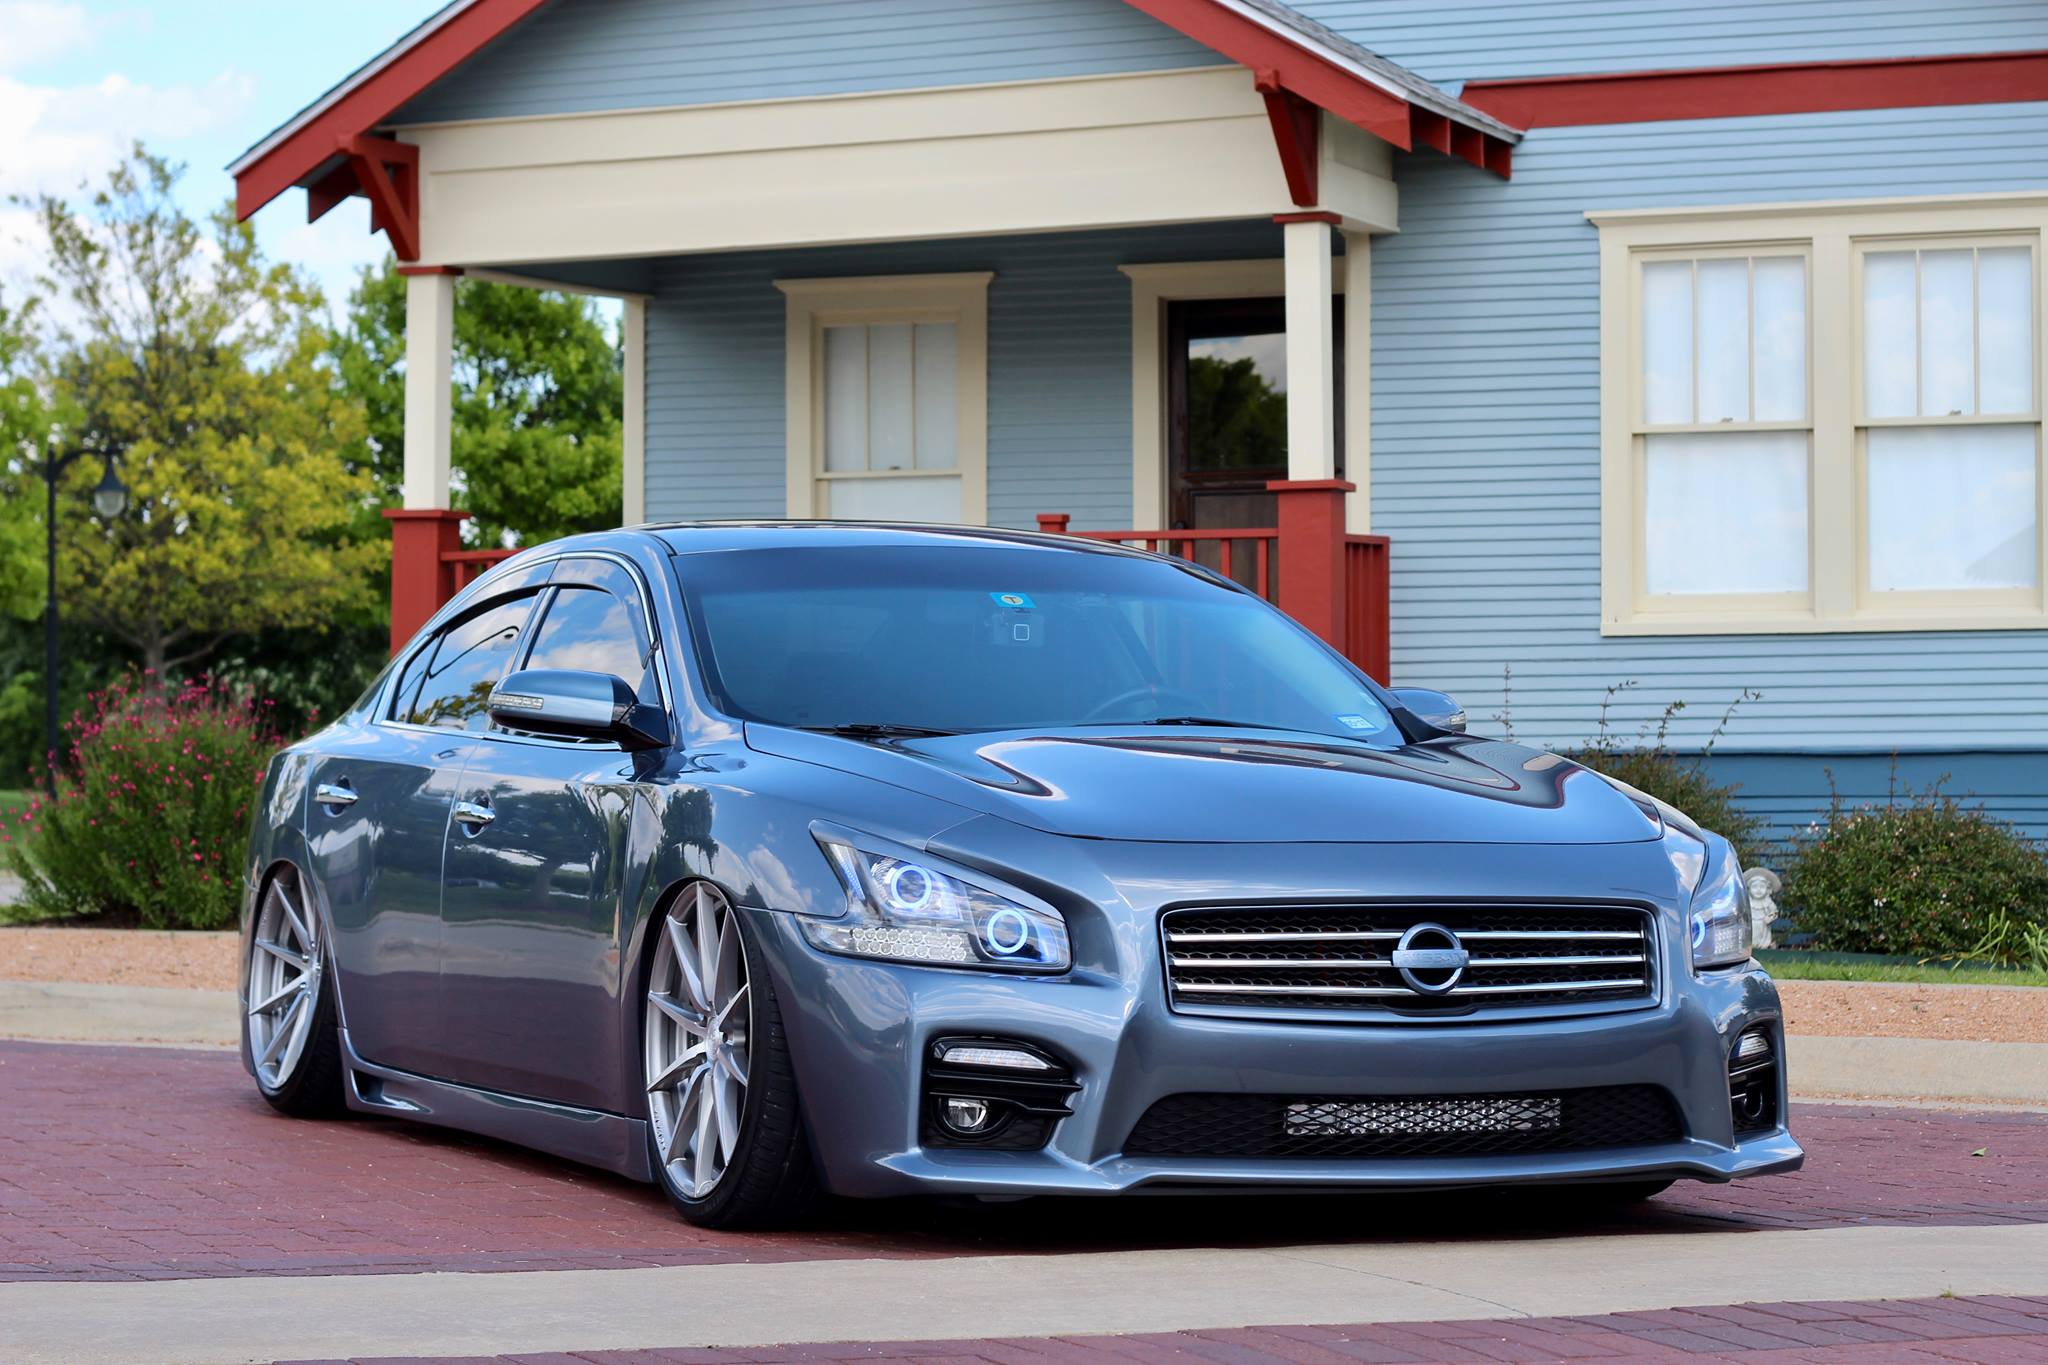
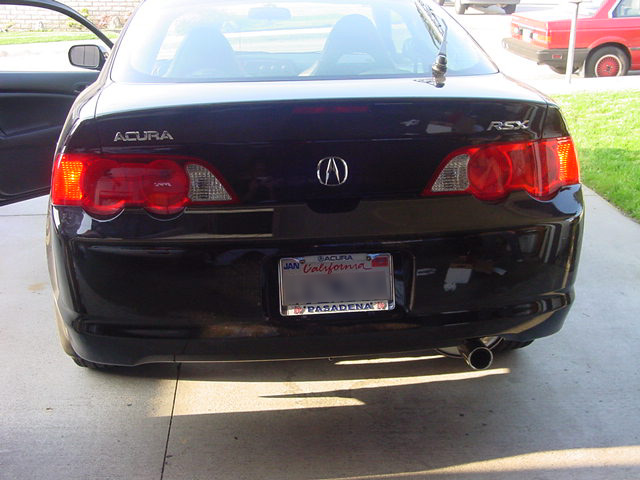
Community Member Credit: Miguel Arroyo


![]()


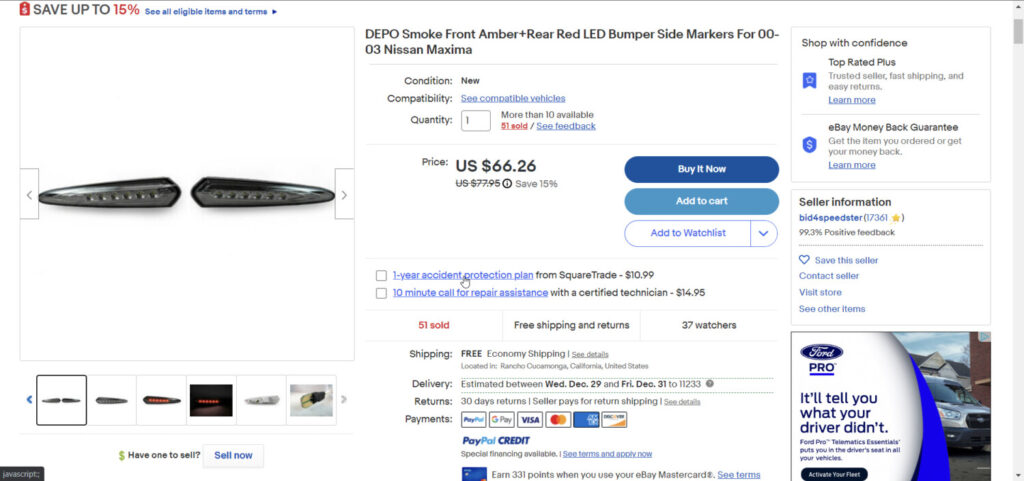
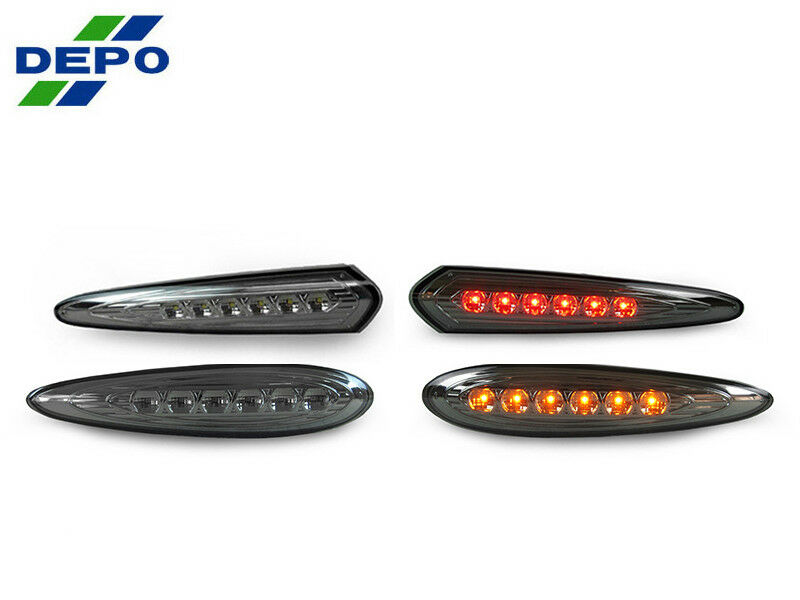
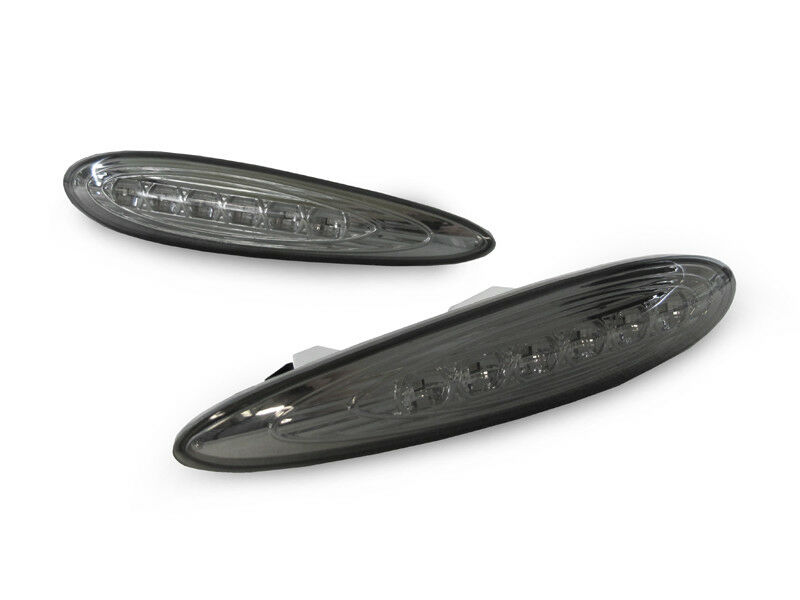
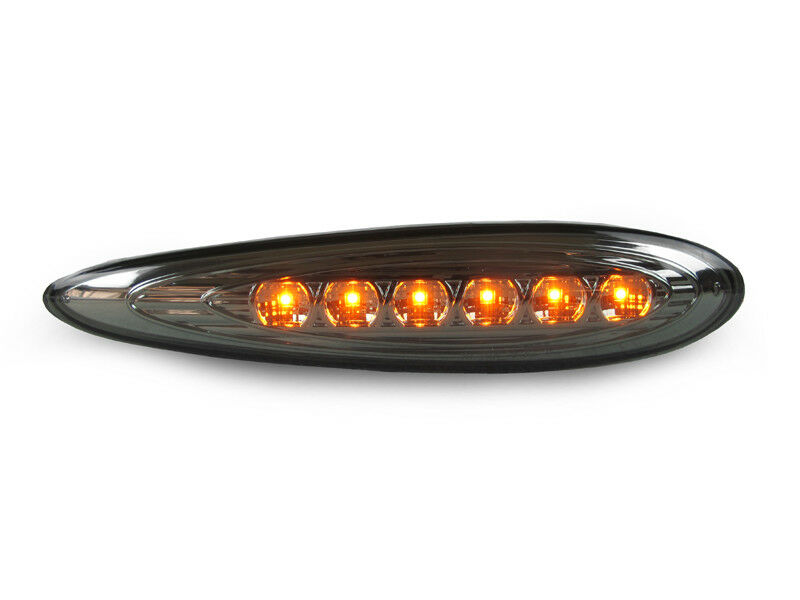
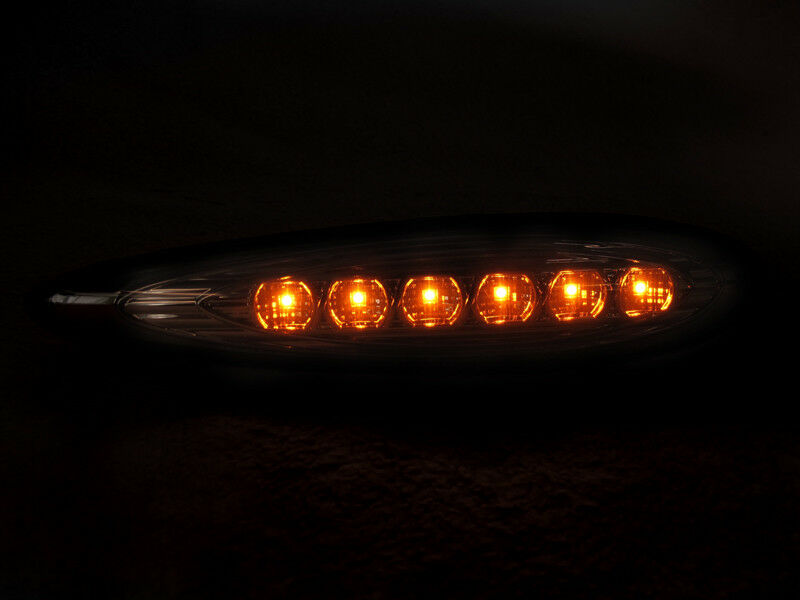
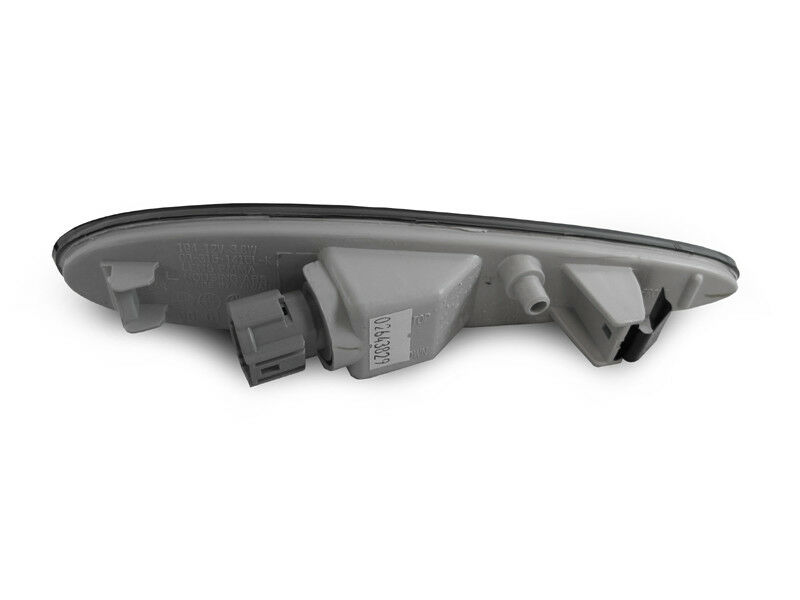
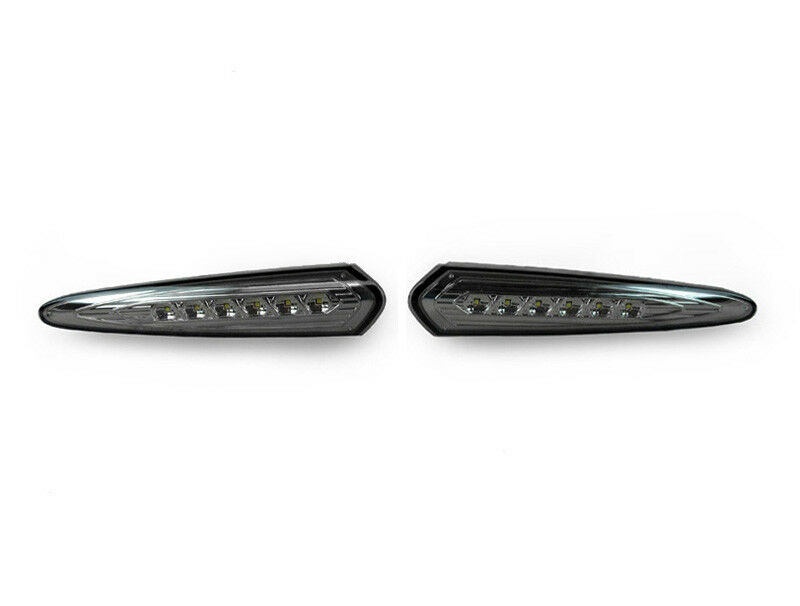
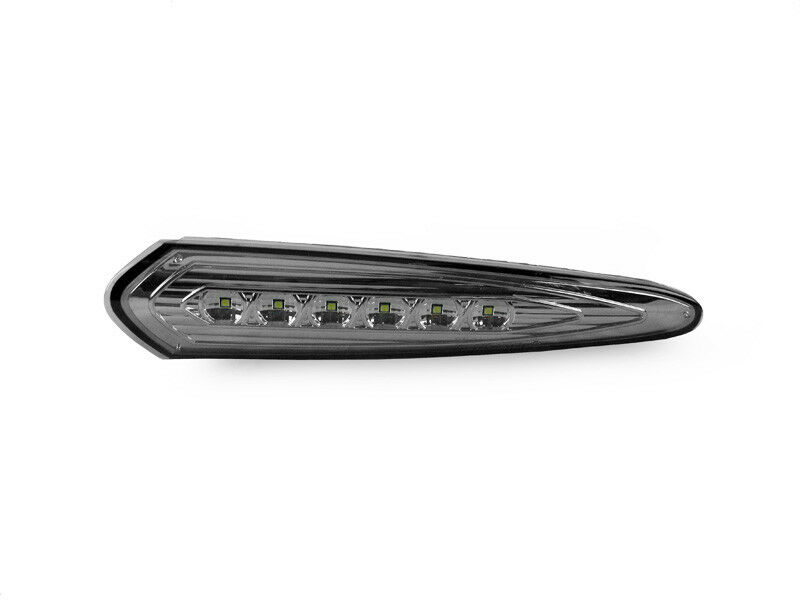
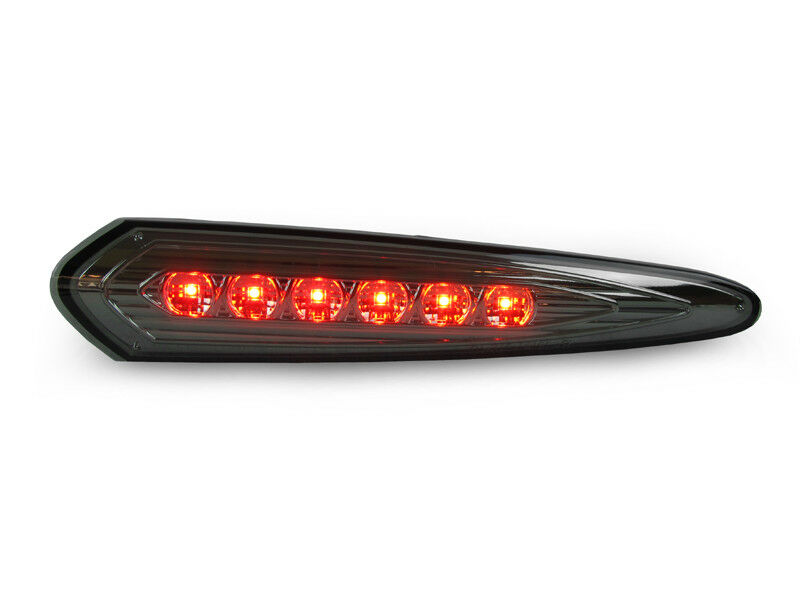
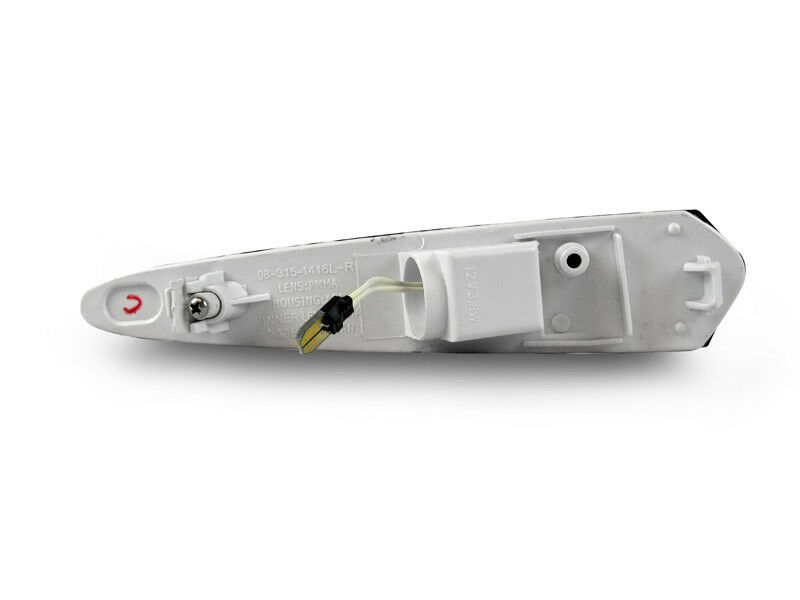
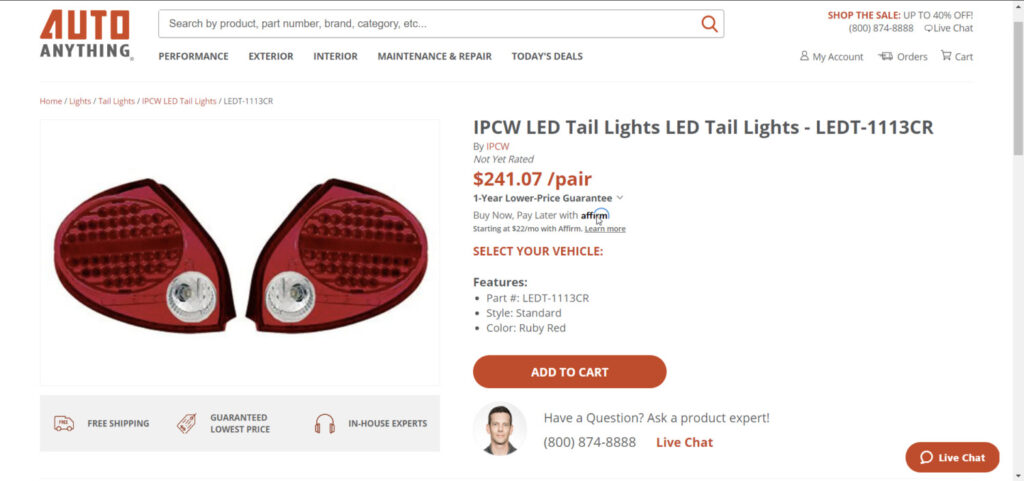
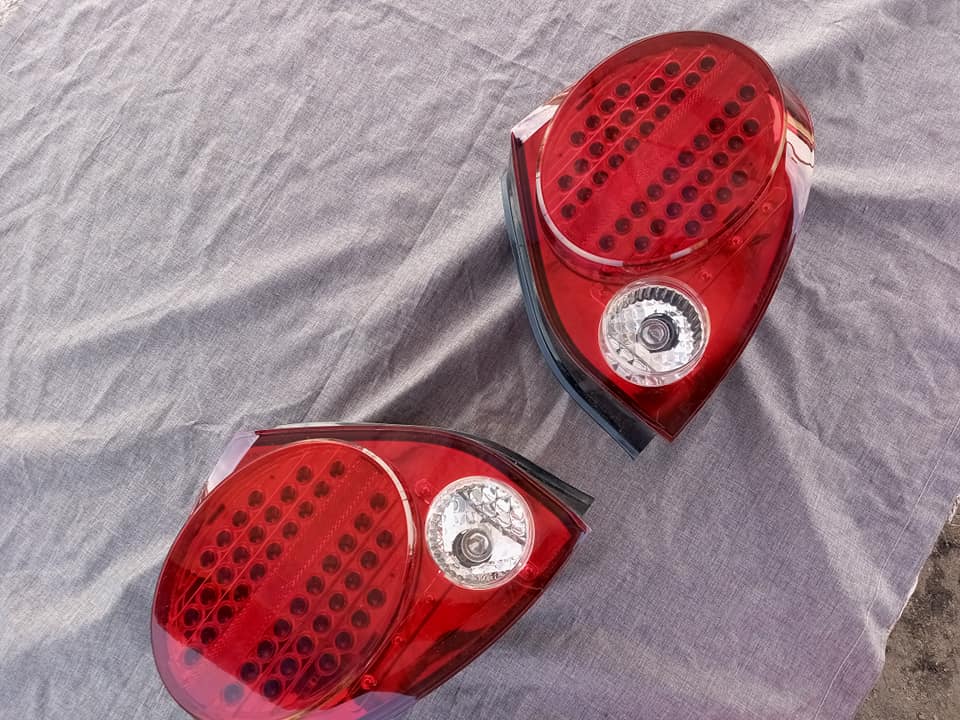
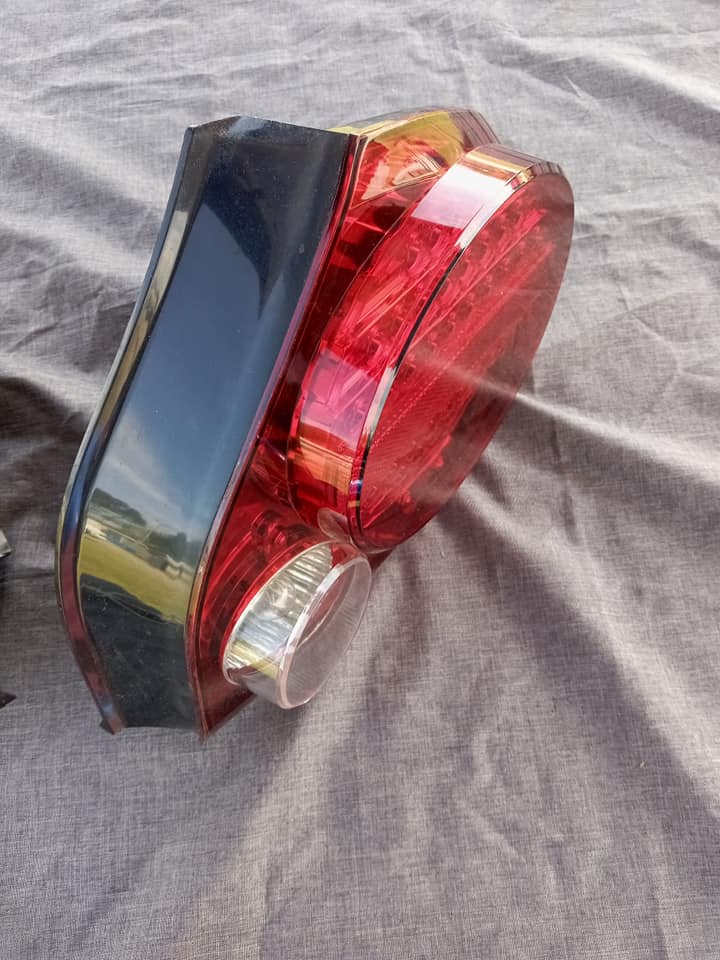
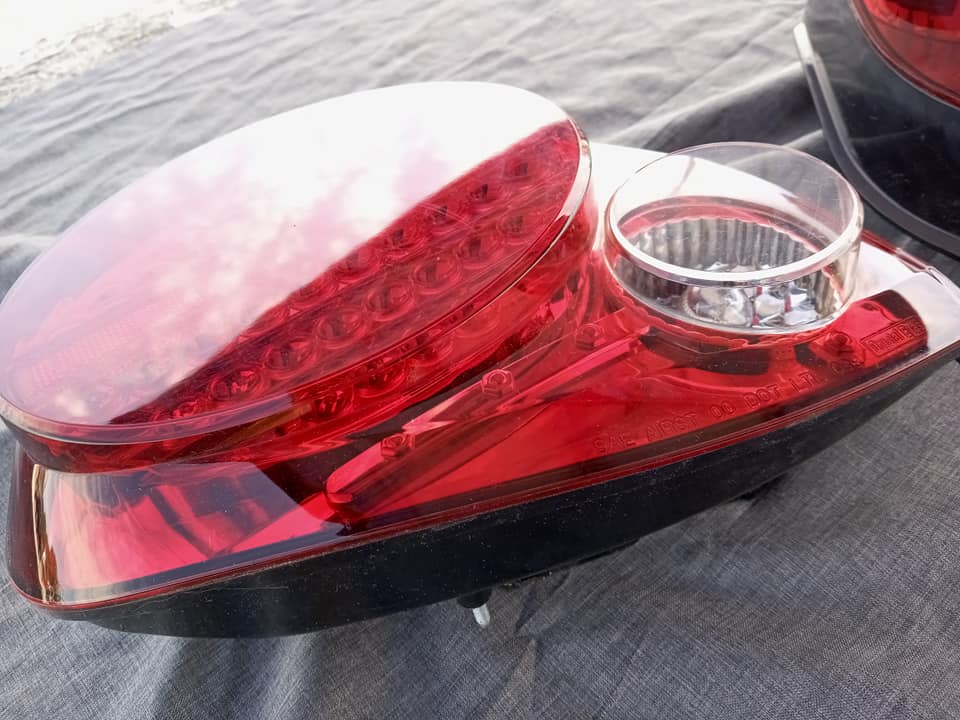
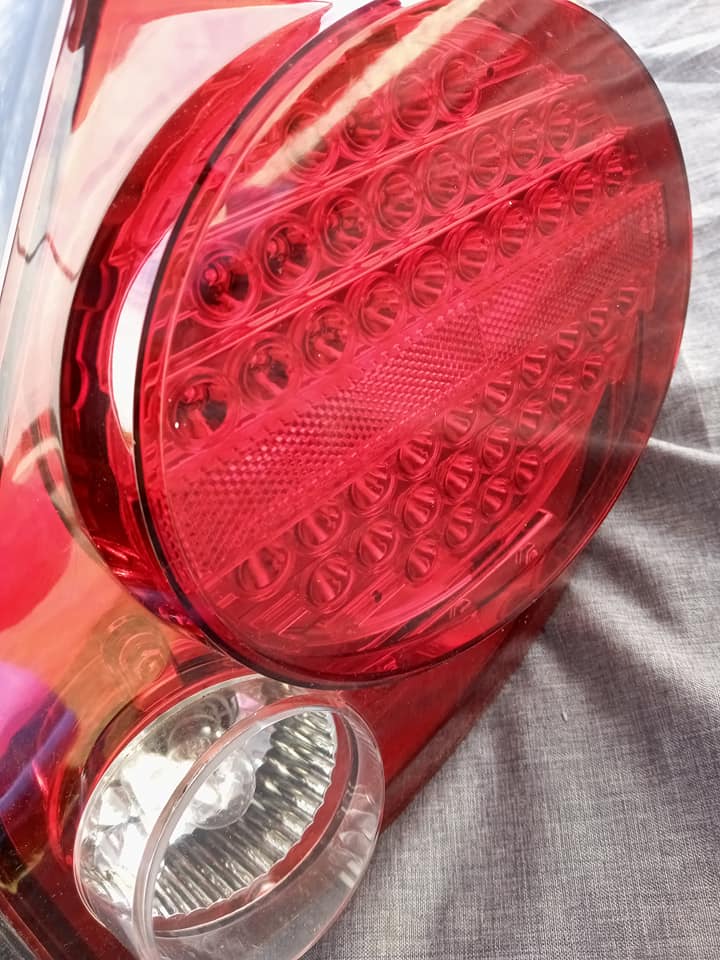
eBay Description: DEPO Smoke Front Amber+Rear Red LED Bumper Side Markers For 00-03 Nissan Maxima
Price: $66.26 (Front/Rear Shipped)

![]()


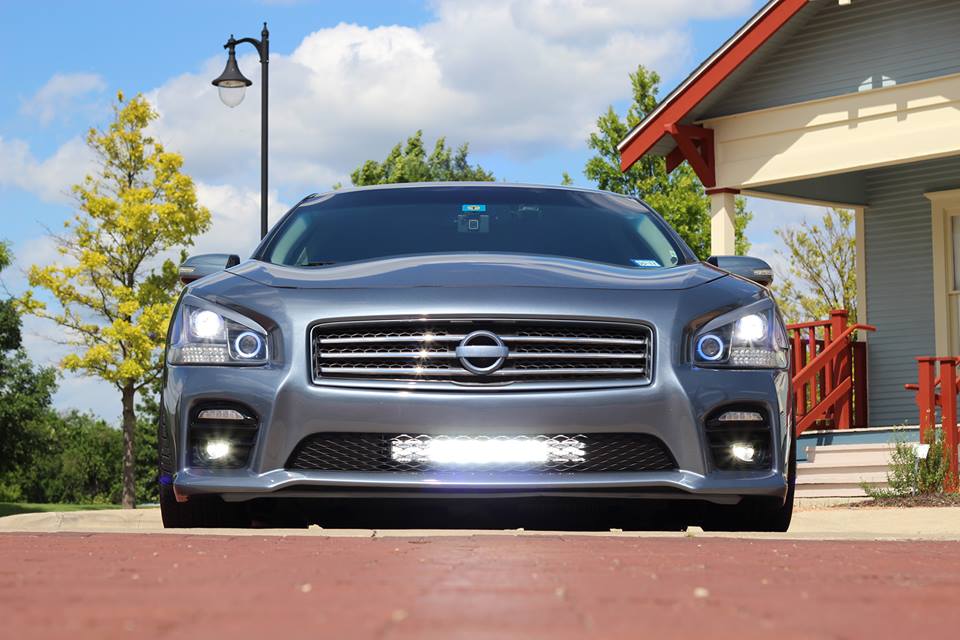
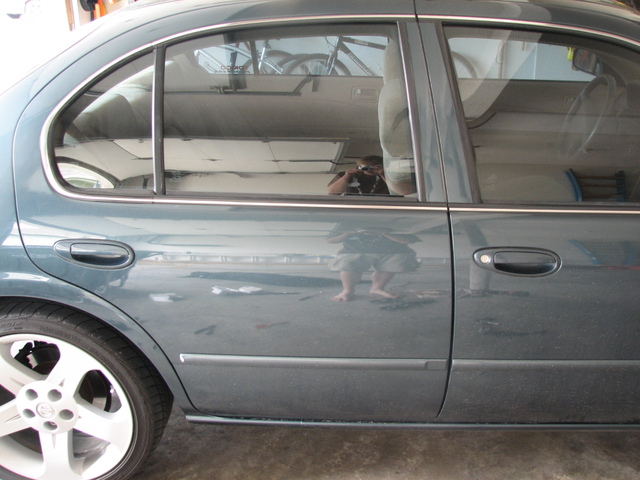
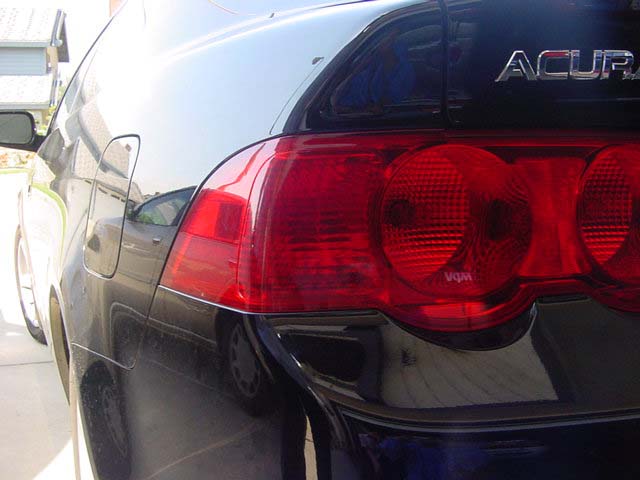
Community Member Credit: EnervinE
Figured I’d do a write-up because there’s next to no information about this procedure on this site. That, and a shop wanted $350 to remove and install – talk about a joke.
This is generally regarded as an extremely frustrating, time-consuming, impossible procedure, but in reality it’s quite easy if you know what you’re doing and you use a couple tricks I discovered. The driver’s side, since I had no idea what I was doing, took me roughly four hours of work, along with many bruises and foul words uttered. However, the passenger’s side, even with taking all of these pictures, only took me about an hour.
Following these instructions, I’d say this job’s about a 3 out of 10 on a difficulty scale. Don’t let a shop gouge you for this job, you can do it without much trouble.
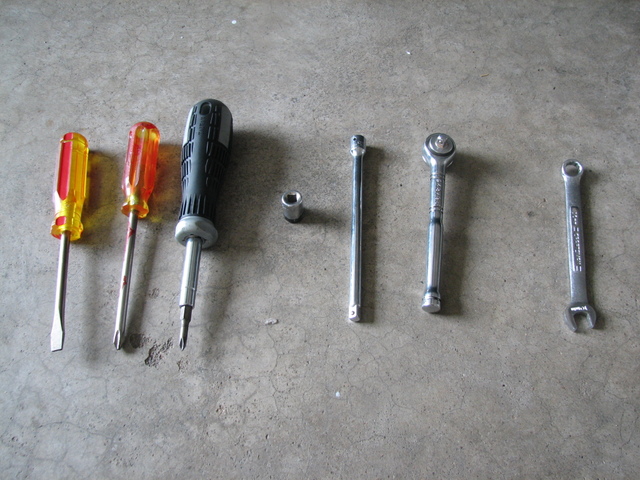
TOOLS NEEDED:
Flathead screwdriver
Small and large Phillips head screwdrivers
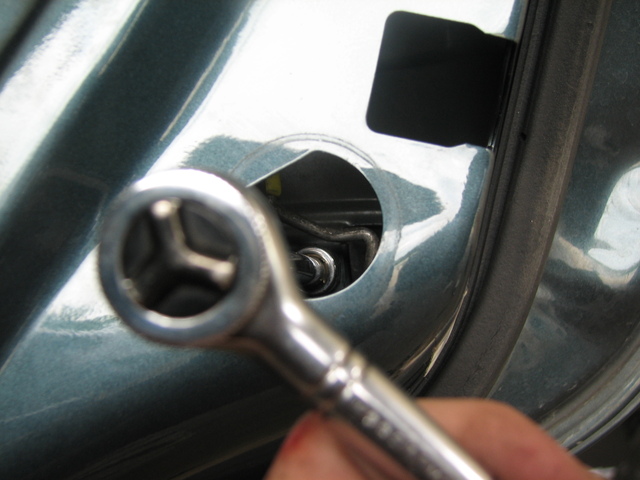
10 mm socket and extension
Ratchet
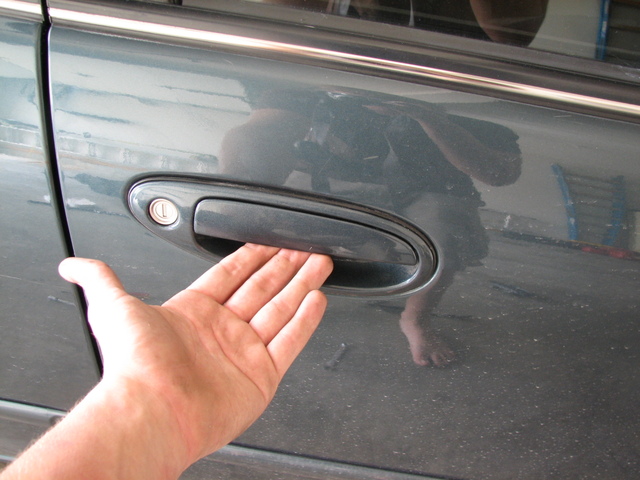
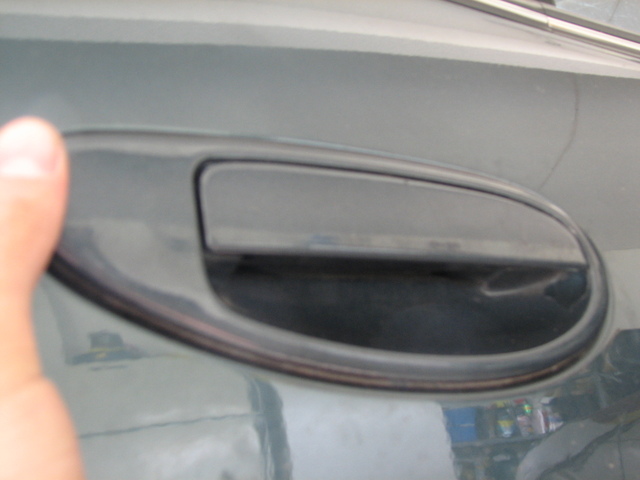
10 mm wrench
Optional: Magnetic grabber (bolts like to fall out of your hands and into the door crevices…this helps.)
Okay, let’s get started!
FRONT DOOR1. Make sure the window is rolled up before beginning work.
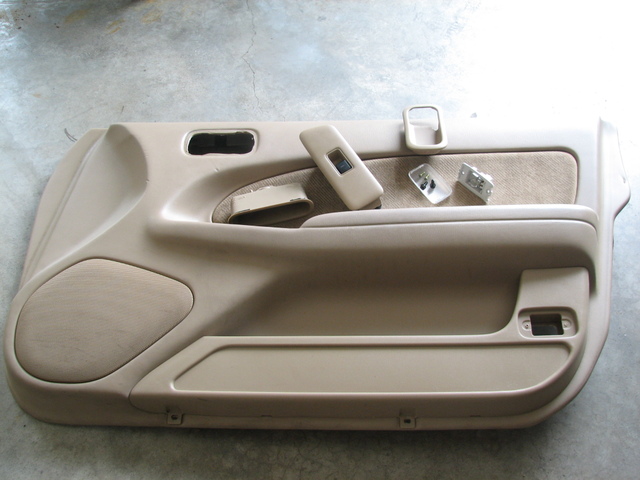
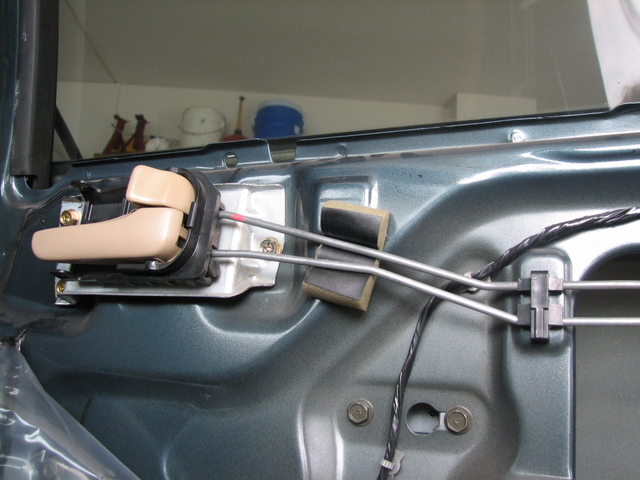
2. Remove all accessories on the inner door panel. Pop the handle trim off with a flathead. Be gentle, as it will snap with too much force. Remove the cup handle’s screw and pop it out. Use a flathead to remove the window switch. Undo the connector and set it aside. Remove the light’s lens, remove the two screws, and undo the connector.
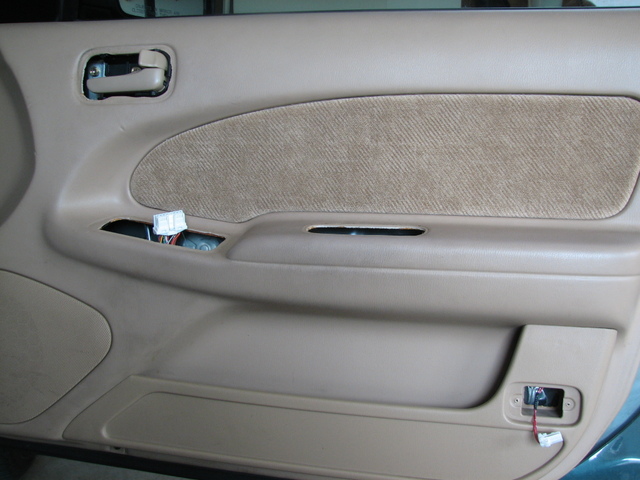
3. Remove the two screws on the bottom of the door panel.
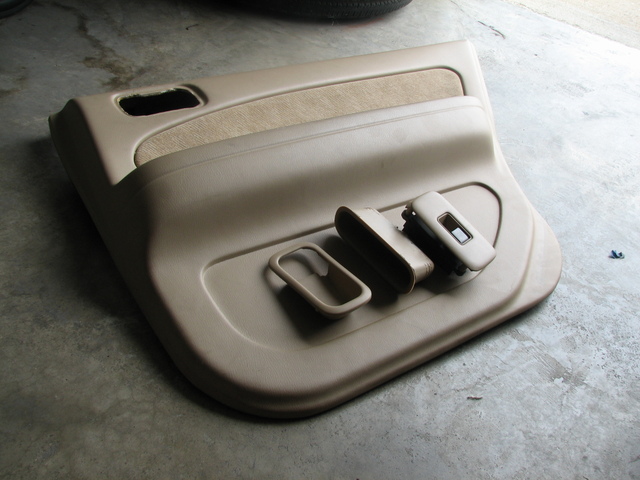
4. Remove the door panel. It is held in by a bunch of snap-in pieces that Nissan likes to use everywhere. Lift it upwards and away and set it aside with all of its accessories. (note: the driver’s side has an extra connector on the back for the trunk popper. Remove it.)
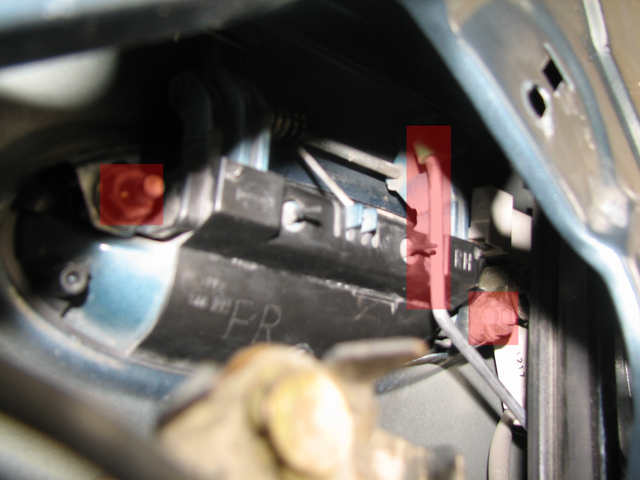
5. You should now be looking at the door with the panel removed.
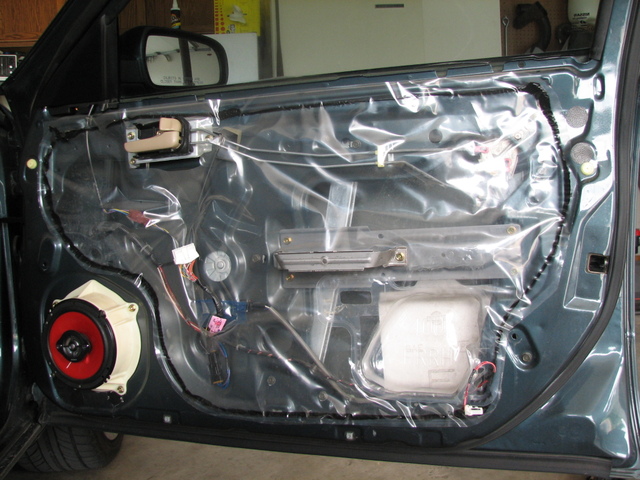
6. Start peeling away the weather covering. It is sealed with a black goop. Try to conserve the integrity of the goop so you don’t have to apply more sealant when you replace the covering.
7. Peel away enough to give you some room to work with.
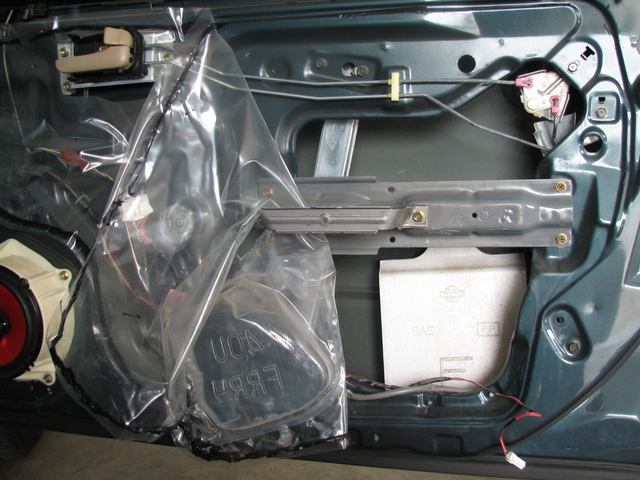
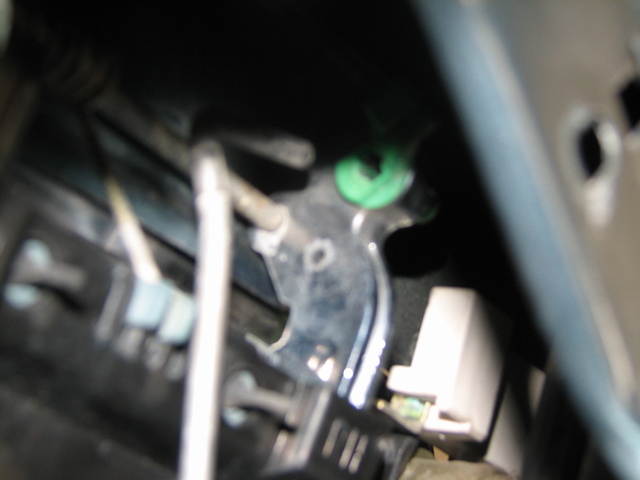
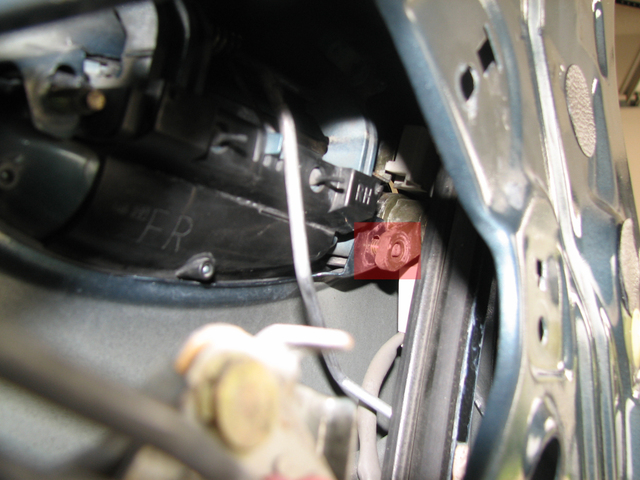
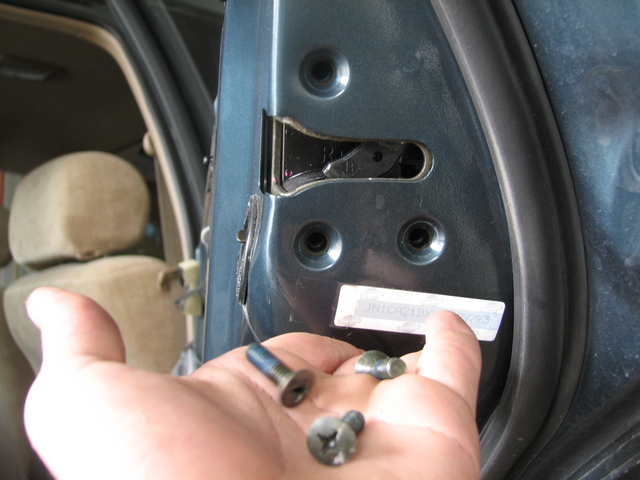
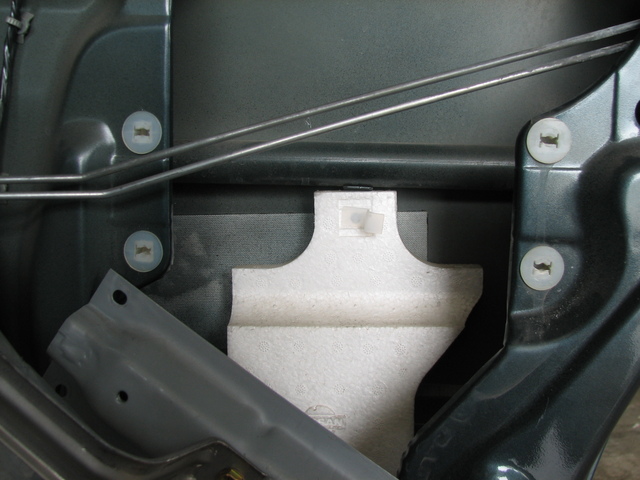
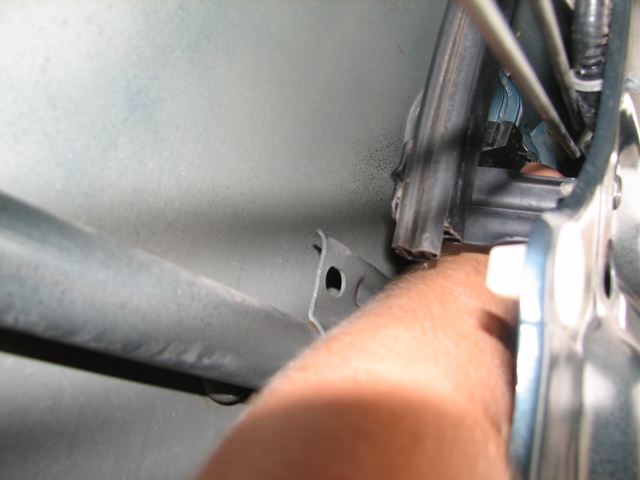
8. Remove the bolts highlighted in the picture below – 5 in total. Push the middle bar downwards and out of the way.
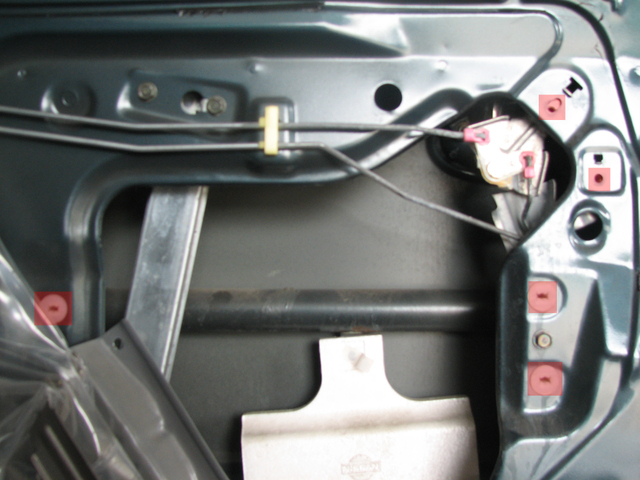
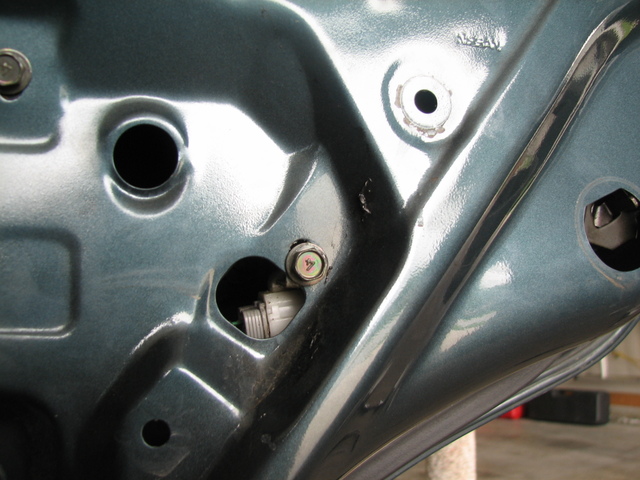
9. Remove the lower bolt holding this metal piece in and remove it.
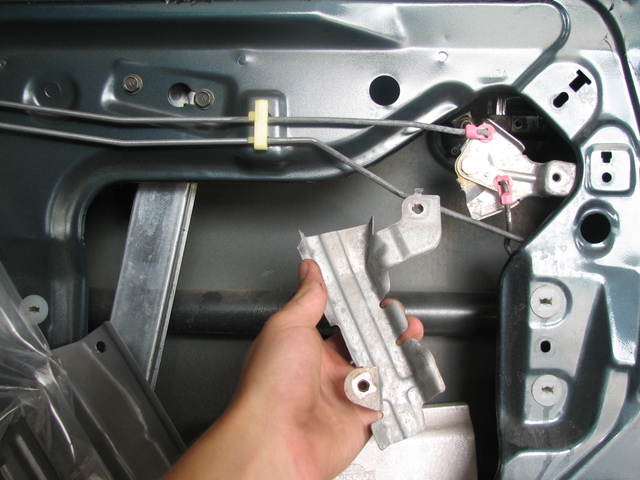
10. Unclip the whiteish-yellow piece holding the two bars in place. Move the assembly downward and out of the way.
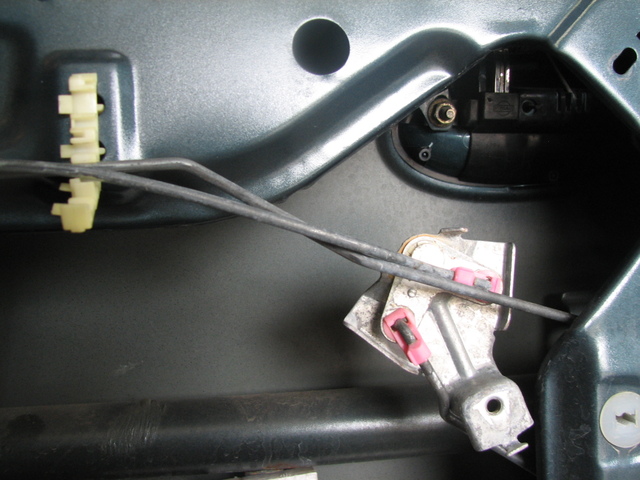
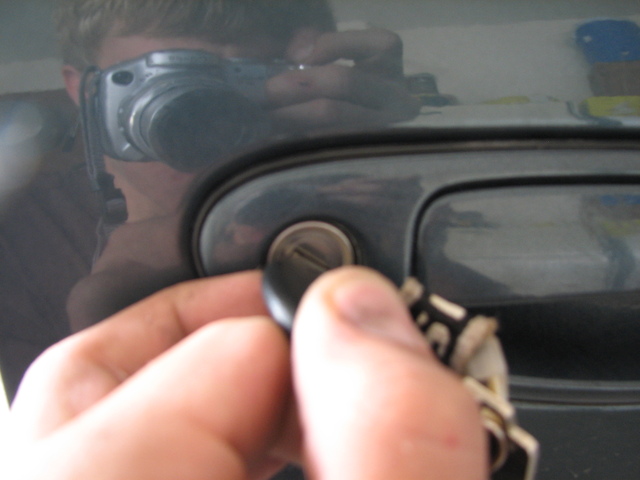
11. Remove the left nut holding the handle in place.
12. Use the 10 mm wrench to remove the right nut holding the handle in place.
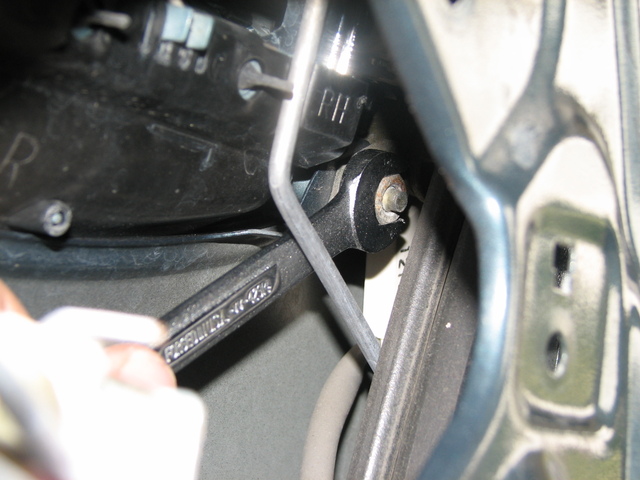
13. Pull out the bar inserted into the handle, shown removed below:
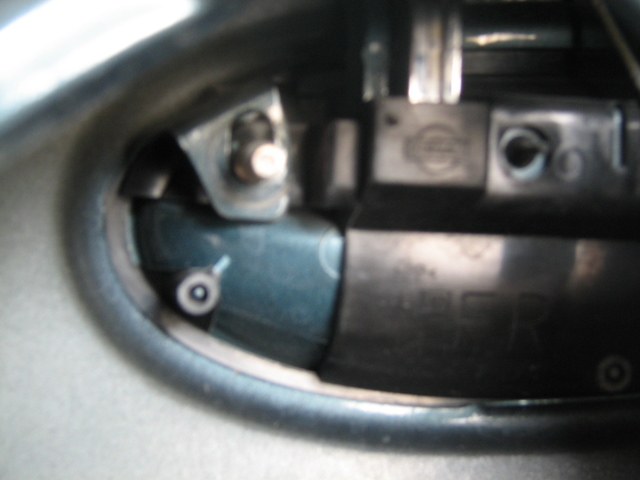
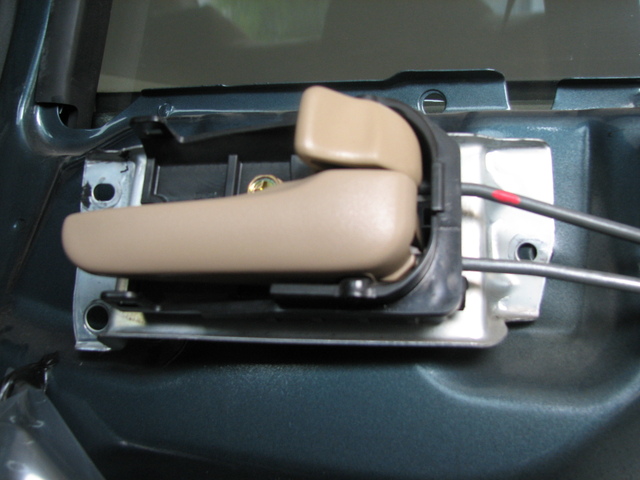
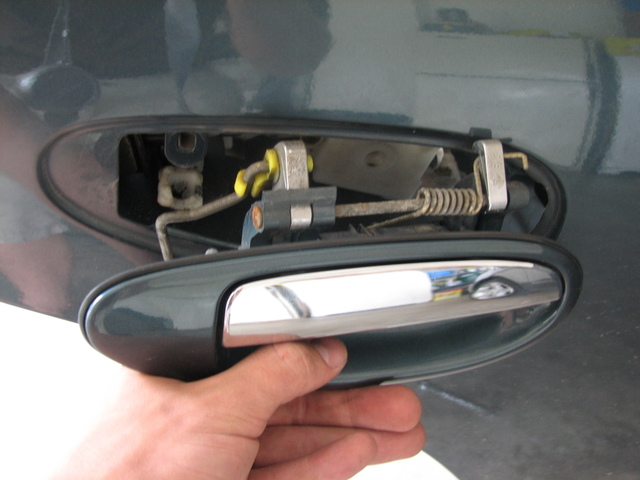
14. Remove the handle from the outside.
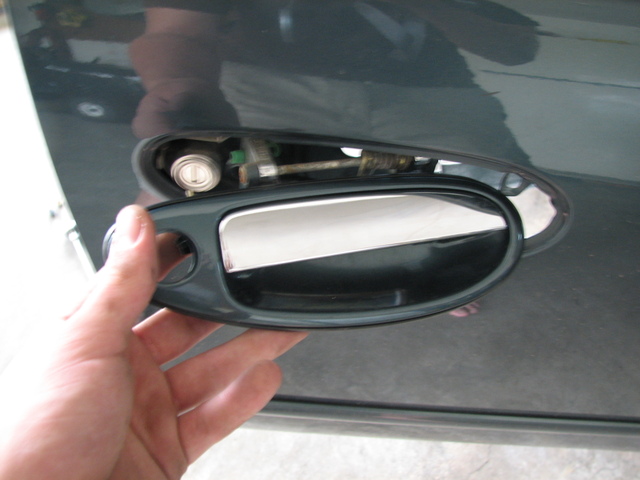
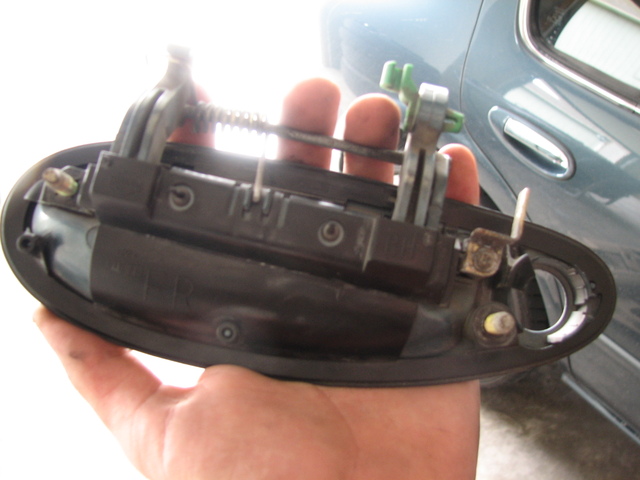
15. Examine the replacement handle. Make sure it operates correctly and has everything installed on the reverse side.
16. Insert the handle most of the way into the door.
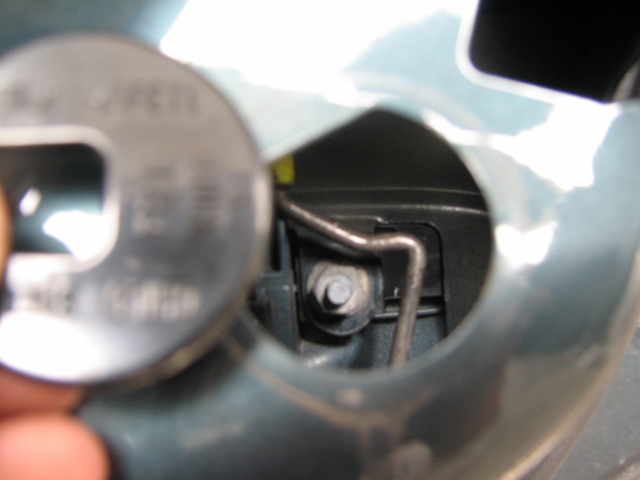
17. On the back side, line up the bracket for the keyhole with the bolt on the back of the handle. It won’t go all of the way through yet, as the keyhole is not inserted into the handle.
18. I found that the keyhole is almost impossible to push into the handle. I figured out the best way to do it is to take your key and insert it into the keyhole and turn it left. This locks the key in the hole, enabling you to pull it through the handle.
19. You can now thread and tighten the right nut, which will pull the keyhole all of the way through. Don’t forget to remove your key afterwards! Reinstall the left nut and insert the latch rod back into the handle.
20. MAKE SURE THE HANDLE WORKS before continuing work. If it doesn’t, recheck that the latch rod is installed correctly.
21. Reinstall the removed metal plate. Move the large metal bracket back upwards and reinstall all bolts. Don’t forget to re-fasten the white-ish yellow bar guide.
22. Double check that everything has been re-installed, then replace the weather covering. Make sure the sealant is applied so no water can get through.
23. Reinstall the door panel and all accessories.
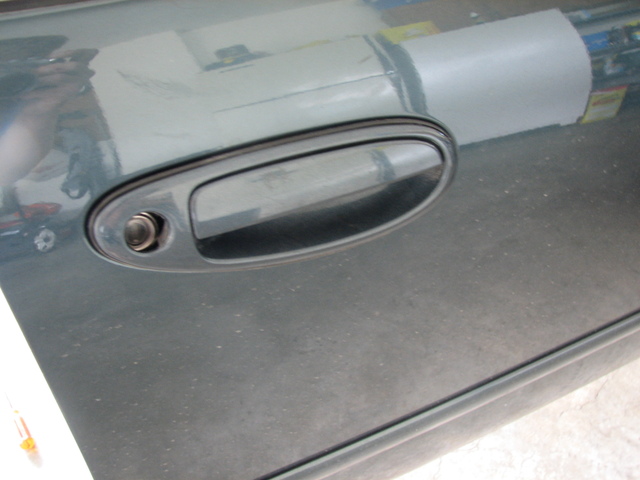
24. You’re done with the front side!
2. Remove all accessories on the inner door panel. Remove door panel and set aside with accessories.
3. Peel away the majority of the weather covering – you’ll need a lot of room to work.

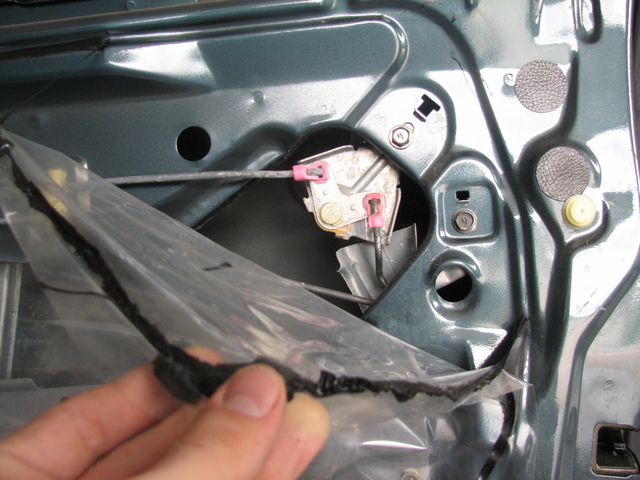
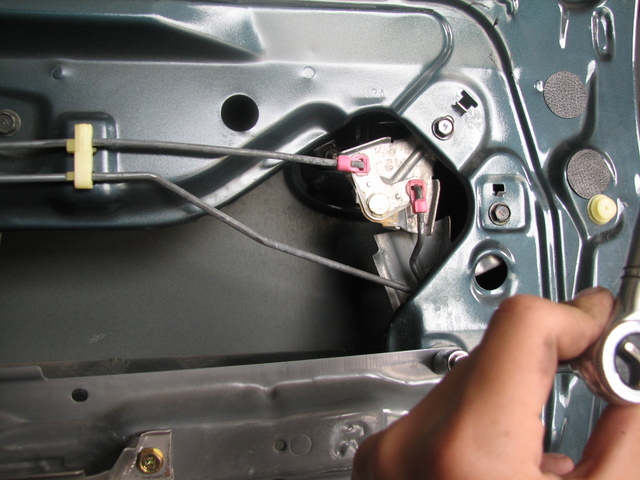
4. Remove the three bolts holding the inner handle in place.
5. Unclip the black plastic guide and remove the bars.
6. You can access the left nut holding the outer handle in place with the socket and extension. Remove it.
7. Remove the three screws holding the latch assembly on the side of the door.
8. Remove the bolt highlighted in the below picture. The latch and rod assembly will come loose.
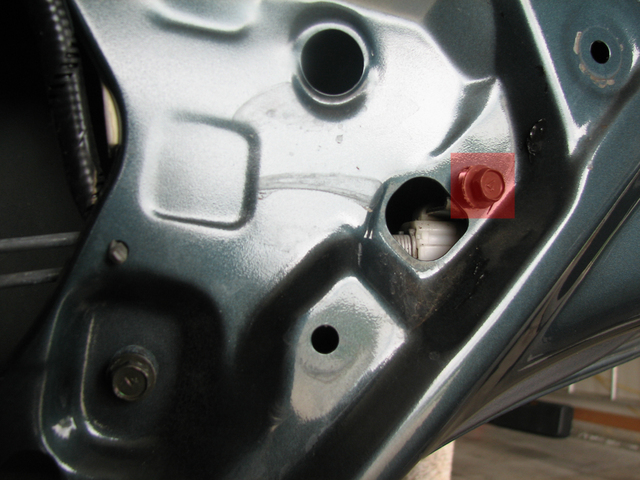
9. Remove the black “child safety” plastic piece. If the latch and rod assembly is moved to the side enough, the right nut for the handle will be visible through this hole. Remove it with the socket and extension.
10. Remove the handle, with the latch rod, through the other side.
11. Examine the new handle. Make sure the handle operates. Make sure it contains the latch rod – if not, install the one from the old handle.
12. Fit the new handle into the door.
13. Reinstall the right nut through the child safety hole. Move the latch and rod assembly if needed to install the left nut.
14. Remove the 4 bolts holding in the large metal bracket and push it downwards, out of the way.
15. Reinstall this bolt into the assembly finger tight to hold the assembly in place.
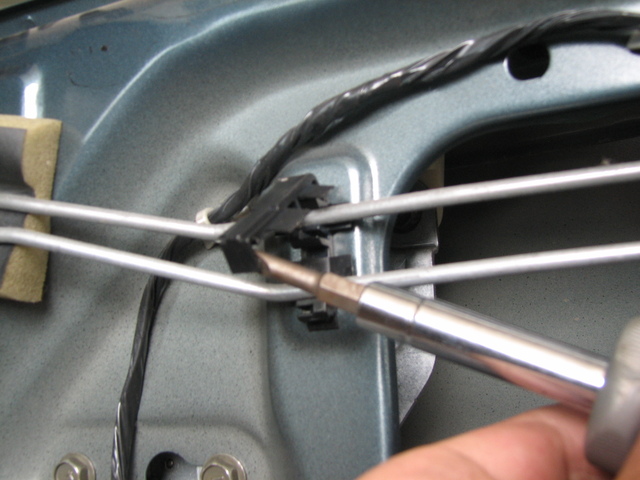
16. Here’s where it gets tricky. Remember the latch rod that goes from the outer handle to the latch and makes the outer handle work? That couldn’t be installed until now because the left and right nuts for the handle had to be installed first. This has to be done by feel, and it helps to have a long arm. Stick your arm along the bottom of the door, upwards until you feel the latch rod. Grab it, then feel around for a lever with a hole in it. Push this lever down and insert the rod into the hole. It’s too far back to get a picture, but feel around and you can get it.
The proper way to run your arm up there:
17. Once the latch rod is in place, reinstall the three screws for the latch.

18. MAKE SURE THE HANDLE WORKS before continuing work. If it doesn’t, recheck that the latch rod is installed correctly.
19. Re-tighten the bolt you hand-tightened. Replace the inner rods in the black keeper and snap it shut. Reinstall the three bolts for the inner handle. Replace the large metal bracket and install the 4 bolts. Make sure all screws and bolts are reinstalled and tight.
20. Replace the weather covering.
21. Reinstall the door panel and accessories.
22. You’re done with the rear side!
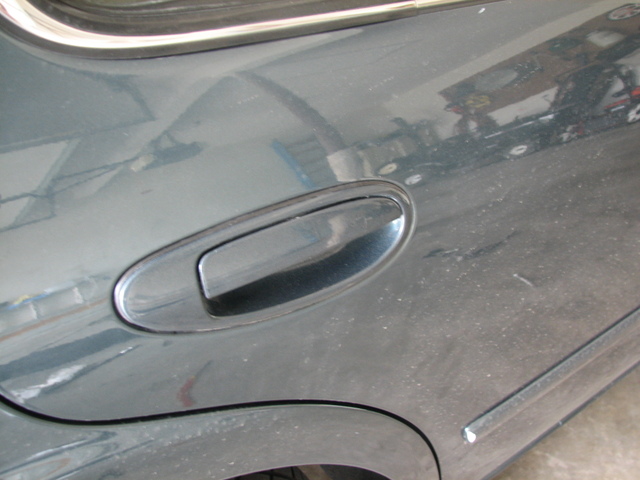
Before:
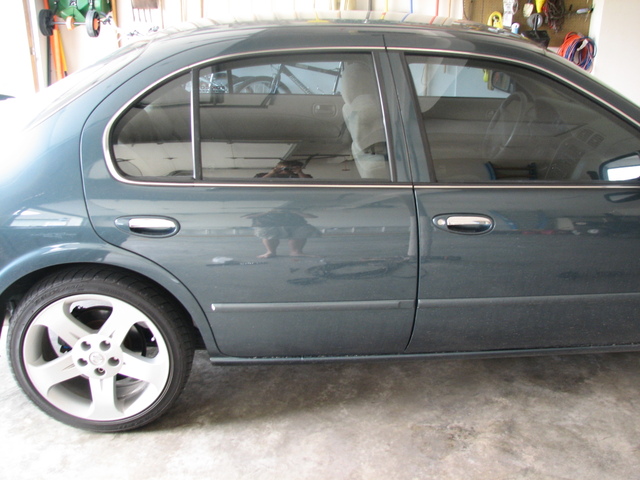
After:
![]()

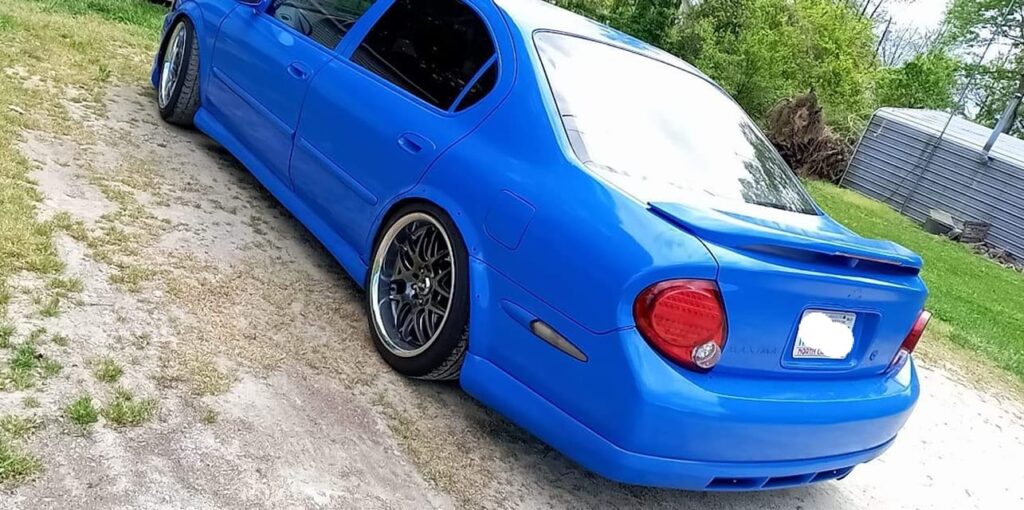
Community Member Credit: Sexima
Things you need to BUY:

1. View your Altezza’s and enjoy it while it lasts.

2. With the circle shape (I took bowls and matched them up on the Altezza’s and then draw the shape on paper. I taped the front side so it doesn’t absorb the paint in. Then taped them to the Altezza’s making sure no paint will go through. Then put it on the Altezza lights.
*Note*: I didn’t cover up the side marker because I didn’t need them You may cover them if you want to.
3. Spray a thin layer or two of the primer. Try to get a primer that is close to your car color. Let it dry.
4. Use the paint you got from paintscratch.com and spray them layer by layer. The best is to put a thin layer on, come back in 10 minutes, put another thin layer. And repeat this step till you have the whole thing covered. Try putting about 10 layers on.


5. Wait till it dries… Let it dry for about 3 hours.
6. Clearcoat *or tri-coat if you needed* with layers. about 4-8?Whatever floats your boat.
7. Let it dry for an hour or so… after it is dry, CAREFULLY take off the circle thing that you used. you don’t want hand marks on that thing…
8. You will see some parts that you painted that you don’t want. Simply wipe them off with Goof Off product. Do not use too much of it, it will leave little marks. Don’t try to make it too perfect or it will look stupid at the end.

9. Go outside and clear coat the WHOLE THING and it will leave you one shiny
skyline’s ass!!


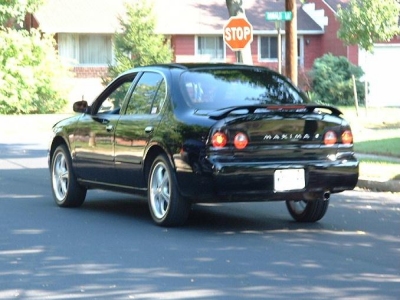
Finished Product


NightTime

DayTime


The originator of this Style Tails Pic…
![]()

Community Member Credit: JSutter
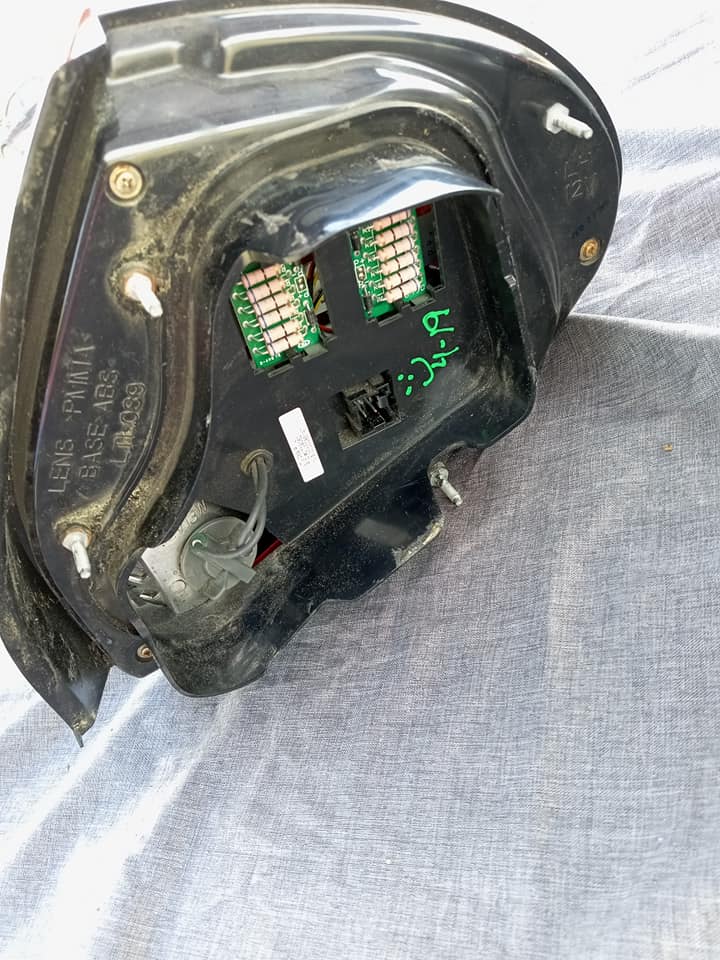
I was driving home in the dense fog, barely making out the car’s taillights in front of me. I thought to myself, why don’t all USDM cars have a rear fog light? I really couldn’t see the car’s taillights and I didn’t like that. So after pondering the thought I went ahead and converted the inner driver rear brake light to a fog light, just like many European cars.
Here is how to wire it to the driver inner brake light keeping the stock function of the brake light when the fog light is off:
Cut the stock brake light wire, it?s red with a green stripe. Connect the light bulb side to pin 30 on the relay. Then connect the side that comes from the brake switch to pin 87a of the relay. Then splice into, BUT DO NOT CUT, the parking light wire, it’s a red with a blue stripe. Connect it to pins 86 and 87 of the relay. Then run a wire and from pin 85 up to a switch, mine is at the dash, which connects to the ground.
The extra wire not connected is the brake switch wire and connects to the center (87a) pin.
It’s a safety thing and should only be used in poor visibility. I bet this winter it will come in handy.
I’m sure most of you’re not going to like it, but oh well. It will set me apart from the rest.


![]()

Community Member Credit: Neo Raven456
Alright, so I know this isn’t a complicated procedure, but a lot of people like to know exactly what they’re getting into when they go to do a mod. I’m one of those people. I had found a tutorial before, but it seems it has gone offline or I can’t find it anymore. So I decided to take pictures and write one up while I did the mod myself.
Time: 5-10 min.
What you need:
And these tools:

Step 1) Take off the outer light housing using the 1/4 Flathead Screwdriver wrapped in the cloth. Pry from the left side of the housing because the clip is on the right.

Step 2) Unscrew the one Phillips head screw holding the inner housing as seen in the above picture.
Step 3) Remove lights from housings, simply grab the Grey connector and twist, then remove.
*Note* Some states require amber bulbs (NJ does not) to be installed as well since our stock ones are clear, if this does not apply go to Step 4:
Step 3a) For the outer bulbs simply pull the bulb and it comes out

Step 3b) For the inner bulbs twist, then pull

Step 4) Reverse what you just did and your done!
Stock vs Clear

Final Product with clear bulbs

Final product with Ambers

![]()
")
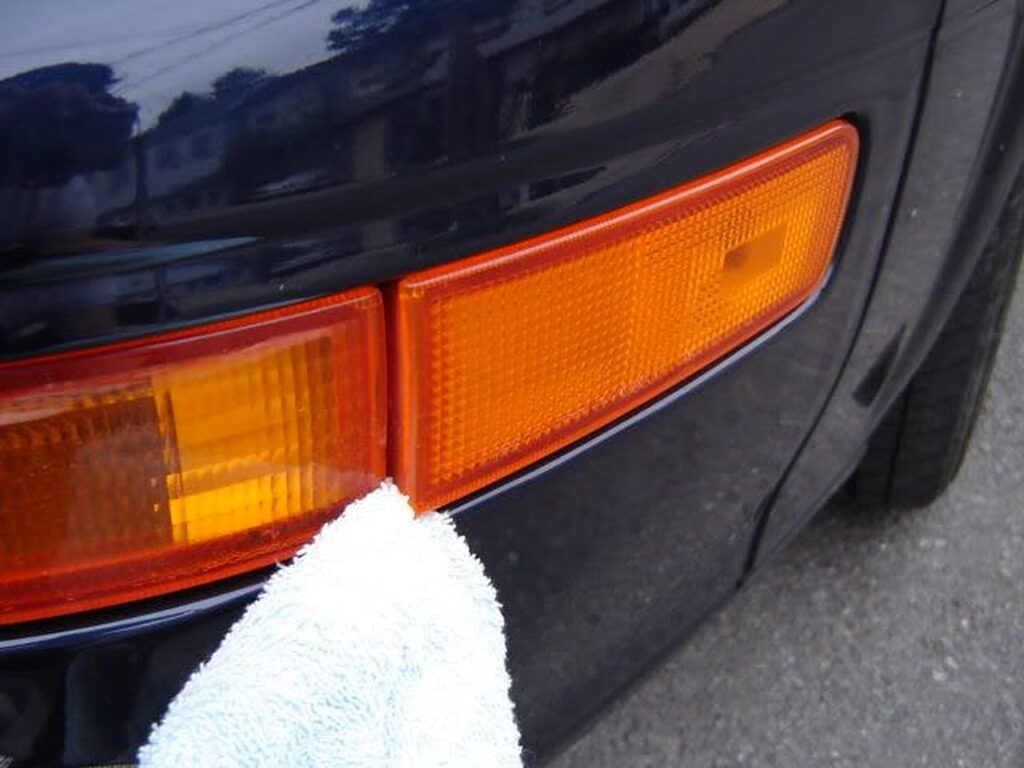
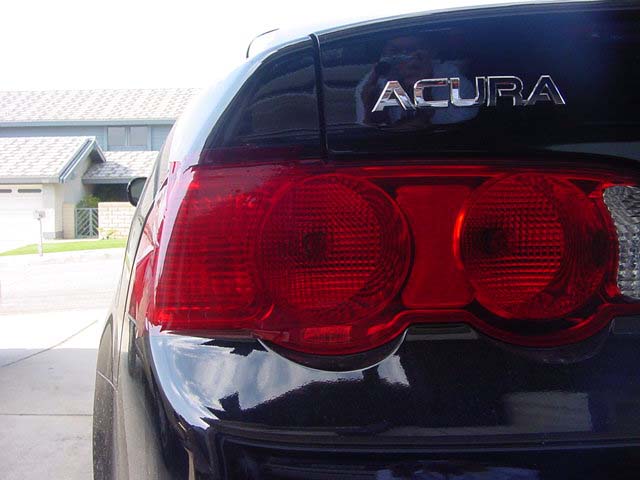
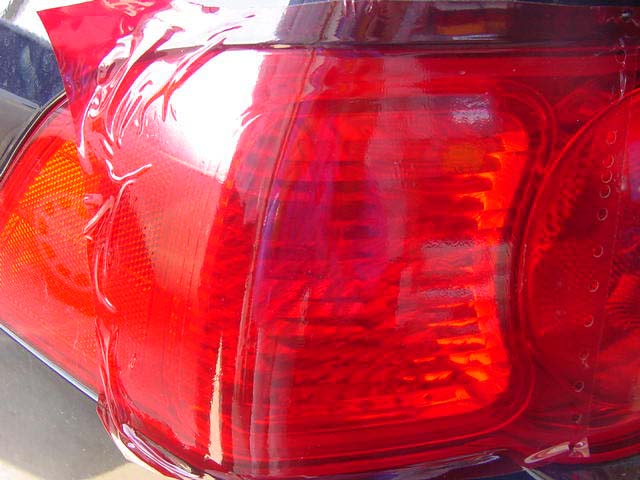
Community Member Credit: nadir_s
I’ve explained this a lot of times but i thought I’d write a clean explanation on how to “red-out” your tails. This really goes out to all the 95/96 owners who want to at least get rid of the ugly ambers on their tails. This process requires some effort but is worth it in the end. There are 2 ways to red them out… using red tape or painting them. This is how to use the tape. Of course the real red/clears look great but this is a pretty simple $3 cosmetic mod!
Things you need:
Procedures:
1. Wash/Clean both tails so that there isn’t any dirt on them
2. Now, apply LOTS of soapy water on the tails… let it run down, it doesn’t matter, but they need to be wet as you apply the tape. The reason for the soapy water is to avoid any air bubbles or having the tape annoyingly stick onto the surface where u don’t want it to be.
3. Now place the tape on the ambers and position it. With the water under the tape, you will be able to move the tape and adjust it properly.
4. After adjusting it, use the credit card to squeeze out the water underneath. Start from the middle, then move outwards. Keep scraping the top of the tape so that the water underneath will squeeze out from the ends of the tape. Don’t worry, the adhesive will still be 100% sticky.
5. Now that you’ve squeezed out as much as u can on the most flat surface and the tape is stuck to the ambers, you will realize that u have to do the outwards of the ambers where they curve. For this to be done properly, use your heatgun/blowdryer to heat the tape so that it “melts” or become softer and stretchable.
6. As you heat up the curved parts of the tape, stretch the tape out as hard as you can w/o ripping it hopefully to wrap around the curve and not form any air bubbles. CAUTION: Don’t burn your fingers!
7. After doing a satisfactory job w/ the tape stuck to the ambers, use an exact-o knife or razor to cut the excess tape off. CAUTION: Don’t cut yourself in this process.
Voila! No more ambers.
As you read this instructions, you may start to realize this is EXACTLY how tinting windows are done. Basically you are doing a tint job on your ambers. Good luck!
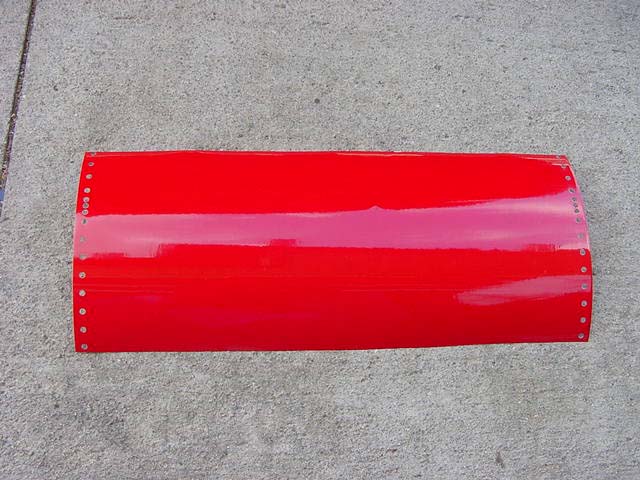
Tools Required
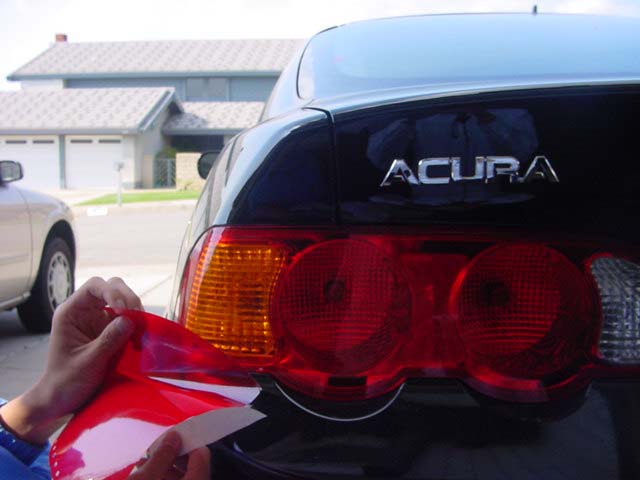
Get your sheet of transparent red vinyl.
Put the sheet up to the signal light and see how much you will need.
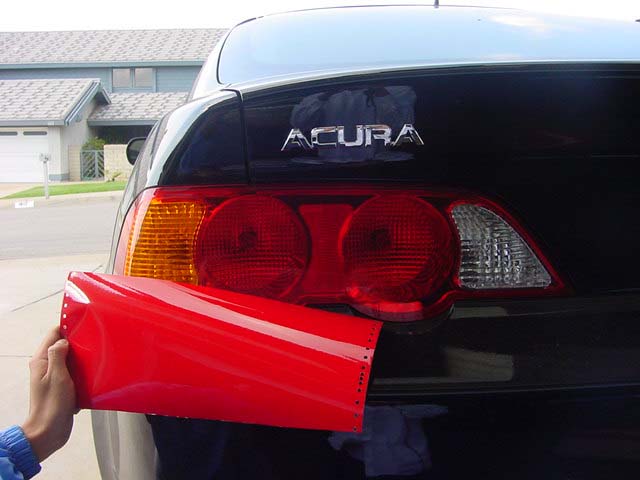
Start cutting the vinyl so u have enough for one side.
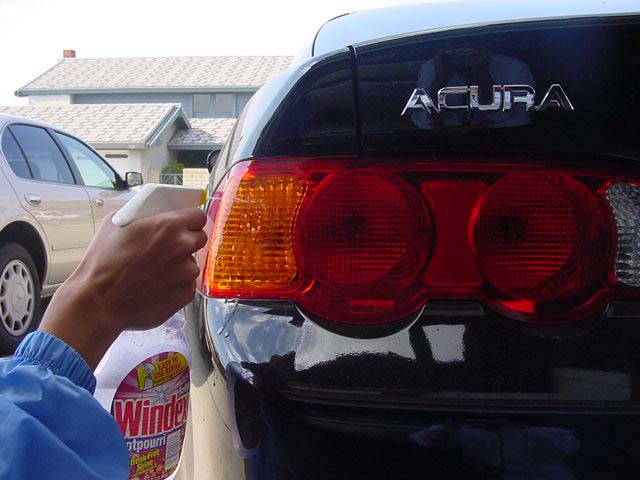
Mix water and dishwashing liquid in a spray bottle and spray onto the tail lights.
Peel off the vinyl, exposing its sticky side.
Apply the vinyl flat and parallel to the tail light.
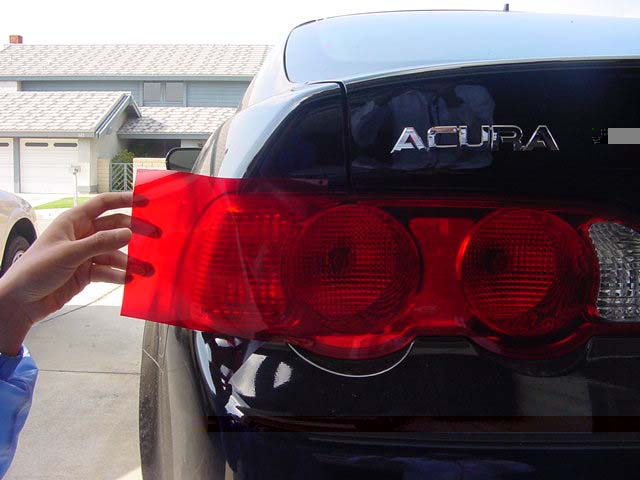
Flatten the edge out as much as possible, while pushing outwards towards the borders of the vinyl. Doing this will push out all of the soap water underneath. If you fail to push out most of the water, theirs a chance of small bubbles forming. Now do the same to the sides of the signals. This part is a bit trickier because the vinyl might wrinkle a bit on the sides.
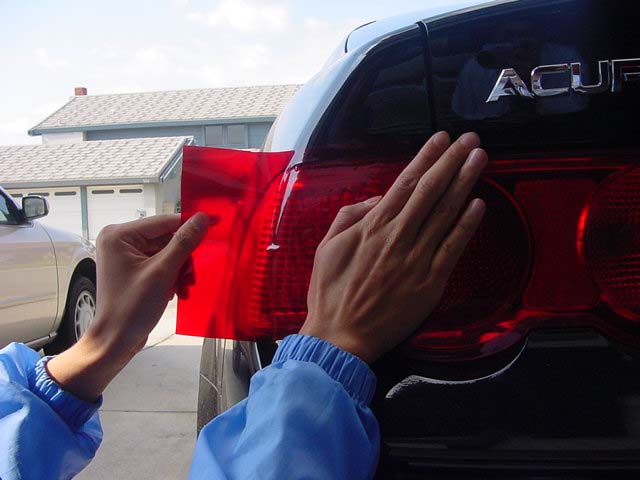
This step is optional, but it is highly recommend. This will help get rid of wrinkles, giving you a smoother, cleaner look. Use a blow dryer and aim it towards the edge of the vinyl. You will notice that the vinyl quickly becomes more flexible. Use this to your advantage. Pull the vinyl outwards and stretch it so that it is taut (not slacked.) And use flatten it down. It helps to have another person help u at this stage, but not necessary. The vinyl should be on nice and smooth over the amber signal area.
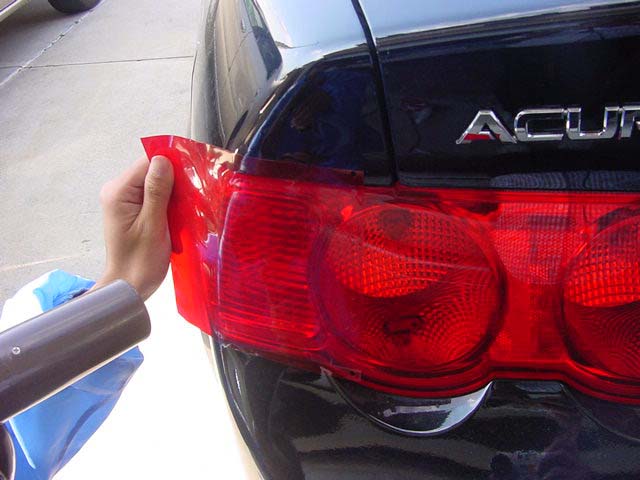
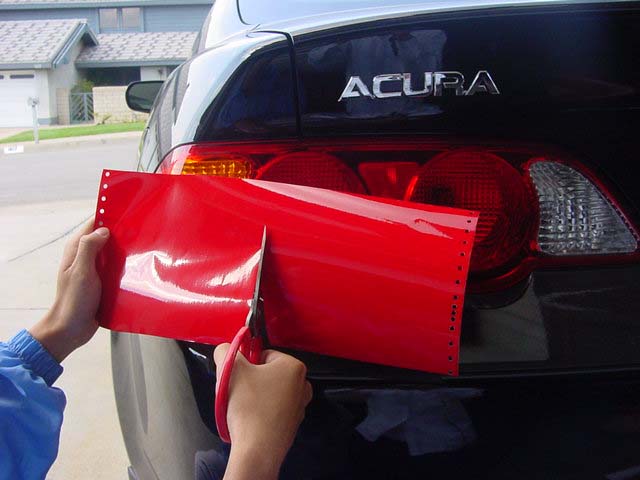
With your exacto blade, begin lightly tracing the shape of the signal. You should be able to see the shape through the vinyl.

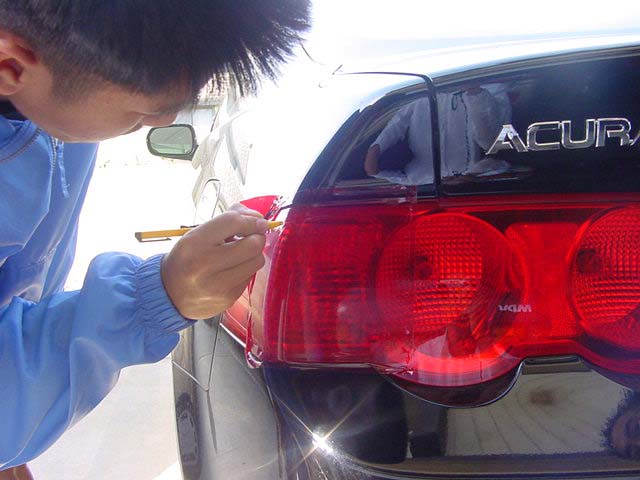
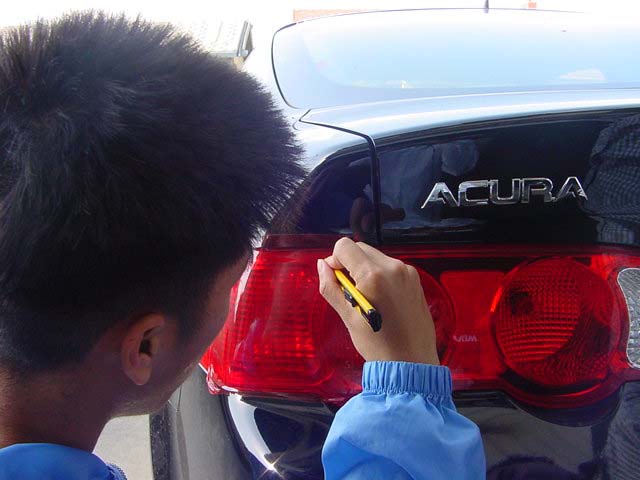
Once you have traced the entire outline of the amber tail light, start peeling off the excess vinyl.
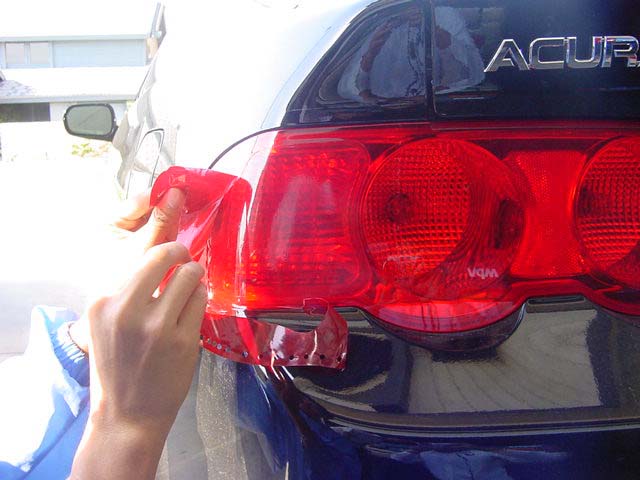
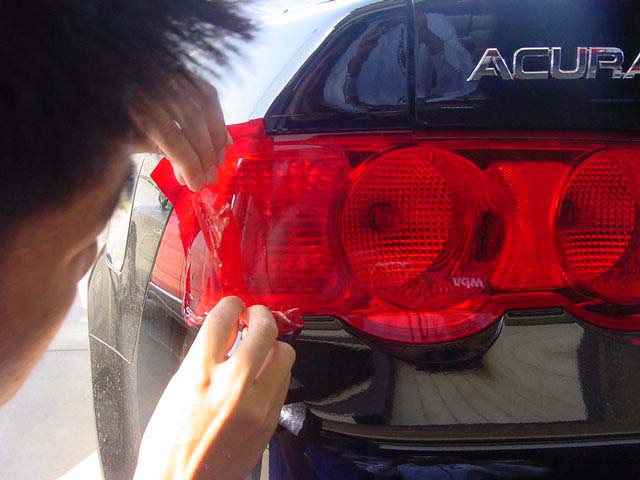
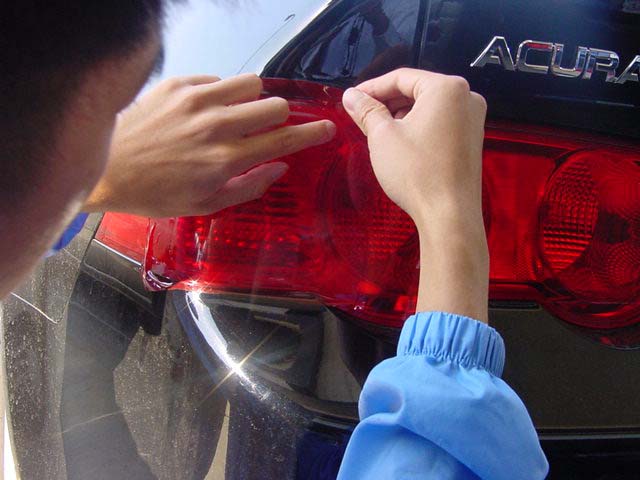
Once you have gotten rid of all the excess vinyl, flattening it out again with your hand to get rid of any left over water/bubbles.
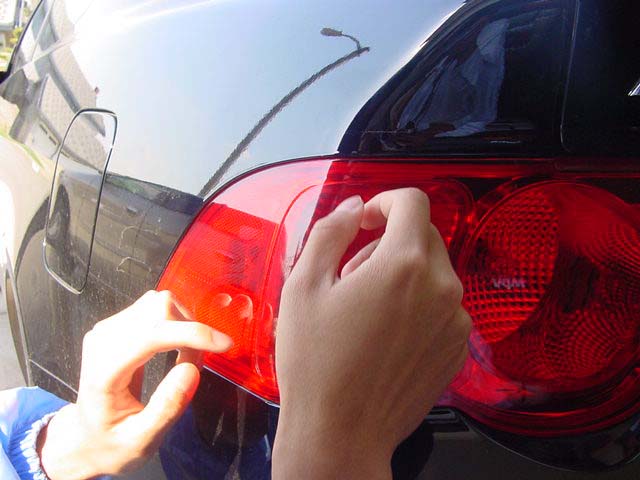
Wait about 5-10 minutes to ensure its dry.
If you ever want it back, all you have to do is peel it off. The vinyl is very strong and will withstand the weather and car washes.
![]()


![]()


![]()