Tag

External-Affiliate

Browsing

Community Member Credit: Brad Connor

As many of you may know the radiator core support is a known “weak point” on the A32 chassis. This is an extremely common issue among A32’s from “wet” states. This thread will address a number of key points with these issues

  1. Signs of a bad radiator core support
  2. How to replace said radiator core support
  3. And why you shouldn’t use a cheap radiator core support

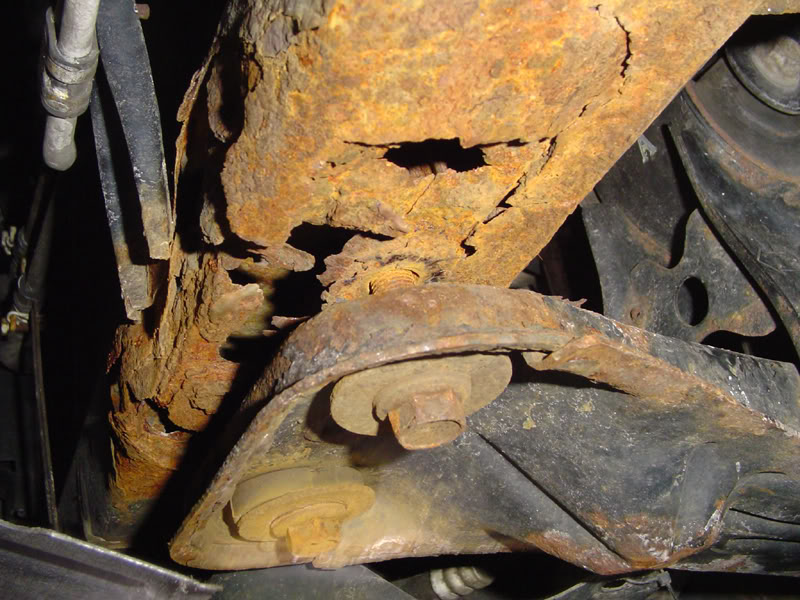
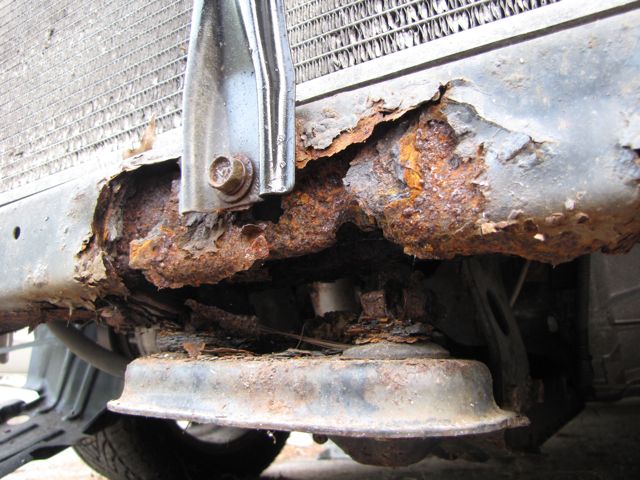
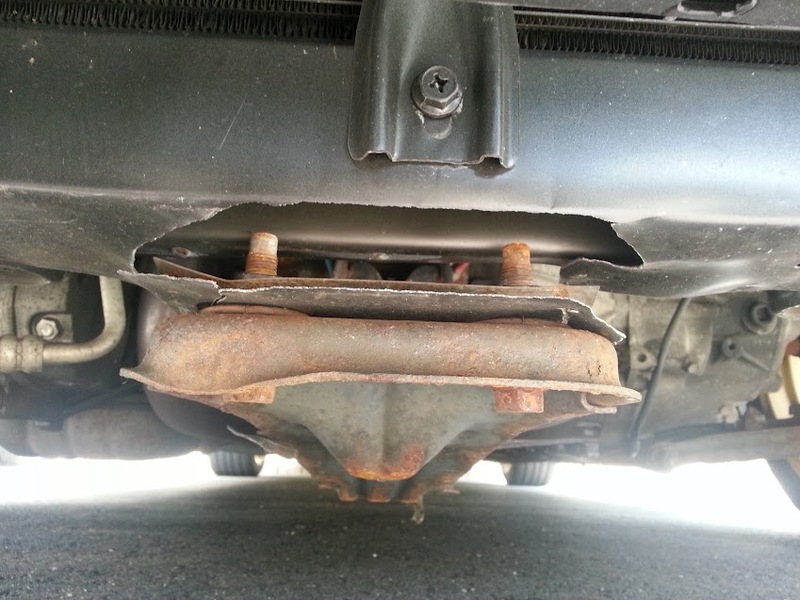
I: Let’s start off with spotting a failing core support (NOTE: The images shown are of very, very badly rusted supports)


II: We move on to How To replace the core support and what is the proper parts to be used and where you can purchase them.

To correctly replace the core support, the old unit will need to be cut out and the new unit will need be be bolted and welded in place..This job is definitely not one of the easier things to do an A32 and will likely need to be done by a professional or a fairly knowledgeable DIY mechanic with access to air tools and a welder.

Their are two common methods to to replacing the core support; one is replacing just the lower support (under the radiator) and the other is replacing the entire front core support. Either of these parts can be sourced at your local Nissan dealer or through a reputable online dealer such as Courtesy Nissan Parts.

PARTS

  • The part number through Courtesy for the entire support is 62500.
  • The part number through Courtesy for the lower support is 62530M.

III:
We will move on to why you should buy an OEM core support and not a cheap piece off of ebay or rockauto. This is one of those things that “if it sounds too good to be true, it probably is”…meaning that $50 core support on eBay may sound like a steal of a deal right now, but 3 months down the road when you notice your engine cradle is sitting 3 inches off the ground and you have to pay to do all of this work again, you will wish that you had just spent the extra money to begin with because in the long run an OE piece is going to be the cheaper AND better investment.

I will let the images speak for themselves


Loading

Community Member Credit: NiZMo1o1

The Sun Auto Hyper force is an ignition enhancer, in which provides greater throttle response and smoother engine performance by providing optimal spark duration and maximum voltage output. This product is very effective at higher revs where a normal spark would diminish, specially on boosted 350Zs/ G35s. It prevents high rpm ignition miss that reduces peak power and the longer duration allows the Twin Power to improve lower RPM throttle response and torque.

The Sun Hyper Force system is the next generation high-efficiency ignition tuning and strengthening system. It works by absorbing all back electromotive force, which aids to improve plug voltage and promote complete combustion by producing higher coil efficiency. Also, the Sun Hyper Force System eliminates any ignition performance loss due to decreased electrical current under heavy throttle. Since ignition efficiency over the entire revolution range improves, available torque and acceleration response improves; this efficiency enhancement also contributes to better fuel efficiency and a reduction of harmful emission.

Features

  • Increased horsepower
  • Increased torque
  • Better gas mileage
  • Improved throttle response
  • Longer battery life
  • Improved battery efficiency
  • Reduced emissions

This is a plug and play system, you connect the plugs from the coilpacks into the harness and there is a plug there goes back into the coilpacks.

6 Ground wire and 1 positive to the battery from the Blue box.

It flashes Blue LED light so that you know everything is up and running.

Uncovering the CF cover

After these it got really dark so i didn’t bother taking anymore pics, I need to clean up the wires and mount the box near the firewall , this system was design for the 350z but will work for our cars.

If you know how to do your own spacers or change your spark plugs you can do this upgrade. This is how I would rate the difficultly.

Loading

Community Member Credit: DeusExMaxima

The procedure for removing the OEM intake and replacing it with the Kinetix was fairly straightforward. With basic hand tools, I did the job at a casual pace in under 2 hours.

Tools Needed:
Allen wrench (supplied with manifold)
10mm, 12mm, and 14mm wrenches and sockets
Flat blade screwdriver

1. Disconnect battery and remove engine cover with Allen wrench

2. Remove attachments on the manifold, including this canister shown here:

3. Remove air intake

4. Remove throttle body with 4 allen bolts. Now is the time to clean the throttle body.

In this picture, the disconnected hose is a vacuum hose. But the hose below, that is still connected, with the black fitting is a COOLANT hose. Be careful when remove this hose as coolant leaks out. You can also see the EGR hose which has black braided material, which is right below the two vacuum hoses near the left center of the picture.

5. The bolts at the back of the manifold are now accessible . .. barely. They are hard to get to, and you have to have a good touch. I believe they are 12mm, and there are two of them.

6. Once all hoses and front brackets are removed, and the rear middle bracket is disconnected, the EGR tubing must come off. Its very stiff and hard to take off.

7. Now is the time to undo the manifold nuts and bolts. Do it in a cross pattern and start it a 1/4 turn at a time until they are loose so you don’t warp anything. There is one more bracket to remove, but its easier to remove it when the manifold is raised a bit.

8. The bracket on the passenger rear side of the manifold is very hard to remove because of the lack of space and the angle. Its a 10mm bolt head. Here is a pic of the green connectors that attach to it:

The manifold should come clear from the car.

Installation:

1. Unscrew the plug from passenger side of manifold. Screw in the fitting from the EGR hose; only the fitting, NOT the hose yet. Make sure its positioned in line where the hose will eventually connect.

2. Lay the hose across, behind the lower manifold. Connect the braided EGR hose to the OEM stiff pipe. I reused the gasket but you should get a new one.

3. Install manifold. Tighten in cross pattern so nothing warps.

4. Connect the EGR braided hose to the fitting in the manifold.

5. The coolant hoses need to be joined together. Identify the coolant hoses (green fluid dripping out) and join them together with this fitting:

After its connected, it should look like this:

6. Connect hoses, the throttle body and air intake. This should be fairly obvious if you’re careful when you disconnected things.

7. This is the end result:

Before:

After:

Other Photos of Install:

%image_alt%

%image_alt%

Loading