Credit: Genes1s


![]()


Credit: Abdala Fernandez via https://www.fastmaximas.com/2019/12/20/4th-gen-r34-quad-projector-retrofit/
In this article, I go over the process for doing quad projector lights retrofit in eBay R34 Maxima headlights. Specifically the 4th generation Maxima(95-99). The projectors used were inexpensive Mini H1 projectors (https://amzn.to/2GX9GaA).

The previous lights I had on the car were FX35 projectors but the job was not great and I wanted to clean up the look of the front end of the car. I bought R34 headlights from eBay and with some modification, they fit well (I made a video and article on that here). I wanted to do an inexpensive retrofit job that was much cleaner than the previous one. I opted for Mini H1 projectors which are the common projectors that have a threaded shaft at the back and allows you to slide them through the cars existing housing light bulb socket hole.


It is common to use an oven to bake the housings to then remove the lens cover. However, I used a heat gun to loosen the glue holding the covers. Being inexpensive units, it was easy to separate them; OEM lights are tougher because they are properly sealed and glued. I separated the cover from the housing and then tested the projector. I first tested it on the low beam side. I slid the projectors threads through the R34’s bulb hole and right away saw an issue. The projectors’ back shaft was not long enough to be able to catch any threads with the nut that holds the projector in place.

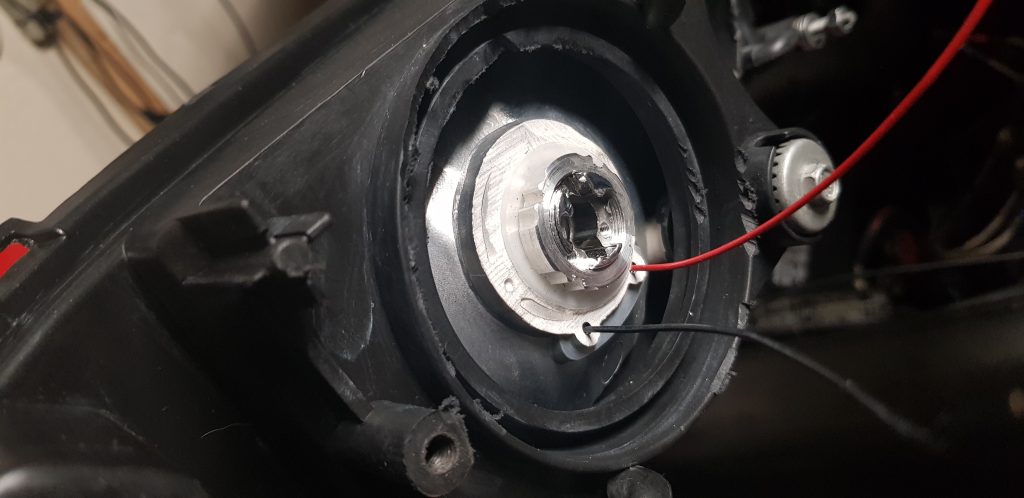

I took out the grinder and started cutting. I used the side edge of a thick grinding wheel to remove some material from the R34’s bulb socket. I then was able to slide through the projector again and catch plenty of threads to put the nut and H1 bulb retainers. The projector looked great, it is said that the vertical alignment is not bad because it is using the stock bulbs hole which is lined up somewhat. But the rotation needs to be addressed, I eyeballed it at first to test putting the lens covers. They looked great, so next was the high beam side.
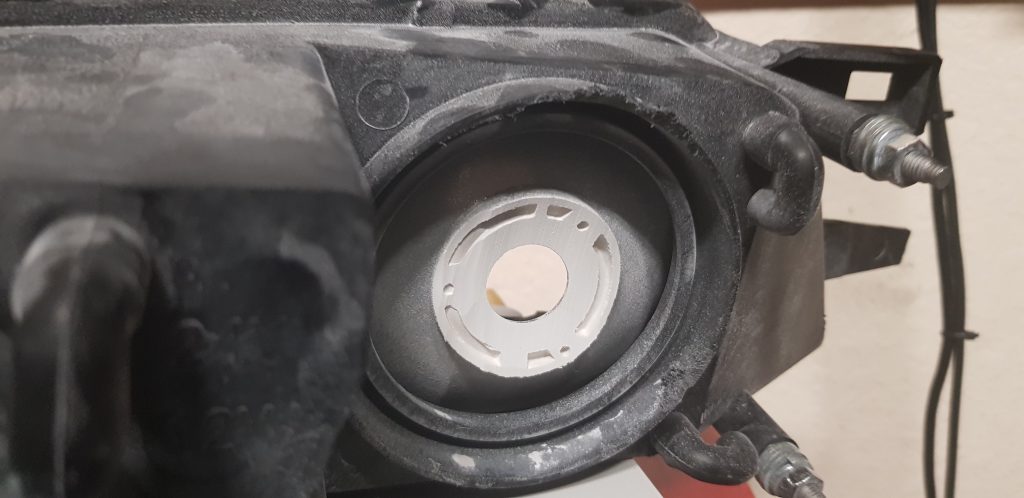
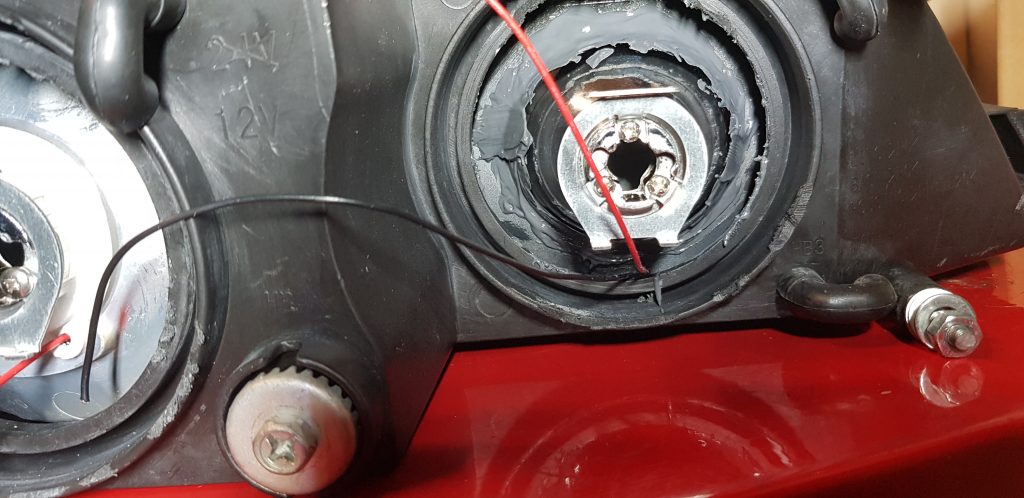
The high beam side is a different story, there are two issues to address. One, the bulb hole is too small to fit the projector back shaft through. The second is that even if you could slide the projector through, it would sit to far forward and hit the housing lens cover. In comes the angle grinder again, the goal here is to cut an oval so that the projectors reflector can sit on that oval deep into the housing and away from the lens cover; a file was used too. While cutting I would test the projector once in a while and ensure I was cutting a clean enough oval to not have gaps around the mating area to the reflector.


Next was the painting, I decided to go with an all-black housing; glossy. I painted everything except the projectors shroud. First I sprayed it with a primer and then the black. Once dry I went to line up the projectors.


To line up the projectors I mounted the housings on the car with no lens cover and used the garage wall. I know its very close but I felt it was good enough. I put in the bulbs then turned them on and rotated the projectors till I saw a horizontal line on the wall. This was not too hard because the high beam projector stays in place due to the shroud touching the floor and ceiling of the housing; holding it in place. This allowed you to rotate it to match the low beam projector. Once I had that set, I then slowly took them off so the high beam projector would not move. Then I sat it down and applied JB Weld to the back of the high beam projector. I used the original JB Weld.


Once the JB Weld was set on both housings all there is left to do is to put the lens covers. I heated the glue areas with the heat gun all around then I placed the cover on and pressed it with my palm against the housing. I then worked on the electronics, I originally had HID ballast’s with D2S bulbs on the FX35 projectors. I wired in another set of ballasts, h1(hid) bulbs as well as relays. I turned them on and waited about 15 minutes to see how hot the wiring and the housing lens cover got. The front of the lens cover gets pretty hot, it is a focused beam like using a magnifying glass to burn with the sun. The back of the projectors got extremely hot, I was not comfortable at all with it; it felt like it could burn wiring or anything near it. So I then ordered H1 LED’s, removed the ballasts and wired the new bulbs in. The output still looks great with LED’s, you can see more intensity with the HID’s for sure but LED’s do not stay far behind so far.
I am very happy with the results and it was exactly how I pictured it. The front of the car looks aggressive and different. I will give an update with night time shots and some feedback.


![]()

Credit: Maxima 97 SE
These are what I have and they are the best plug and play LED bulbs out there. They are the best LED brand that has a perfect beam and spread of light across the road with no gray spots. They are super bright and really quite and you won’t even notice the fans running. I tried every other brand but the JDM XSpeed brand is the best and you can read the reviews. I’ve had them for a year and there has been no problems.
For the fog lights H3 I have tried every brand out there and the best bulbs turned out to be the Osram H3 12V 55W 5000K 62151CBA COOL BLUE ADVANCE Car Bulbs Halogen Fog Lamps 2X. As you can see in the pics that the fog lights are really bright and have a really high shine.


![]()


Price: $146.32
Order Link: https://www.ebay.com/itm/Dual-LED-Halo-For-2002-2003-Nissan-Maxima-Dual-LED-Halo-Black-Headlights-Pair/274382324188
General Feedback:


![]()
")
Credit: Mitesh aka nismomaxgtr18
Specs:


![]()


