Tag

Intakes, Headers & Exhaust

Browsing

Member Credit: ViperVadim

The purpose of this thread is to compare the available headers for the 95-03 VQ3x Maximas. I’ve managed to get together the following different headers in the same room and do this comparison.

Click the image to open in full size.I was able to pull it off thanks to:

  • speed racer for SSAuto/XS Power
  • secondtonone317 for OBX
  • M&R MAX for Hotshots
  • Maximariceboi for Cattmans
  • tavarish for the Stock Fed Spec header (thanks to qnzmax too)

Let the comparison begin:

Stock for Stock (Federal Emissions vs California Emissions)

There are the two types of Stock VQ front headers:

  • 95-00 Federal Emissions Header
  • 99-00 California and ALL 2001+ Header

Click the image to open in full size.The California front header is a system that incorporates a Huge pre-cat (cat converter) doing it’s job for the environment.

Click the image to open in full size.

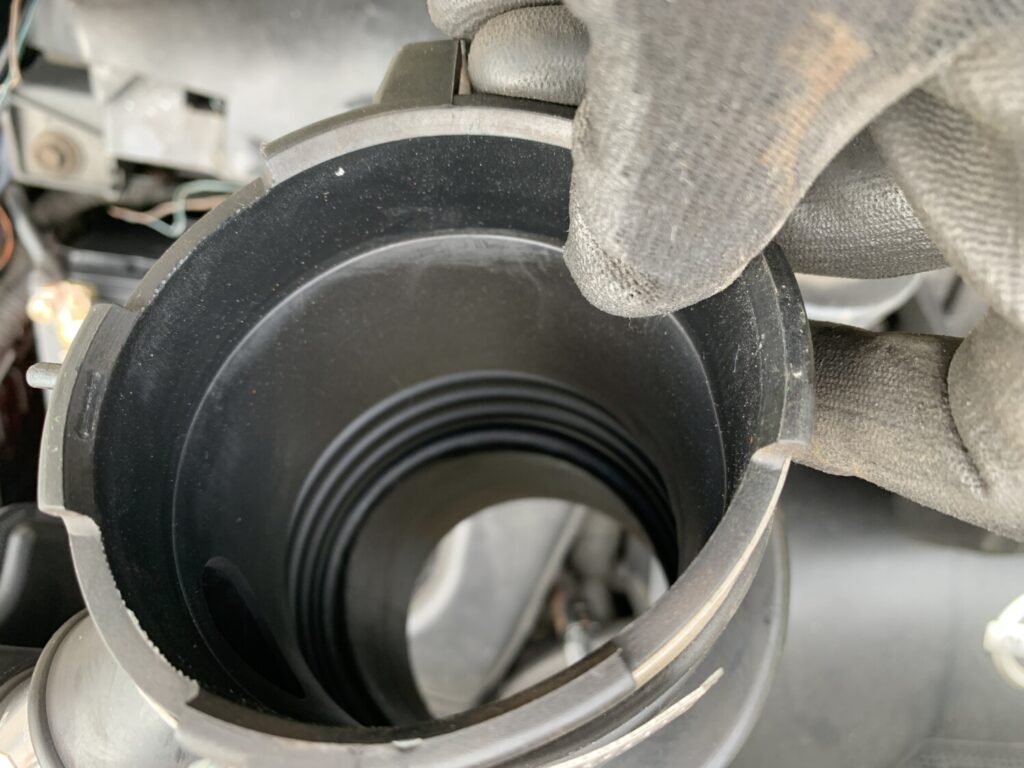
The pre-cat up close is big, and the stock headers are restrictive to the exhaust gasses flowing through.

Click the image to open in full size.

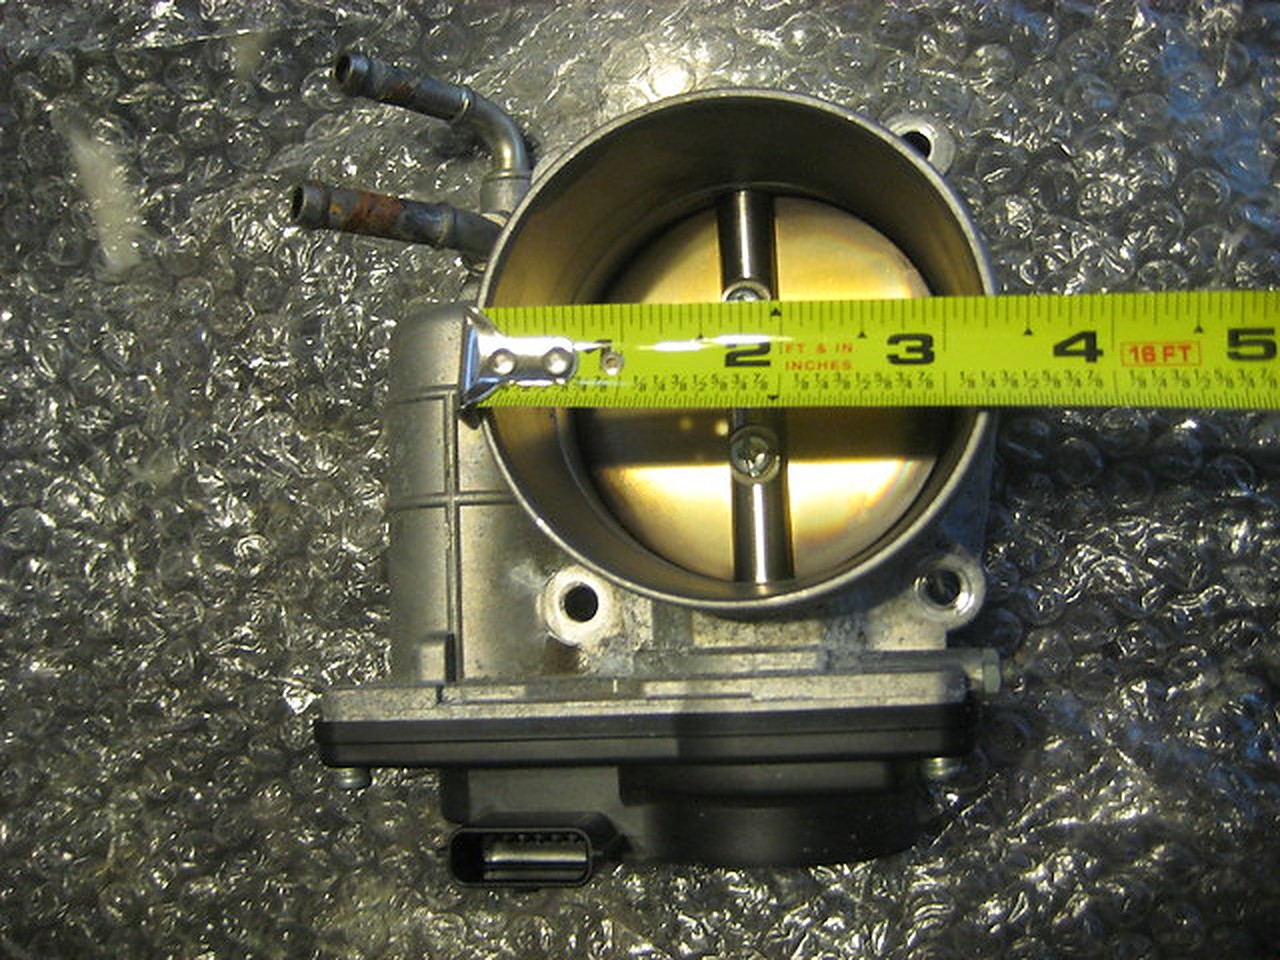
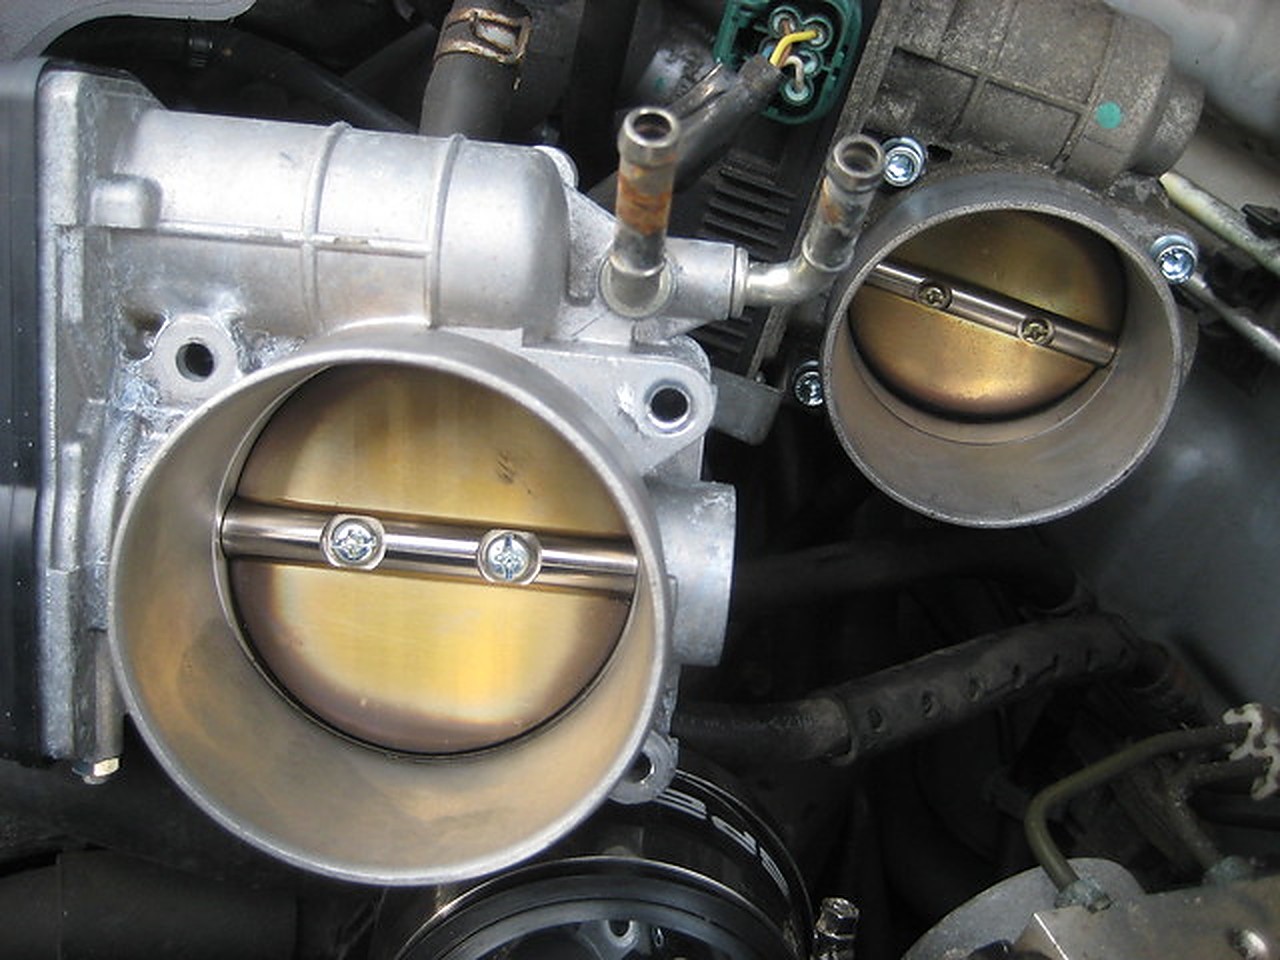
The front headers kinda look similar, until you look inside them.

Click the image to open in full size.

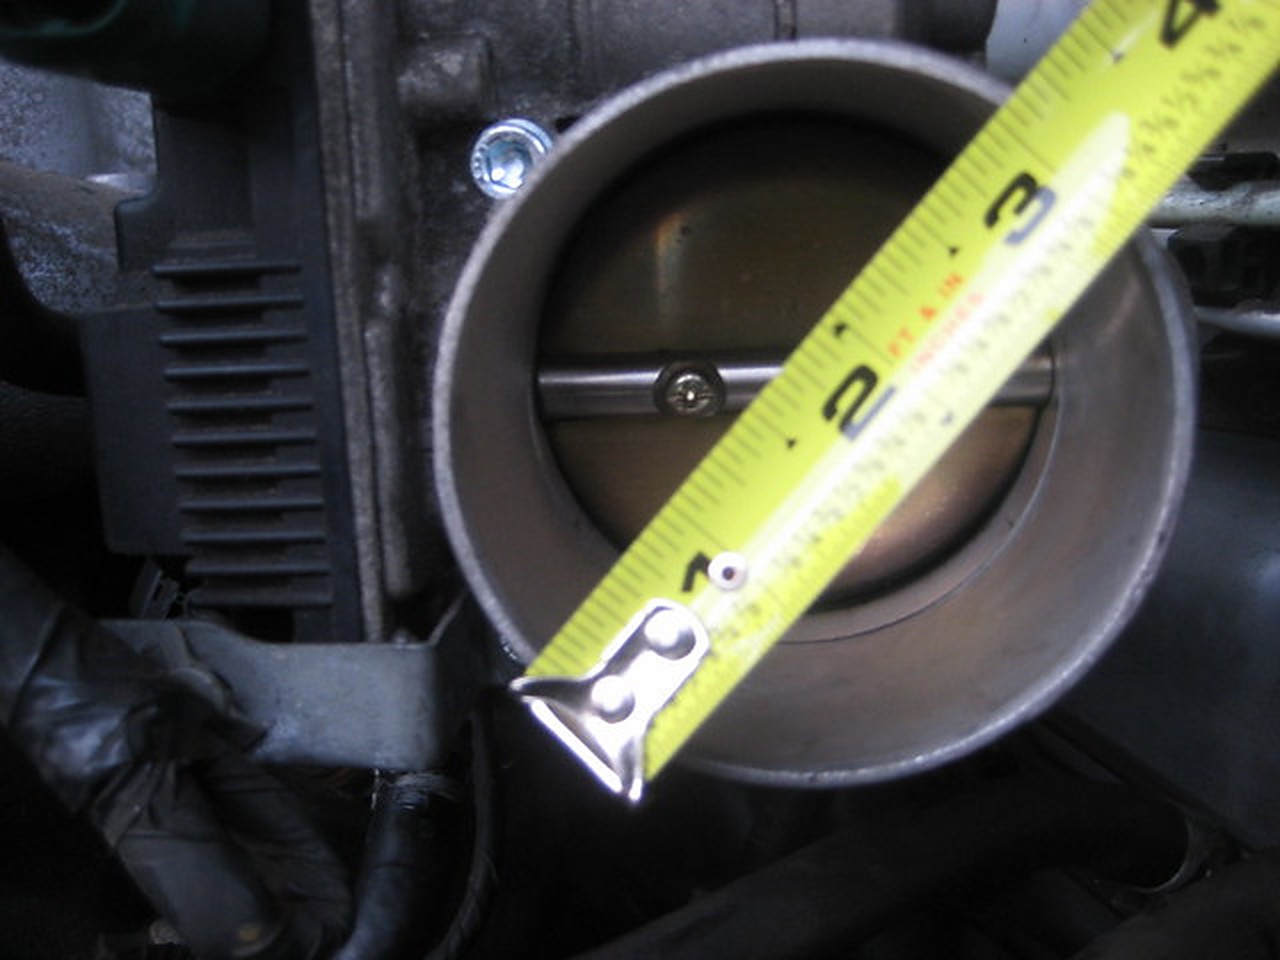
The fed spec has a round exit hole and has superior internal flow to the Cali-spec, the shape of the openning on the cali spec is irregular, and more restrictive.

Click the image to open in full size.Click the image to open in full size.

The bends and rough edges inside the manifold all hinder exhaust flow, creating backpressure.

Furthermore the outlet after the pre-cat on the cali spec is much smaller than the fed, with an oxygen sensor placed directly in the exhaust path restricting even more flow.

Click the image to open in full size.Click the image to open in full size.

Tthe rear VQ header is unchanged from 95-01.(EGR is closed off with a Large Bolt on all 01’s) But in 02+ ALL rear headers also received a pre-cat similar to the california front header in 99.

Here is a pic of 02+ rear header pre-cat, used from BLAKKILLA.GTR, thanks Man

Click the image to open in full size.

Now everybody knows what all maximas come with from the factory. As you can see from the pictures the Stock headers are designed very cost effectively, they comply with auto standards and compromise heavily between good Fuel Economy and power output. (Very Bad for HorsePower)

Before we discuss Aftermarket Headers we need to discuss:

EGR: Which cars have EGR?

  • All 95-00 Maximas Have external EGR.
  • All 01-03 Maximas have NO (external) EGR.

This is the EGR guide tube used on all 95-00.
Click the image to open in full size.

This is how the EGR bolts into the REAR header – and why you need the EGR bung on the rear header.
Click the image to open in full size.

GASKETS

Aftermarket Headers will come with Aftermarket Gaskets (read as: POS Gaskets).

The difference between POS and OEM

Click the image to open in full size.

DO NOT USE the supplied POS Gaskets! They cannot stand up to the heat of the headers. The gaskets are prone to cracking. OEM gaskets are multi-layered Steel and provide the best seal.

Click the image to open in full size.

OEM Multilayer FTW!

Click the image to open in full size.Click the image to open in full size.

XS Power/SSAutochrome/Stone Mountain Racing Headers

These are the very first headers designed and mass produced for the maxima, it has went trough many names, but not so many changes, the latest distributor is XS Power.
This is the only system that can be used with a Budget/Cattman/Warpspeed y-pipe, meaning if you already have a (Fed Spec) aftermarket y-pipe, the headers will bolt right up to it. I still prefer to use the Supplied XS Power Y-pipe (for ideal fitment)

Cost $325 

Click the image to open in full size.

Click the image to open in full size.

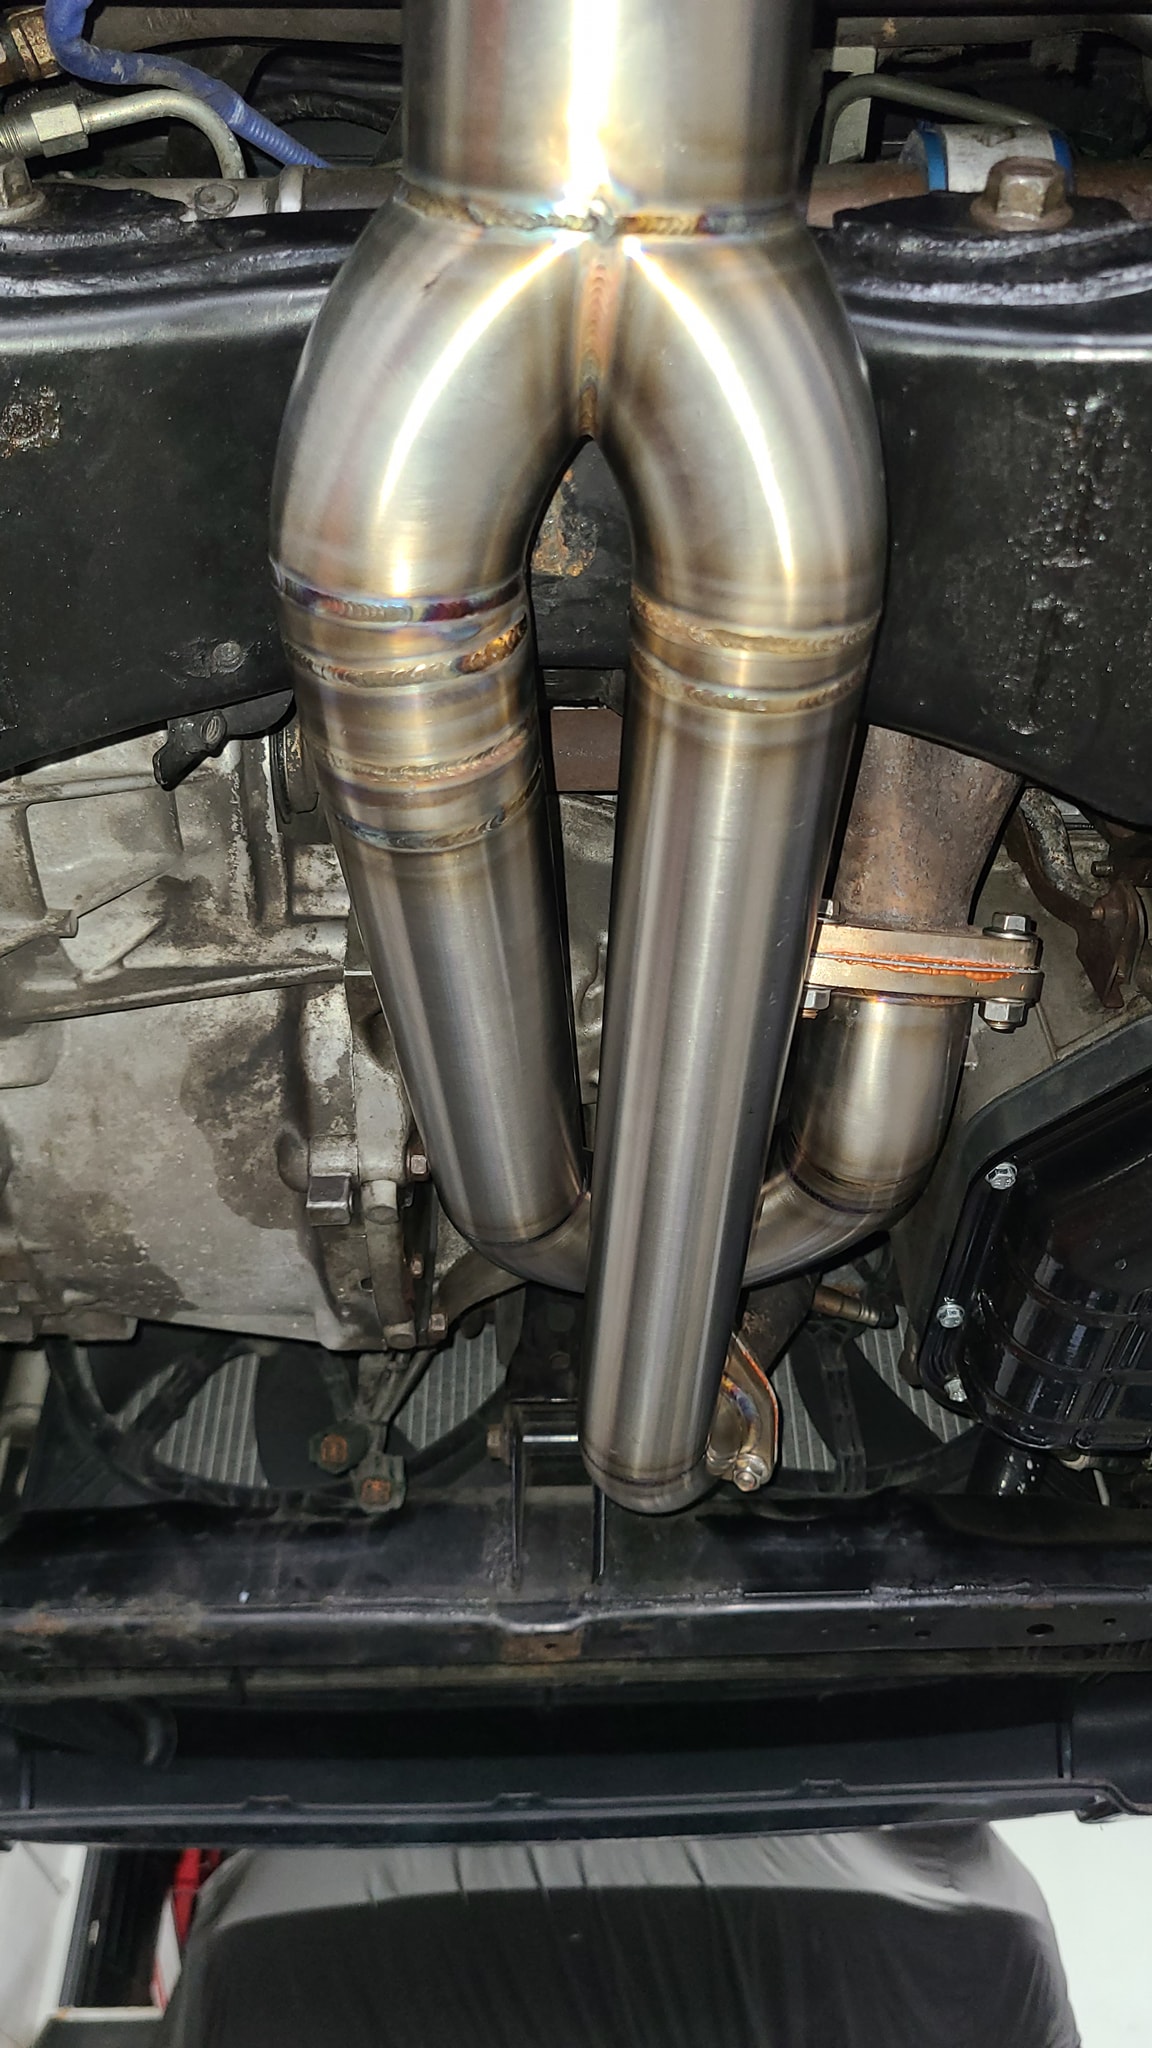
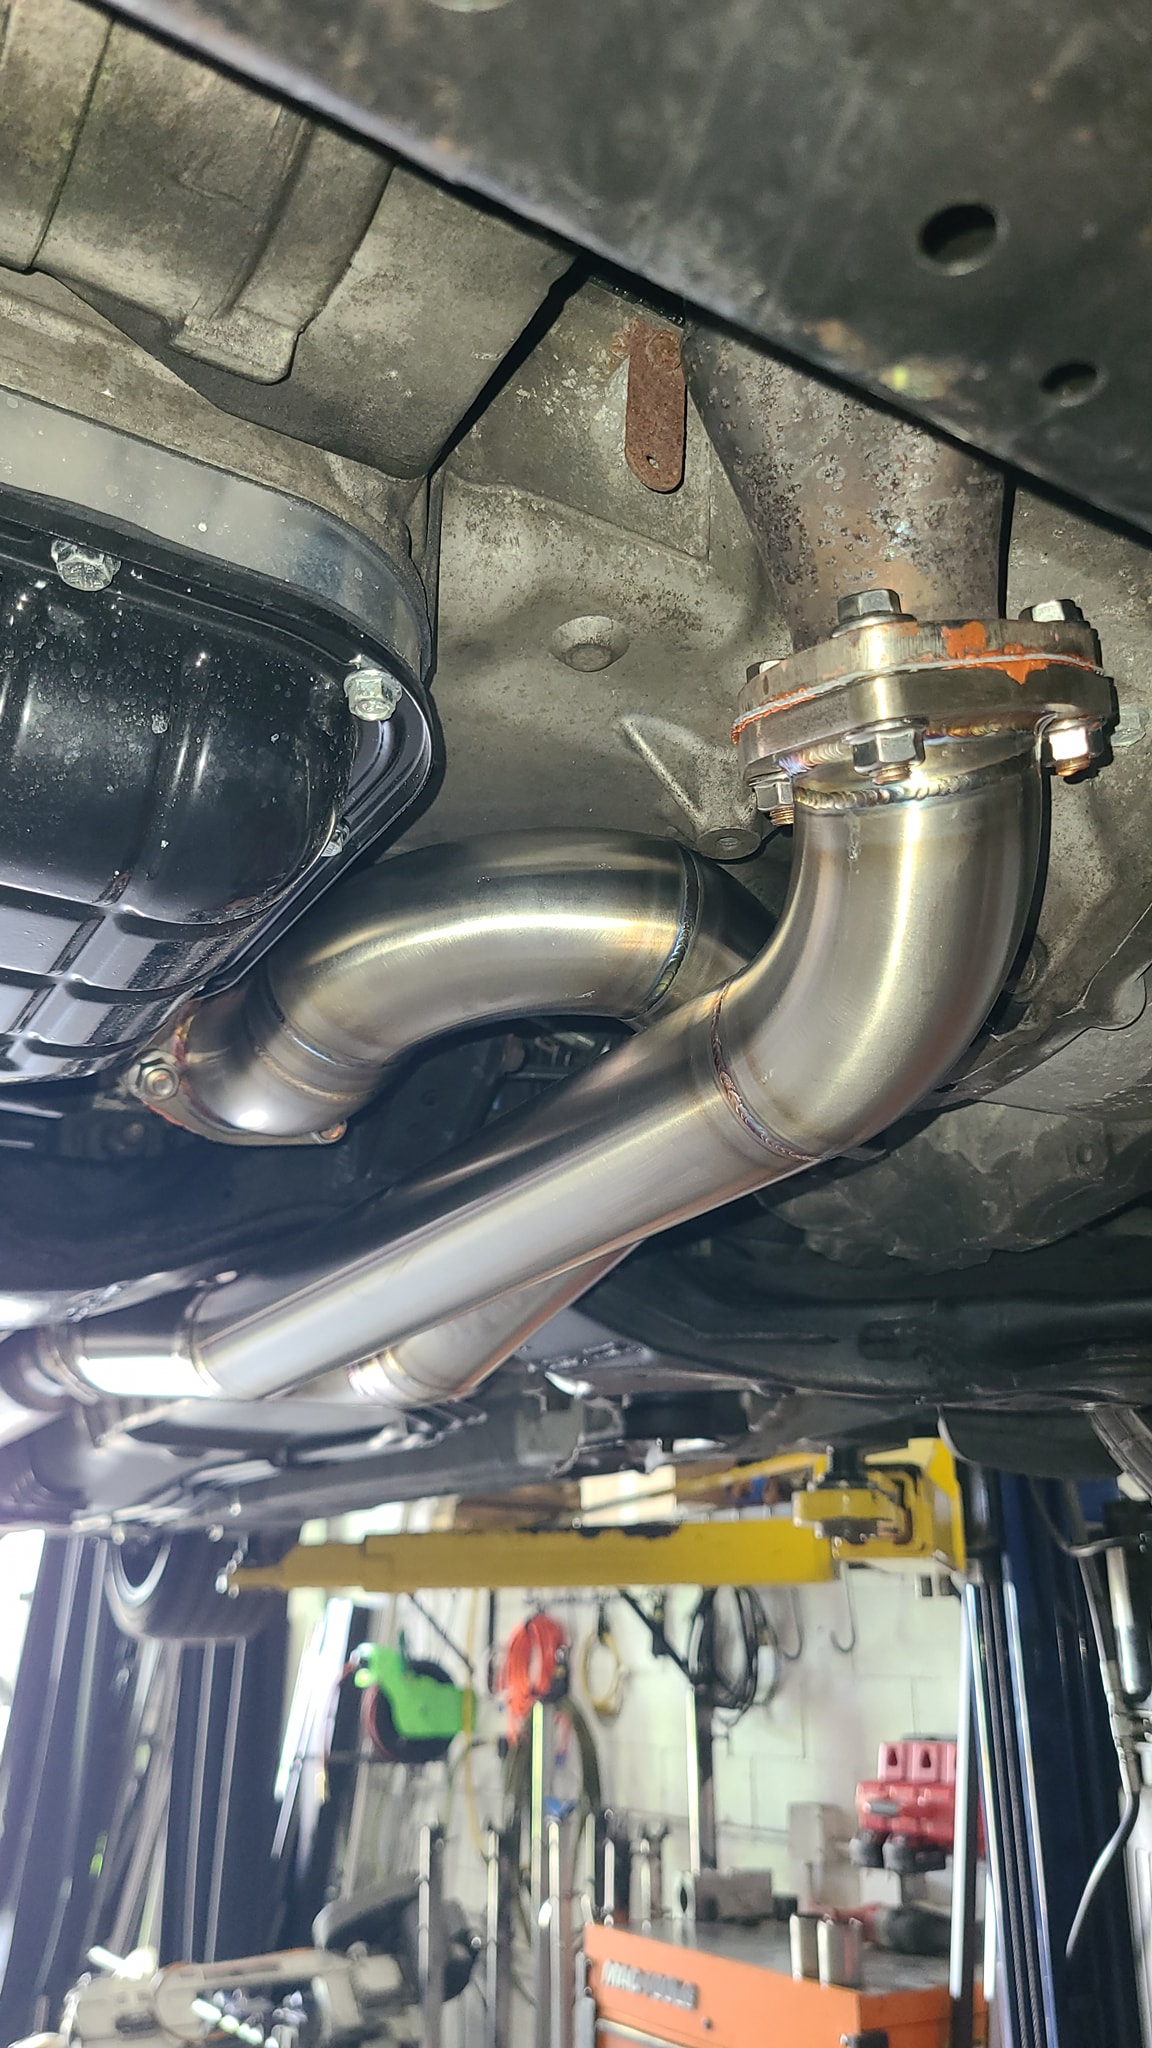
They are derived from the stock header design except they have a nice flow improvement. every runner is separate, and merges into a 3-1 collector. They have much better flow over stock.

Click the image to open in full size.Click the image to open in full size.

This is the flow improvement, you can see the 3-1 collector.

Click the image to open in full size.

The rear header has longer runners than the front with EGR bung as well

Click the image to open in full size.

Fresh from vipervadim’s paint shop

Click the image to open in full size.

However when comparing them to the header system from OBX you can clearly see the difference between long and short runners.

Click the image to open in full size.

With short runners, peak power is delivered earlier in the powerband. low-end and midrange is emphasized. (at top-end the headers are choking the motor)

with longer runners, peak power is delivered later in the rpm range. Midrange and Top-end power are affected better since the engine has less backpressure and less restriction for exhaust gasses.

Stats:

Header:
A. Runner Inlet (oval) 1 3/4W x 1 1/4H
B. Runner Diameter (outer) – 1 5/8in
C. Runner Length – Front (5, 5 1/2, 10 1/2) Rear (7, 8, 8 1/2) in
D. 3-1 Collector Diameter (inner) – 2 1/8 in

Y-Pipe
E. Y-Pipe Diameter (outer) – 2 1/8 -> 2 3/8in.
F. Collector Diameter (inner) – 2 1/4
G. Not Equal Length W/ EGR

OBX

OBX is not new to Maxima headers, they used to have this (below) header system for the 95-99 Maxima, 3-piece design, however they had a big fitment problem: the front header was right in the way of the front motor mount bracket (needed to be cut), and the rear header joined the y-pipe in a 90 degree bend (bad exhaust flow).

 I WOULD NOT Advise buying it because of Bad Fitment.

OBX has however smartened up from ^^those times^^ and completely redesigned their New Maxima Header System (fits 95-03, same VQ block) and this is what they offer:

Cost – $325 

Click the image to open in full size.

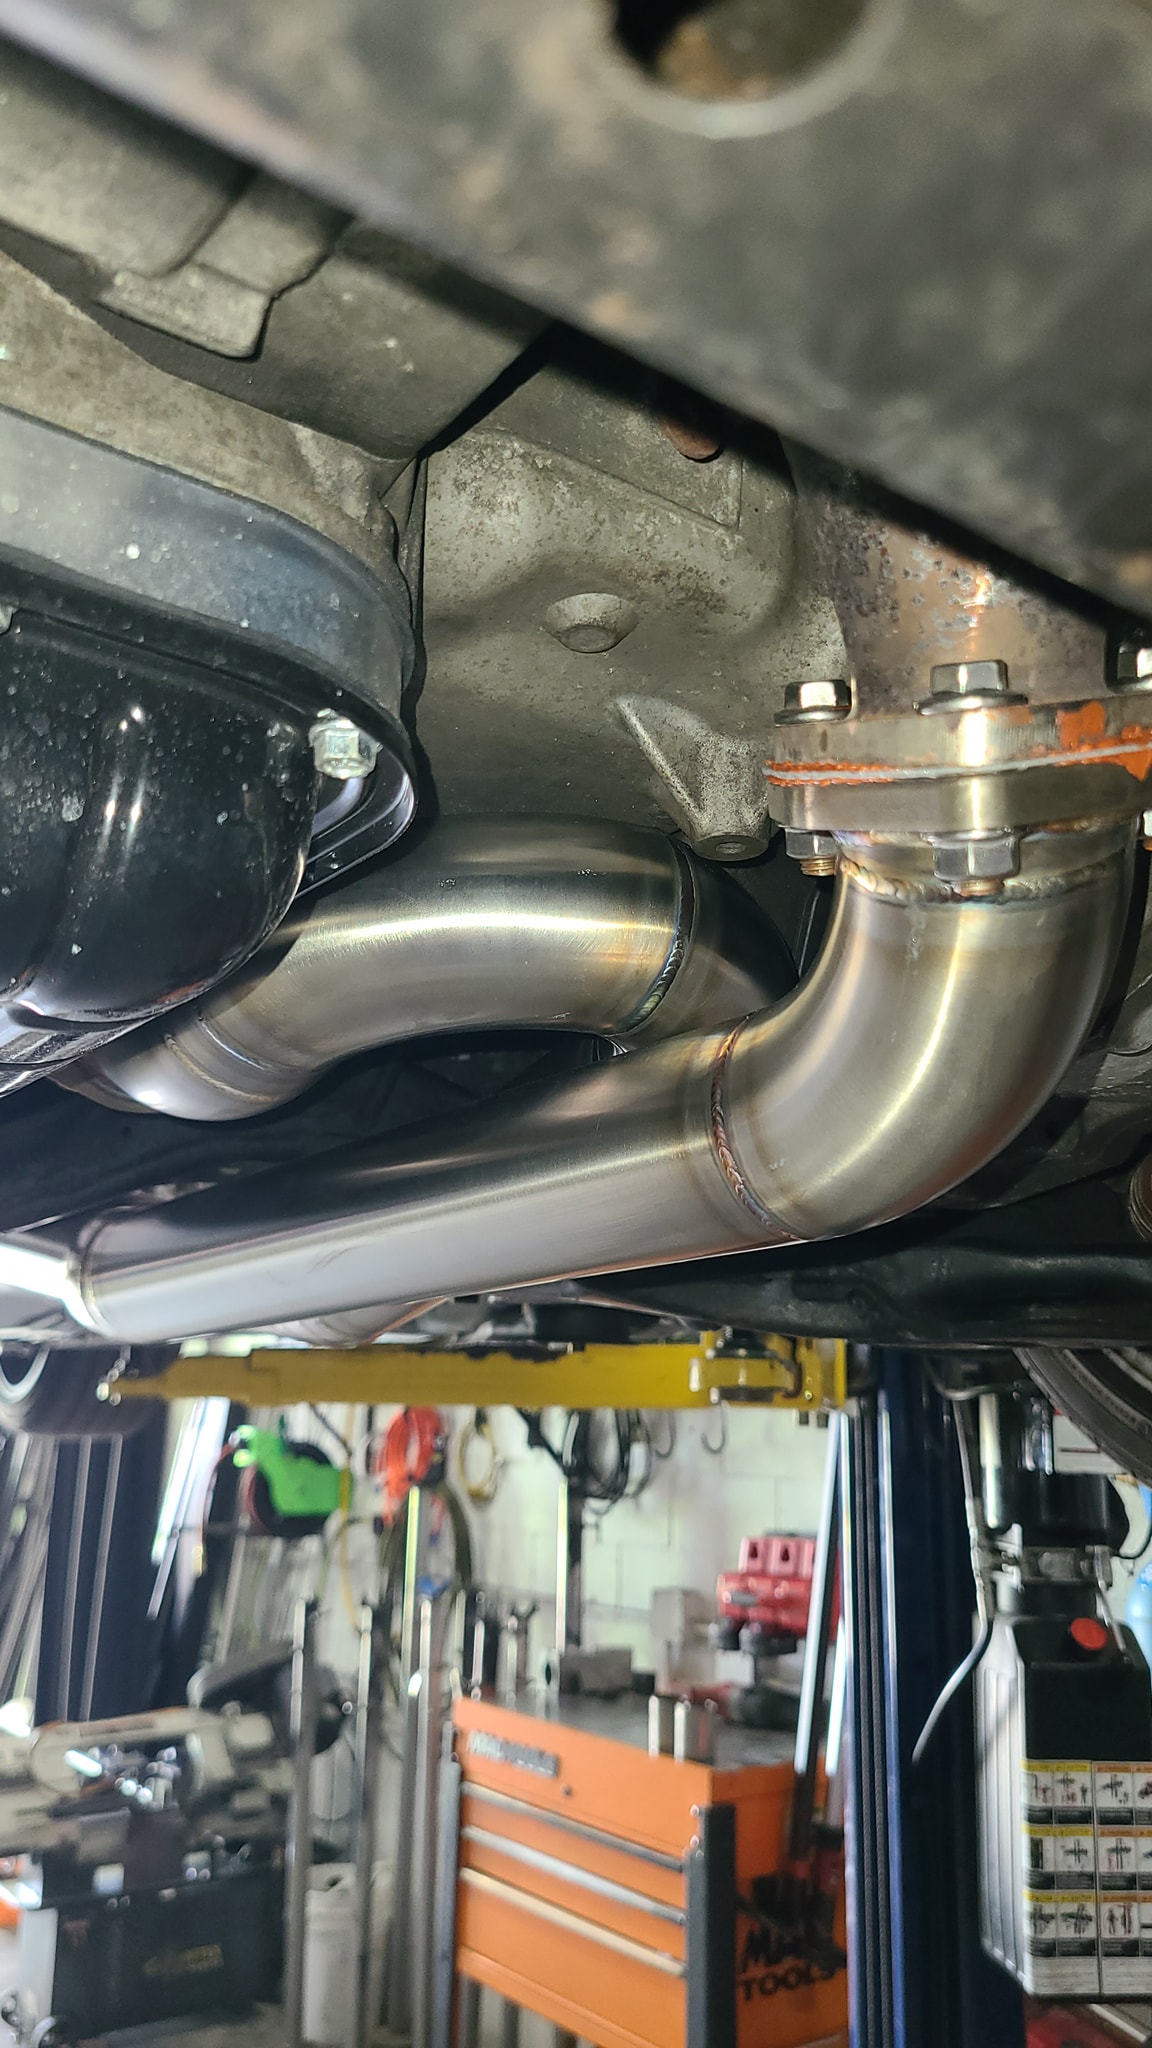
They have improved from the original header design, redesigning the whole system. the new design is now 2-piece. It incorporates long runners in the front header, with the mount issue solved (similar to hotshots design), and a distinctly improved 2-1 collector, eliminating the previous 90-degree bend. the rear header (with EGR bung) is integrated into the y-pipe as one piece

Click the image to open in full size.

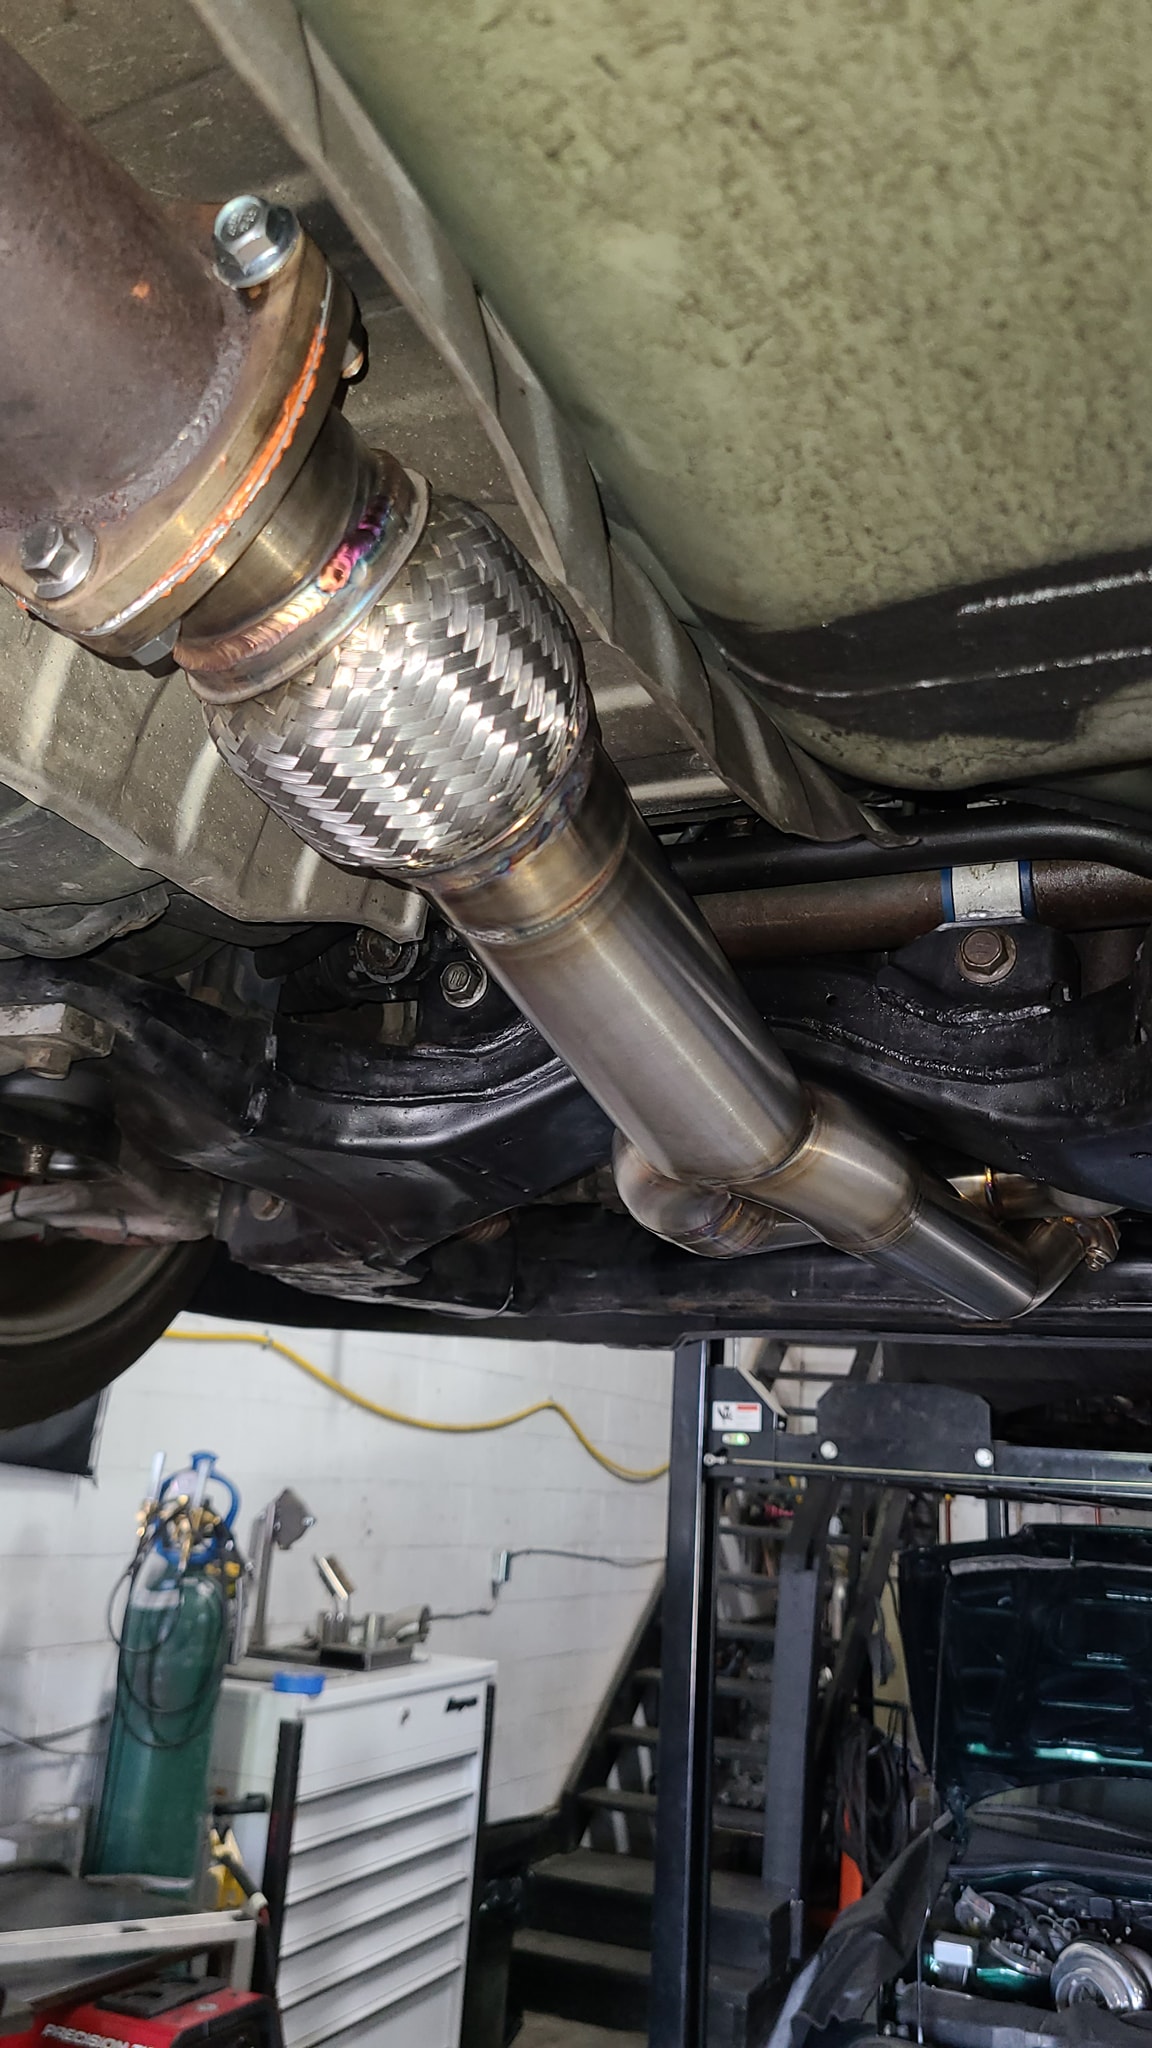
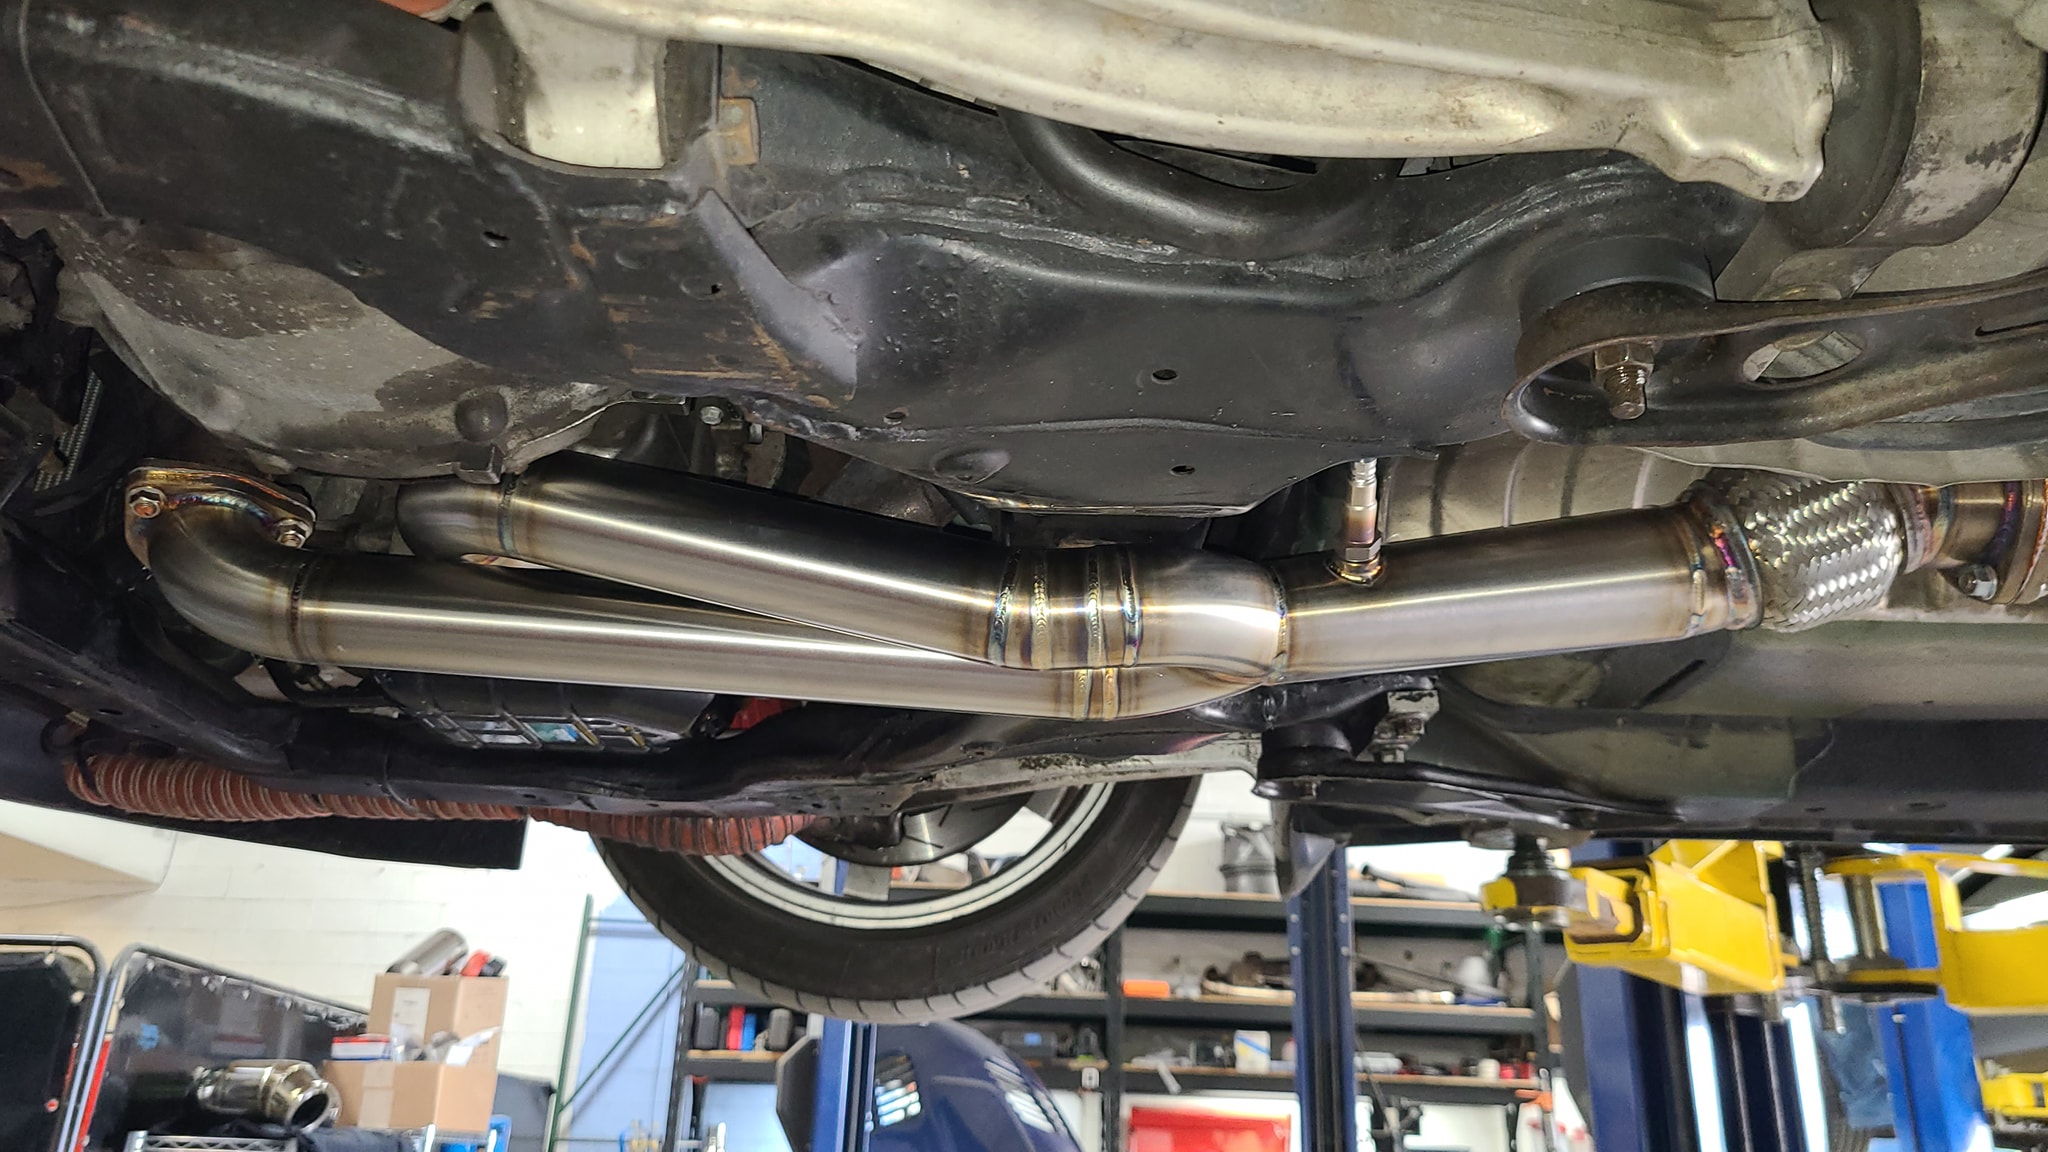
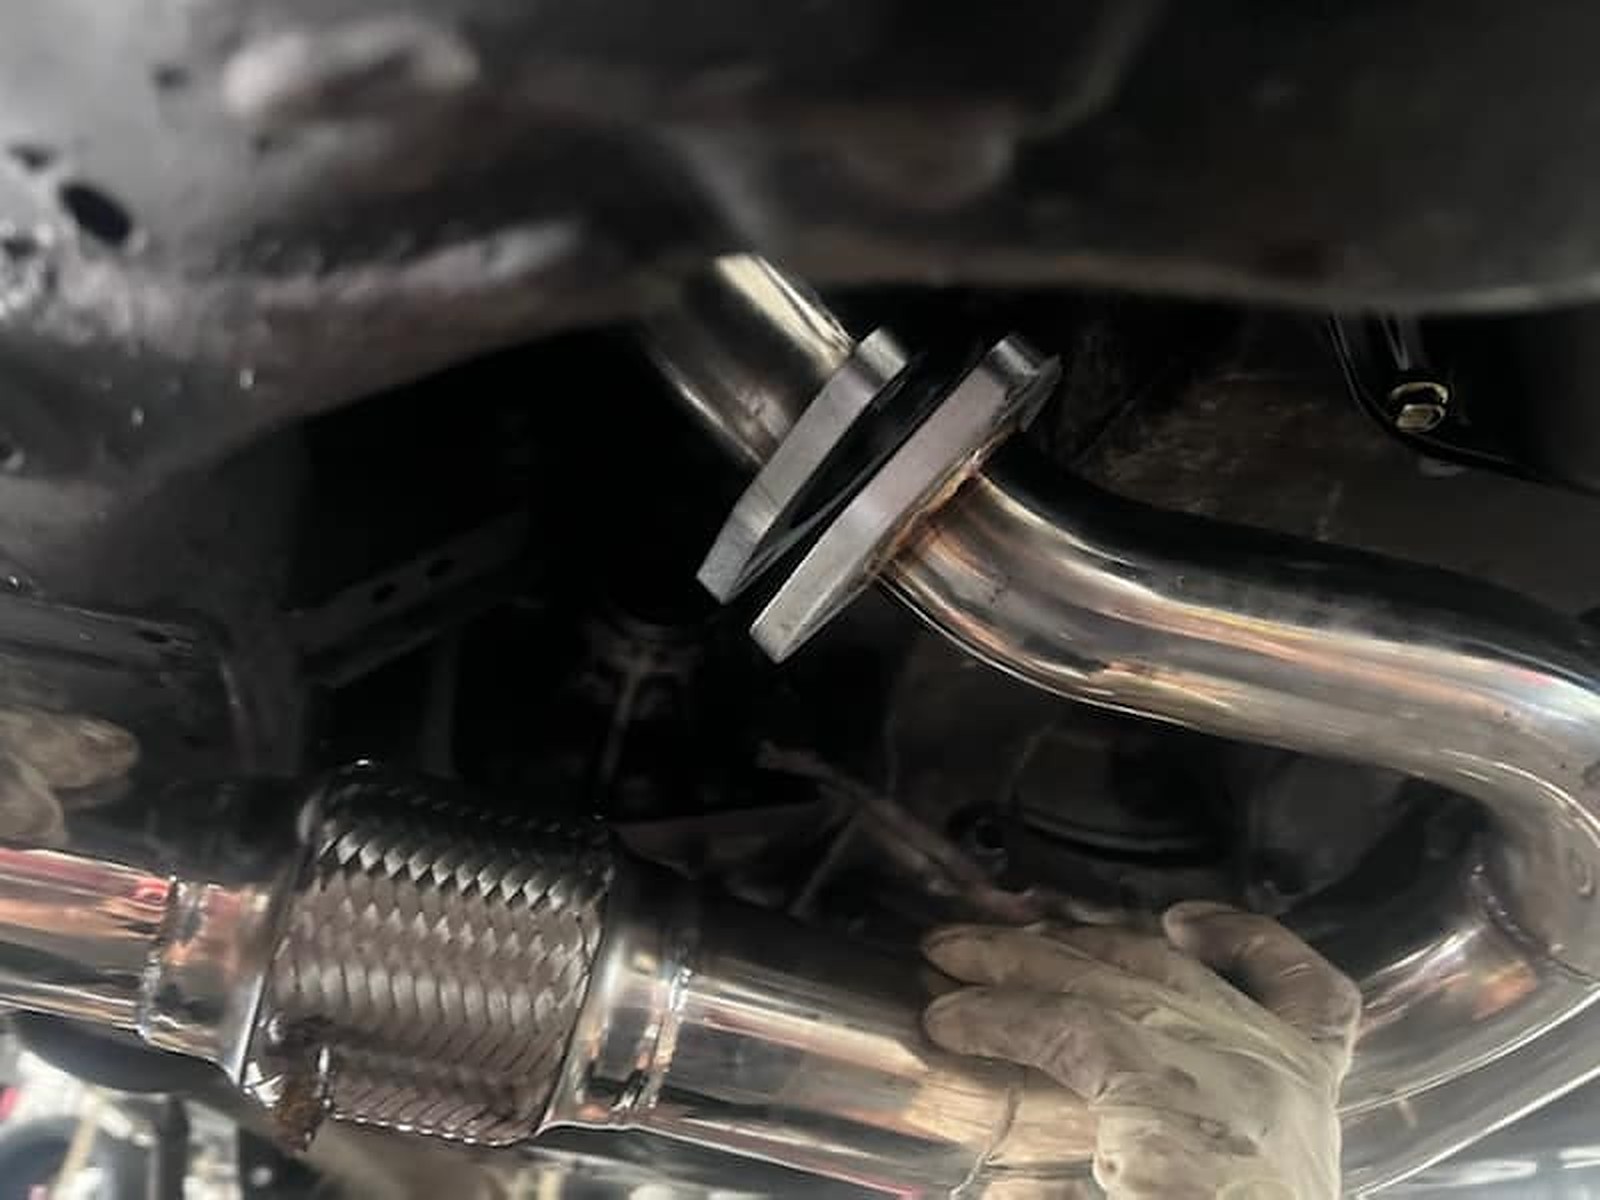
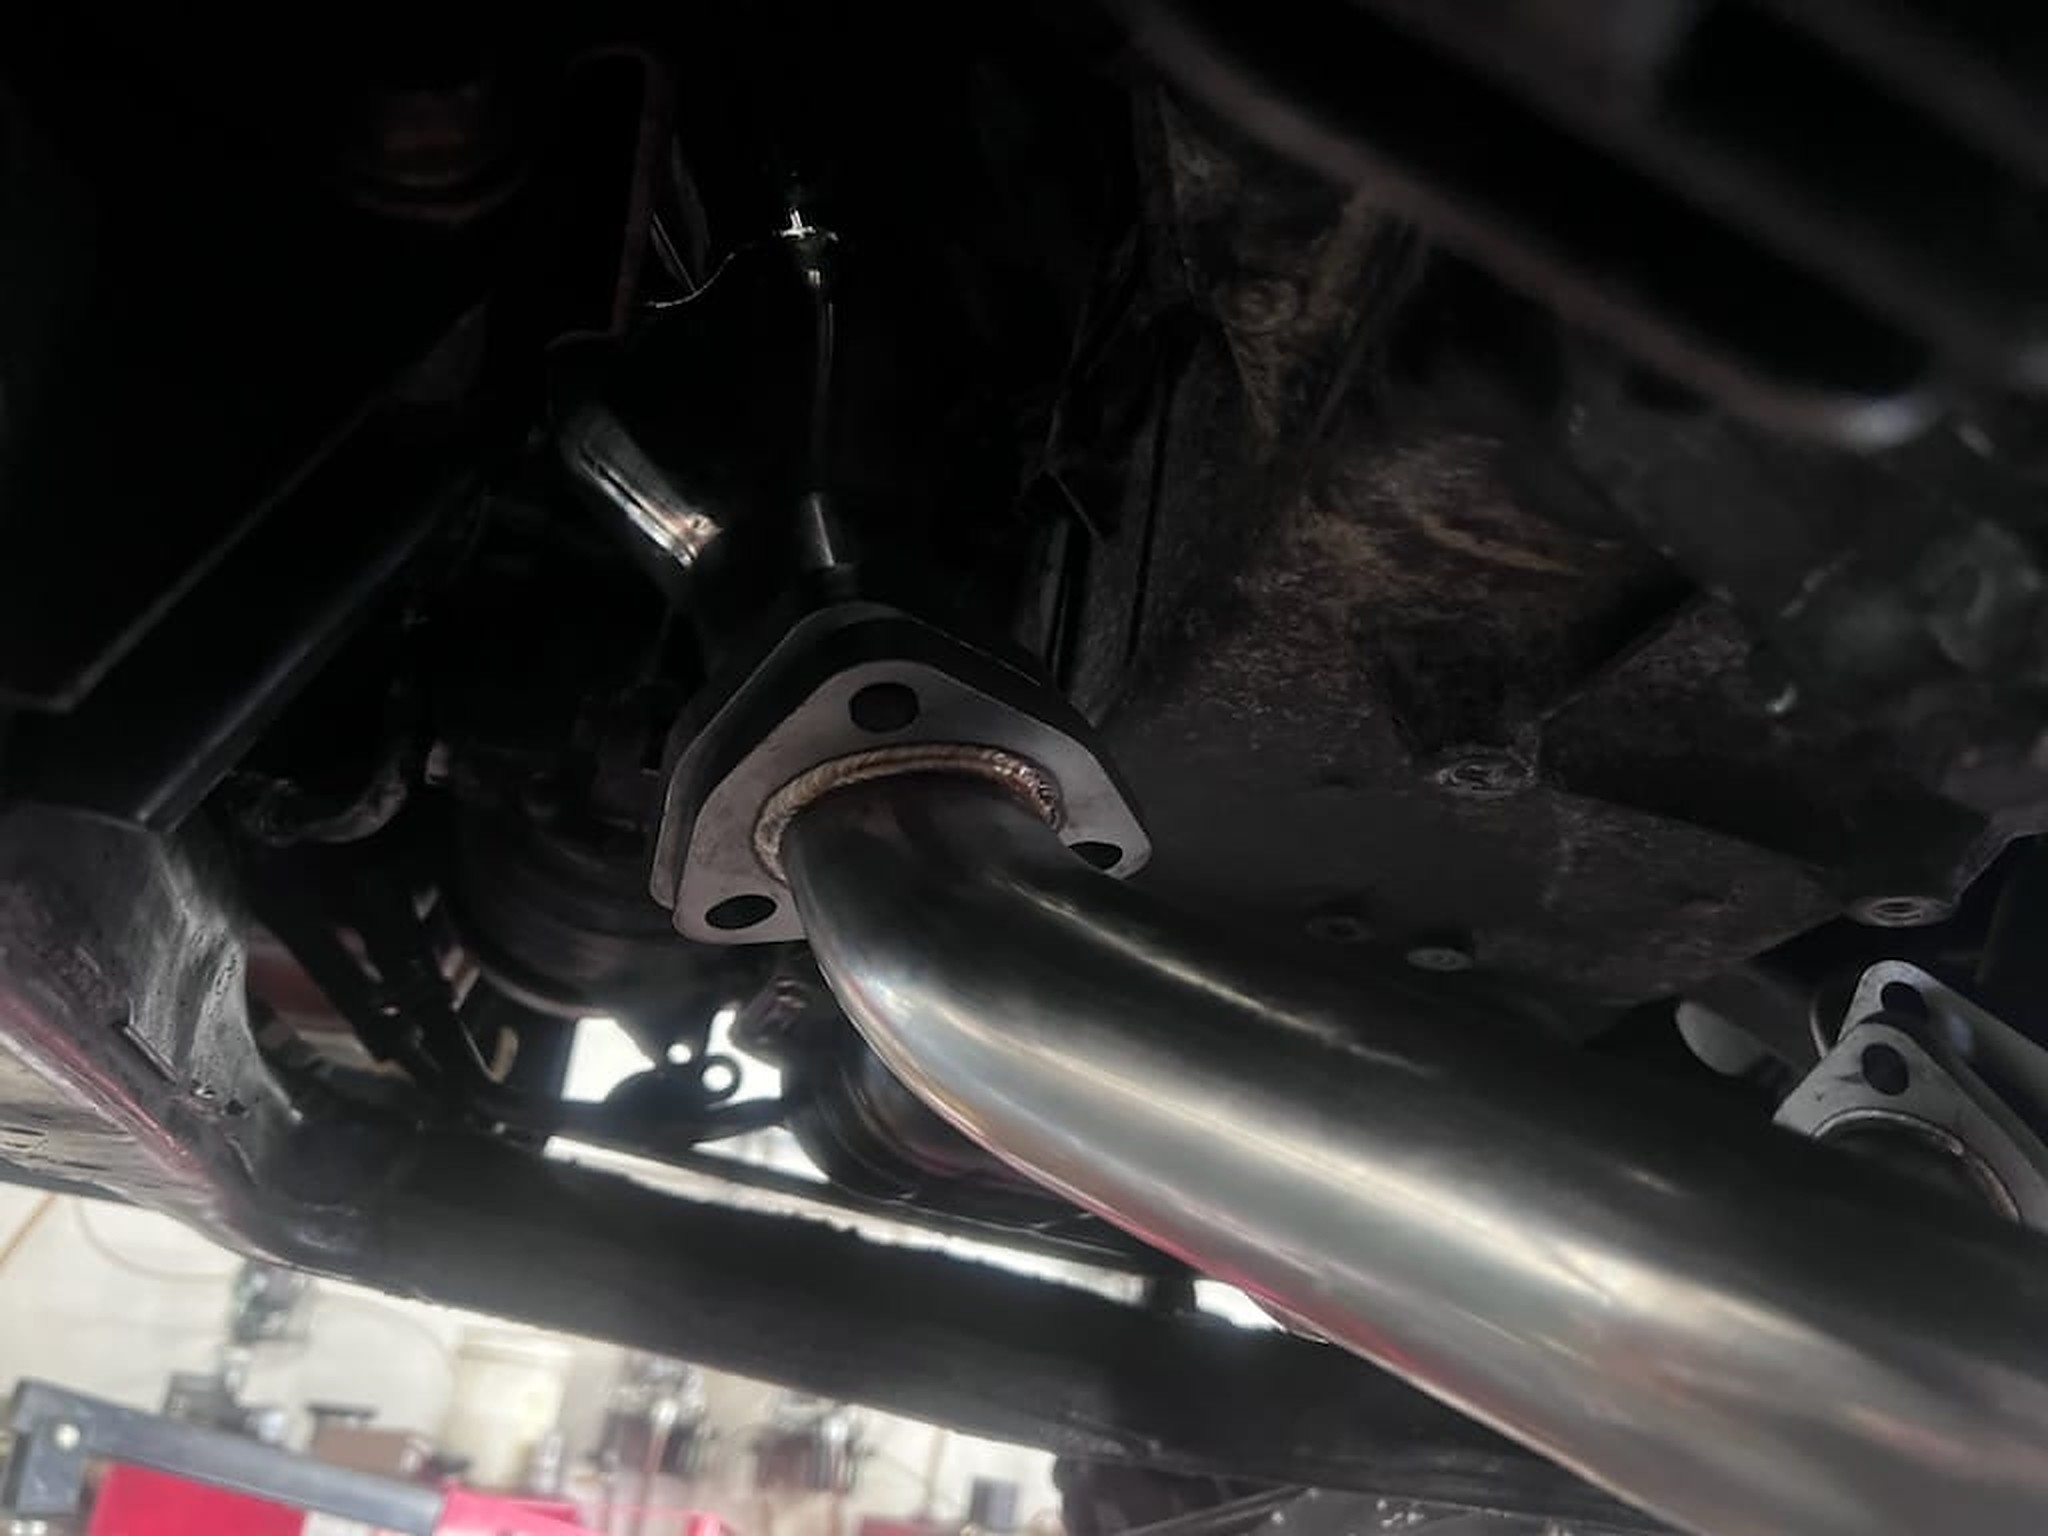
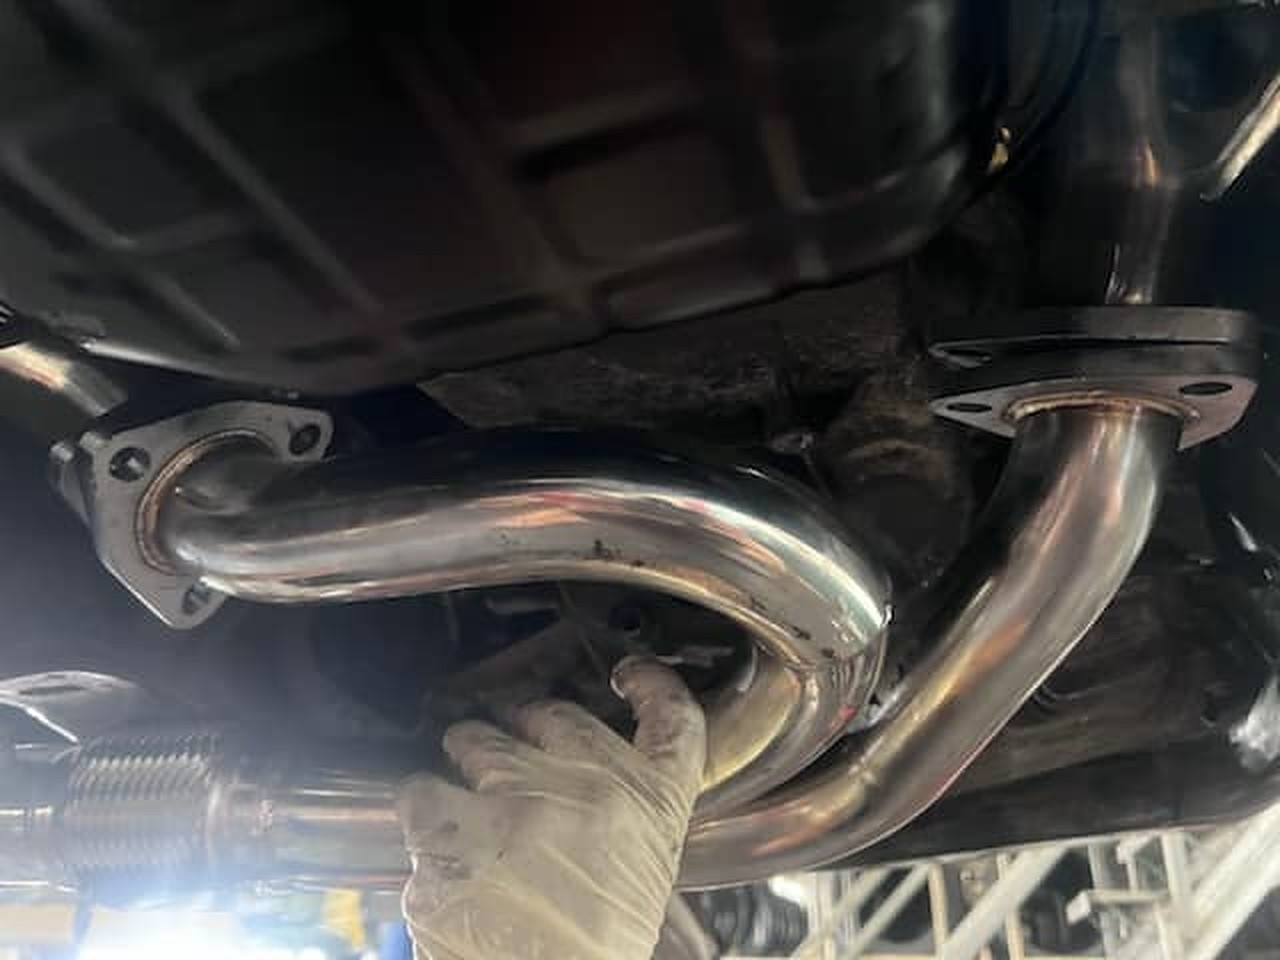
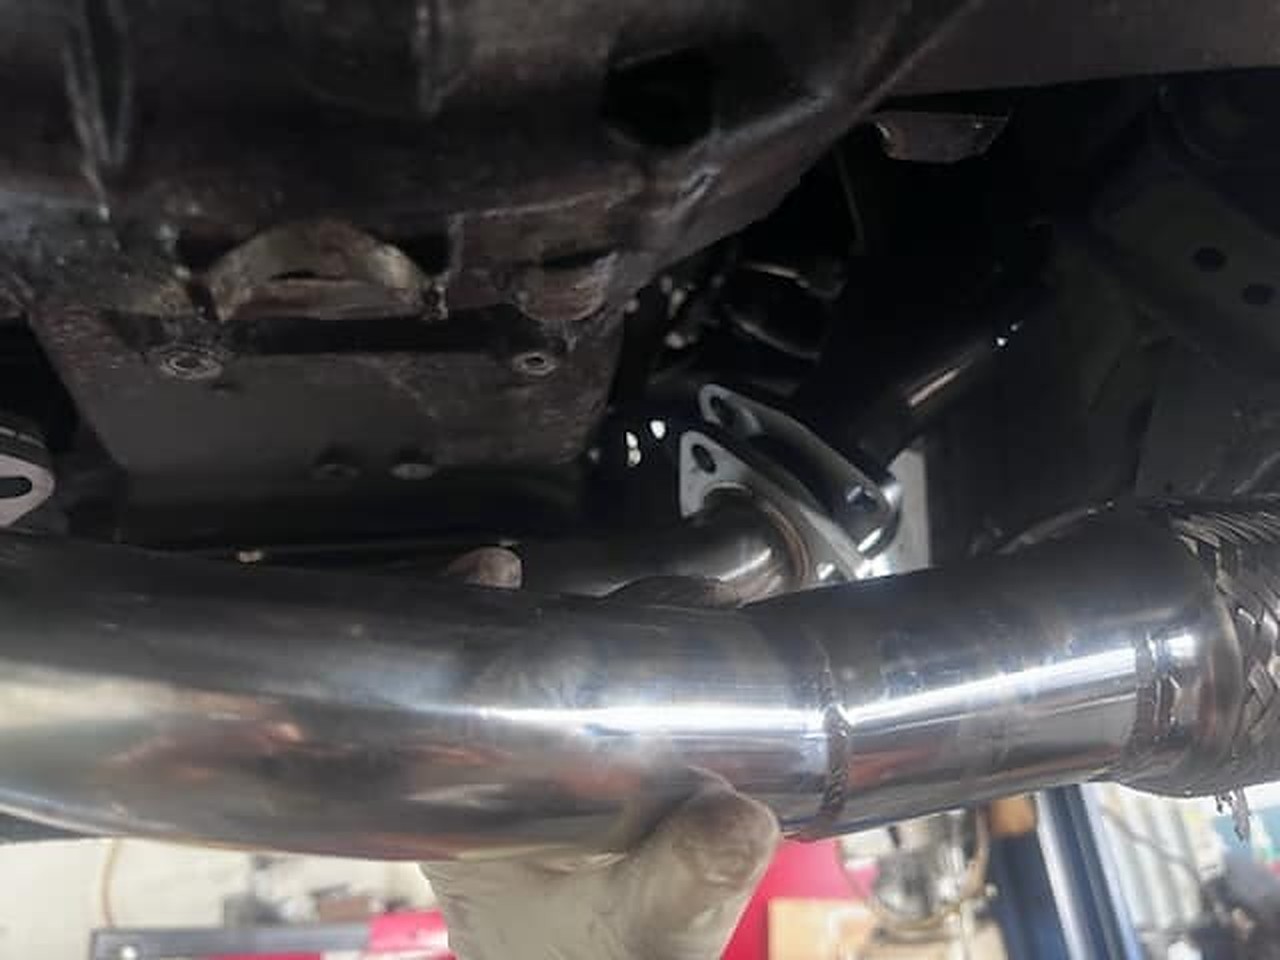
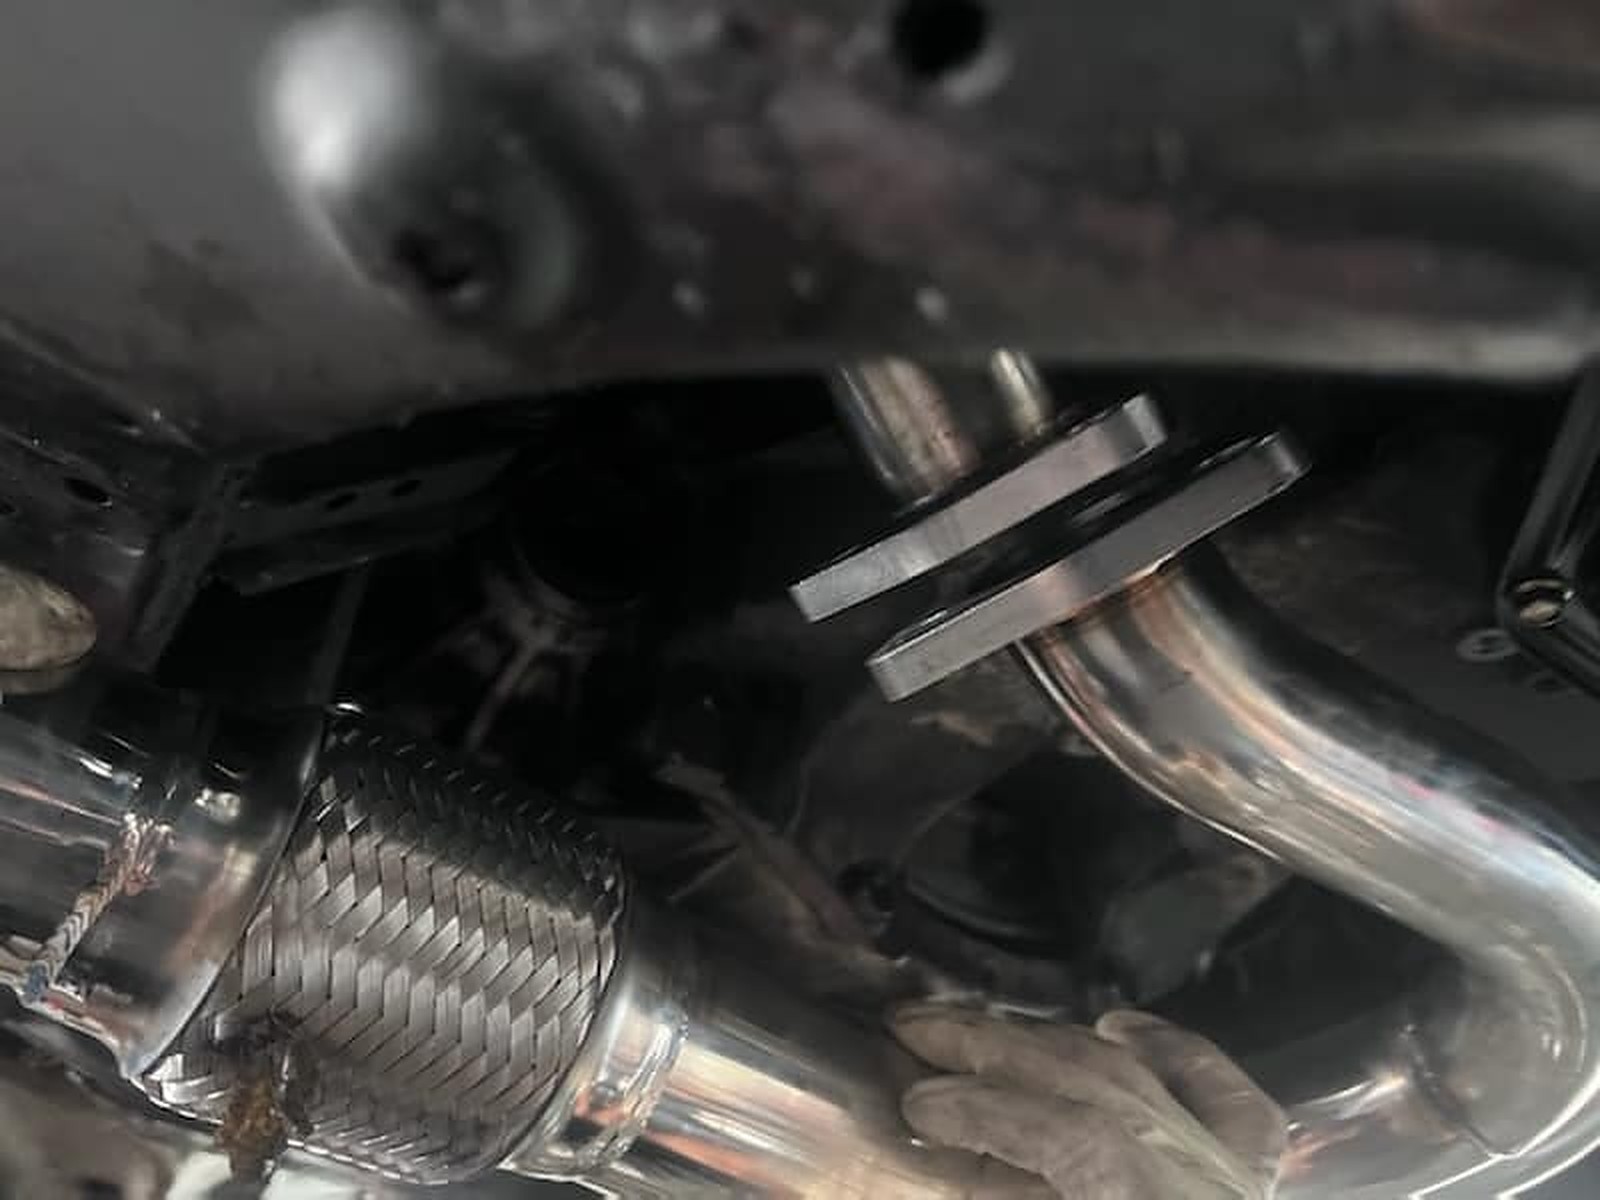
This is how the system looks put together.

Click the image to open in full size.

Notice there are 4 o2 bungs for the front and rear oxygen sensors (ideal for 99+ cali spec), there is also 2 small flex sections instead of a single.

Click the image to open in full size.

I am very impressed with the OBX, they officially put themselves back on the map with their new redesigned Maxima headers. for the price and the end-result, this is the ideal header system for a ‘budget minded’ maxima enthusiast. I think the SSAuto/XS Power have met their downfall, because the OBX are in a similar price range offering a better designed system similar to (cattman and hotshot). I still have yet to find out how well they fit or how well they perform.

However the new OBX has it’s one drawback. unlike the Cattman and Hotshot and even the SSauto/XS Power Y-pipes, the inside diameter of the y-pipe outlet is only 2 1/16in, (outside diameter 2 1/8) smaller than stock.

Click the image to open in full size.

If you can replace the flex section and the outlet piece with 2.5in piping more gains will be had in the midrange and top-end.

Stats:

Header:
A. Runner Inlet (oval) 1 3/4W x 1 1/4H
B. Runner Diameter (outer) – 1 5/8in
C. Runner Length – Front (9 1/2, 11, 14 1/2) Rear (9 1/2, 10 3/4, 12) in
D. 3-1 Collector Diameter (inner) – 2 1/16 in

Y-Pipe
E. Y-Pipe Diameter (outer) – 2 1/8 -> 2 1/8in.
F. Collector Diameter (inner) – 2 1/16
G. Not Equal Length, W/ EGR

Hotshot

Hotshot is Out Of Business, so the Headers are no longer produced. There are some resellers who still have the last remaining stock, and of course the people who bought/installed them.

Cost $639 

Hotshot headers are on par with Cattman. they look very similar and the construction is very good. According to my measurements the Hotshots have the longest header runners and longer equal length runners on the y-pipe. They also have well machined inlet and oulets.

Click the image to open in full size.

The only problem with Hotshots: In the Front header, the O2 bung needs to be welded in another location. The original location puts it too close to the A/C compressor. Also depending on what year maxima you have, you will need to weld in an EGR bung to the rear header, since the Hotshots do not have EGR.

Click the image to open in full size.

Headers put together
Click the image to open in full size.Click the image to open in full size.

Fresh from vipervadim’s paint shop
Click the image to open in full size.

Stats:

Header:
A. Runner Inlet (oval) 1 7/8W x 1 5/16H
B. Runner Diameter (outer) – 1 5/8in
C. Runner Length – Front (15, 15 1/2, 20) Rear (12 1/2, 14, 15 1/4) in
D. 3-1 Collector Diameter (inner) – 2in

Y-Pipe
E. Y-Pipe Diameter (outer) – 2 1/8 -> 2 1/2in.
F. Collector Diameter (inner) – 2 7/16
G. Equal Length (23 1/2in each) W/ NO EGR

The Hotshots like the Cattman headers have equal length runners (notice the round bend at the rear header), unlike the SSAuto and OBX.

Equal length pipes help the sound and they provide less backpressure.

Cattman

Price is somewhere around $850+ ShippedNewest ‘Gen2’ Version of the legendary Cattman Headers. Cattman switched to a 3-piece design like the Hotshots from their 4-piece ‘Gen1’ header design. Cattman is a full integrated system, the most expensive headers for the maxima, they are also made wit the most time and precision. there are no big bends in the Cattman piping, every piece is mandrel bent slightly then welded together to form a larger bend. Header runners and Y-pipe runners too.

Click the image to open in full size.

Cattman does it right: O2 bung in correct location, there are NO issue with the Cattmans. (you get what you pay for?)

Click the image to open in full size.Put together
Click the image to open in full size.Click the image to open in full size.Fresh from vipervadim’s paint shop

Click the image to open in full size.

Stats:Header:
A. Runner Inlet (oval) 1 11/16W x 1 1/4H
B. Runner Diameter (outer) – 1 5/8in
C. Runner Length – Front (12 1/2, 13, 16) Rear (12, 12 1/2, 13) in
D. 3-1 Collector Diameter (inner) – 2in
Y-Pipe
E. Y-Pipe Diameter (outer) – 2 1/8 -> 2 1/2in.
F. Collector Diameter (inner) – 2 3/8
G. Equal Length (20in each) W/ EGR
 

Header Comparison:

Here are pictures of the various headers compared to one another. This is the Group shot after Painting.

Click the image to open in full size.

So here we go: Many people have been asking me about this:

Cattman + Hotshot, just how different are they?First the y-pipes, notice how similar they are the only real difference is in the shape of the bend, the hotshot has a gentler bend, but the cattman is more steeper.

Click the image to open in full size.Click the image to open in full size.

Now onto the headers, you can really see how longer the hotshot runners are compared to Cattman. the Cattman has great 3-1 collectors.

Click the image to open in full size.Click the image to open in full size.Click the image to open in full size.

Hotshot and OBX

Click the image to open in full size.

Cattman and OBX
Click the image to open in full size.

Cattman, Hotshot, and OBX the 3 top contenders.

Click the image to open in full size.

This concludes my headers comparison.

So which headers are the Best?

You Decide — depending on your price range/preference. Thank You to everybody who helped out.


Loading

Community Member Credit: luke95gxe

So I decided to install a cold air intake the diff is noticeable and I love it.

Tools Needed

  • Flathead Screwdriver or 8MM Socket
  • Phillips Head Screwdriver
  • Drill Bit
  • Sawzall

Parts Needed

  • Cold Air Intake Piping
  • 3” Rubber Coupling with Clamps

My ram air intake set up:

Here is the pipe I used. It was beaten up so I painted it.

Remove fuse box and battery on driverside drill pilot holes and cut a hole a lil bigger than 3” in diameter.

Remove drivers-side wheel

Remove the splash guard by Phillips head screws you don’t have to completely remove.

Install cold air piping through the hole

Install air filter

Put splash guard back on and wheel and enjoy a better breathing engine. Finished product

I can definitely feel a difference on pulls than the ram air intake feel free to comment sorry for the crappy pics taken with my cell phone.

Loading

Credit: 02whitemaximase

The OBX headers (02-03 Maxima, equal length y-pipe) have been out of stock for at least a year. For engine performance mods I have the Megan OE-RS Catback installed along with berk/Apexi intake and 5 piece spacers. I have compiled all of the information needed to get these headers installed correctly.

My first photo is of new OEM exhaust gaskets. Look at the part numbers and order those if you plan on doing a header install on a 3.5. Although you could get away with reusing the original gaskets, I would recommend spending 35 bucks for peace of mind.

The front (closest to the radiator) header measurements are as follows:

Runner length from where it meets the flange to where all three join cylinder 2= ~10″, 4= ~9″ 6= ~12″

Prices and part numbers:

  • OEM exhaust header gaskets $13 each 14035-4W015
  • OEM cat gasket $8 20692-65J00
  • Spark plug anti-fouler $5 each pack made by HELP 42009, 42002
  • MAF cleaner $7
  • Energy Suspension (ES) subframe bushings $25 7.1116G
  • OBX 02-03 headers $350-380 shipped

The purpose of this thread is to display the newest batch of OBX headers. Exhibit how the install goes and post up some before and after pictures and videos.

Installation Notes

My install went nearly flawlessly minus one heat shield bolt being seized and a secondary o2 sensor not coming out of the old converter. I know these headers are made overseas where quality control is not great. With that being said I think no two sets of headers are exactly the same which means that you may need to trim something during your install. I came to a couple of millimeters from having to trim my front motor mount bracket and my rear bracket went on no problem although it was very close. Probably about 2-3 mm from touching and my front bracket is literally 1mm from touching the header. My flex pipe has about 1/4′ space from touching the subframe.

As you can see one of the primaries comes very very close to the front motor mount bracket but it did not require trimming. Although some may be uncomfortable with how close they are, it is no problem. The mount and header will NOT move even though mine are basically touching it does not matter.

The y-pipe comes about 1/4 of an inch from touching the sub-frame cross member. Again this is not a problem. I have driven it like this enough to not experience any noise and the way I see it the motor really only moves front to back so this tight space does not come into play.

In order for the front primary to have enough wire slack to reach the new header bung, you will have to cut the tape holding the group of wires that travels directly over the middle coil from the larger harness that runs along the top of the valve cover. The tape was holding both harnesses together to about right in the middle of the top middle of the valve cover. Easy fix takes one second.

As you can see below the far left plug has to be unclipped from the coolant pipe in order for that primary to reach.

The rear primary wire has to be extended too. From all of my research people here have been saying to cut the primary either at the wire harness and add some wire to lengthen it or to cut the actual o2 wire and extend those by adding wire. Problem is that it can mess with the voltages. The wire is stainless steel which is nearly impossible for an amateur to solder correctly. My method requires NO WIRE CUTTING!!! You need to remove the wire harness cover pictures below and simply separate the o2 wires from the rest of the wires. First, you need to separate it from the green plug wires, then you need to slit the right side of the main harness that fees into the back of the plastic box. PLEASE TAKE YOUR TIME!!! Be very careful to cut precisely and slowly. Doing this will give you enough slack to reach the rear primary o2 sensor.

This next picture shows exactly where my o2 wire is coming out of the main harness. It is wrapped in a black plastic protector. This picture is taken along the firewall from the driver side, so the top of the picture is the passenger side, the bottom is the driver’s side and as you can see the top left is the upper part of that black wire harness box. The fattest harness coming from the box is what you need to slit the side of and separate the 02 wire from. My o2 wire is running out of that harness down toward the middle of the picture.

The following picture is of one of my secondary sensors. I have the antifouler setup and as of about 75 miles no CEL. This secondary is the one with a green plug and red wire cover. The wire running above it is actually the other secondary which is the blue plug with a white wire cover. Secondaries have different length wires so I recommend this configuration.

Additional Info

As you can now see the y pipe outlet is not quite at 2.5″ but pretty damn close

My new wideband bung on the y-pipe.

The relocated rear header primary bung and plugged original location

Loading

Community Member Credit: Maxxi12

Hello everyone!

I recently toyed around with the idea of putting an intake in my Max, so I started reading some threads on here. After looking at the posts and my own engine bay it’s pretty obvious that all intakes are pretty much going to be the same for this car…there’s only one place to go. The filter on the end of it is really the only variable.

So, I went with a bit of a gamble and got a little known (but all over the bay) intake kit from a company called Check Point Tuning, or CPT for short. They have two options for their kits, $99.95 for one that comes with what looks like a ‘Spectre’ type knock-off filter, and $139.95 for the same pipe – but with a K&N filter included. I went with option B. At that price it undercuts K&N’s own air intake system’s price by more than half, and K&N is already on the cheaper end of the spectrum for intakes. So, I’m putting this review out there for people like me, who want to check out their options and maybe came across this low price company on the bay.

Now to get this out there…what every other thread out there for the 7th gen Maxima says is true. No out of the box intake swap will gain power in this car. I’ve built true CAI’s for other cars before and the stock system truly is about the best you can do performance wise. It’s pretty well thought out. So, you won’t be gaining mad VTEC or anything, but if you go into it for the sound, like I did, you won’t be disappointed.

That being said, while I didn’t gain any performance I don’t feel like I lost any either. Driving dynamics are essentially unchanged. So that’s a plus. No low end power loss or any other abnormalities.

Sound wise, well it’s just nifty. Google Maxima K&N intake video and you’ve got the sound, it’s nice. Noticeable even in low RPMs but obviously gets more so as the engine is pushed. Sounds just as great as the 2x expensive name brand with exactly the same level of protection. All around fantastic, unless you’re my gas card.

Now, for the negative –

Yes, it does come with instructions. They are not very good. I suppose that’s because I’m a visual person and I like diagrams, but I’d say if you’ve never really worked on an engine or installed an intake…WITHOUT instructions…this may not be the kit for you. I had to double back a couple of times just because things weren’t completely clear.

Secondly, my third drive after the installation did throw a check engine light. My car had been running and driving as smooth as ever so I knew there was nothing wrong. I cleared the code and it hasn’t come back in days, so I think I’m in the clear. Just a false code more than likely, but still something that others may face.

Lastly, it does come with a heat ‘shield’ but it doesn’t do much. Again though, with these cars there just isn’t any cold air to pull unless you custom build or use the factory intake. Don’t buy a kit and expect performance…it’s all about the sound pretty much, so spend your money on a good filter. The pipe and the shield really won’t matter when compared to other kits.

All in all – great value. That great VQ sound is there, NO performance loss (or gain), and I spent less than half (or even less than that) of the price of the name brand kits with the same K&N protection. What’s not to like?

Please excuse the dirty engine pics. It’s been a long summer.


Loading

Credit: pimpin02max

Alright…there seems to have been many many questions about the install of the newer OBX Headers/Y-pipe. So I have decided to do a small writeup on the installation of these headers/y-pipe. So below I have made a faq with some of my answers that should be right but if I am wrong on anything feel free to let me know…and like everything else, this is a guide to help you on your install and any questions you have, so if you screw something up it is not my fault

FAQ

1. Are these worth saving the extra money over the Cattman’s?

(Answer) If you are a do-it-yourself kind of person then yes definitely, the Cattman’s are an awesome product and have no fitment issues whatsoever (I have owned a set of Gen III’s) and the peace of mind is nice, but if you aren’t afraid to do some small modifying and saving around $500 sounds good then yes the OBX headers are for you.

2. Do these make decent power compared to the Cattman’s?

(Answer) The OBX Headers make just as much power as the Cattman’s. Depending on who you ask some will tell you they make more but I think that since the dyno’s differ I would say all around they make around the same power.

3. I have heard you have to extend the O2 sensors, is this all 4 or just the primaries?

(Answer) Alright, when I installed my headers all I had to extend was the primaries which are the O2 sensors in the collectors of the headers…now if you choose to plug up the secondary O2’s then you might have to extend them, I don’t know because I did not hook mine up.

4. Do you have to relocate the rear bung for the primary O2 sensor?

(Answer) Don’t know if you absolutely have to but I would 100%…it makes the install a lot easier and you won’t be so worried about it hitting the steering rack and whatnot. All you need to do is move the bung 90* to the right on the collector and your good to go, you could have a shop do this for you or for the DIY’r you could do it in your garage (like me…lol)

5. Will I throw a SES with these headers?

(Answer) Yes most likely, since you do not have any precats for the secondaries to monitor you will throw a code which is why it is useless to plug up the secondaries to begin with since they will still throw a code because there are no precats. The SES light thrown will not effect your performance at all because the primaries are the only O2’s that affect your A/F ratio. Now all you need is a dual output O2 simulator which you can get from here: http://www.02sim.com/ Some have reported not throwing a SES and most get one. When I installed my Cattman’s I threw one upon first startup, with the OBX’s I have been driving around for 1 1/2 months now without a simulator and have yet to throw a code, but that’s just mine.

6. Should I use the gaskets included with the headers or the OEM ones?

(Answer) Definitely use OEM multi-layer gaskets because the ones included like every other header kit are crap. Now if for whatever reason you have to use them then they are ok but plan on changing them down the road because they won’t last as long as your OEM ones.

7. Is there that much modifications to make these work?

(Answer) That depends on who your talking to. I didn’t think it was that bad. The only modifications I had to do was to move the rear bung 90* to the right, plug the 2 secondary holes in the y-pipe, trim down the crossmember like 1/2 inch for the flex section, and then grind down the rear motor mount bracket peice for the primary tube on the rear header. That’s it. Not bad at all. Some people claimed to have installed them without any modifications but I would plan on doing the above on your install.

8. Do you have to have a lift to install these headers?

(Answer) NO!!!! You can install these with your car on jackstands…I installed both my Cattman and OBX’s with the car in my garage on jackstands. Even with the one peice rear header/y-pipe deal it’s not that bad. The y-pipe header peice doesn’t weigh that much and once you get everything trimmed and out of the way it isn’t that hard to put up on the head.

That’s all the questions I could think of for now, I am working on the Install Writeup as you are reading this so I will post in a little bit, but I hope this helps out a lot with some of the questions and concerns people are having with these headers.

Installation:

Now bare with me hear as I installed these quite a while ago, so if I left something out please feel free to let me know because this is going off of memory, I didn’t take a gazillion pics either so it will mostly be an overview because I’m assuming you guys can figure out the small details . So use this as a basis to go off of when you are installing your headers, it’s not an instruction manual but I’m sure it’s a good outline to follow.

Alright first things first. Here is a pic of the bung relocation courtesy of C-Young:

1. Remove your filter, midpipe etc. off of your intake.

2. Proceed to remove your intake manifold (12mm) upper only though.

3. Remove your Radiator fans, only 2 bolts on top (10mm) and 2 on bottom (10mm) unplug them as well.

4. Jack up the car and put on jackstands.

5. Take off the passenger side splash guards.

6.Take off the front heat shield off the header.

7. Undo the 2 front O2 sensors and the rear secondary. 22mm wrench or an adjustable wrench.

8. Unbolt y-pipe completely from the precats and the cat.

9. Unbolt exhaust manifold from head.

10. Drop the front manifold throught the bottom.

NOW THE EASY PARTS OVER….LOL

11. Undo the rear O2 sensor off the rear manifold

12. Now it would be easiest to unbolt the precat from the rear manifold but mine decided to be tricky and stripped out so I couldn’t undo it so it was a little hard to get to the nuts for the header.

13. Unbolt the rear manifold using a combination of underneath the car and from on top to get to the different nuts.

14. Bolt the front header to the head.

15. Go ahead and test fit the y-pipe/header and see where you’ll need to cut (even though you already should know by now…lol)

16. Grind down the crossmember so that it’s not touching the flex section.

17. Now grind down the rear motor mount peice on top that’s almost just like a cover for the top of the mount, this can be kind of tricky, I’ve found it to almost be easier to undo the mount from the engine and cradle and take out of the car and since all you are grinding is a plate you can just cut it all the way off…photo courtesy of datdude20.

18. Your header/y-pipe should now slide up into place.

19. Bolt on header to head

20. Bolt y-pipe to cat and to front header.

21. Plug in your O2 sensors. You may need to use some zipties on the front because my wire was being hit by the fan so I ziptied it so it wouldn’t hit.

22. Double check and make sure everthing is bolted up tight so you won’t have any leaks.

23. Lower car back onto ground.

24. Re-install fans, intake manfold, intake.

25. Enjoy your headers!!!!

Loading