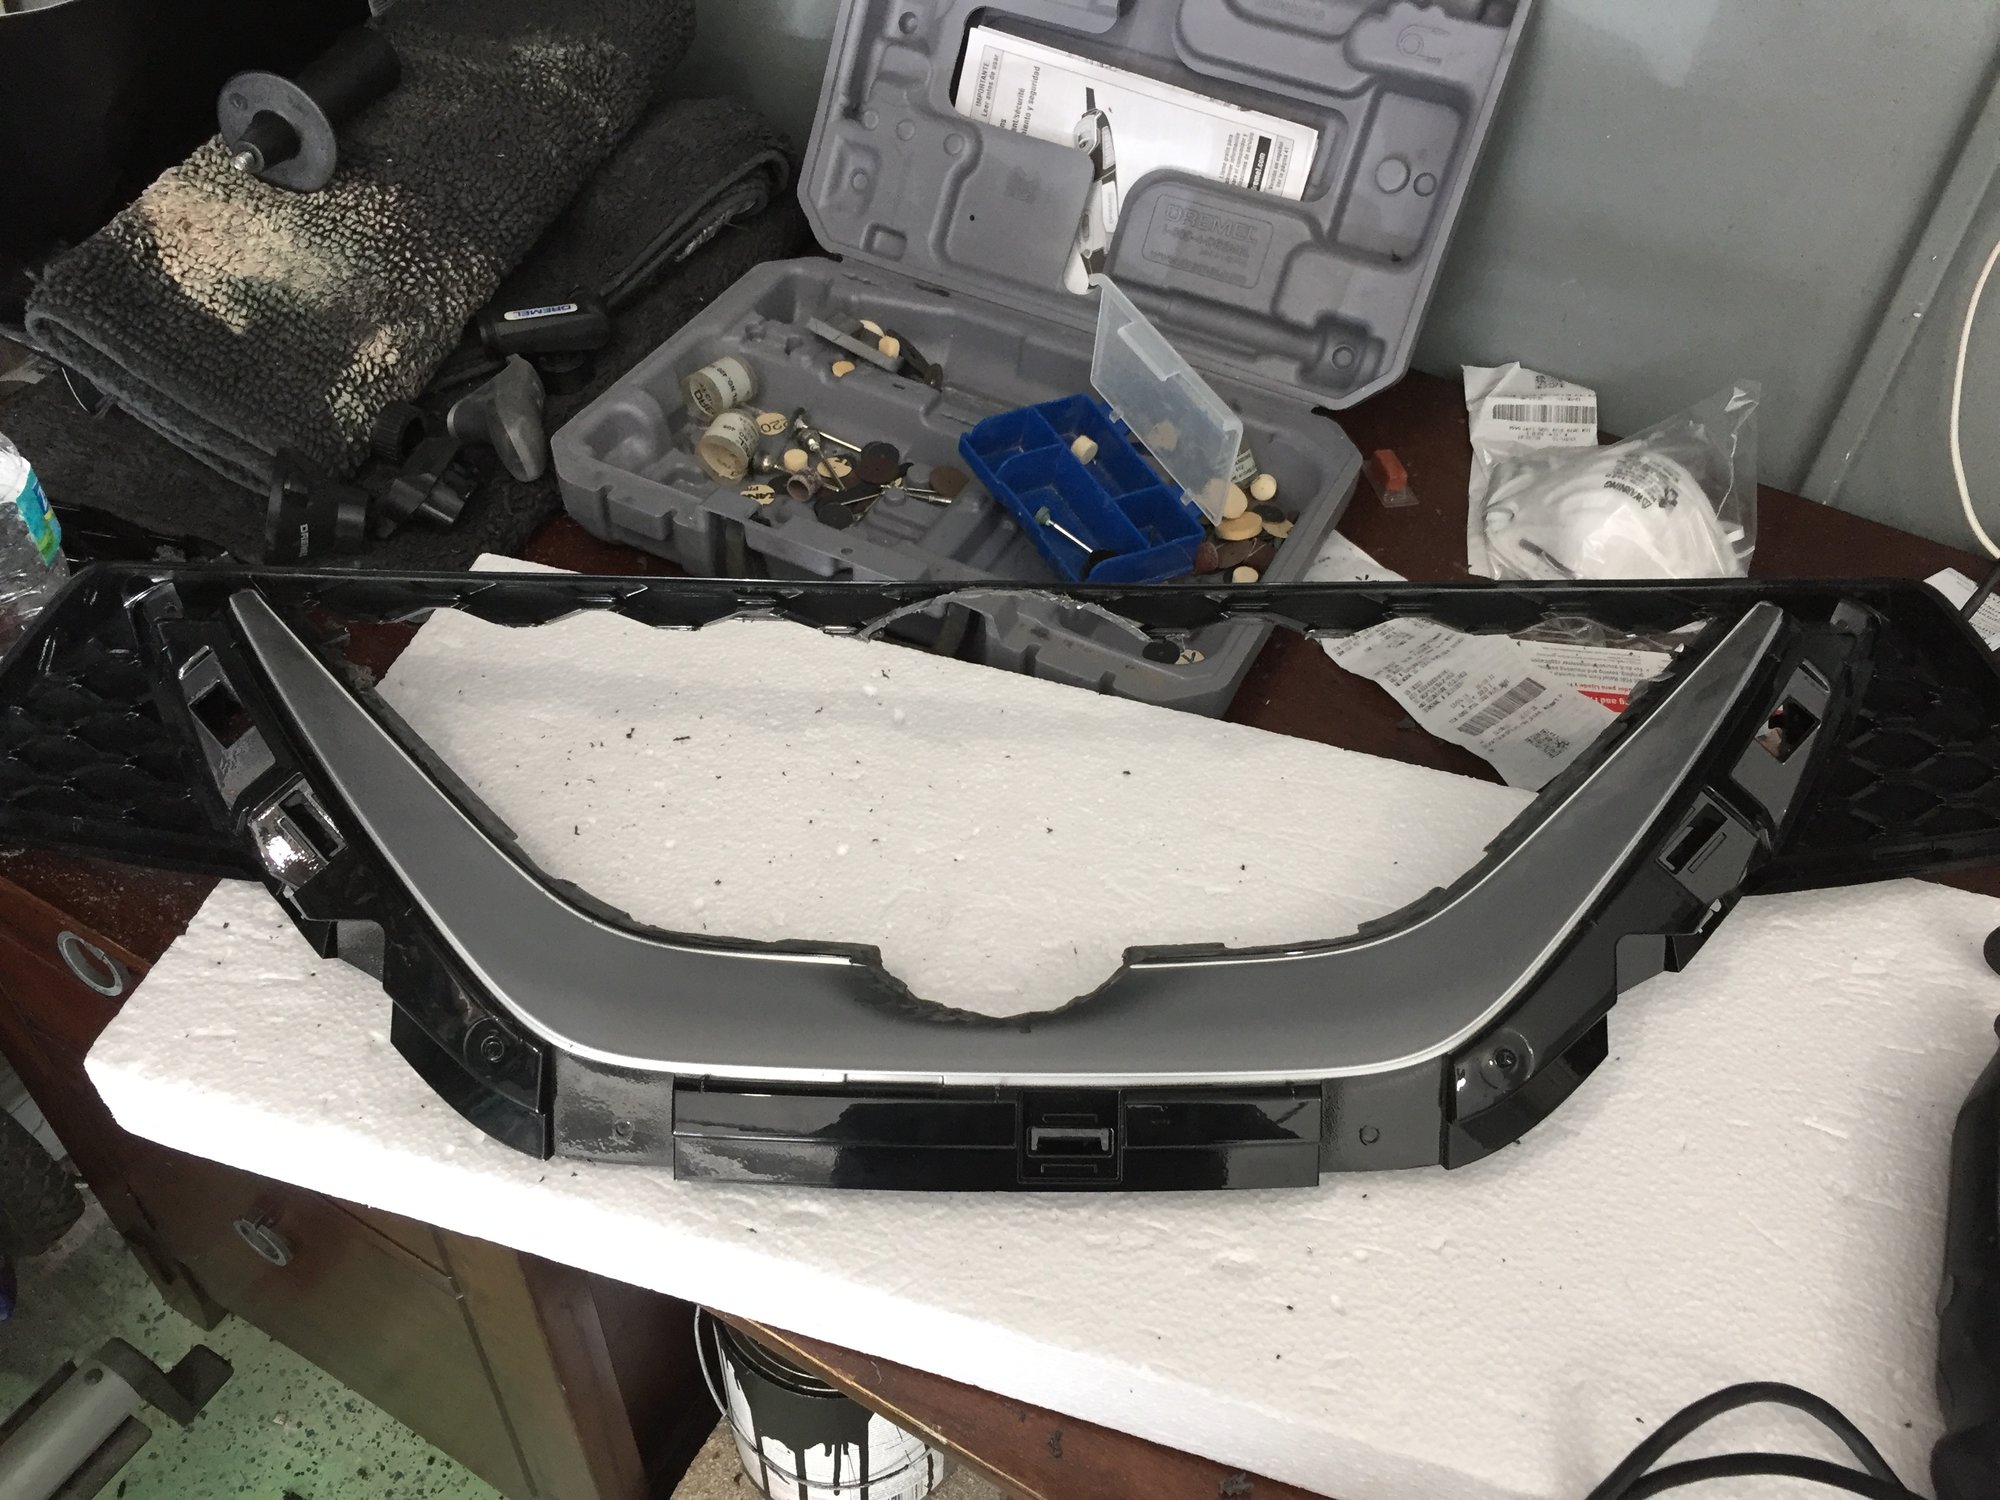
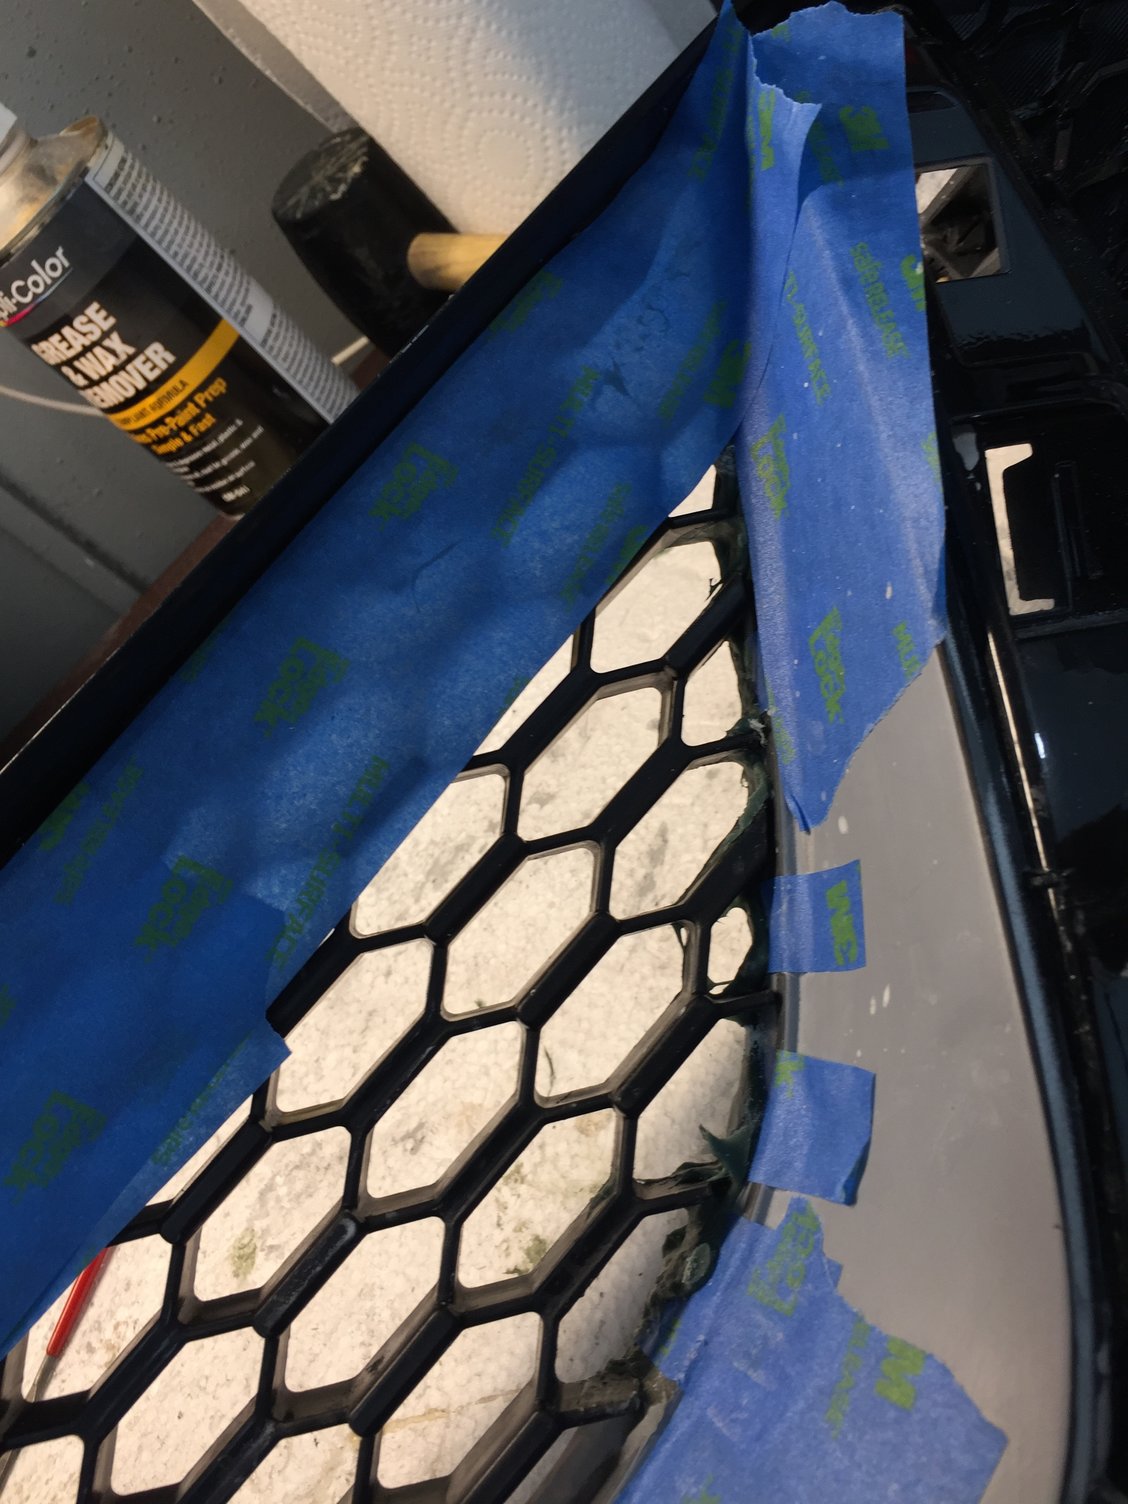
Decided to make a new from grill, the emblem is just way too big (IMHO) and detracts from the lines on the front end of this car. Bought a new grill to start working on, got a nice deal on it from a black friday dealership sale.
Dremeled and filed everything out
Fiber-glassed and compounded the base from where the emblem was removed
Primed the frame
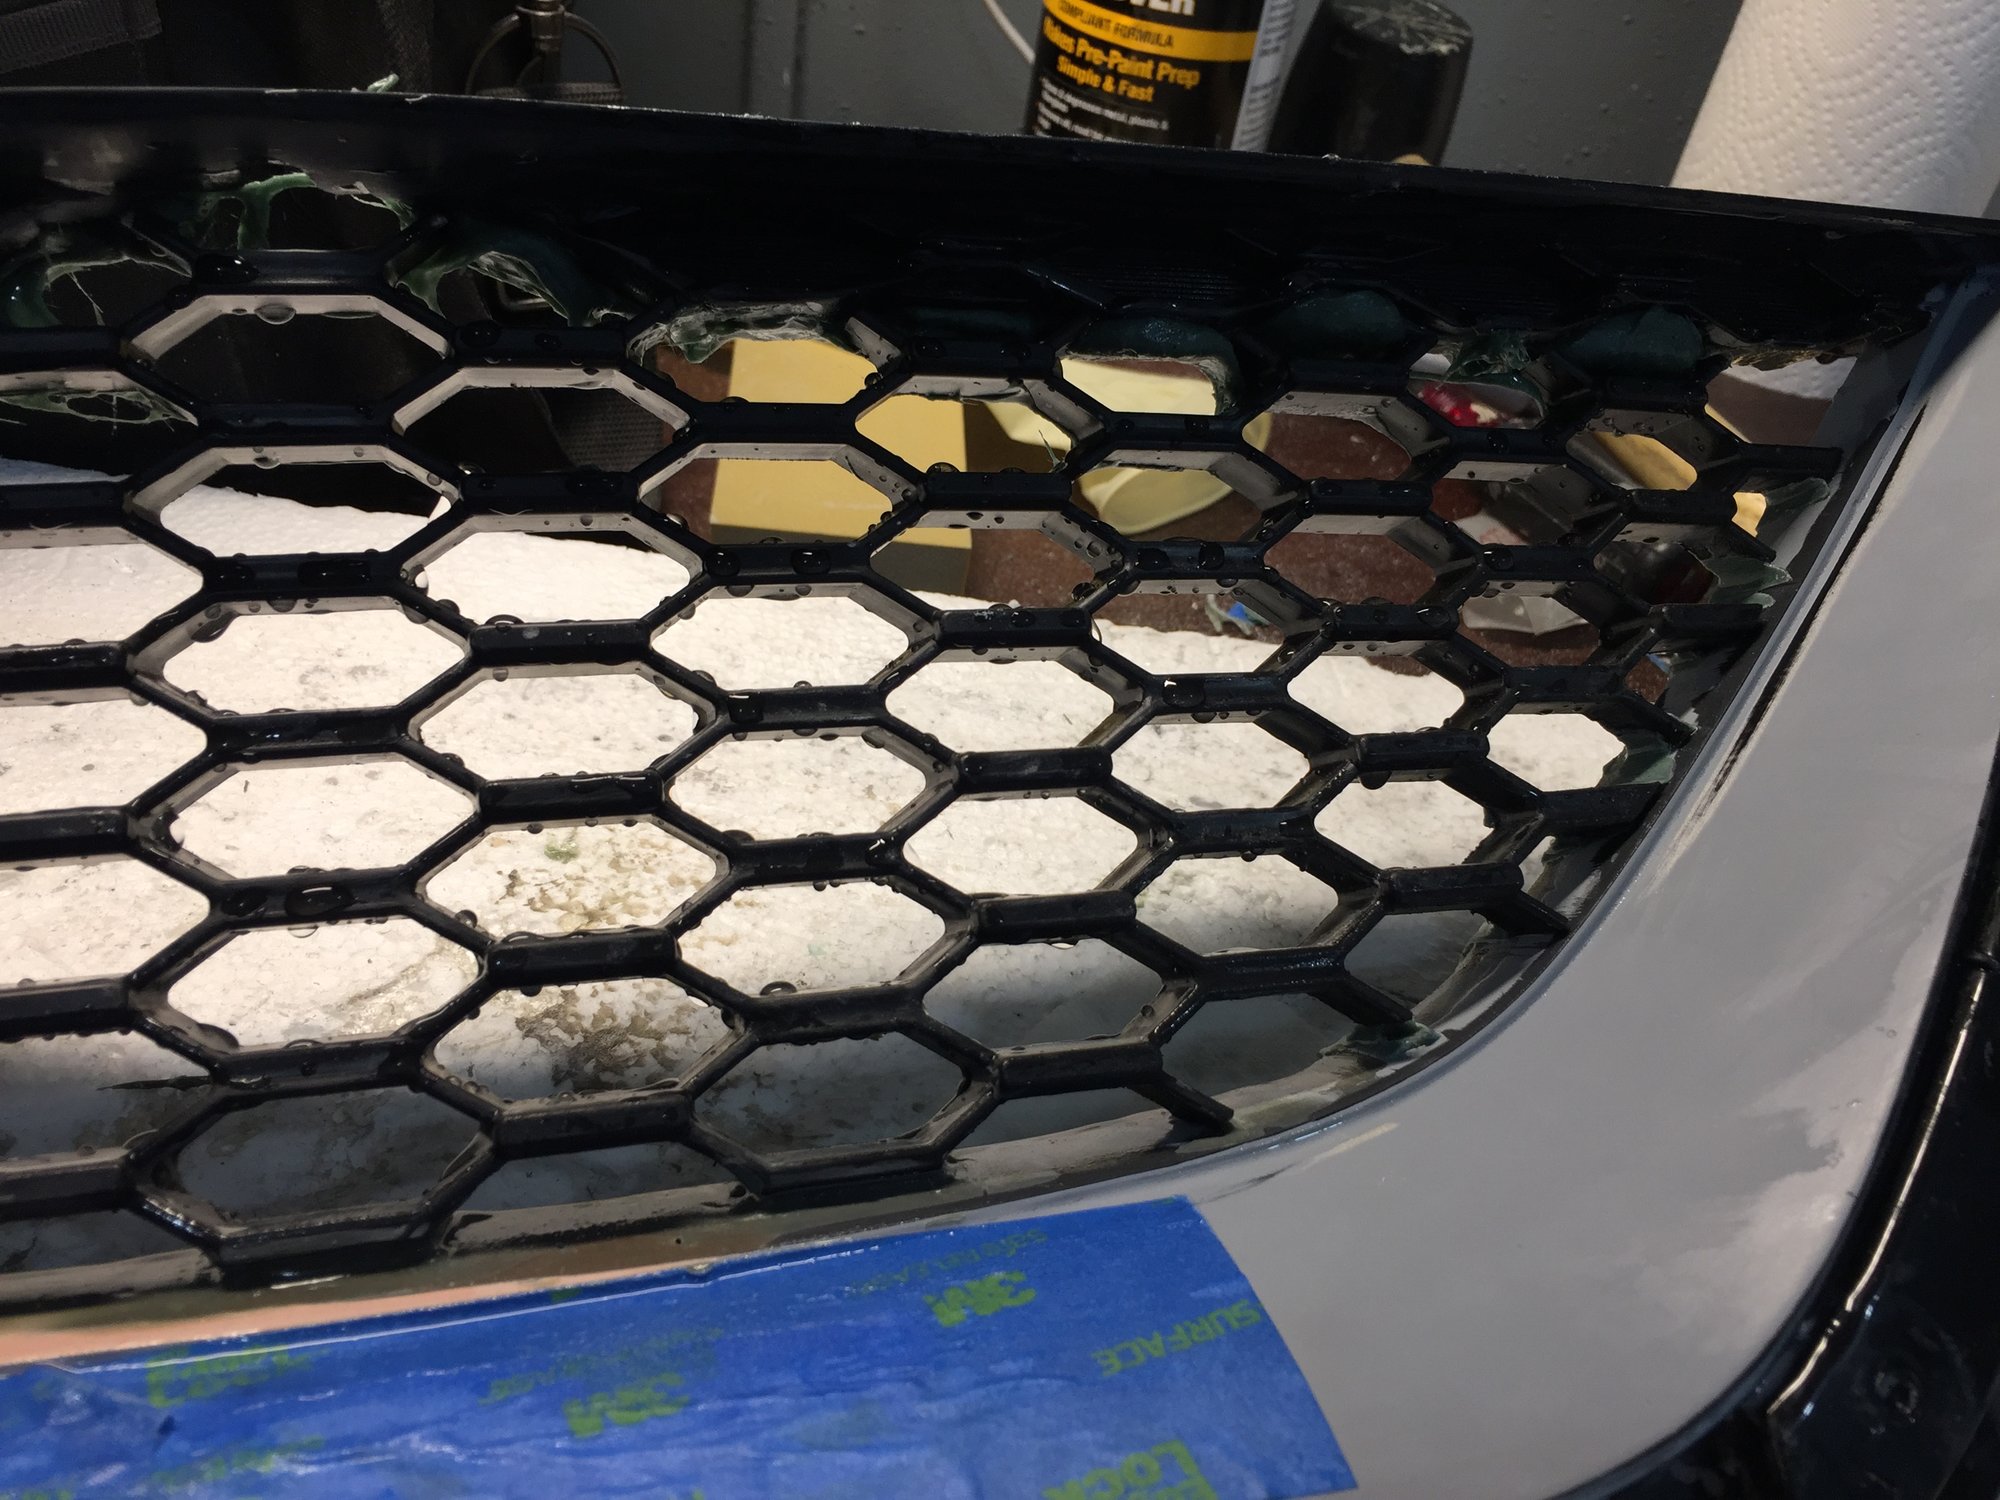
I ordered the grill material from customcargrills.com i wanted something thick and as close to the factory look as possible
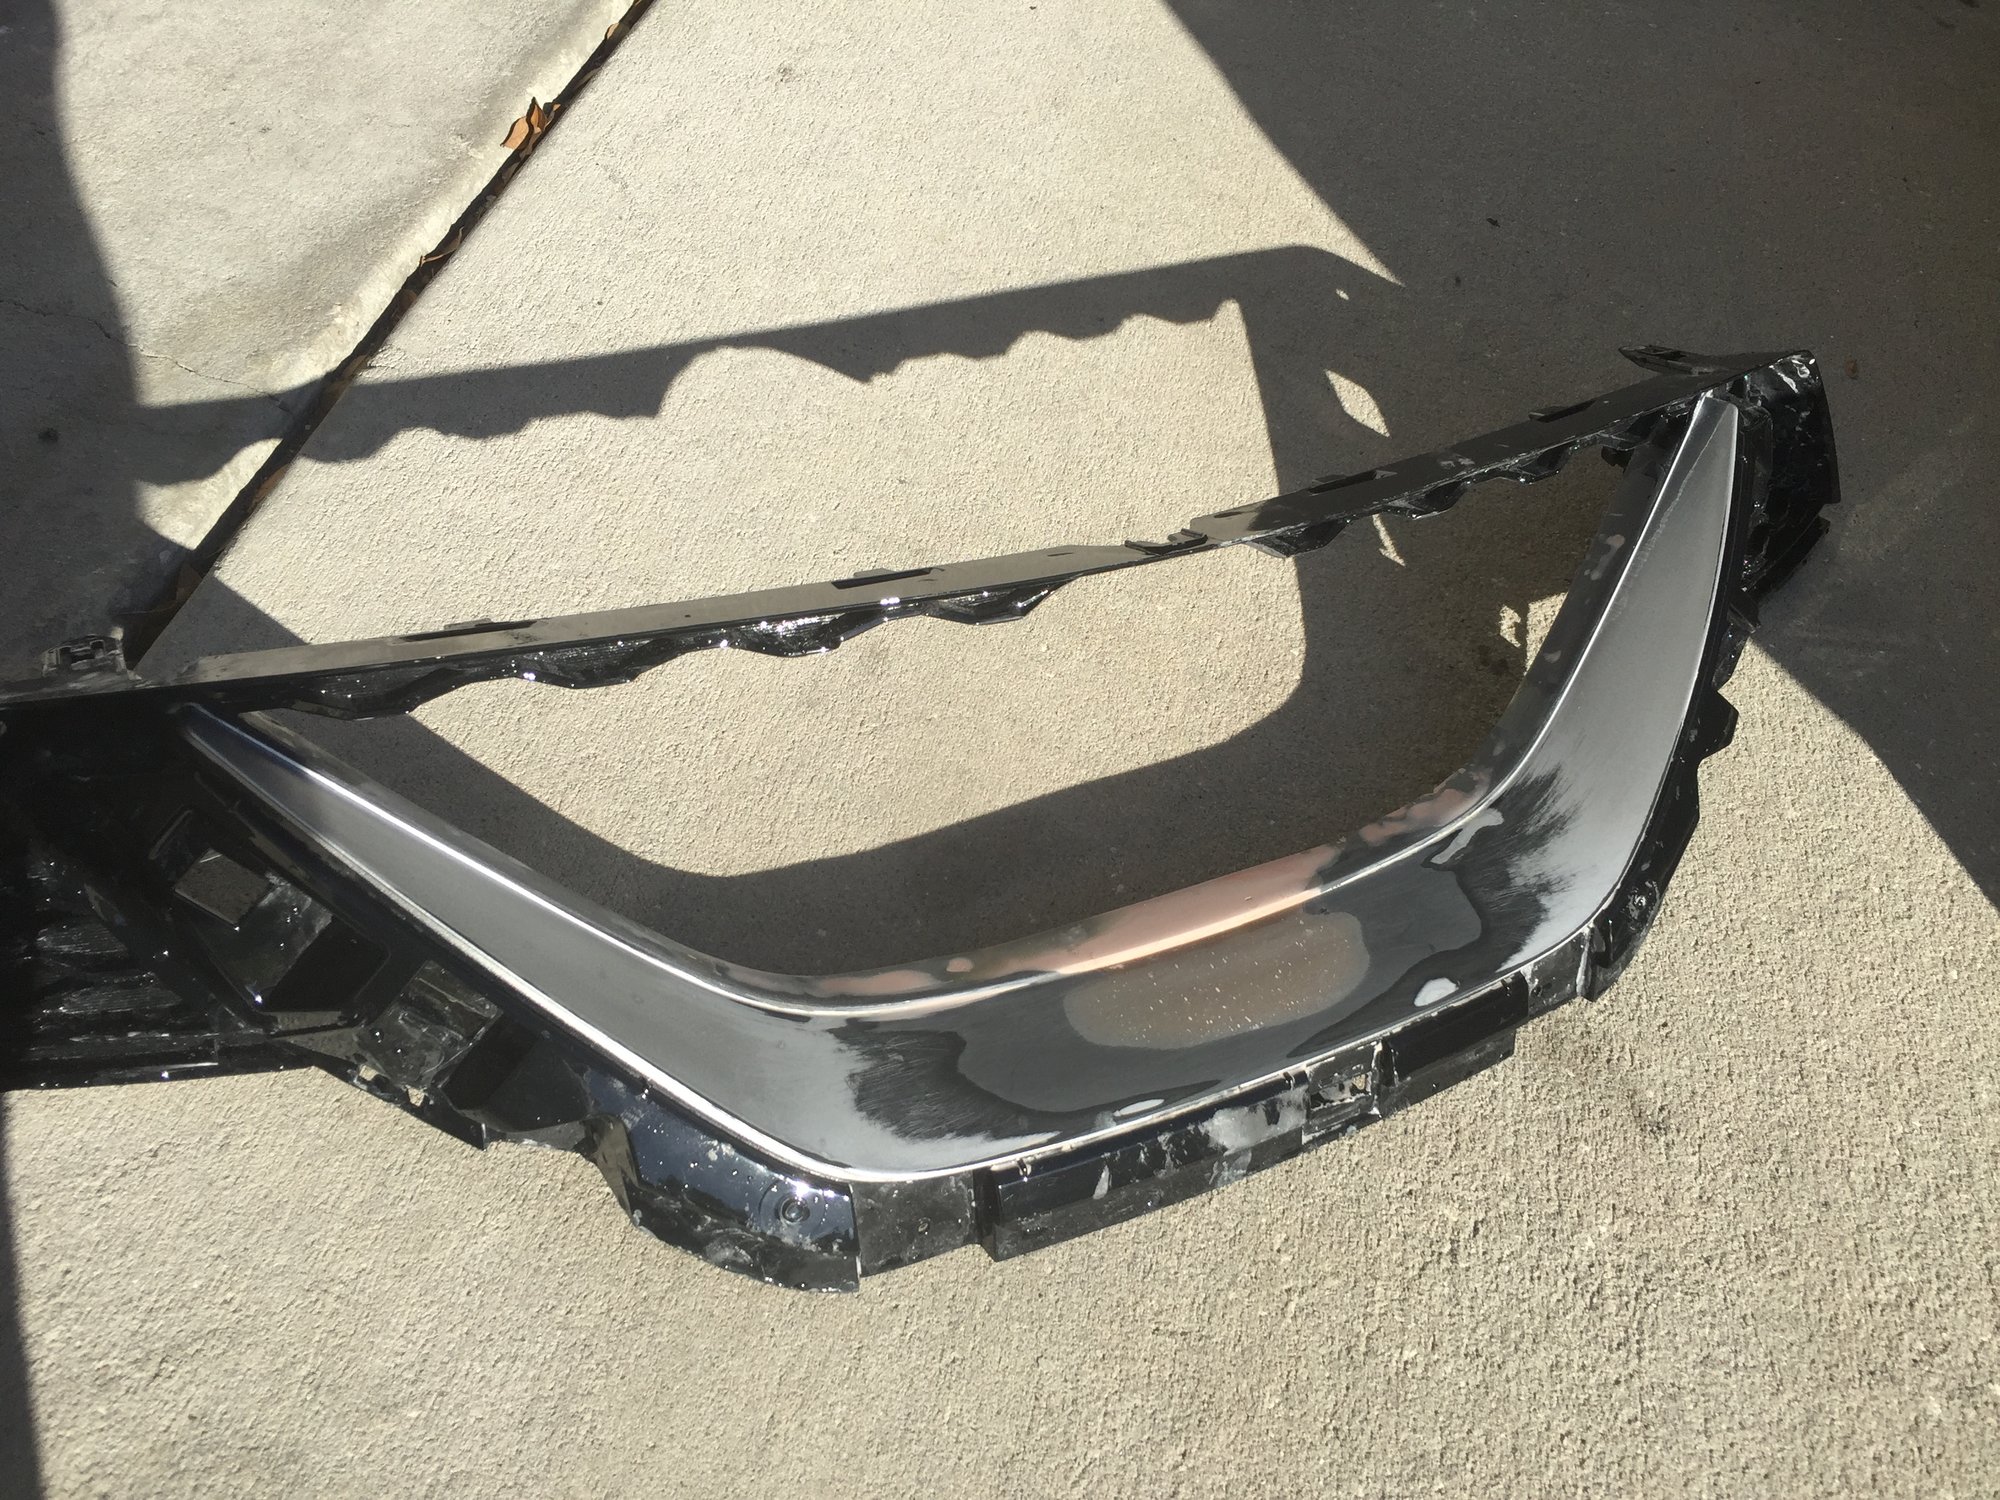
This next part was a lot of trial and error, fiberglass didn’t want to stick to the abs plastic, tried tiger hair stranded fiber and results were not good…third times a charm….ended up testing some JB quik and this stuff was money! really bonded well to the plastic. lot of time spent cutting/forming and sanding to get the grill to where i was happy with it
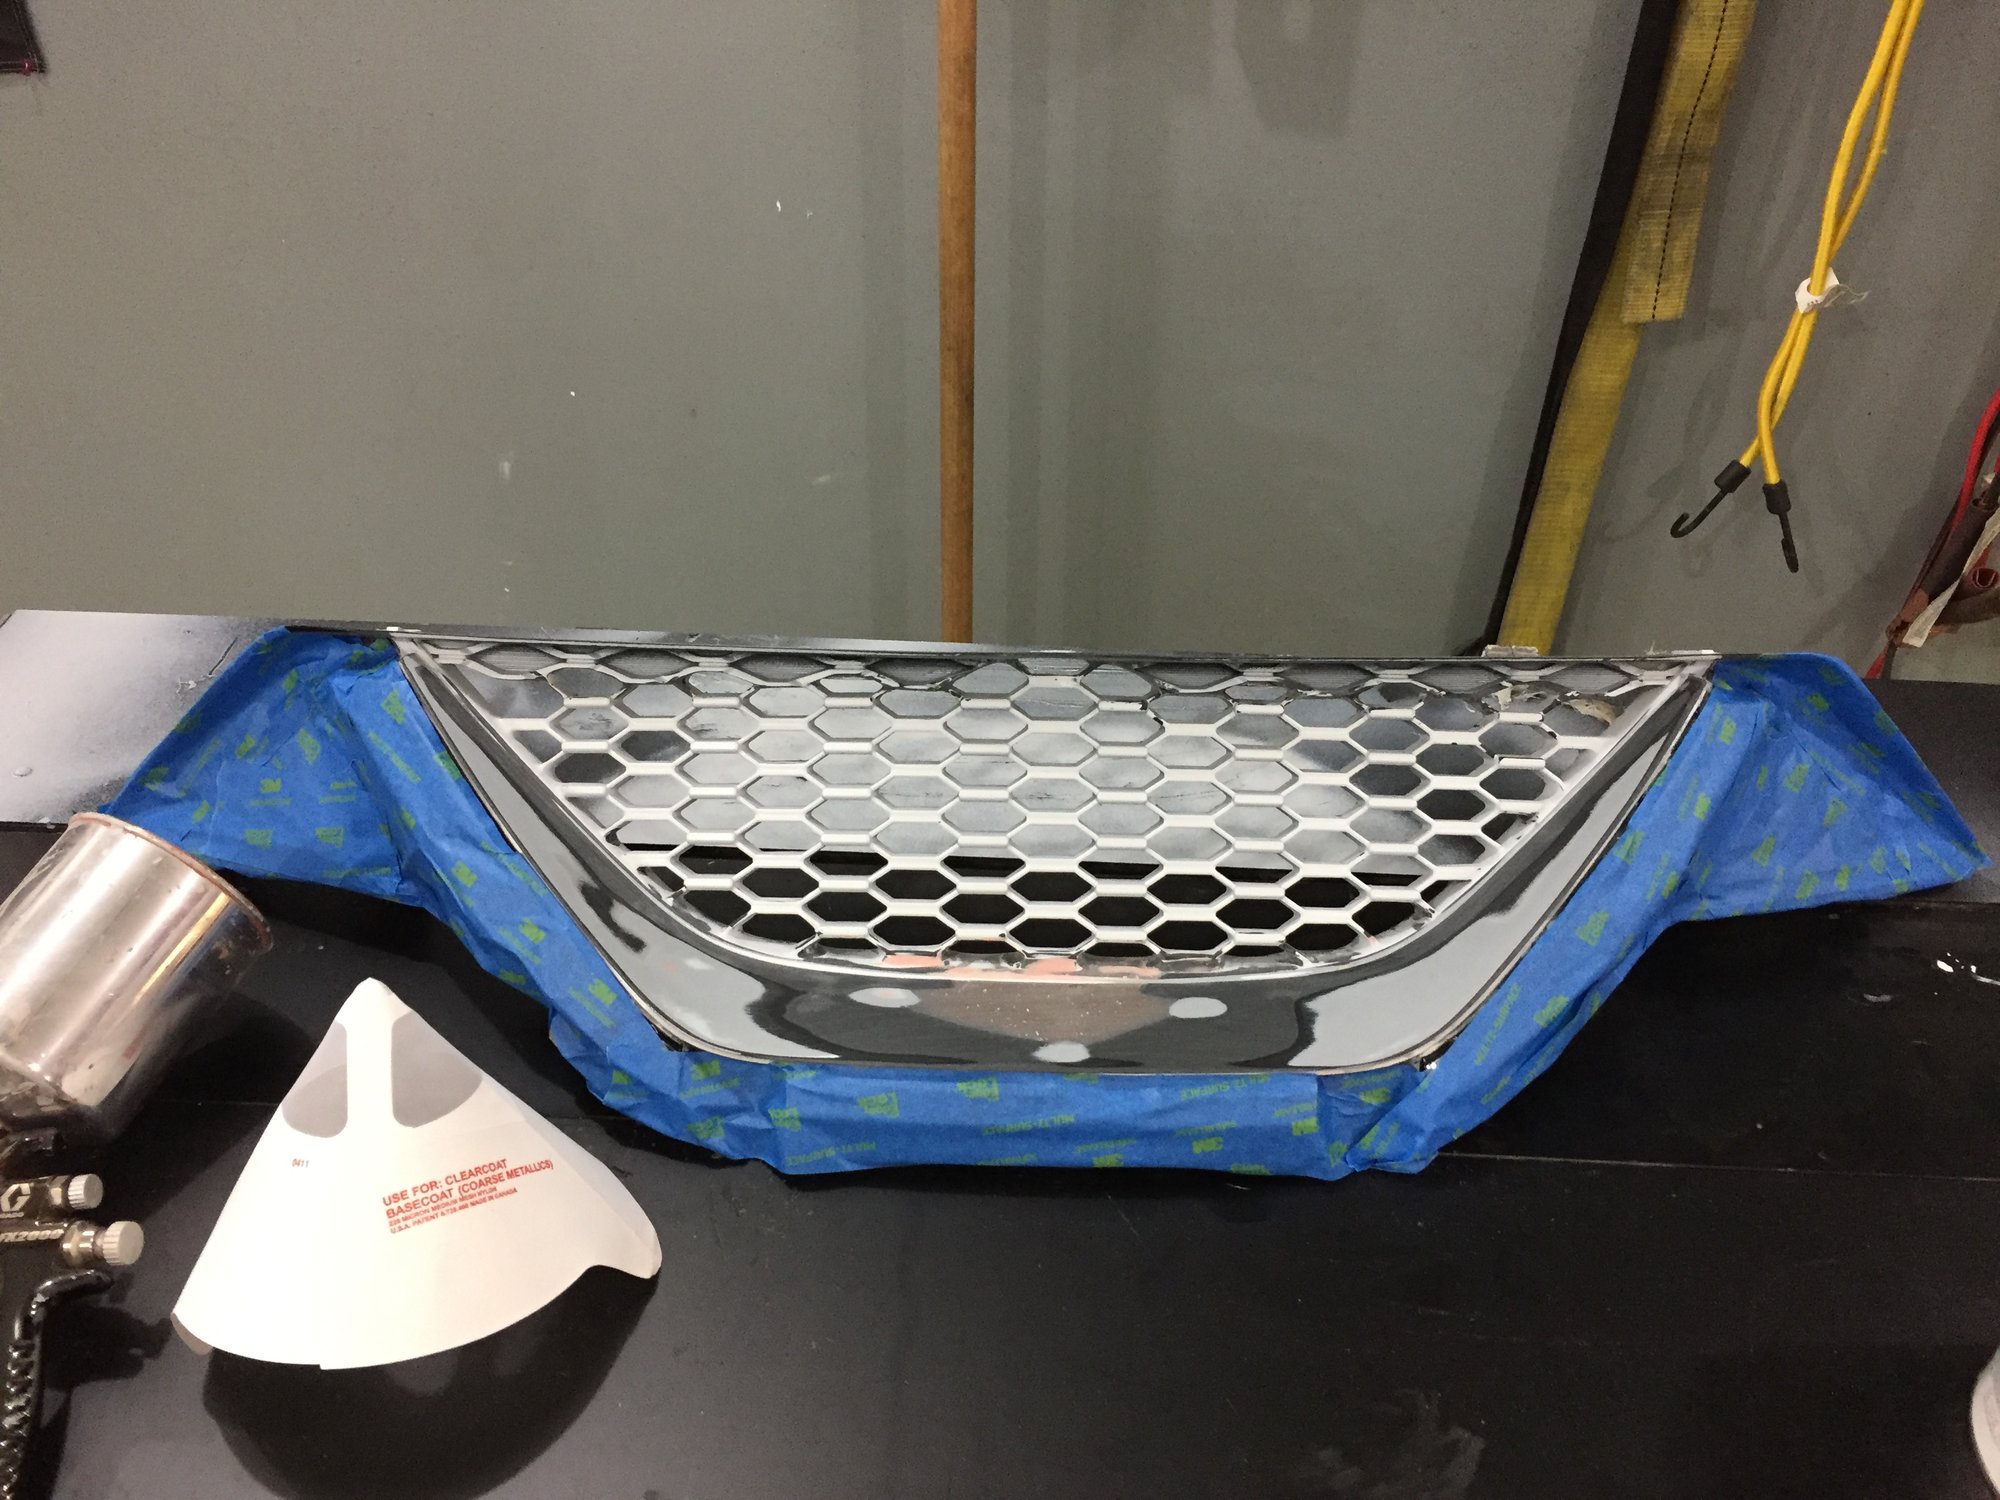
Final sanding before paint
Primed
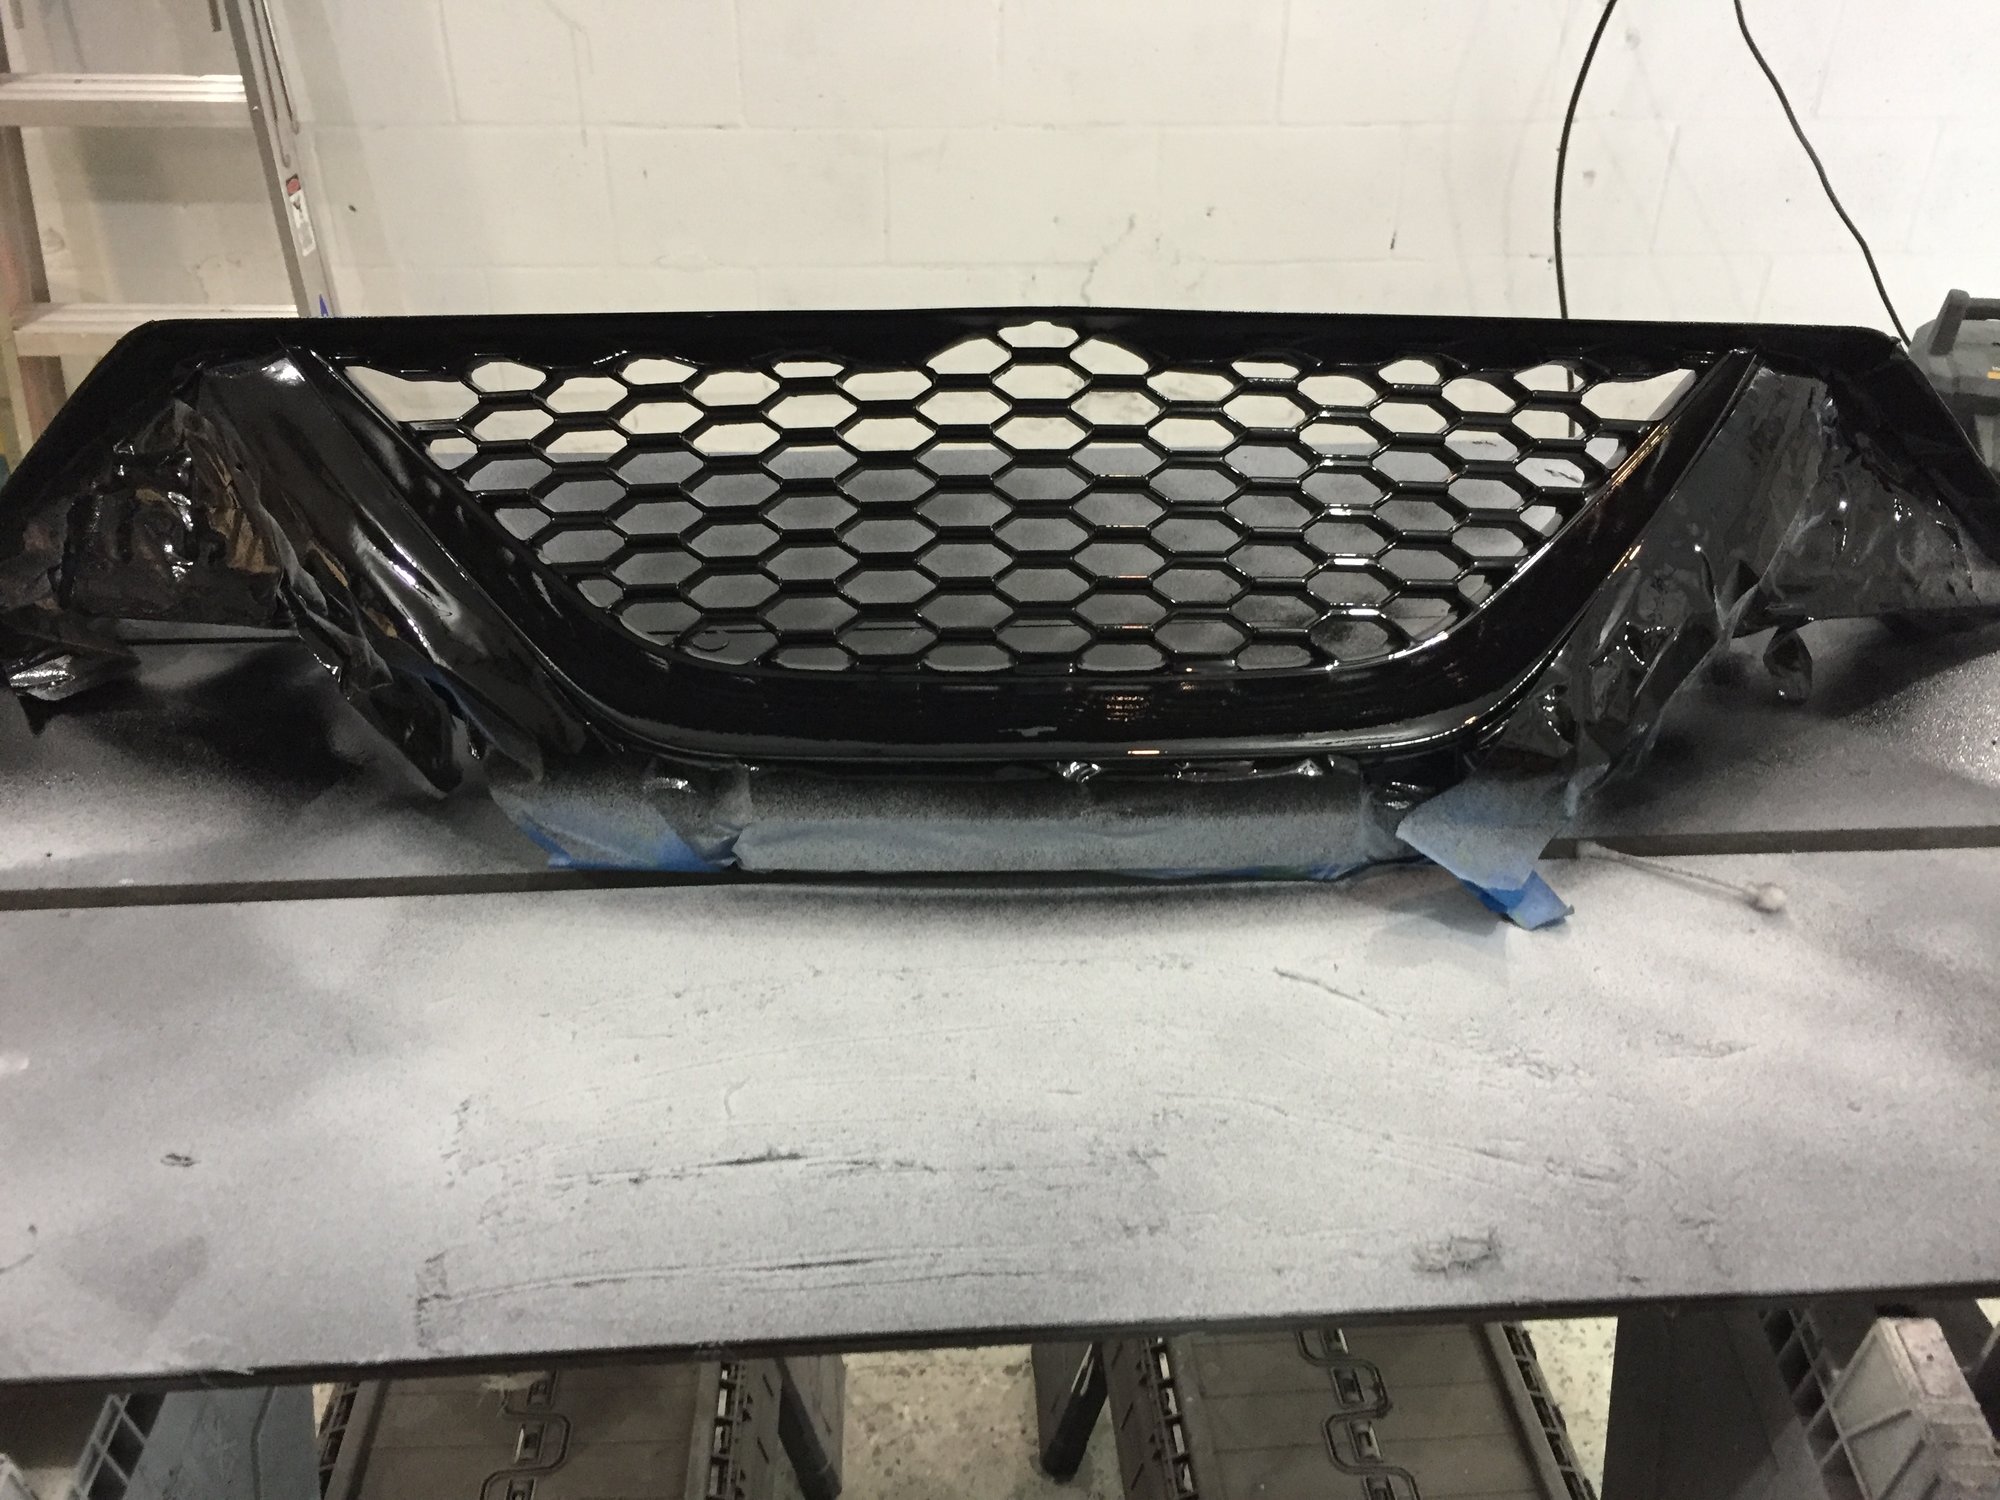
Painted gloss black
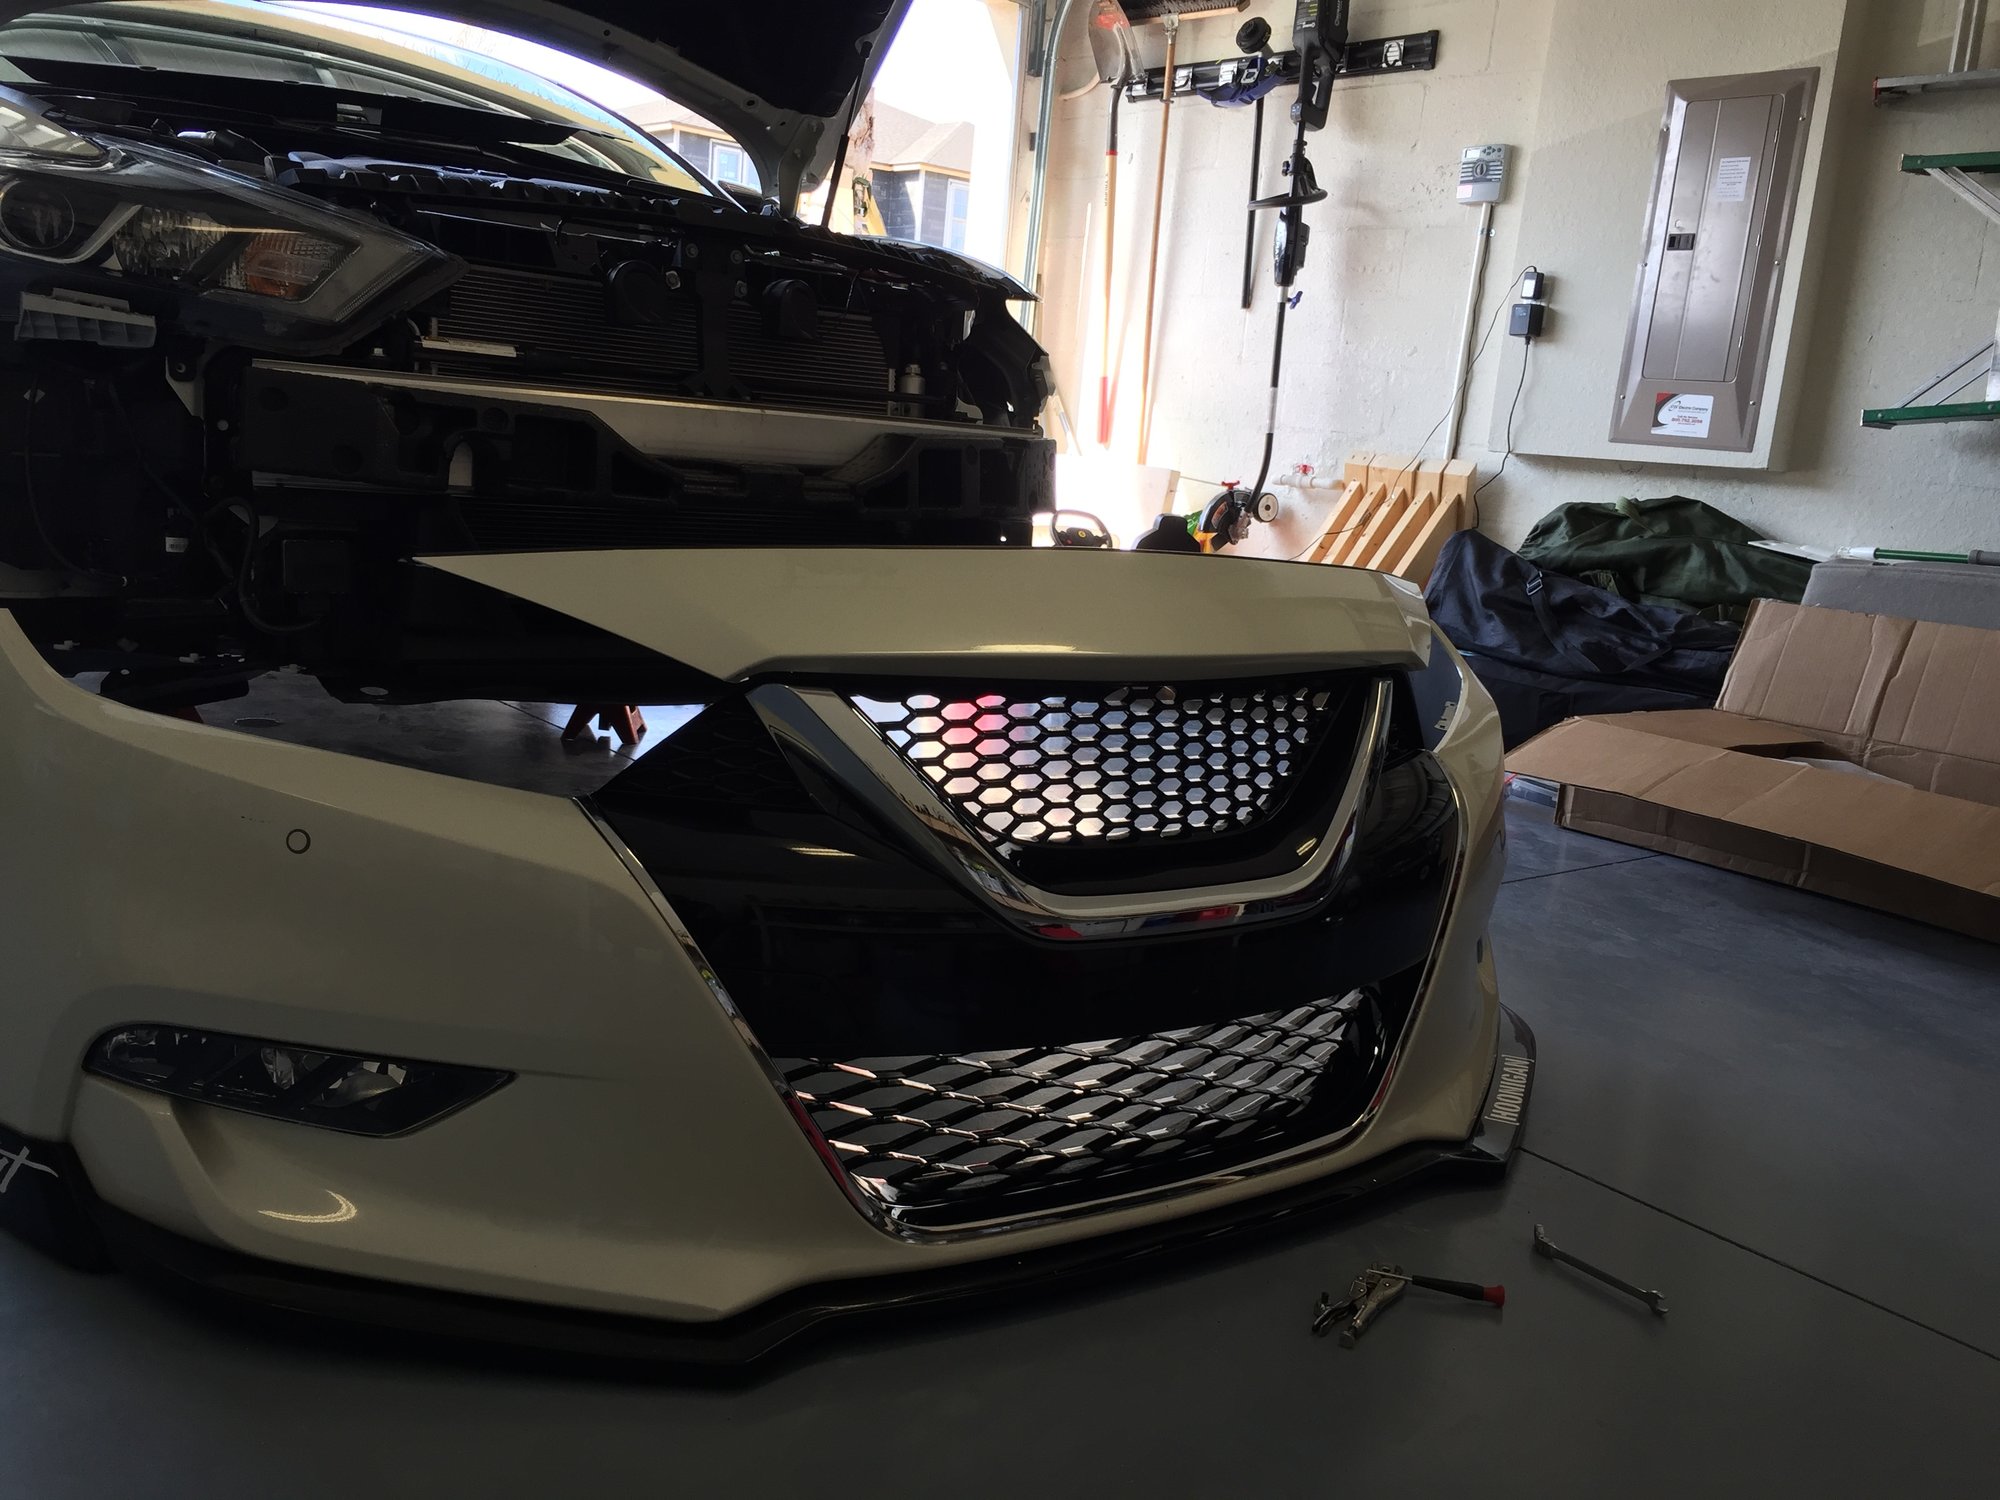
Out with the old and in with the new:
Bumper back in place
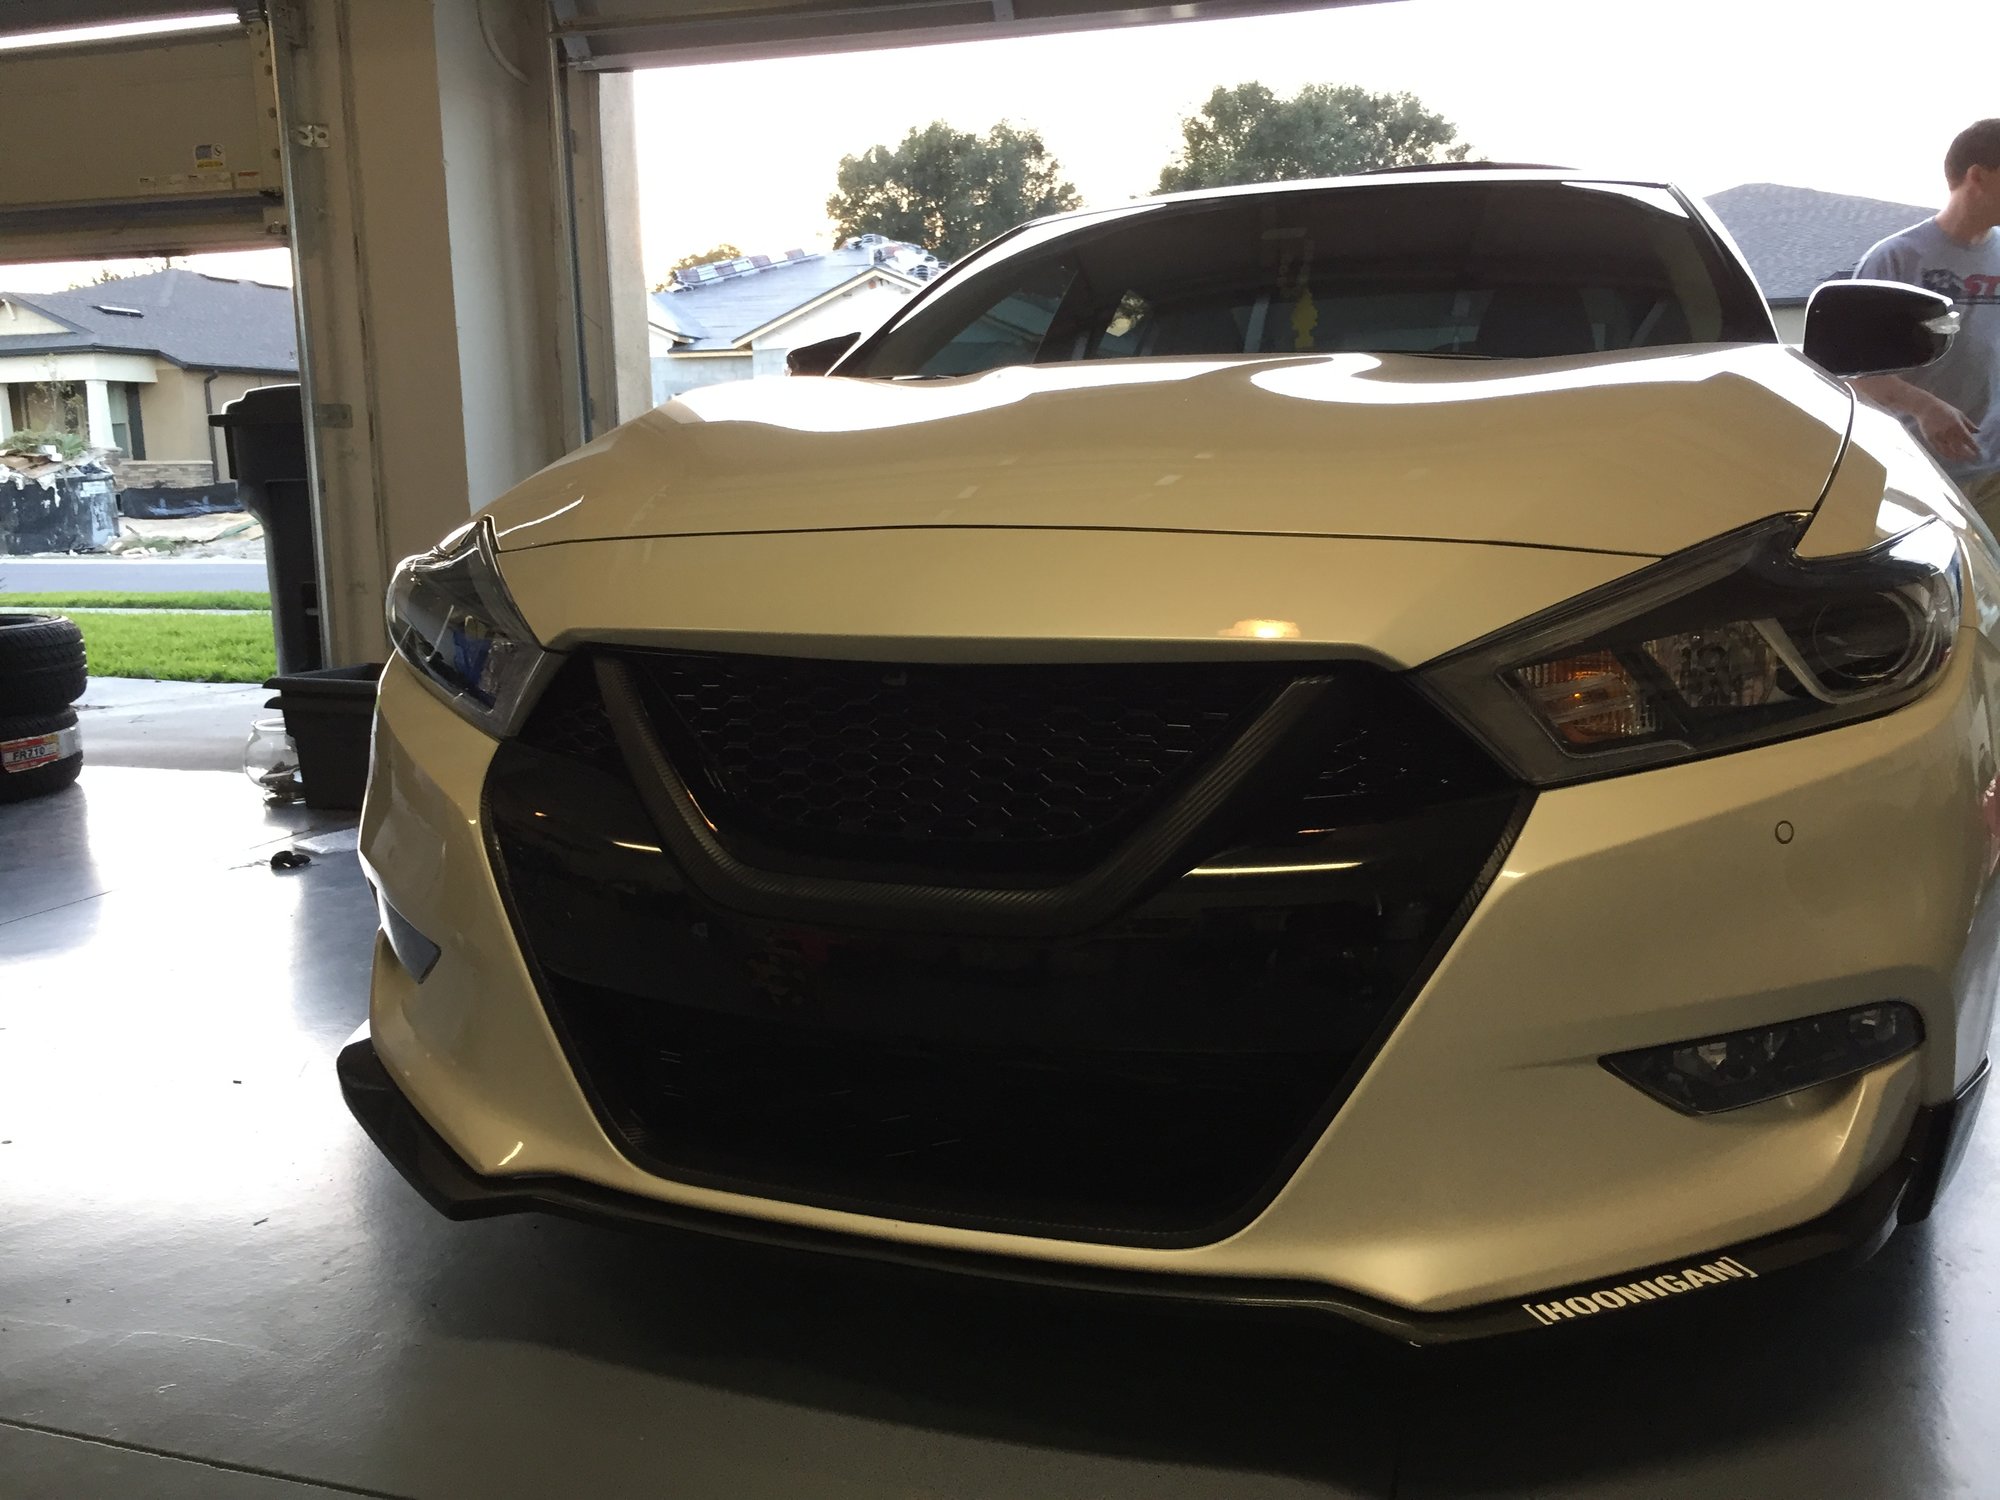
Wrapped chrome trim in carbon fiber to match the rest of the car
The following directions can be utilized in the replacement of HID bulbs in the 2002-2003 Maxima. These instructions cannot be utilized with other years of the Nissan Maxima. One person can accomplish this task with no no problems. Please view pictures with steps for additional detailed information.
Tools needed: 10mm deep socket or wrench
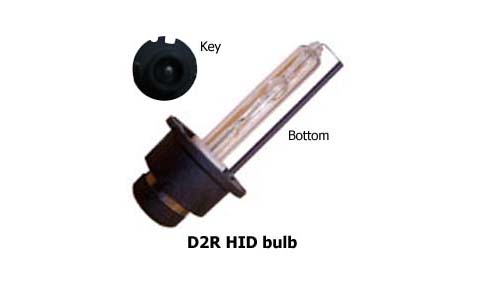
The 2002 and 2003 Maxima utilize D2R HID bulbs. These bulbs fit into the headlight housings in a certain direction based off the key as seen in the picture. Bulb orientation has the bulbs power wire in the “down” position, thus this “bar” will be on the bottom when installed.
When handling the bulbs, DO NOT touch the bulb as oil from your fingers will shorten their life.
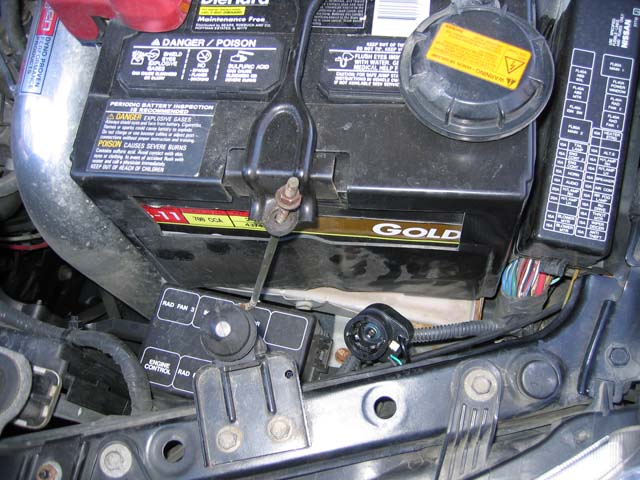
Step 1. Disconnect the battery. I chose to disconnect the negative battery terminal. Due to the tight confines within the engine bay, the drivers side is tight and will require the battery to be moved unless you have hands the size of a child. Using the 10mm socket or wrench, loosen the two nuts from the battery tie-down. One loose enough, you can disconnect the hooks and move the battery out of the way. This will give enough space to work. On the passenger side, there is nothing to move. You simply have to work around the windshield washer tube.
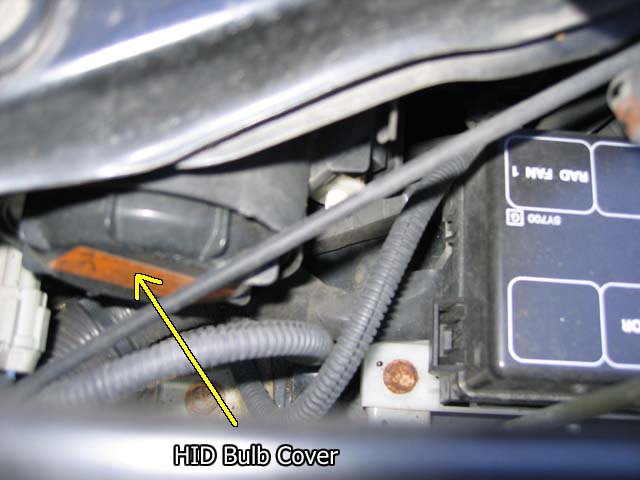
Step 2. The HID bulb has a sealed cover (utilizing a rubber O-ring). To remove this cover, twist counter clockwise to release and you will be able to remove it. Cover Removed
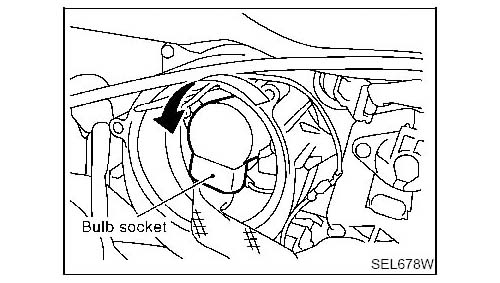
Step 3. Once the HID cover is removed, you will have access to the socket. To remove the socket from the HID bulb, twist counter clockwise and pull backward. You may need to wiggle it somewhat but it will disengage.
Step 4. The most difficult part of the installation seems to be figuring out how to disengage the retaining ring from the HID bulbs. Per the diagram, you will need to depress each “hooked” end of the ring inward (toward the front) and slide inward to toward the bulb. Once each side is done, the bulb will loosen up and you will be able to remove it. Do not touch the bulbs. Picture of retaining clips
Step 5. Time to install the new bulbs. Remove the bulbs from their packaging without touching the glass section. To install the bulbs, use one hand to hold the retaining clip out of the way (it is hinged from the top) and slide the bulb in. It is easiest to insert the bulb with the “power wire” on the bottom as this should align the bulbs key. Once inserted, twist the bulb slightly left and right to ensure it is in. Move the retaining clip over the bulb and re-engage each end of the clip.
Step 6. Reinstall the socket but leave the cover off. Once both new bulbs are installed, temporarily reconnect the negative battery post and turn on the headlights to make sure both bulbs are functioning appropriately. If all is well, reinstall the HID covers and Remount the battery (remember to tighten down the negative battery post).
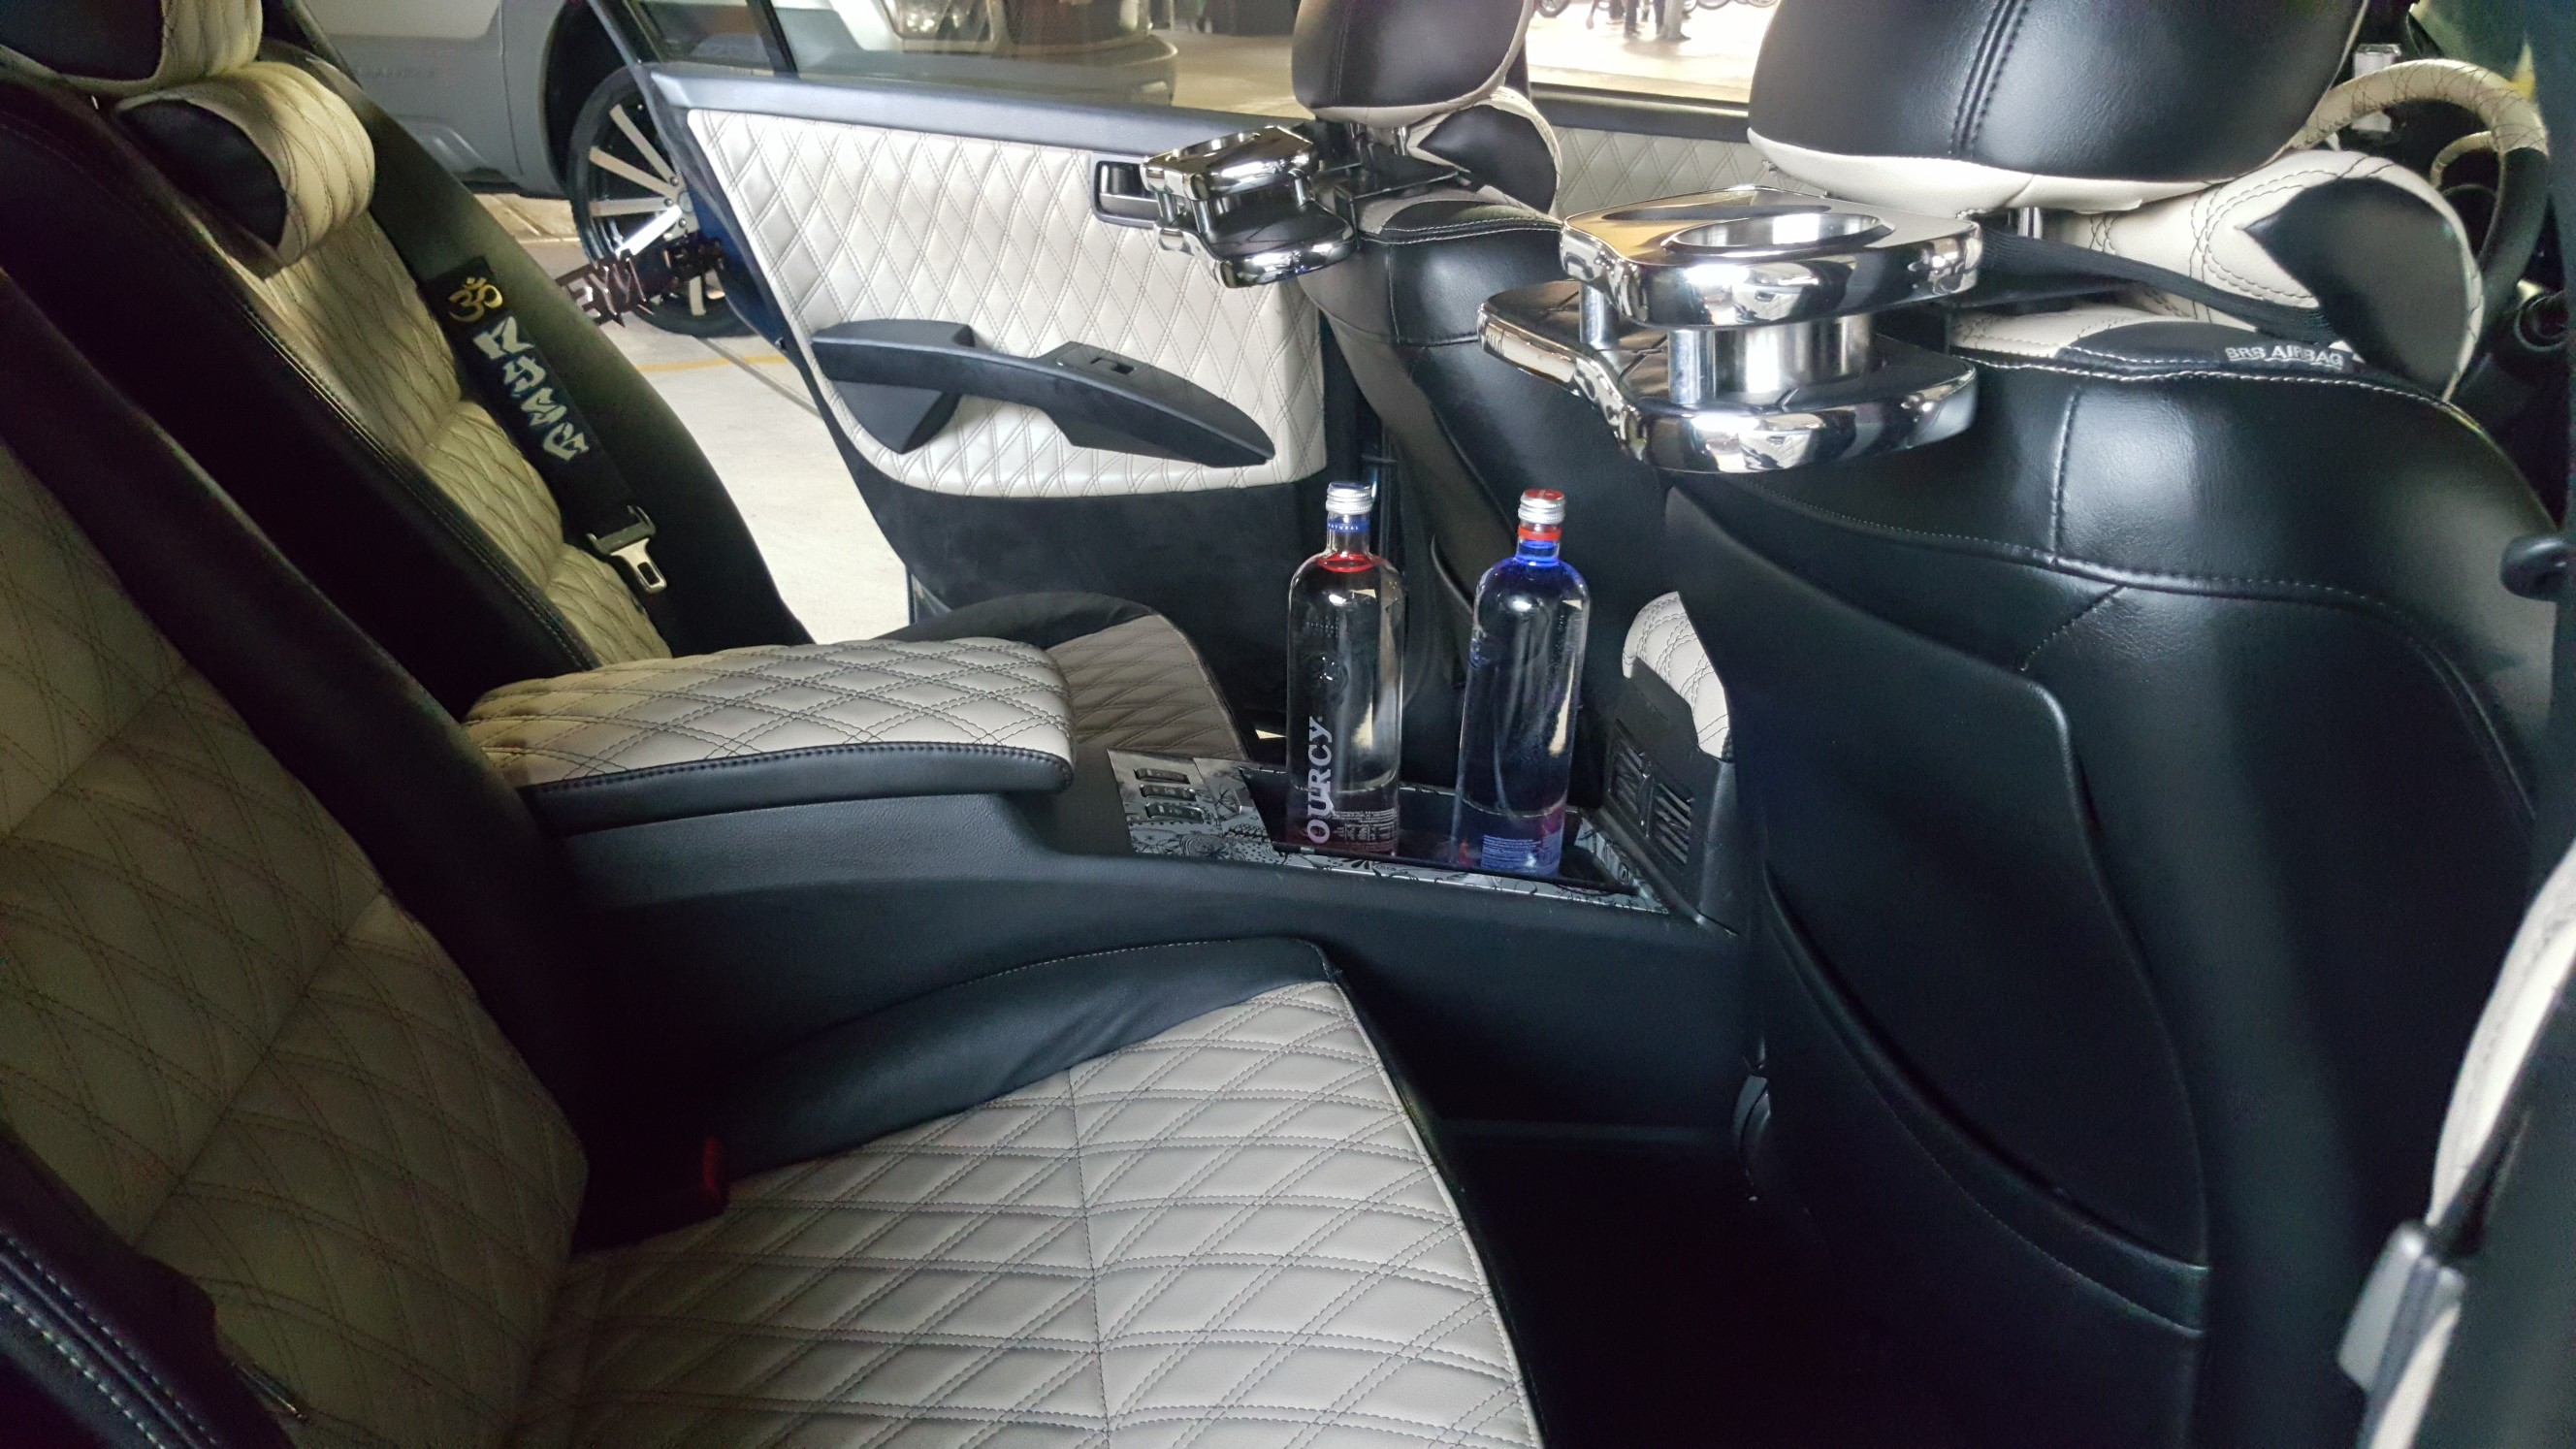
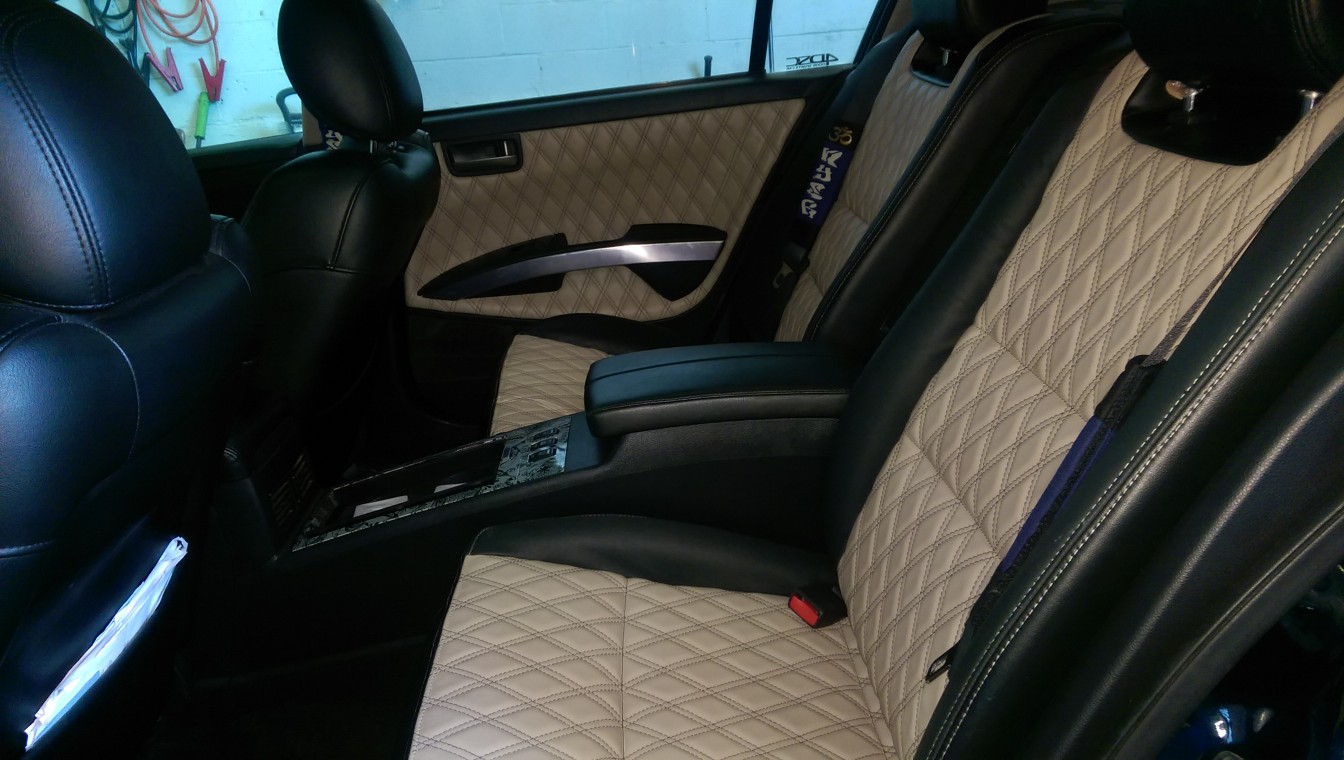
This is the story of my 2008 Maxima conversion using an Elite Package from a 04-06 Maxima. Hopefully this will help some of you. As you may know the Elite option was offered from 2004-2006 (6thgen) and some 2007-2008 (6.5gen) Maxima’s. Not too many 2007-2008 Maxima’s were ordered and build with Elite package. I have physically only seen two 07-08 Elite package Maxima’s.
You can pickup a used Elite Package anywhere between $150-450. All depends on who you get it from. Also, the “Peanut Butter” edition will go for slightly more.
“Peanut Butter Edition”
Pictures and Corresponding Numbers:
Rear Deck Lid
Rear Sun Shade
Rear seats (4 pieces) Two Bottom and Two Top Pieces
Side Bolster Plates
Seat Plate
Center console (6 total pieces)
Top Cubby
Rear Bottom Console
Rear Bottom Side Plates for Console
MAKE sure to get the assorted wires and switches behind/under the console. These wires control heated seats and sunshade.
The stock speakers on the 04 Max just don’t cut it for me, so I decided to take apart the rear deck and swap them out with a pair of 6X9s I had sitting around. I’m planning something with more punch in the future, but I figured I might as well learn how to remove the little thumpers now, and it wouldn’t hurt to put something better than paper cones while I save.
I’m sorry for the lack of pictures but it’s not nearly as hard as you would imagine. I took some for those that may want reference shots before they start ripping up trim.
Start by removing the side trim pieces. These are very simple, just insert something that won’t scratch behind them and lift out. There are only two integrated clips and one white body clip holding it in place. Slide it out of the way and toss it someplace soft. It may take a bit of coercing to get it to slide out safely, since there are two large plastic supports that get in the way, but it can take it. Just go slowly.
After both side trim pieces are removed, start prying the whole deck up by inserting a tool between the deck and the back of the seats. If you wish to remove the seats before doing this I can only imagine that it would make the task much easier, but I didn’t bother.
Push the tool as far back as you can, popping up all the clips that hold it down. DO NOT go ripping it up, as the brake light is connected to it through a ridiculously short connection feeding into the trunk. Slide the deck up and over the seats, following the path of the seatbelts. Be careful to watch your hands around the child seat latches and the seat release button.
In this shot you can see the white plastic clips that hold the deck down to the metal below, as well as the large white clip that connects the rear brake light assembly. There are five bulbs that could potentially burn out, so I’ll have fun replacing those in the future if they do wind up going out. The white brake assembly clip is of the exact same sort that are used in the stock speakers. Place a tool directly in the center of the plug and push VERY FIRMLY in, then simultaneously pull the whole thing apart. With a bit of DIY skill, it should be perfectly fine. I spent about a half hour trying to figure this out due to the angle and I wound up breaking it… Luckily there are two more to practice on under the speakers!
After you have the light assembly safely unplugged, feed it up through the deck (which it is wrapped around the plastic for reasons unknown. It doesn’t move at all by itself if you leave it loose) so it can safely slide away from the rear of the car to the seats, where you can set it down and access the speakers.
The speakers use 8mm sockets and are bolted down with four little screws. They’re also sealed with a thin strip of material so you’ll have to insert a tool between the metal deck surface and the speaker, prying directly up. Be careful when you remove the speakers, as the magnet is strong and the rear window is very close. Cover the speaker with your hand to avoid hitting the glass. I know this may seem like common sense, but you’d be surprised what happens in my garage…
I just cut the speakers at the base of the plug and soldered on some new terminals. If you do plan on replacing the stock speakers with new ones make sure that you have enough space to tighten them down. The ones that I had were apparently intended to be used with a screwdriver and not a socket, as there was insufficient space to fit the socket around the head of the screw. Few minutes of cutting and filing fixed that.
Installation is the reverse of removal, just take extra special care to line everything back up. Key phrase here is to just take your time. Slide the deck all the way back and push down firmly to pop the clips back in. Feed the side trim panels in around the brackets, pushing down first to ensure a snug fit. Snap them back into place and you’re all set to go!
Lastly, here’s a shot of the poor little dude in all his paper glory:


")
")