Member Credit: EddyMaxx (Additional photos/info by chrisaust and CleanMaxx)
Are you looking to get rid of that orange cluster on your 2004-2006 Nissan Maxima? Well you can install an 07-08 cluster very easily as everything is plug-n-play. All you need to do is purchase a cluster with miles closest to your car and cluster cover/hood. The 07-08 cluster will also work on 04-06 6-Speed 6thgens (even if you are HR swapped lol).
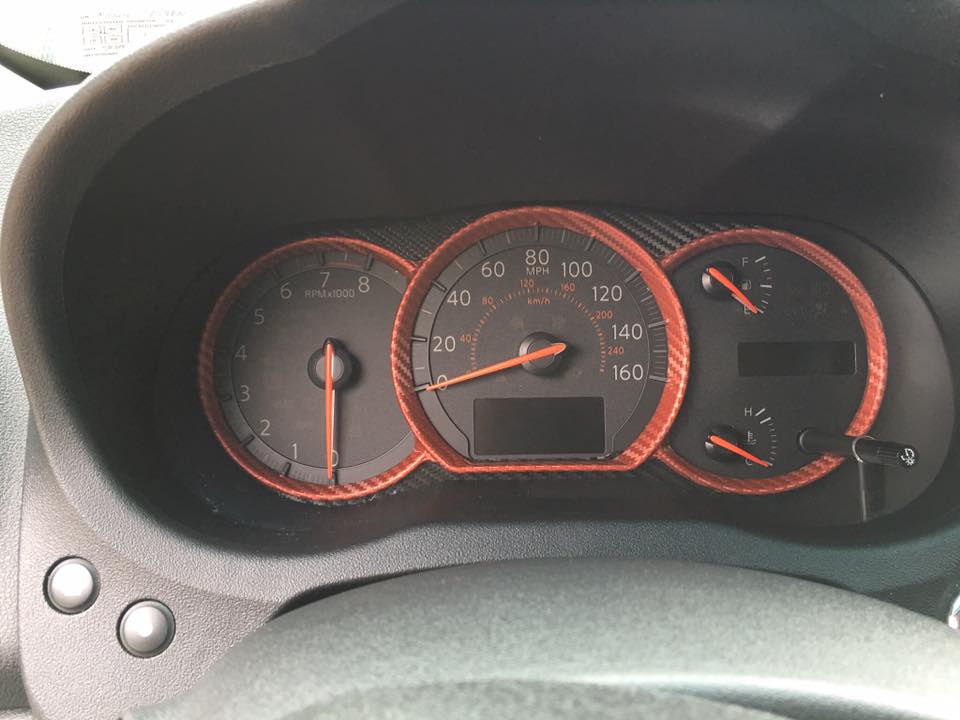
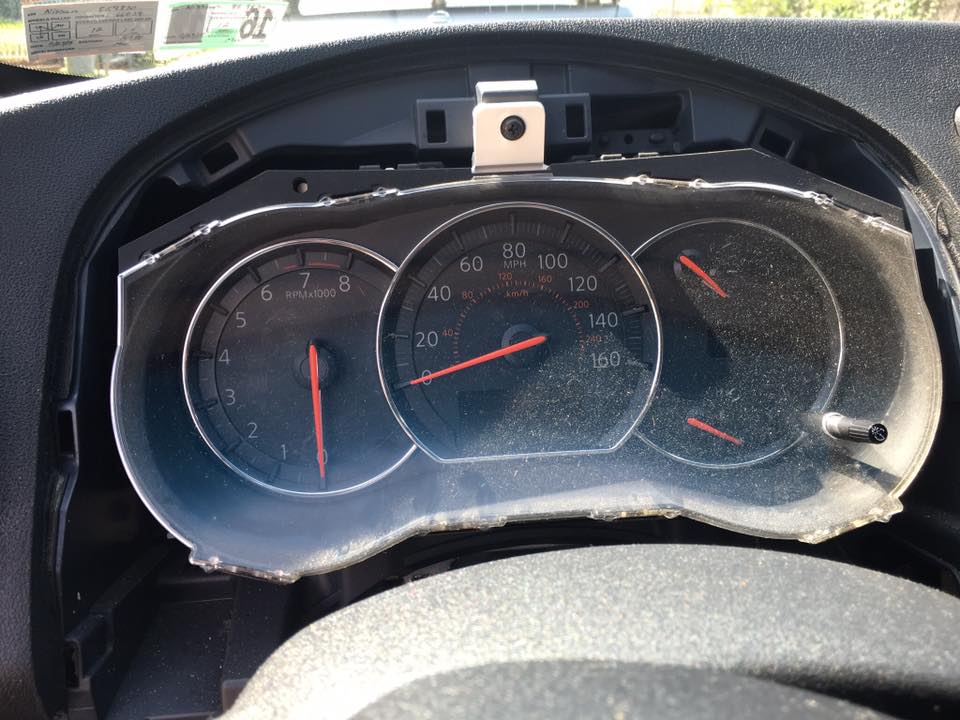
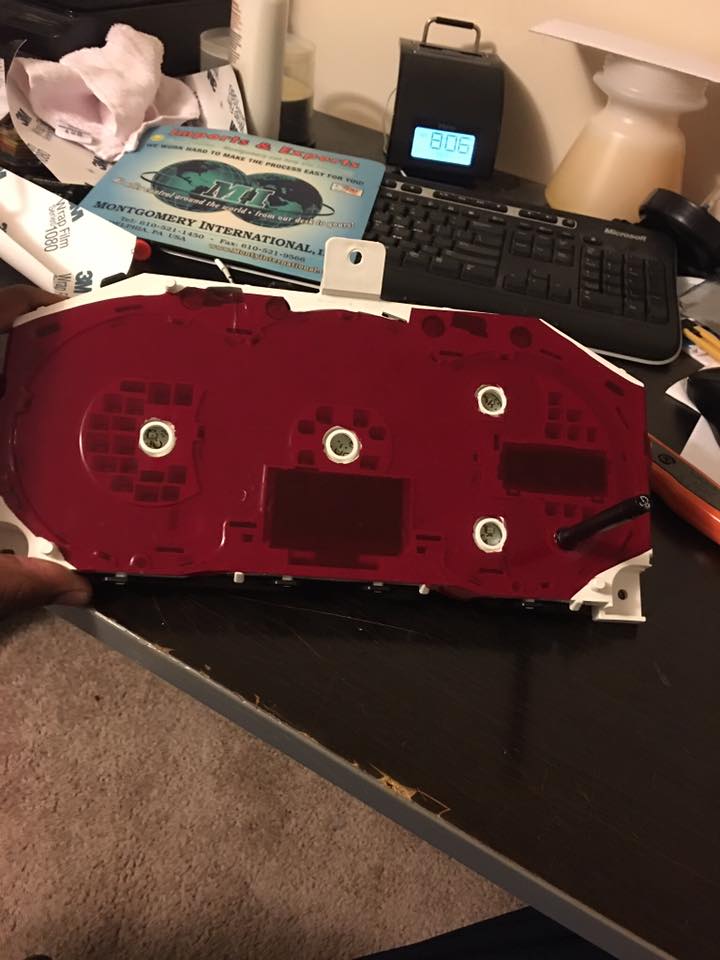
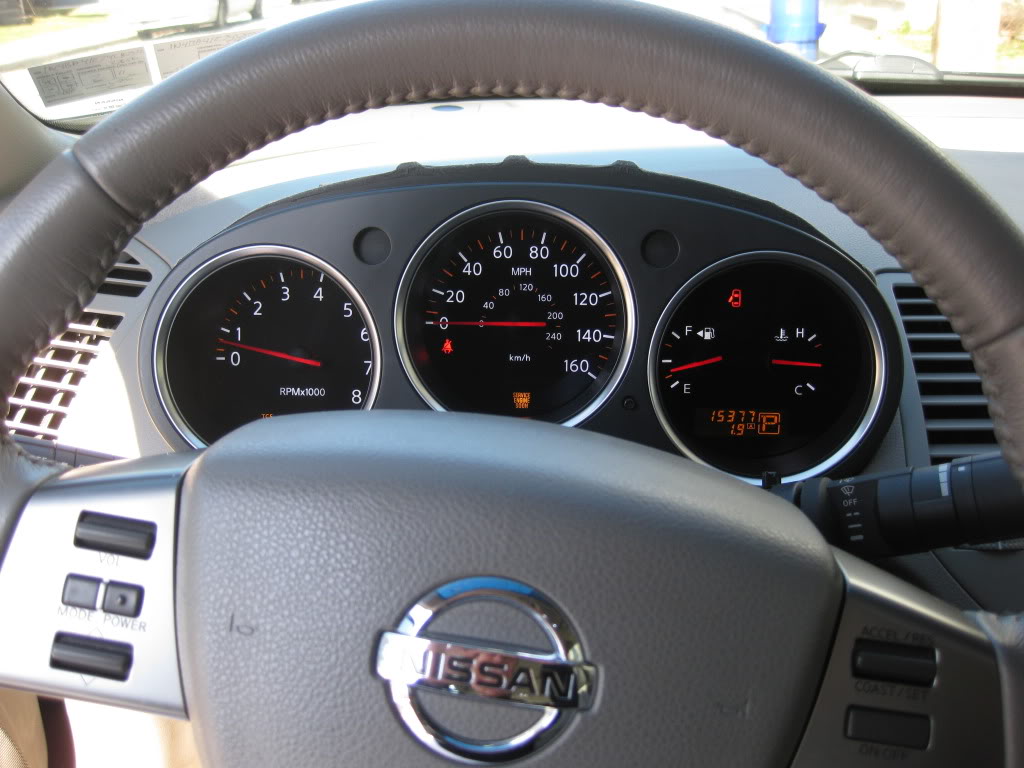
Below is a photo of the 04-06 OEM cluster (all orange….yikes). The only members I’ve seen that like the orange are the ones with the peanut butter elite orange Interior (only because it matches the theme of the car). You can also add custom LEDs to your existing 04-06 cluster but most members just want a newer and refreshed look.
The first step is to buy a speedometer/cluster from eBay or local junkyard (or Facebook Classifieds). Try to get one as closest to your current mileage. You can also pay for an odometer adjustment but just easier to get a closer one to your actual mileage.
The pricing for the cluster is anywhere between $60 and $120 depending on where you get it from. Make sure to also buy the cluster cover/hood as well. Some people forget about this. The cover is usually around $40-50 bucks.
The whole swap takes about 45 minutes to an hour.
You will also need the following tools:
Phillips screwdriver
Flat-head screwdriver (or preferably something thin and plastic)
Socket wrench only if you need to disconnect battery to work on electrical system (not really required)
Something to cut plastic (for creating hole to route cluster plug/harness)
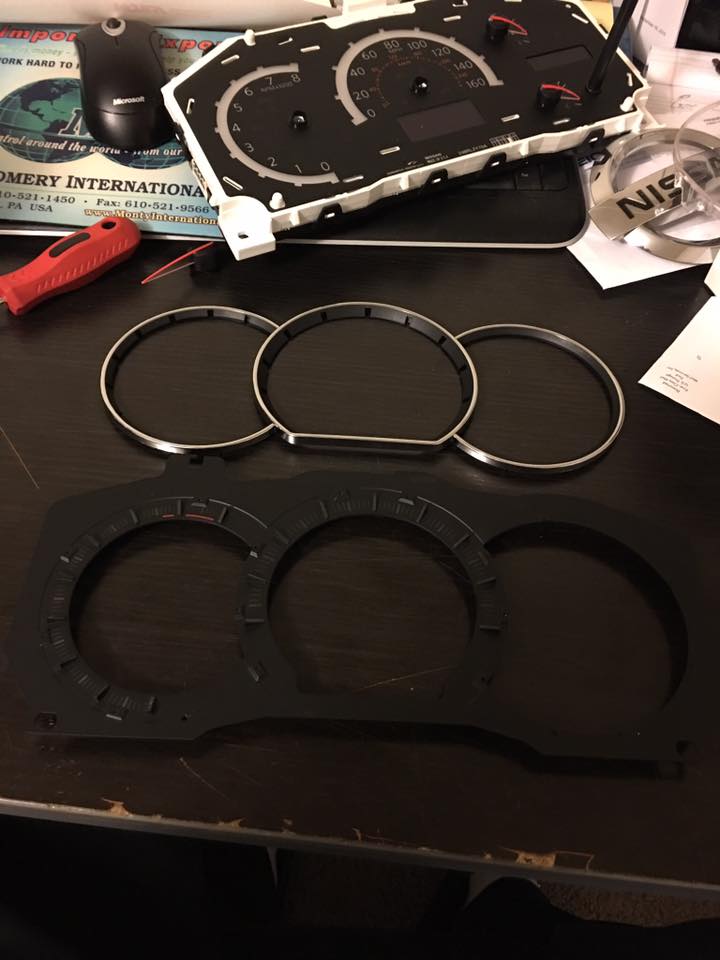
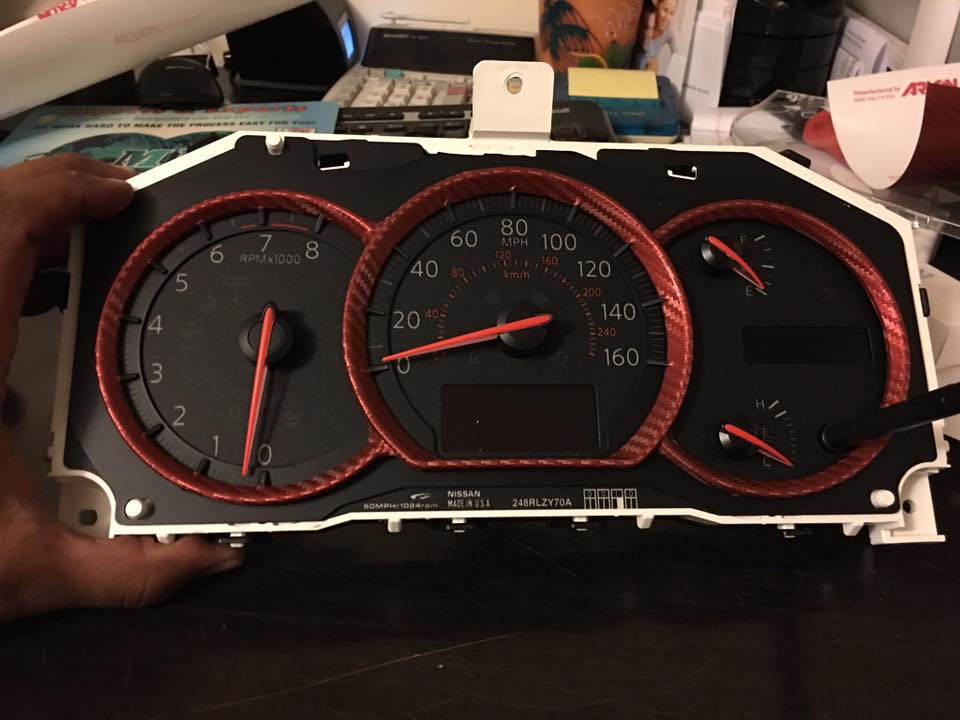
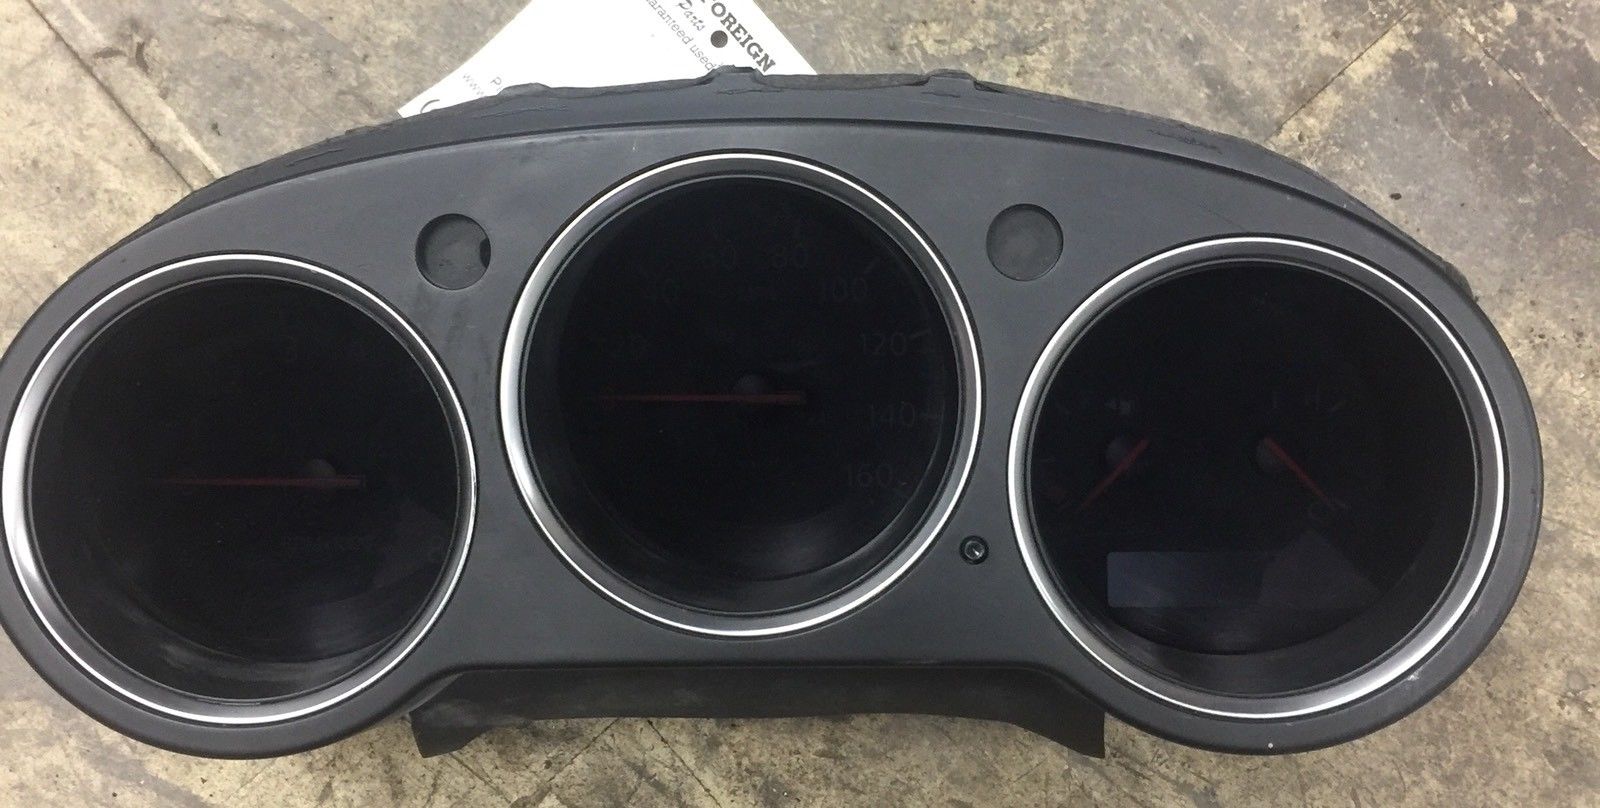
Photo of the Purchased Cluster/Speedometer (Miles were very close)
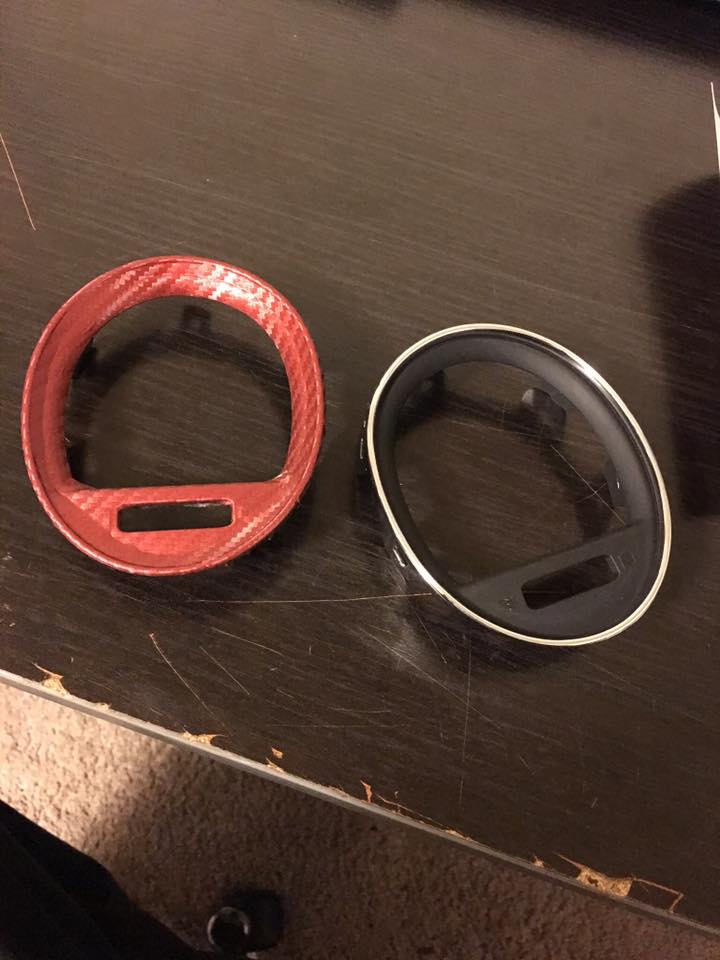
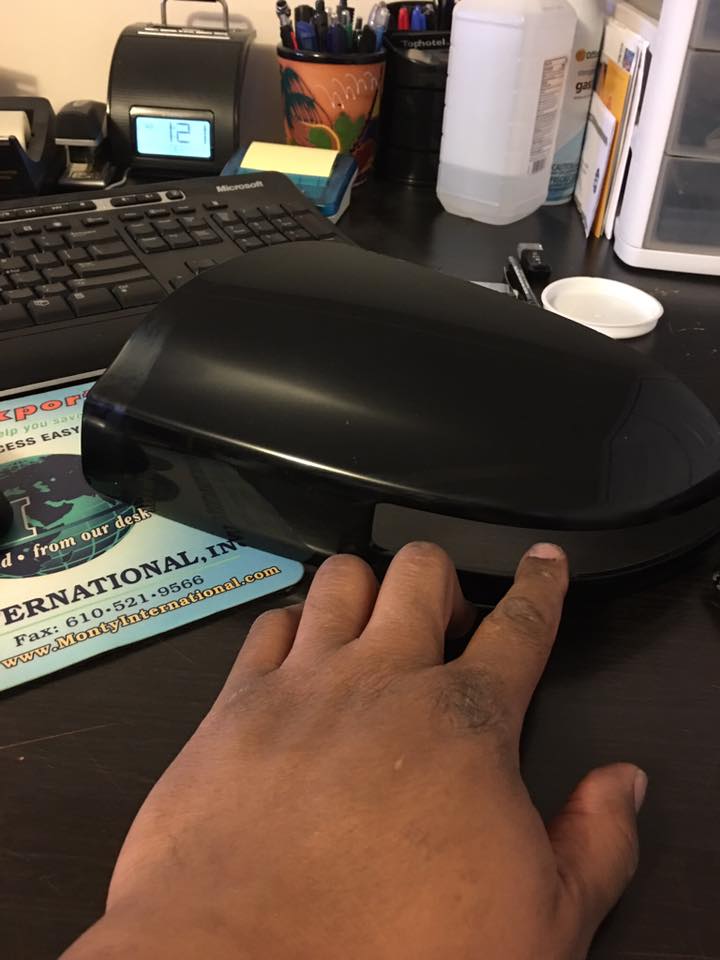
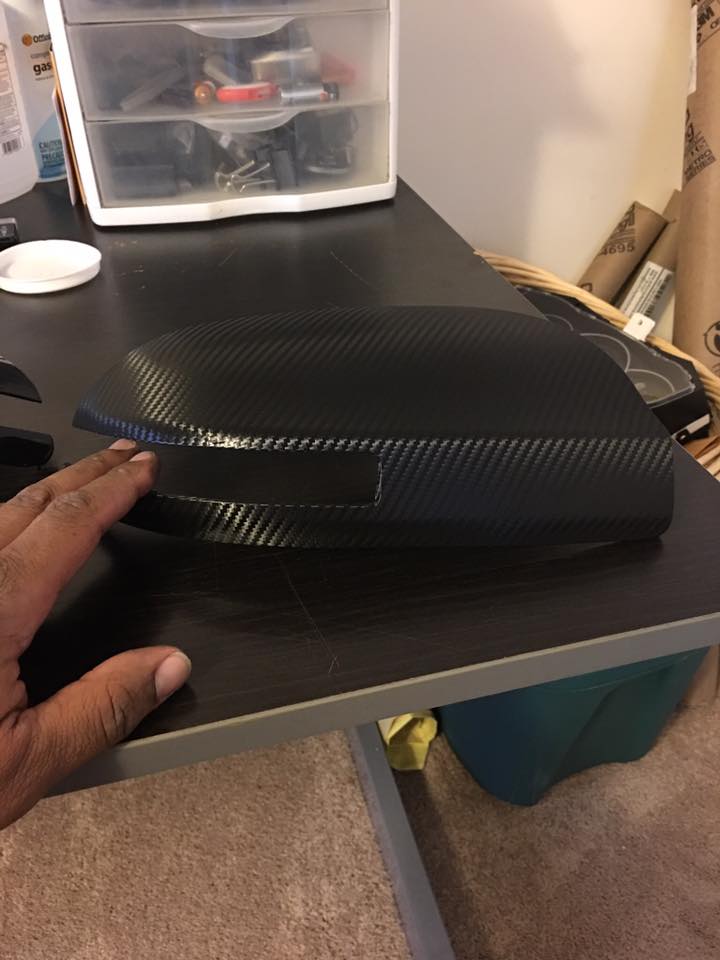
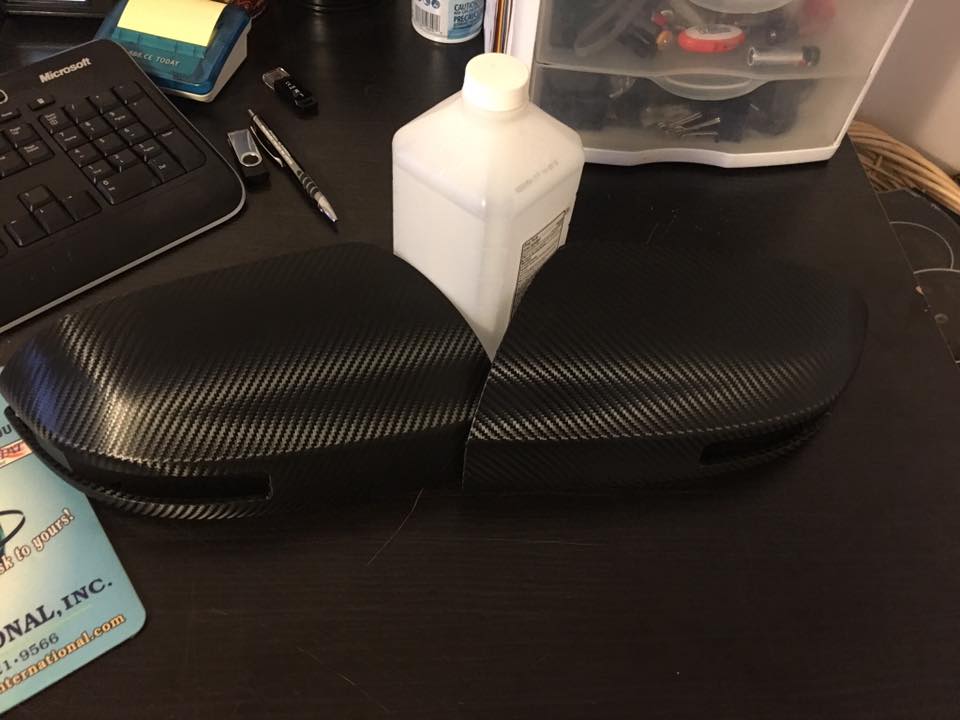
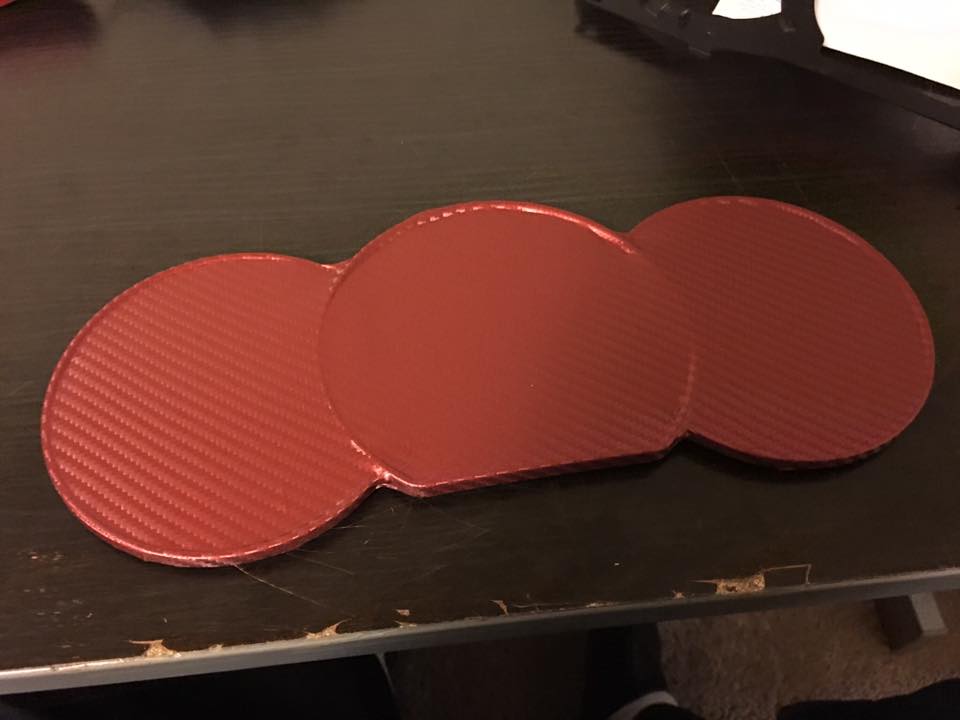
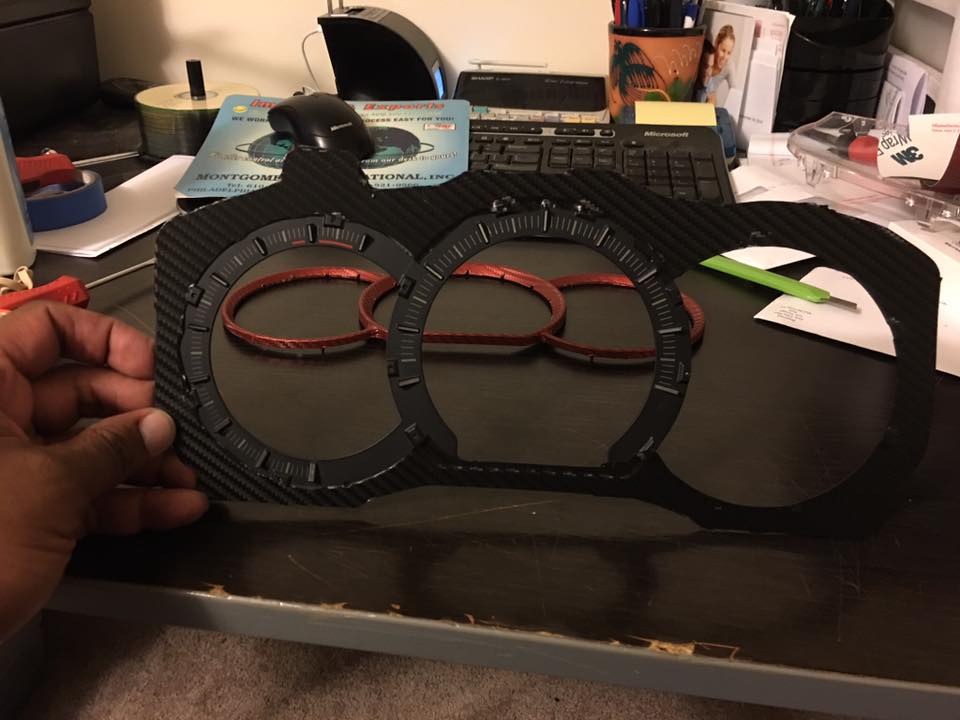
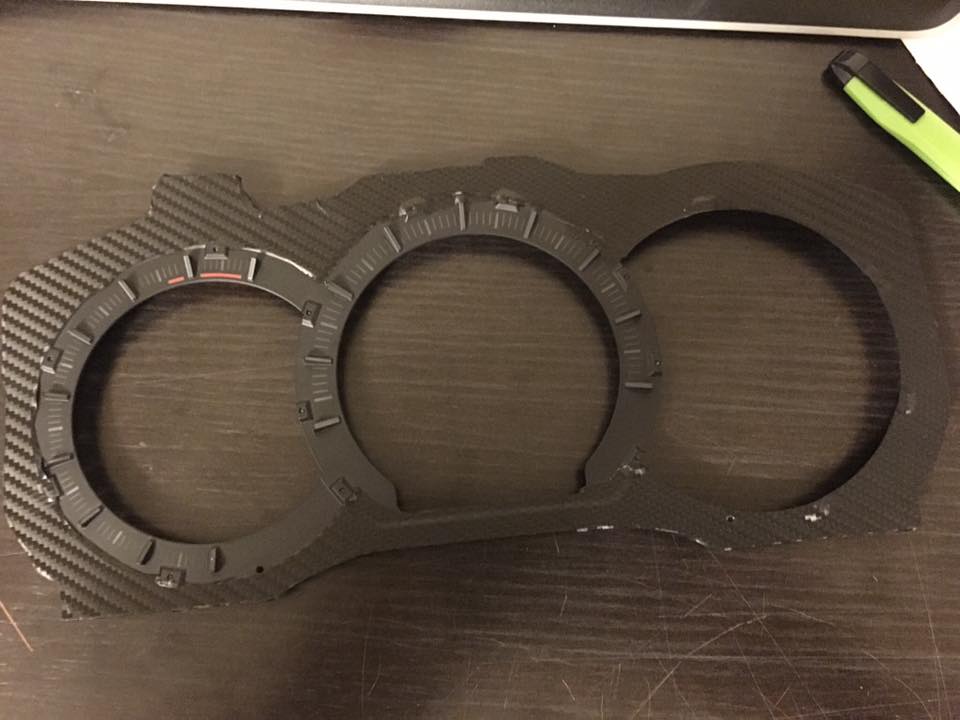
Photos of Cluster Cover/Hood
Steps to remove the old cluster and add new cluster
Underneath the steering wheel there are 3 screw holes… Remove these screws with Phillips screwdriver. Adjust the steering wheel all the way out and down. Inserting flat-head screwdriver in between two plastic pieces on the right side of the steering wheel where the windshield wiper knob is. Carefully pop apart plastic housing surrounding steering wheel and set aside. Remove plastic covering over gauges. Using flat-head screwdriver or thin plastic, slide under top middle plastic piece and slowly lift up to pop out. Then slide under each piece on left and right, pop out front part first, then lift and pull towards you. On top of gauge cluster is one single screw, remove this: Under gauge cluster are two hidden screws, unscrew both but don’t remove, it’s easier to pull out gauge cluster and screws will come out with it, then you can take them out.
Mount new cluster on the dashboard.
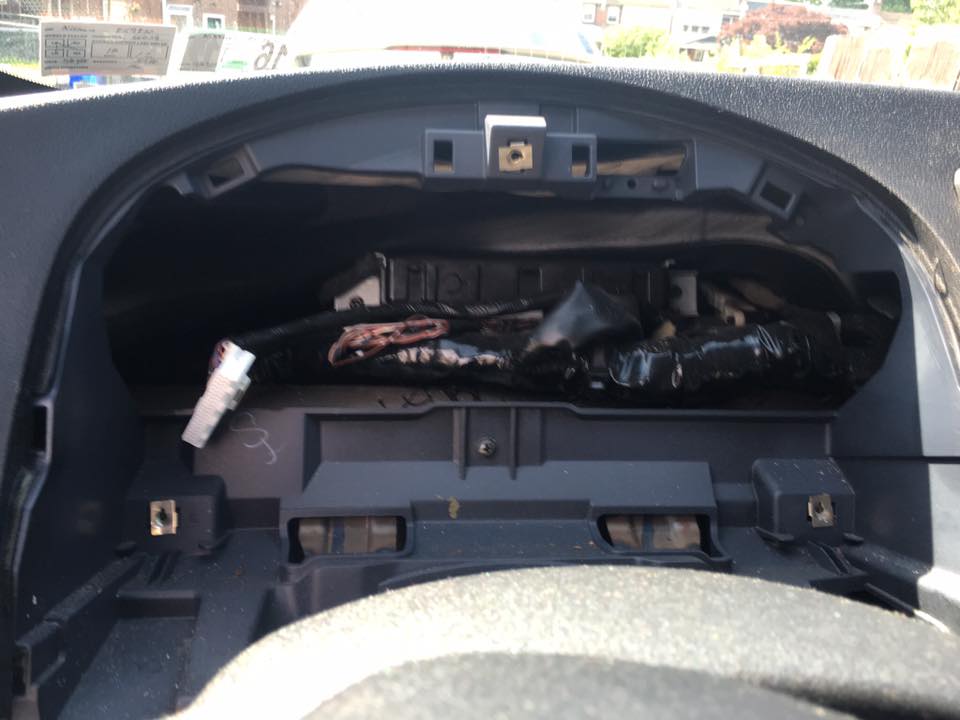
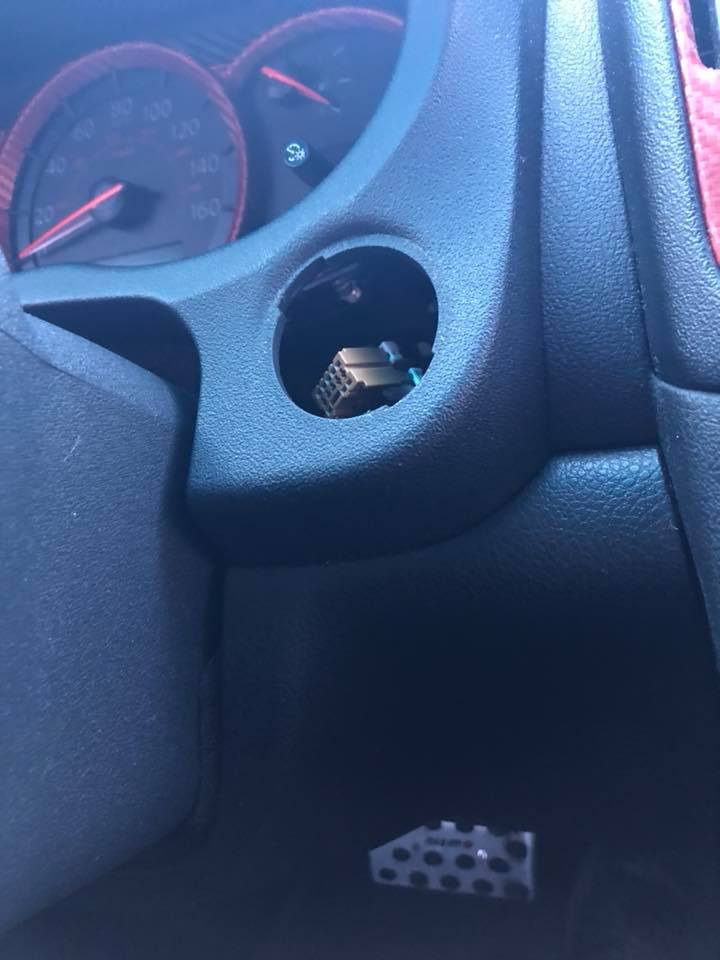
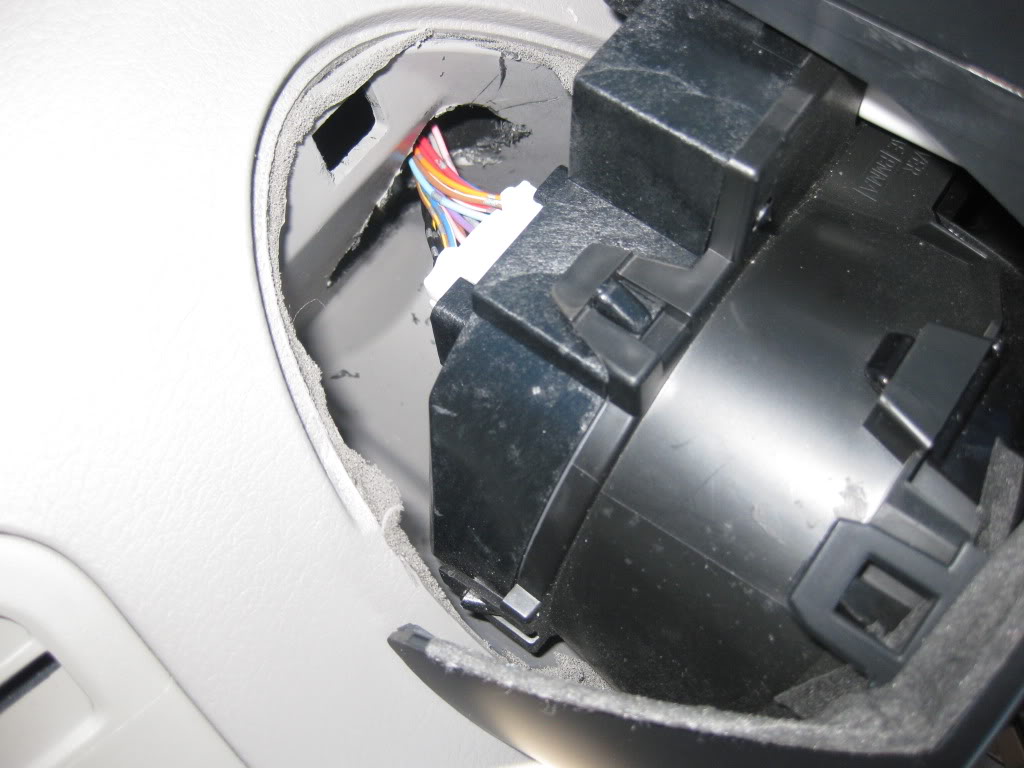
You will notice that the speedometer plug is on the opposite now. Since the plug is short, you will need to cut a hole and route the plug over to the left side. You can also stretch the harness if you don’t want to cut a hole. Just very careful.
Cutting the hole out will make it easier for you to route the plug into the new cluster. Simple and EASY!
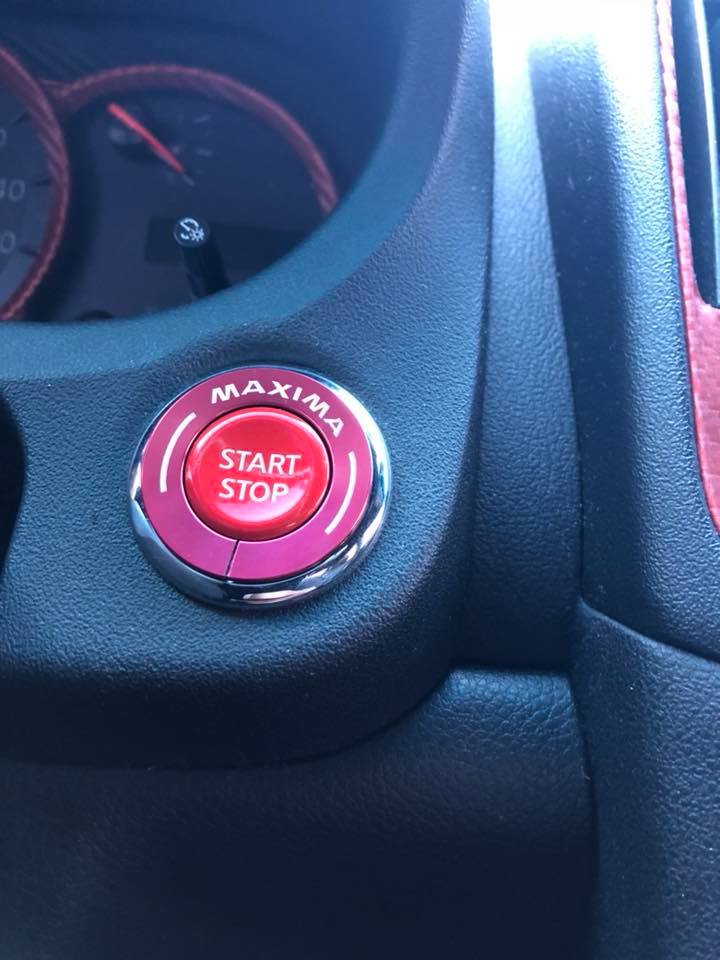
Follow the reverse steps of removing the cluster and add back all the screws. Put the cover/hood back. Start the car and you are all SET! Enjoy your new cluster.
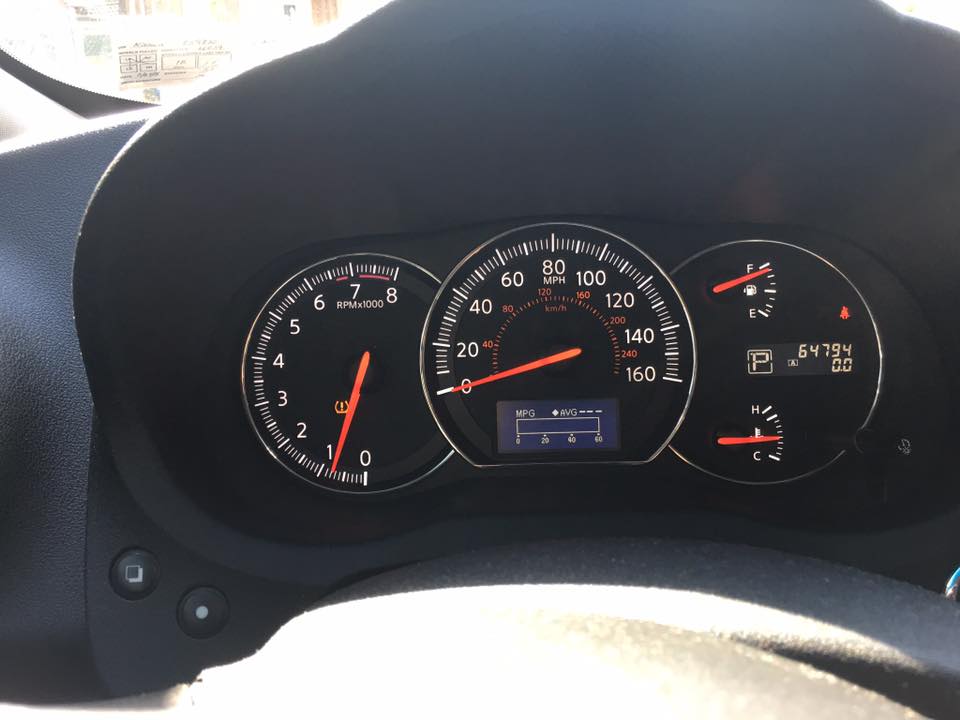
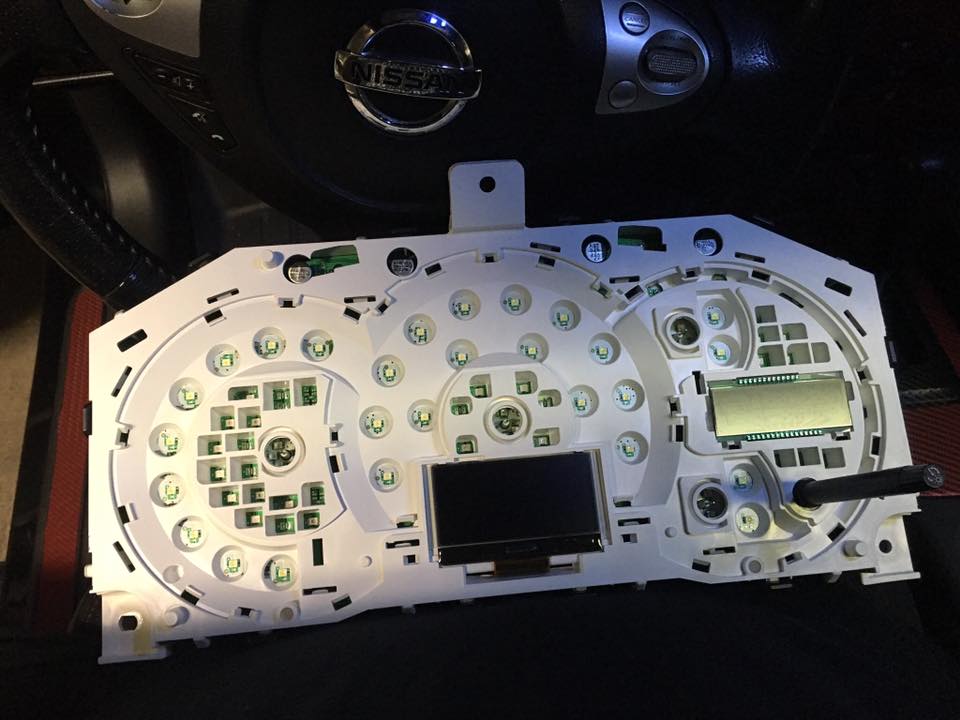
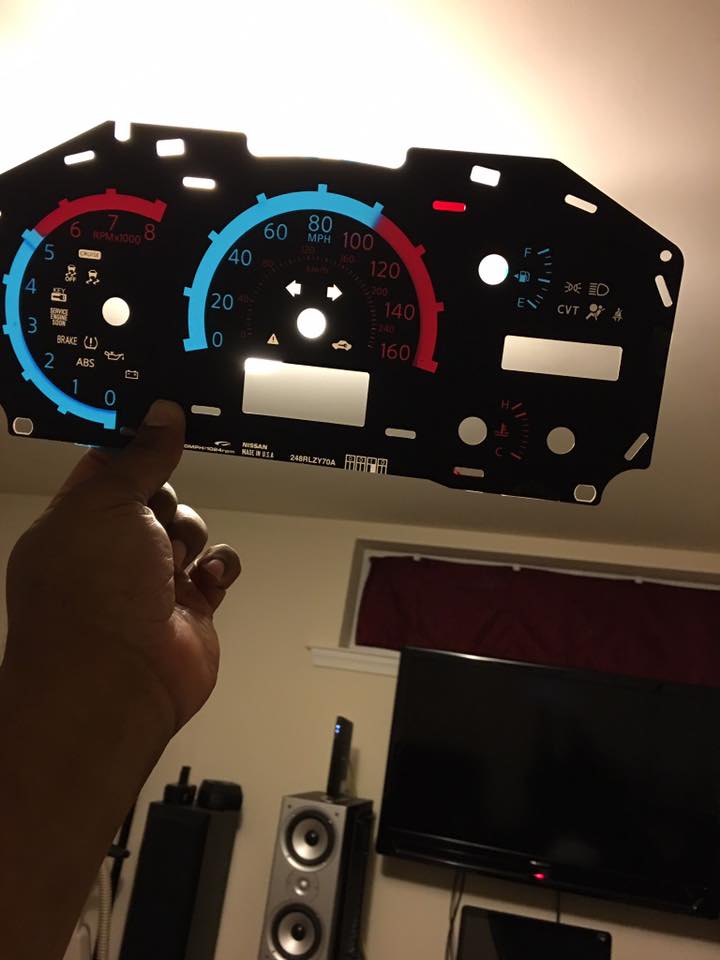
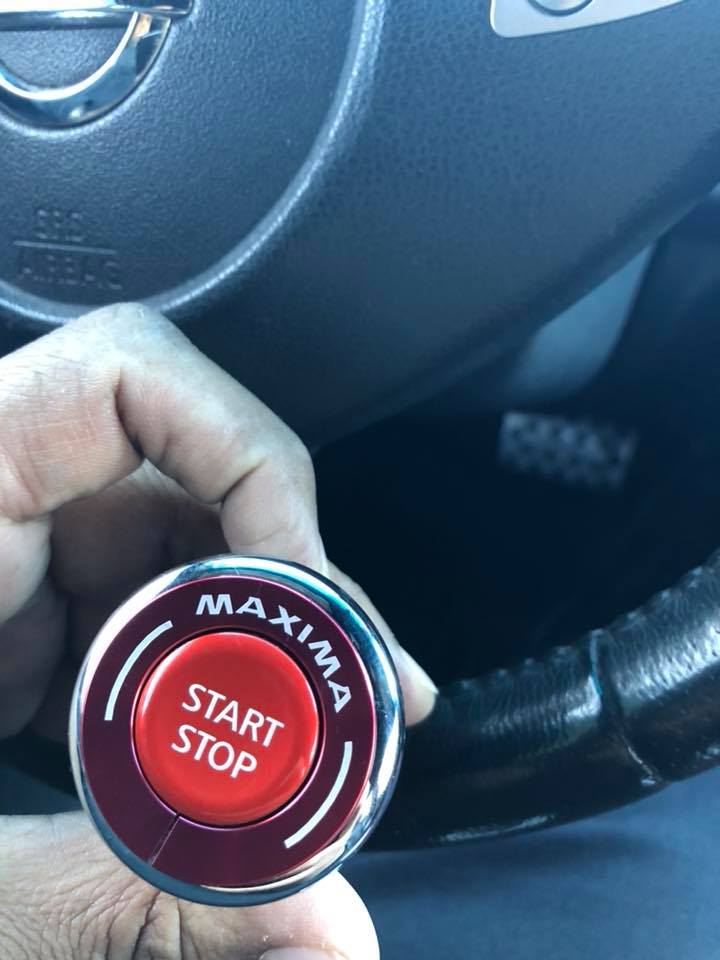
Below is an example of the final product. The clusters below have modded LEDs which you can also add.
First – This is NOT a simple grill install, you will need to cut your 2000/2001 bumper to make this work. So read the entire DIY before you start anything, that way you can decide if you actually want to do it.
Second – You have a few options on how to do this, so this DIY is discretionary of course. I used a 2002 OEM Grill. Installed on a 2001 OEM bumper, I cannot comment on aftermarket grill/bumper fitment, I would assume they are close enough to the same, just be advised.
Third – I am one of the first/only to do this that I’m aware of, so as such I did it all flying by the seat of my pants.
I compiled these instructions in an order I think I would follow if I were to do it over again on another car, so bear with me if something seems out of place.
Fourth and lastly – The biggest decisions you have to make are:
1. If you’re going to remove the front bumper to do this, I did because it was freezing cold out, and it’s just easier to work on, fit, etc. I do believe you can do this without removing the bumper, but expect it to be a bit of a pain in the butt by comparison.
2. How or if you are going to fill the gap at the sides of the grill (you’ll see what I mean soon). To keep this straightforward, I’ve only included the way I did it.
TOOLS NEEDED: 1. Dremel with assorted bits, cutter bit is mandatory
2. 2002/2003 grill
3. 220 Grit Wet/Dry Sandpaper
4. 400 Grit Wet/Dry Sandpaper
5. 600 Grit Wet/Dry Sandpaper ( I suggest you get 800+ grits as well but you don’t have to, I DID)
6. ProForm PF 702 Epoxy plastic filler or equivalent product
7. OEM Insert piece for 2000/2001 grill – this should be attached to your bumper
8. Hardware to secure grill
9. Sand able fill-type Primer. (If you’re painting the grill black get black primer, vice-versa for white, etc. Worth the extra money- this way WHEN your grill gets stone chipped, it won’t be a completely different colour ) Just make sure you buy good stuff, better the filling capabilities the better, and MUST be sand able. Don’t try to save a couple dollars here, you’ll hate the results down the road if you do.
10. High quality spray paint – same deal here, don’t cheap out, buy good paint. It’s going on the FRONT of your car.
11. Needle nose vice-grips, or some type of clamping device, a couple would be useful for test fitting.
Total cost for supplies was around $120 CAD for me. I already had some Wet/Dry sandpaper so I didnt need to buy that.
Let’s get to work:
1. If you’re removing your bumper, do it now. I couldn’t find the DIY for this, but it’s out there. You’ll need to pull back the wheel well splash guards, there are 2 10mm bolts on either side near the clearance lights, and the rest should be pop out clips.
2. Set up a good work station, put the bumper on a couple tables, whatever works for you, something around waist height.
3. This is the point of no return for your stock grill.
Now, cut out your grill, you can find the instructions for this stage in the Street Scenes grill DIY. I can’t find it though, it’s all dead links in the FAQ.
I can’t help you with it because mine was already cut out. Here’s what I started with:
You need to save the insert piece, so don’t destroy it. Use a stubby Phillips screw driver to remove it.
Once the insert piece is removed, you will need to trim down the remaining bumper cut-out, basically you want it smooth all the way around. Here is a pic before its trimmed:
4. Whether you kept the bumper on the car or not, you need to do something with the upper grill support bracket. If you pulled the bumper off, you can just cut the bracket where it is, if you left the bumper on, you will need to pull the bracket off completely or it’ll be in your way.
Here is that bracket (already removed):
These are the two pieces you want after cutting:
Also remove the licence plate and bracket if equipped.
5. Test fit your 5.5 grill. You should be able to tilt the top into place and weasel the bottom in, there will be a lot of resistance, as you’re going to be stretching the moulding. Don’t try to force it all the way at this point, keep your eyes open for any hindrances that you may have missed in your trimming, if necessary trim some more.
Note: As long as you’re trimming the grey portion of the bumper moulding, you don’t need to get incredibly fancy, no one will see it when this project is done.
If your grill doesn’t seem like it’s close to fitting in at this point, you’ve missed something. Here are some pics of where we’re at from the back side:
6. Trim (cut off) the 3 little guides on the top of the OEM 5.5 grill, trim line is marked with red:
7. Use a grinder stone/emery wheel on your Dremel to sand down the support ridges on the lower 2 inside clips. You want this surface flat for when you mount the grill, otherwise when you tighten it the washer will cause the grille to slide out of place. You’ll note I cut out the center of mine, don’t do this it was un-necessary.
8. Now, your grill should go into place, slide the top in first then push in the bottom, a friend may be handy for this part, but not necessary. You want to start deciding how far in you want the grill, so push it in, and use the Vice grips to clamp it in place (clamp on one or both of the tabs you just smoothed out, as this will be your securement point later on).
Now eyeball everything, look at your lines, gaps, etc. Move it around as many times as you need until you’re happy with it, take your time to get it in place.
Couple pics of this stage:
You’re a little excited now, right? Moving on…
9. You’ll no doubt note the string-line of the bumper trim edge has stood up because of you stretching the top of the moulding:
This is where you decide how to combat the gap that should be fairly evident.
It was suggested to try and use some rubber, similar to that used on the top of some headlights:
Pic courtesy of Rochester
You are welcome to try this, it’s cheap and if it works for you, you won’t have to sand, or bother with most of the remaining steps. Personally, I don’t think it would look good enough for me.
Feel free to toy with other ideas for filling the gap as well. Read through my two threads on this topic if you haven’t already, I list a couple options I originally considered when faced with this issue.
I’ll take you through what is necessary for the way I chose, time for the fancy cutting:
Cut those pesky trim lines on the moulding, they are holding way too much tension:
10. Now it’s time to make our insert pieces. You can use cardboard templates, etc to do this more precisely if you want. I did it by eye.
To mark the first cut I put the insert piece against the 5.5 grill and marked it about 2” past the end of the curve on the bottom. The top mark was about 1.25” past the curve. This is so you have extra material to gradually transition the different radii together (5.5 grill and 5th gen insert). See pics below of cut piece for clarification.
First Cut:
Cut extra, you can always trim it off later but you will find it very difficult to put it back on . This cut should be straight, don’t try to get it trimmed or curved to fit yet. See pics for clarification.
Replicate this piece on the other side. If you put the piece you just cut back to back with the remaining insert piece, you can mark it exactly.
You’ll need to trim the old mounting standoffs, cut these at the 90* (corner edge)
Now put the pieces in place, temporarily secure with needle nose vice grips on the back side.
Put the grill into place as much as possible, and look where/how you will need to cut the inserts in order to accommodate the grill. Ensure that you’re keeping both sides even when checking, and mark the curve of the 5.5 grill onto the insert pieces. See pics of my markings below:
Second Cut:
Make a rough cut -leaving extra material- along the line you just marked. Concentrate the bulk of your cutting the back-side of the insert pieces (where you won’t see it). Then you can gradually work the curve out toward the visible portion. Take your time. This is my second cut:
Now test fit again. Make sure your radii are close to that of the 5.5 grill. You should be able to/or be really close to fitting the 5.5 grill all the way now with the inserts in place.
Make another mark if necessary, trim a little bit at a time off the Inserts until you like the way it looks.
Remember, you don’t want the inserts to sit perfectly flat against the bumper cut-out, otherwise the top edge won’t meet the 5.5 grill. (if you have the pieces cut and are test fitting, you’ll know what I’m talking about here)
Couple pics of test fitting:
This was my final cut on the bottom:
11. Once you have the pieces made, rough them up with some 200 Grit sandpaper, likewise for the edges of the grill, make sure to get the inside edge and everything, otherwise the epoxy will be less likely to stick.
Be careful not to sand down the raised edges on the grill (bars), I did a bit, and it’s a pain to get them smooth again. If you never touch them you’ll be better off.
Tape off the bumper well, this epoxy sticks very nicely and you don’t want to have to paint your bumper. You also don’t want to epoxy the grill OR insert pieces to the bumper.
12. Put the insert pieces and bumper into place, use vice grips, whatever you need to use to get it temporarily SECURE. And make sure it’s where you want it, this will be where your grill sits when it’s all said and done, you will have very little wiggle room after the epoxy attaches the insert pieces and the grill.
Disregard the Epoxy in this pic, I want you to note I used a small piece of the old insert cut-out to set the proper gap and hold the insert piece. If you use the same sized piece in the same location on both sides, you’ll know the gap is pretty close to even on both sides.
I can’t stress it enough, take your time getting this secured HOW YOU WANT IT. Measure to make sure it’s even, then remeasure, check all gaps and lines, check the depth of the grill.
If you removed your bumper, I recommend you take it out to the car and rest it back into place, match the grill and inserts to the cut out ridge in the hood line. I forgot this step and mine is off just a shade because of it. It’s a pain to take this step, you may want a buddy to hold things and help, but this step is well worth it at the end of your project.
13. Now that everything is secure, make sure your bumper is at room temperature (inside for at least 30 mins).
Mix your epoxy, and apply in the gap.
The mixing instructions differ depending on what you’re using, the PF702 was a 50/50 mix. The smoother the initial coat, the fewer coats, and less sanding you will need, so do a good job:
You’ll note on the first gap I just put ‘blotches’ on in order to secure the two pieces.
You can do this if you are unsure of the fitment (that’s why I did it). That way after it cures, you can recheck the fitment, and if you’re happy with it just apply another coat (you don’t have to re-install). If you’re not, you can fairly easily cut the epoxy and reset it.
Let the epoxy set. The ProForm stuff I used was about 15-20mins and you could sand it.
14. Remove the grill, wet sand with the 220 grit to form. I can’t fully explain how you’re supposed to do this and I don’t think I should have to, this is on you guys all I can do is show pics.
Make sure you wet sand though, plastics are difficult to sand properly and dry sanding plastics is not recommended (not by me anyways). Another tip is to sand in circles, try to make them as random as possible (random orbital sanding).
After initial sanding:
15. Test fit, I used a marker and put ‘+’ marks where I needed to build up and ‘x’ where I needed to sand down more.
Remove, sand down all ‘x’ areas, re-test, remark if necessary. Repeat this process until you’re ready to add epoxy. You will likely have spots that need sanded around the edge and backside of the grill/insert piece in order to get it to fit into place properly.
16. You don’t need to have the grill installed for the second coat, I didn’t because I didn’t want that epoxy on my bumper at any cost, and I also wanted the tape out of my way for test fitting and eye-balling.
It’s your call either way, but apply the second coat, this coat make sure you add more epoxy at the ends of your ‘insert pieces’, where the radii meet the grill, you’ll need to smooth this edge out to look like it’s all one piece/curve.
Note on the bottom you cannot add much epoxy, otherwise you run into clearance issues. This is not so much an issue at the top as you will see.
17. Let the epoxy cure. Test fit again. Mark it again, repeat. Once you are getting happy with the shape and smoothness of it, start going to the finer grit wet sandpaper. I only listed a couple wet sandpaper grits in the items needed, but if you can tolerate higher grits and more ‘stepping’ you’ll yield better end results.
This post is mainly random pics of sanding/fitting process:
And This will get taxing on you, but keep in mind, the further down you go with the 220 grit, the more likely you will have to put another coat of epoxy on to fill in the scratches. Take your time and repeat this process until you’re happy and around a 600 Grit.
18. If there is anywhere you need to trim on the bumper or the grill, you want to do it now. So put that grill in place where you want it to stay for the rest of its existence. If you’re unhappy with it, do something about it now, or it will bother you later. For me this process was install, trim, install, trim, and sand, repeat.
I trimmed the top edge just a bit at this step to get it sitting a little better, red marks are where I trimmed:
19. I would advise you to install your hardware now. Put your grill in place, hold with vice grips or whatever but make sure you can get in to mark your holes.
QUADRUPLE check the fitment at this point, you DO NOT want to have to mess around trying to secure this grill in a different way because you drilled the holes in the wrong location.
Measure your Hardware, from the edge of the clip to the nut center, mine was ¼”. Use that measurement to mark the location of your bolt hole.
Ensure that you have enough ‘meat’ to allow the Bolt and Nut-Clip to properly secure the grill.
Now drill out 5/16” (if you got ¼” threads in your hardware) holes in each of the 2 tabs (as close to the center as possible, guided by your marking), through the bumper. Pic with holes drilled and grill removed:
Remove the grill, install the clips, reinstall the grill and secure. Make sure it’s sitting exactly how you want it and secured nicely at the bottom. If it looks good, pull the grill out again.
20. You should have a very smooth grill in front of you. Other than the mismatched colours, it shouldn’t be too apparent that the grill was ever modified (from the front). Now you just want to get it prepped, wet sand (fine grit, 600/800+) every part of the grill you intend on painting. I only painted the ‘bars’ and the outer edge.
Then the tedious job of masking the grill. Do it well!
Once done, dry and clean the grill with a micro-fibre cloth, and apply your first coat of primer. Don’t try to put too much on you’ll be wasting your time anyways, a nice light coat is fine.
This pic is 2 coats, I used up some grey primer I had laying around for the first 2 coats:
21. Inspect the grill once the primer is dry, primer has a tendency to bring out imperfections, so if there are any you should see them now.
I had to apply another epoxy coat because of some little pin-holes that became apparent. (If you have to epoxy again, do it, then repeat the steps for sanding). Wet sand everything again very lightly with a high grit (800+). The primer should fill in any minor scratches.
22. If you’re done with the epoxy and all cutting, it’s time for your primer coats.
Apply light, even coats, light wet sanding and drying/cleaning with microfiber cloth in-between each coat. Don’t rush it and try to apply too much, or paint before the previous coat has cured, these are the most common mistakes made in DIY paint jobs.
After you’ve got some good coats on (I put on 5) let it cure overnight (around 8 hours should be ok, most recommend 24 hours but I think that’s ridiculous.
23. Once your primer coats are done, light wet sanding again, (800+, 1000 or slightly higher preferred).
Again microfiber cloth, then first base coat. You have the option of putting on a base coat and a clear coat after.
If you decide to clear coat, remember the clear will bring a shine to it, so don’t put on Gloss Black paint then put a clear coat on that. If you want shine, put on flat black and hi-shine clear coat.
I chose Satin Black Trim paint only. Paint it whatever colour tickles your fancy, if you don’t mind masking it off you can always repaint. Apply at least 3 coats, very light wet sand in between coats.
My grill after this step (chose not to clearcoat):
If applying clear coat, wait 24 hours, then wet sand and apply. Wait longer between clear coats than you would for regular paint, this allows you to gauge the shine, because it changes as it cures. Stop when you’ve achieved the shine you desire.
24. Install the grill, you now want to install the top clips. This is pretty simple, just find a good clamping location at the top that’s inconspicuous, mark it, cut the grill hole out just enough so the clip will fit in, test fit and then remove grill, hang on tight to the clips. (I used 2 clips)
25. Install your bumper (if you removed it).
Install the brackets you made out of the OEM bracket (if you haven’t already done this.)
You have the ability to tweak the lines of the bumper a bit by moving these brackets slightly, so if something is off, you can correct it a bit. You do not have this much flexibility with the stock set up (one bracket).
26. Attempt grill install. You will probably have to trim the grill to allow for the hood release arm. I fretted about this, thinking you’d see it, you won’t, just make a clean cut. You’ll actually use this cut-out to access the latch, it’s pretty tough to get at it otherwise.
27. Install your grill, you’re done!
I used a ratchet ting 7/16” wrench on mine it worked great, depending on the location you used that may not work for you, but at least your grill is still removable! Don’t forget the two clips at the top, if you don’t use these, the trim edge will ‘bow’ a bit, and your hood may hit slightly when closing.
Enjoy some completed pics!! I still needed to do a final wet sand and wax when I took these pics:
Instructions on how to replace stock taillight bulbs with LED’s (or can be followed for regular bulb replacement)
Parts
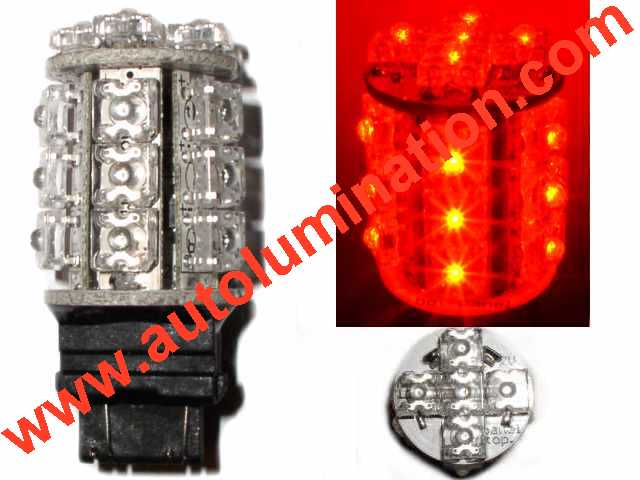
I bought these particular bulbs from autolumination.com(link is external) it’s the Light Tower II. I’ve tried out many different bulbs and these finally work.
20 Powerful Wide Angle Oval LEDS
15 side facing LEDS
5 forward facing LEDS
We require the 3157 bulb (not 1157) So you’ll need 4 3157 Red for the rear (dual circuit, parking light/blinker or brake)
The front Ambers are 1157 (socket type not wedge type)
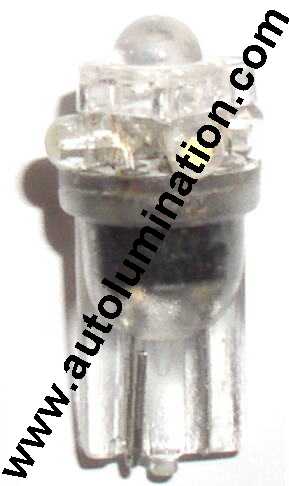
Here’s the bulbs I used for the rear side marker lights
(I also used these for the reverse, foot wells, license plate and stock alarm light)
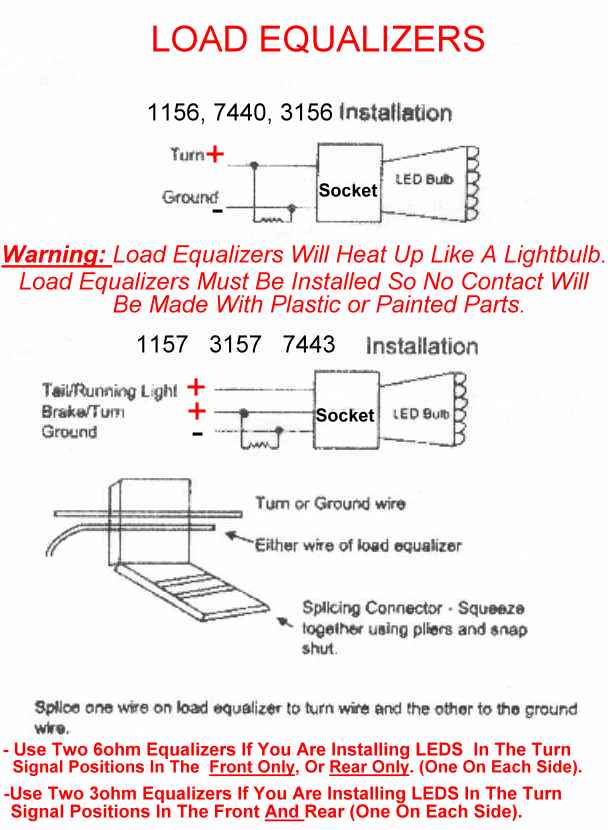
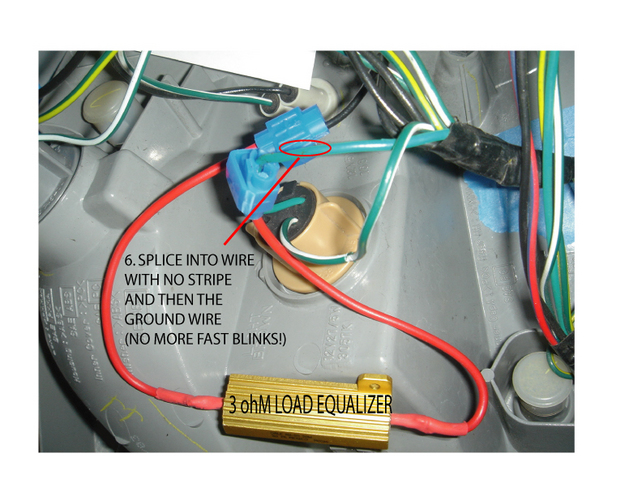
I also ordered 2 3ohm (One on each side covers front and rear) load equalizers as well because I have the fast blinking dilemma you get with LED’s. The load resistor simulates the resistance of the incandescent bulb and restores the turn signal to normal operating function with the led. Here’s the diagram to install these:
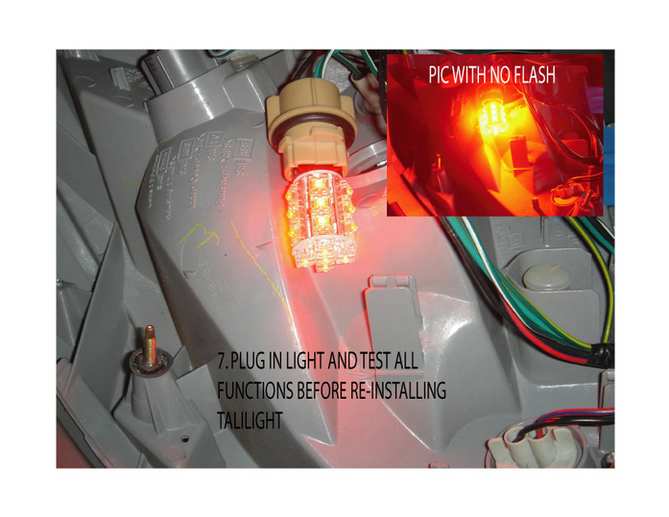
Install
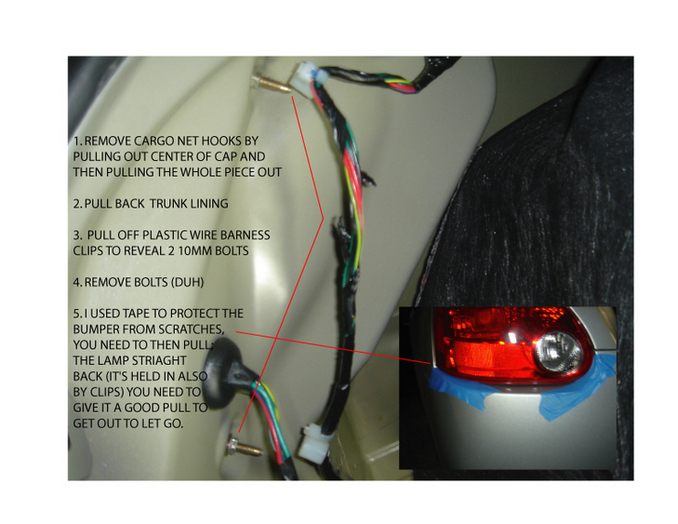
Note: When removing the taillight assembly, you do NOT just pull out the red glass.
The painted frame portion between the glass and trunk lid is a part of the taillight assembly..
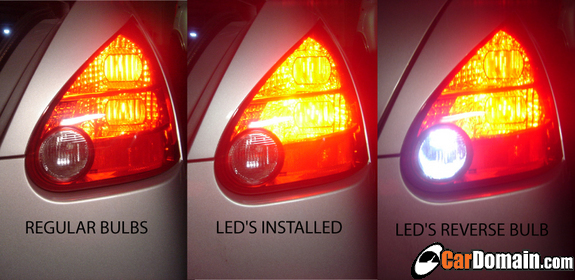
Before and after pics:
As you can see they are much brighter than the stock bulbs and the color in person is a way deeper red than stock. I also replaced the reverse bulbs and side marker bulbs with LED’s.. looks sweet So my entire rear housing is LED I used the matrix LED’s from autolumination.
You can start this project from any part you wish, so you do not have to follow the order I did things. I started in the front, and worked my way to the rear of the car for the most part, although you do have to jump around when you get close to the end.
AS WITH EVERY JOB YOU DO THAT REQUIRES UNPLUGGING ANYTHING ELECTRICAL, DISCONNECT THE NEGATIVE BATTERY TERMINAL BEFORE YOU BEGIN!
Tools Needed:
– Phillips Head Screw Driver
– Flat Head Screw Driver
– Panel Popper Tool
– Small Pick-Tool Set
– ¼” Ratchet
– 10mm Socket
– 12mm Socket
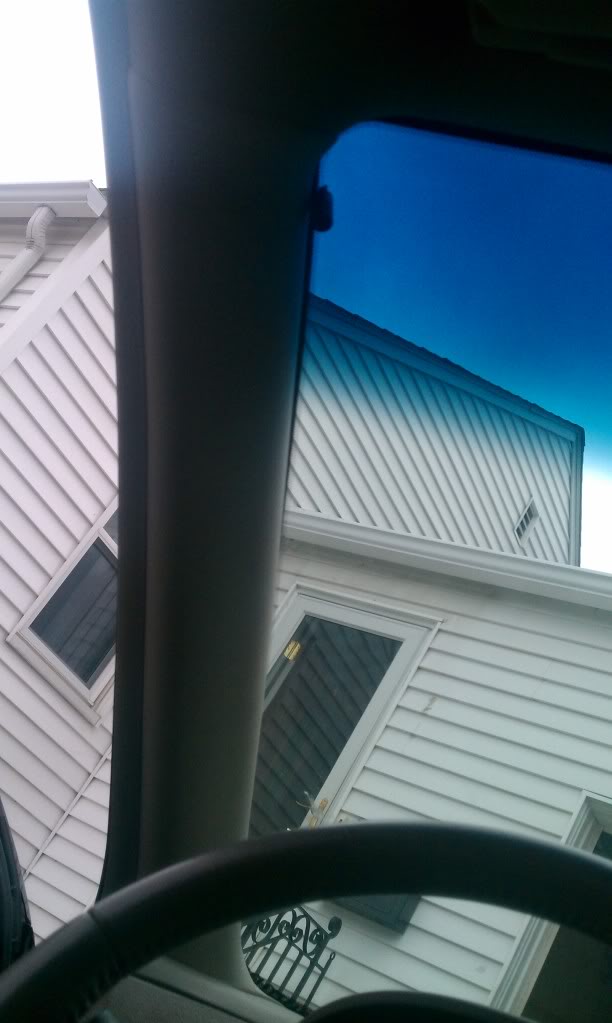
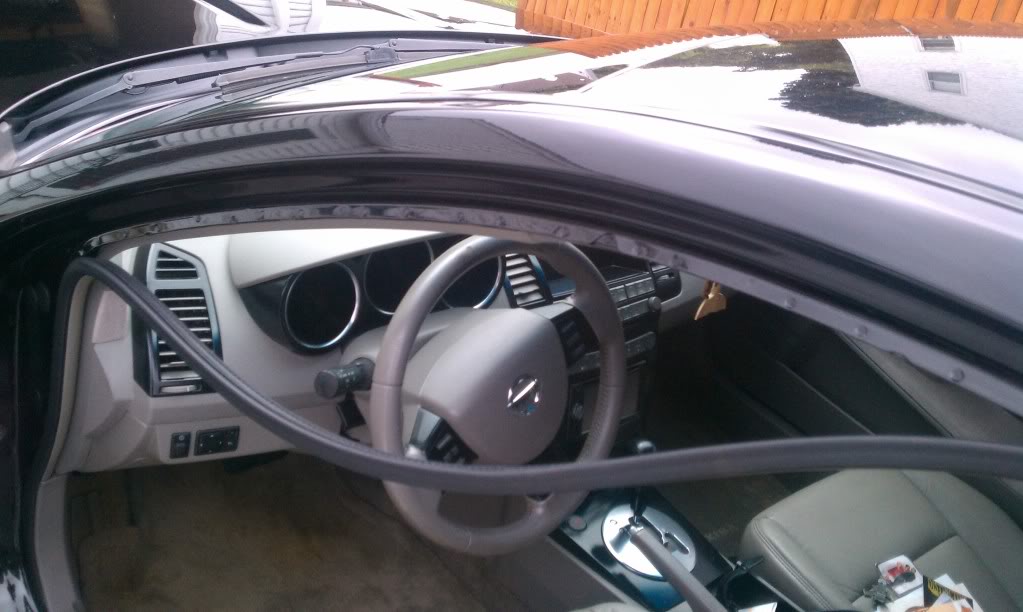
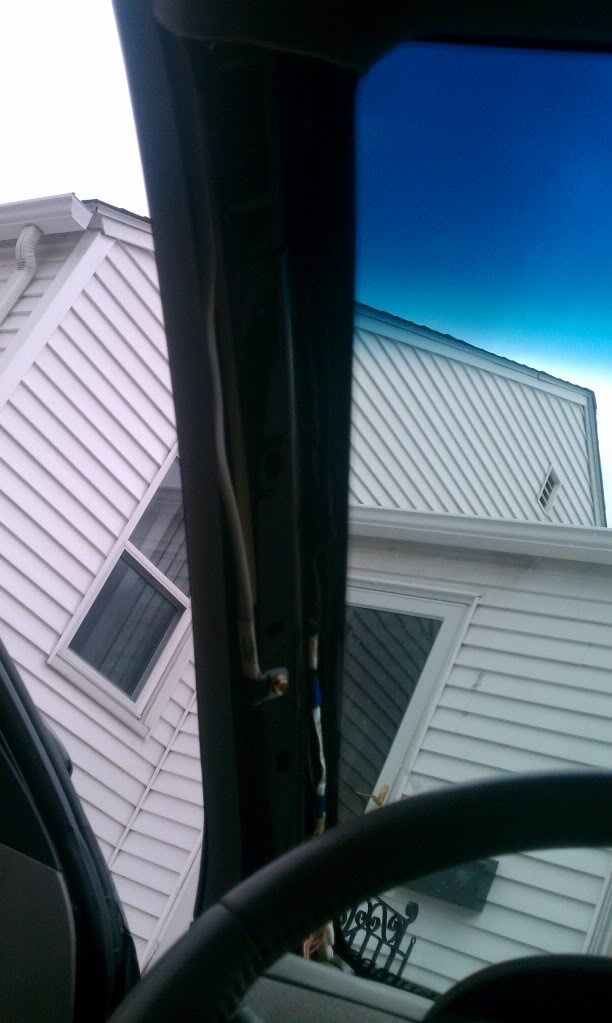
First, I did the A-Pillars:
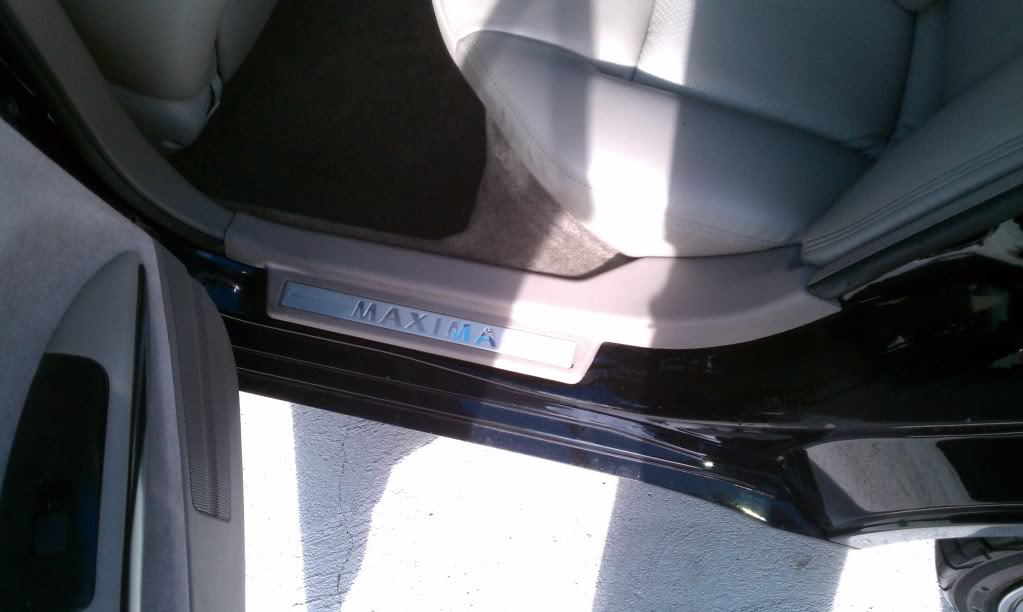
Start by pulling back the rubber molding inside the door jam, giving you better access to the door side of the pillar.
Next, use the panel popper tool to pop the clips out on the pillar, starting at the top, working your way down towards the dash. Start from the outside, then the inside directly across, until you have popped all of the clips out. Once you have all of the clips popped out, you will have to sort of wiggle the bottom out from behind the dash. Repeat for the other side.
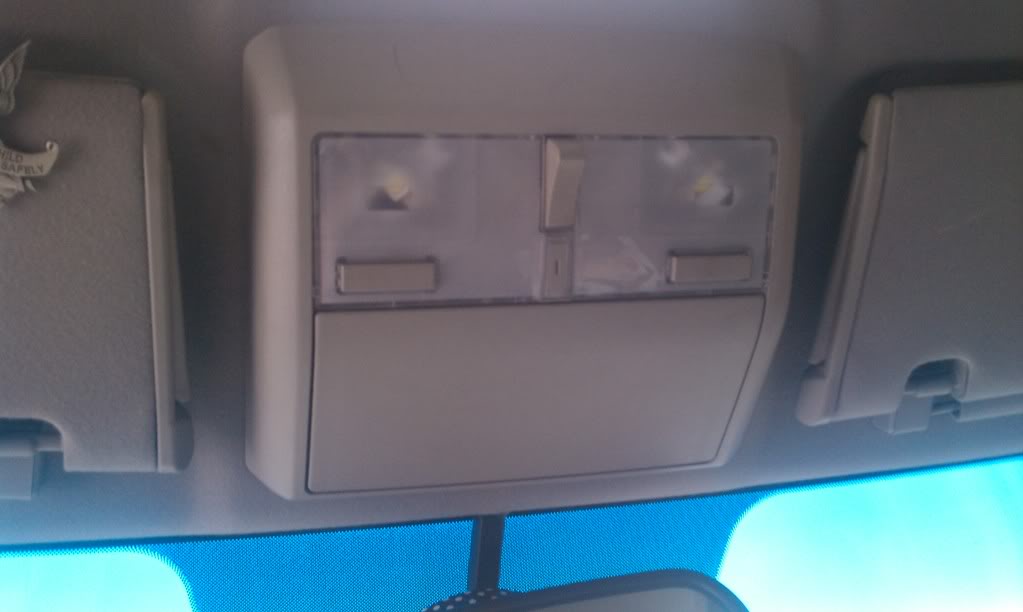
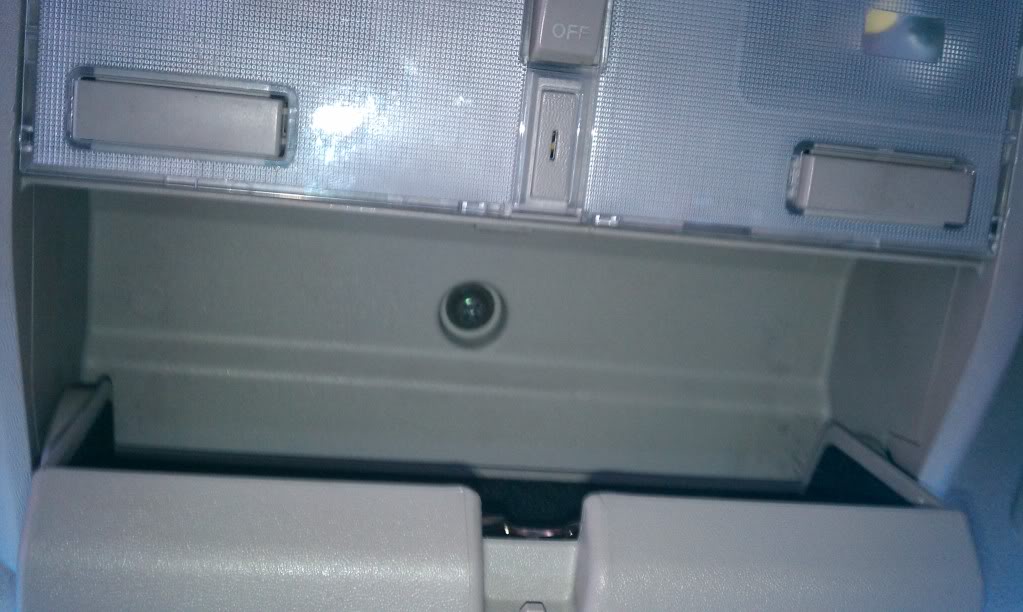
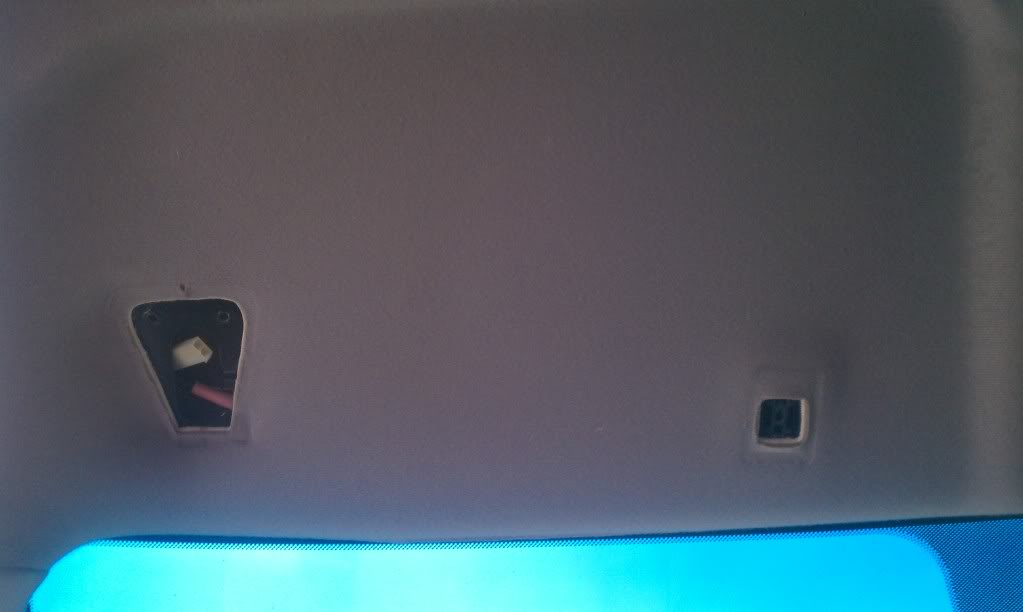
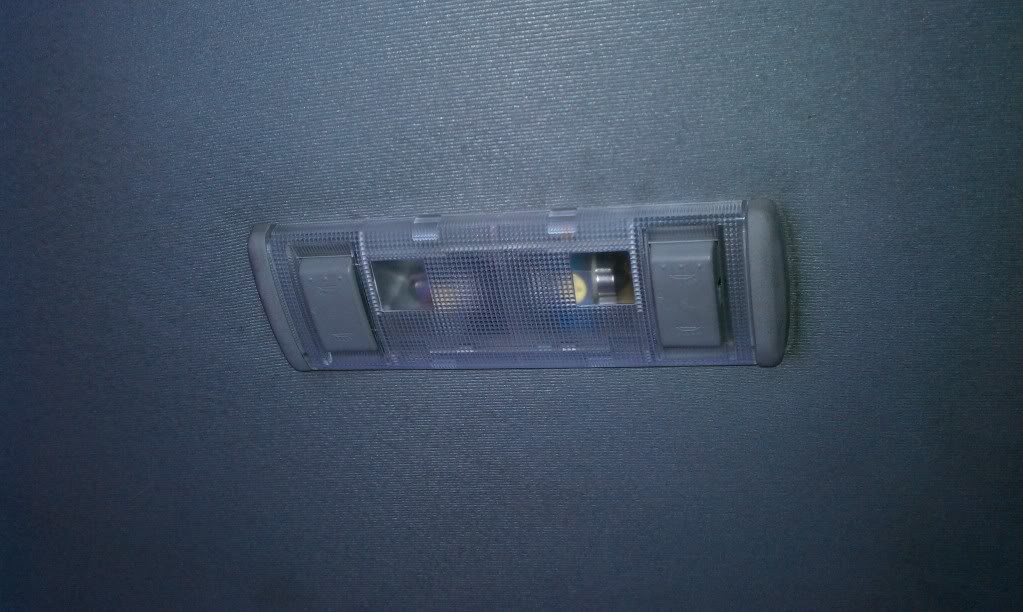
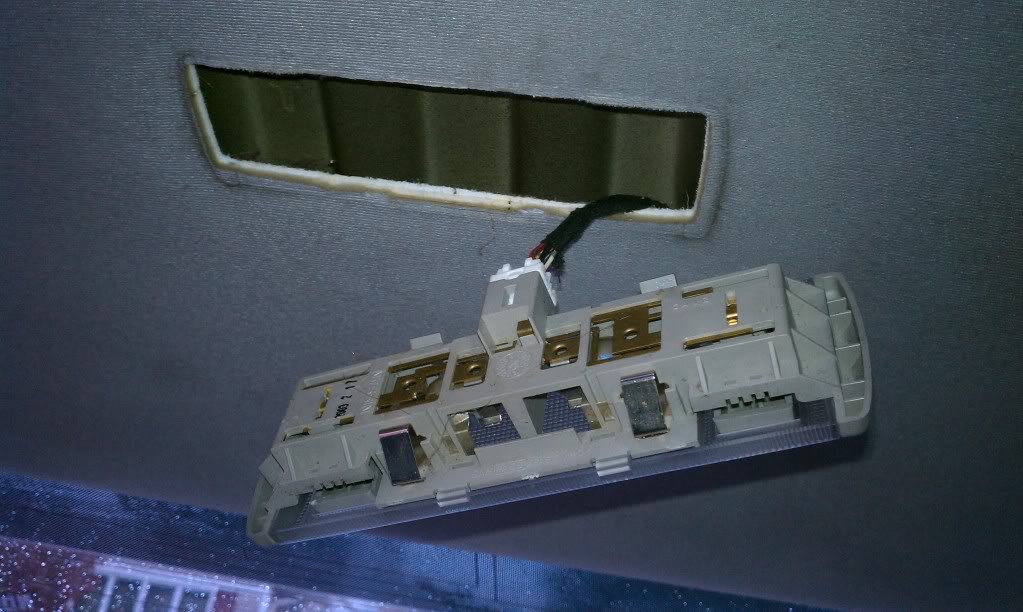
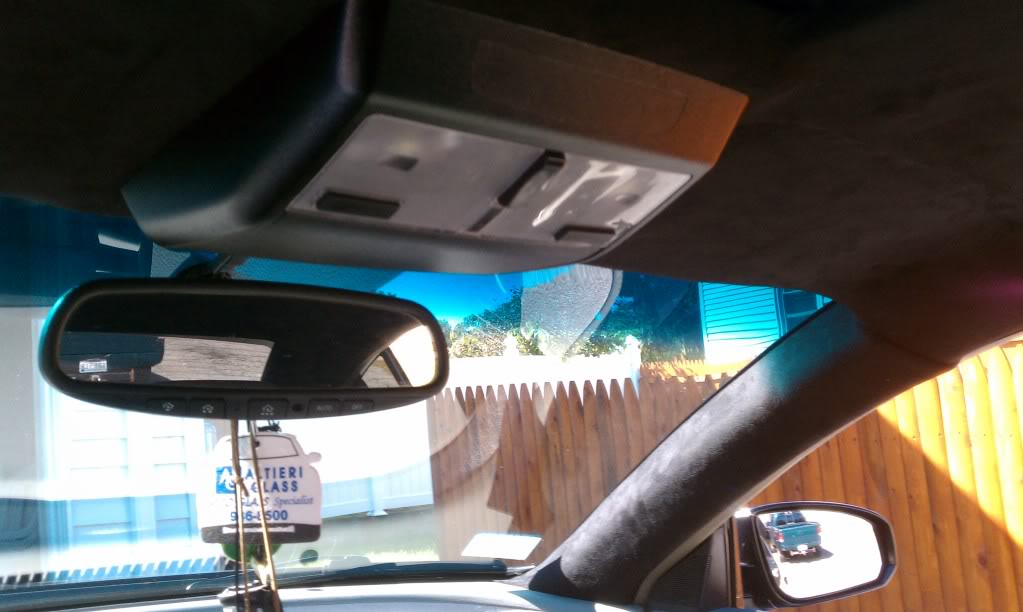
Second, The Dome Light/Sunglass Holder:
Start by opening the sunglass case, revealing the Phillips head screw holding it to the roof.
Remove that screw with your Phillips head. Once the screw is out, start pulling down the piece one corner at a time. It will take some decent strength pulling, so don’t be nervous. Start at the back two corners, then the front two corners. Once you have all four corners out, you will see the harness for the dome lights hanging.
Once you have the piece down, unplug the harness, and move on.
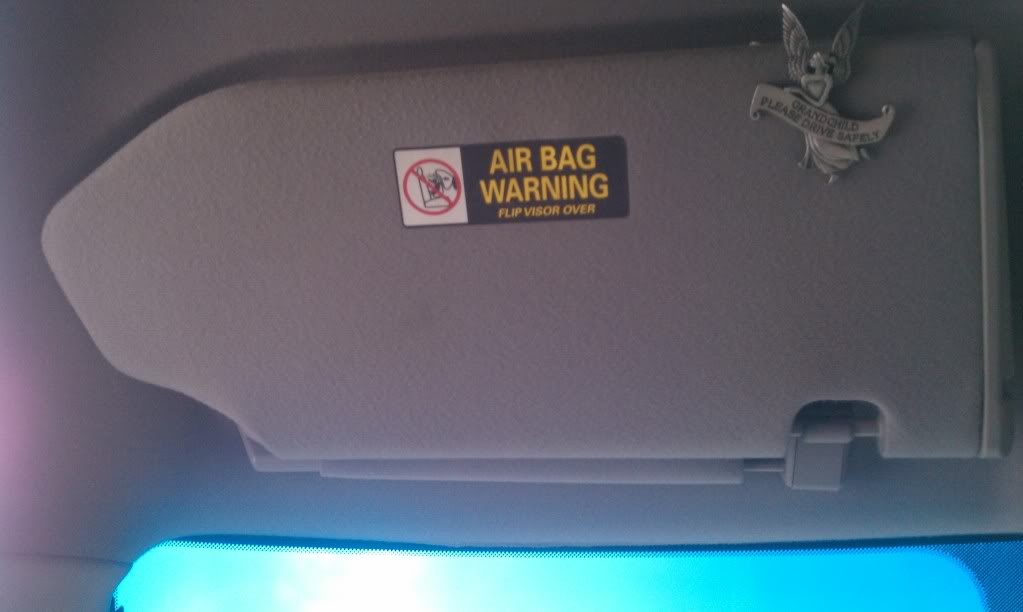
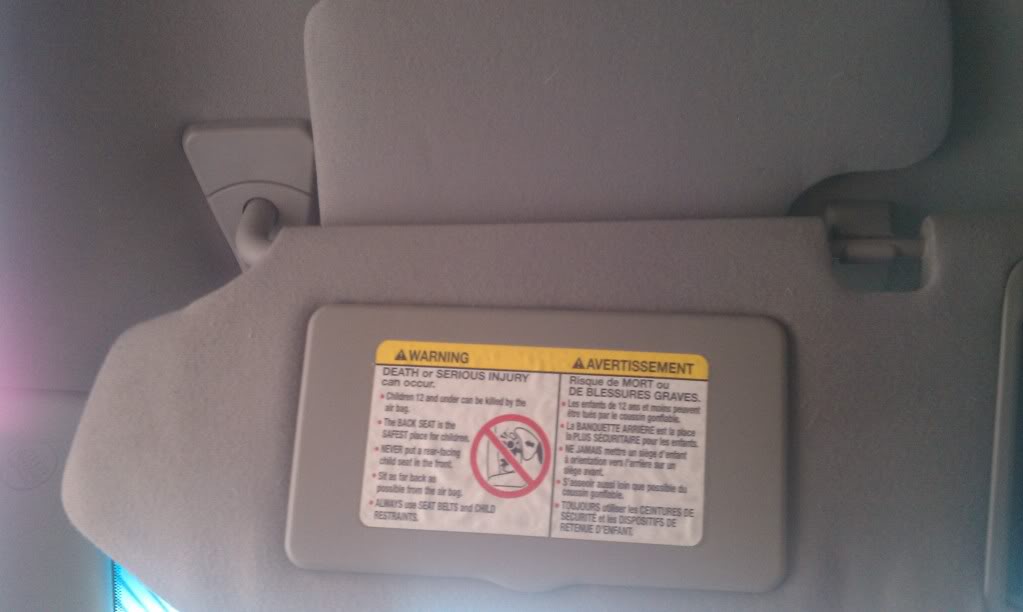
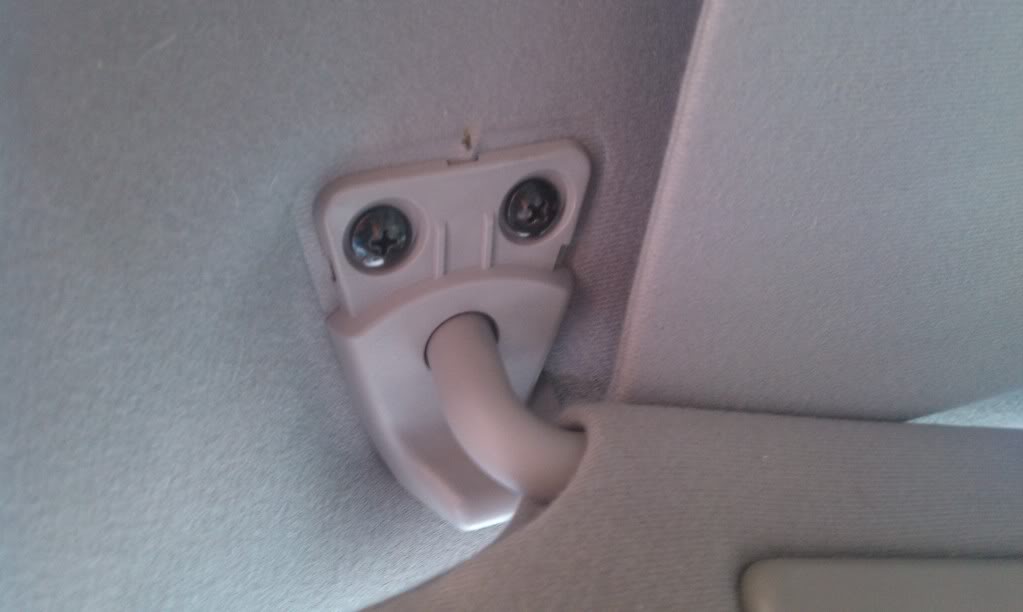
Third, The Visors:
Pull down the visor, giving you access to the mounts on either side.
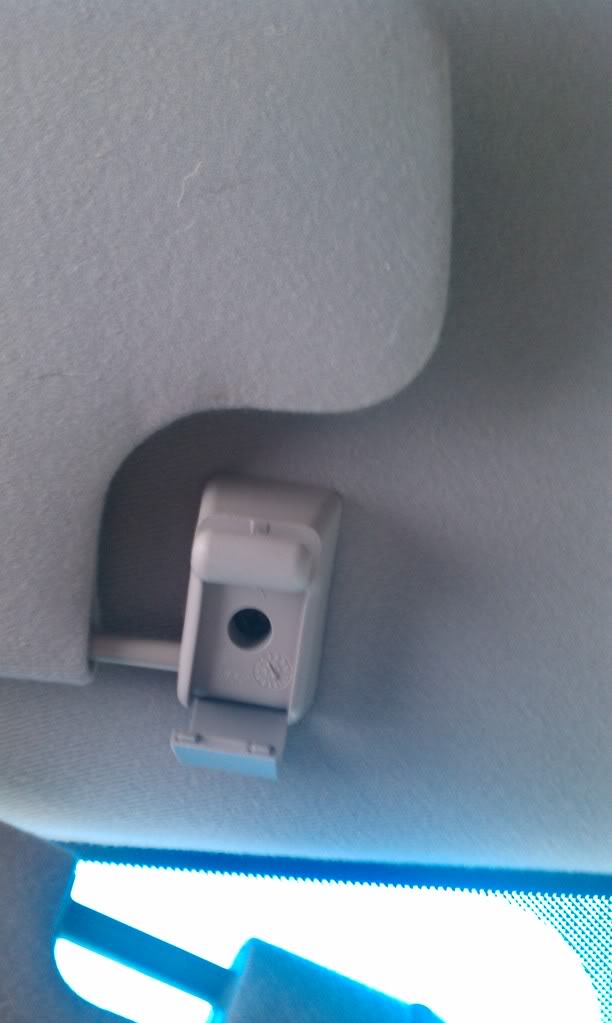
Using one of your pick tools, remove the plastic covers on each mount, revealing two Phillips head screws under the large mount and one Phillips head screw under the small mount.
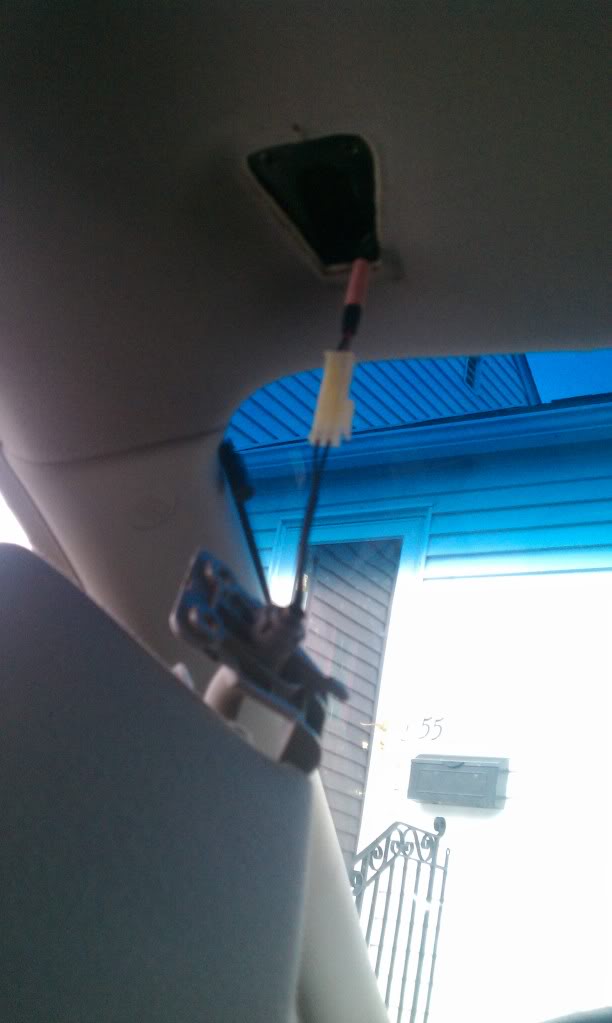
Remove the three screws, and lower the visor, revealing the harness for the vanity lights.
Unplug the harness, and repeat for the other side.
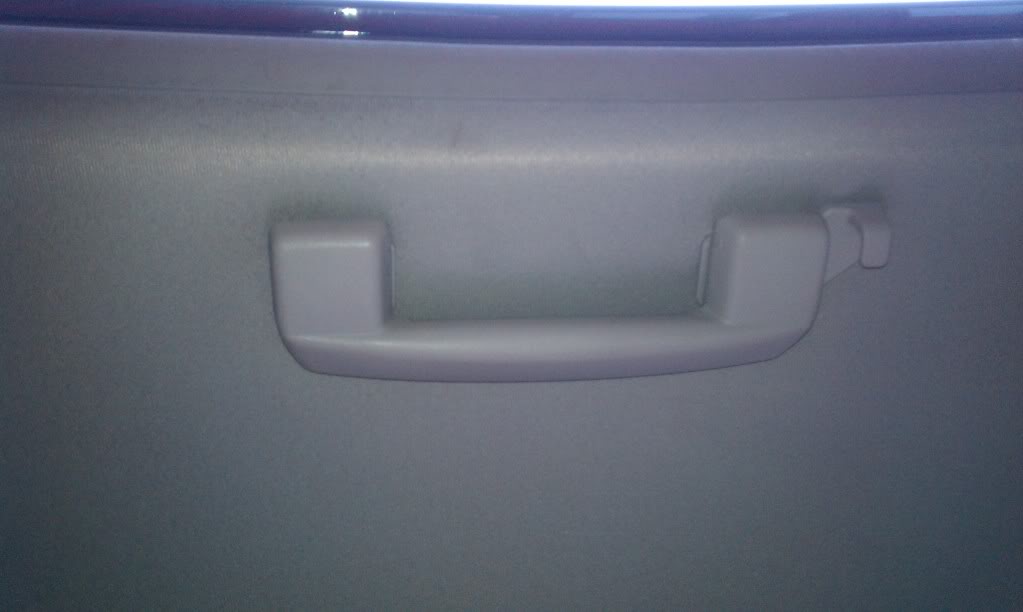
Fourth, I did the “Oh-Shit” Handles:
“Open” the handle by pulling down, and you will see a plastic cover on each end. Use one of your pick tools to remove those plastic covers, revealing two Phillips head screws underneath.
Remove the two screws, and the handle will come right off. Repeat for the other 2 handles.
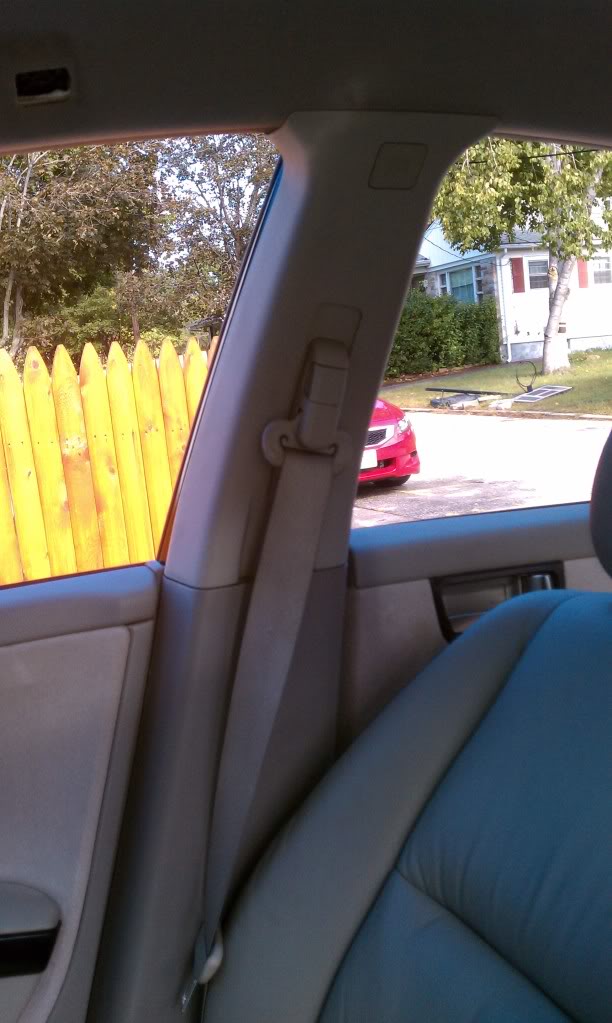
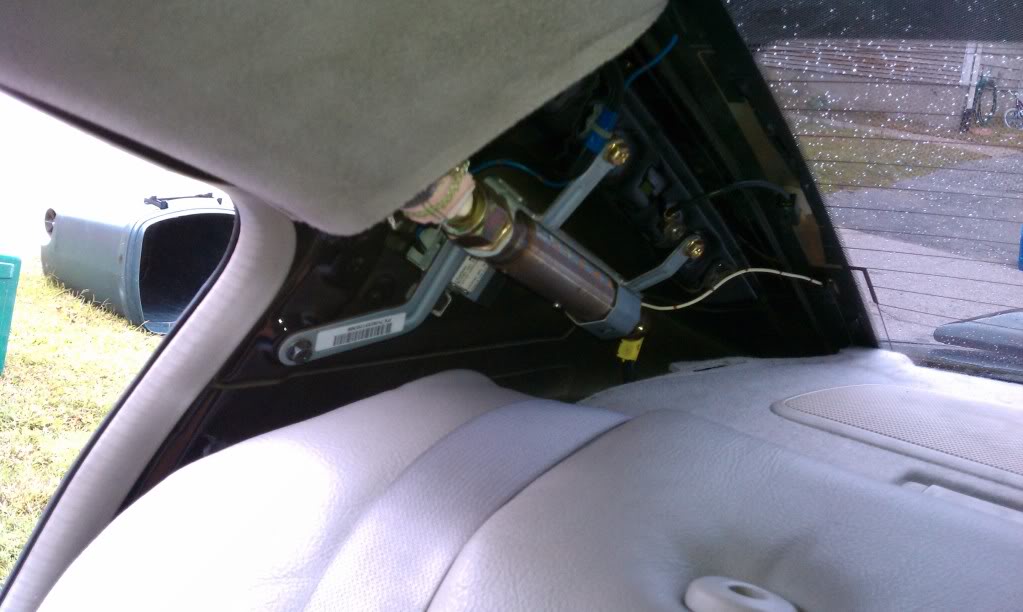
Fifth, I went to the B-Pillars:
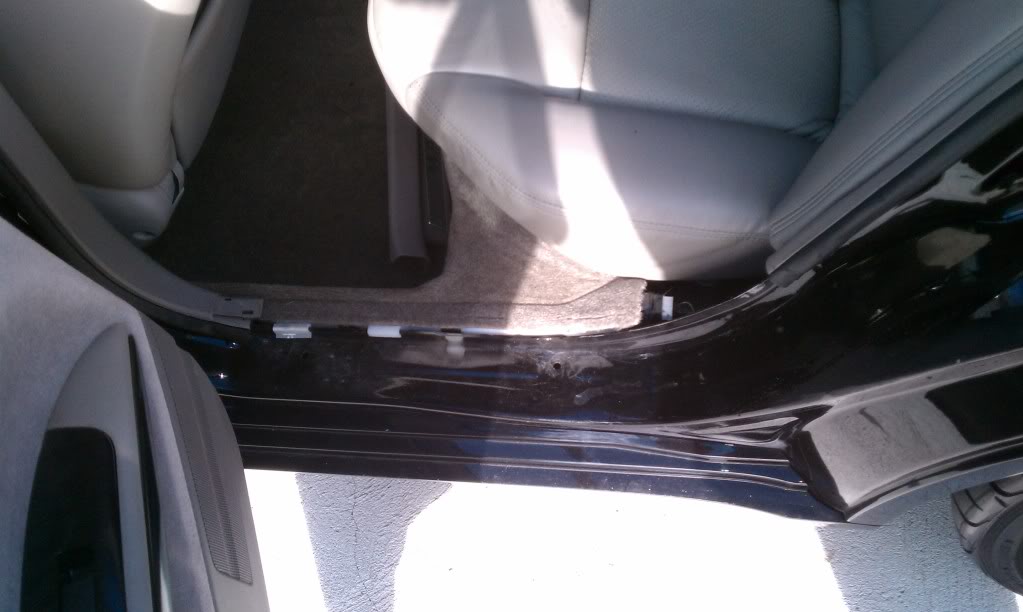
The B-Pillars take a little more work to get out. You could probably sneak them out easier, but I didn’t want to risk snapping a clip or breaking anything, so I took this route. Start by removing the moldings in the bottom of the front door. Just use your panel popping tool or flathead screwdriver to get under it from the outside edge, and pop it up carefully. Do the same for the molding inside the bottom of the rear door.
Next, remove the lower B-Pillar piece, by using the panel popping tool to pop the clips from the bottom up. Once you have all of the clips popped out, remove the piece and set it aside.
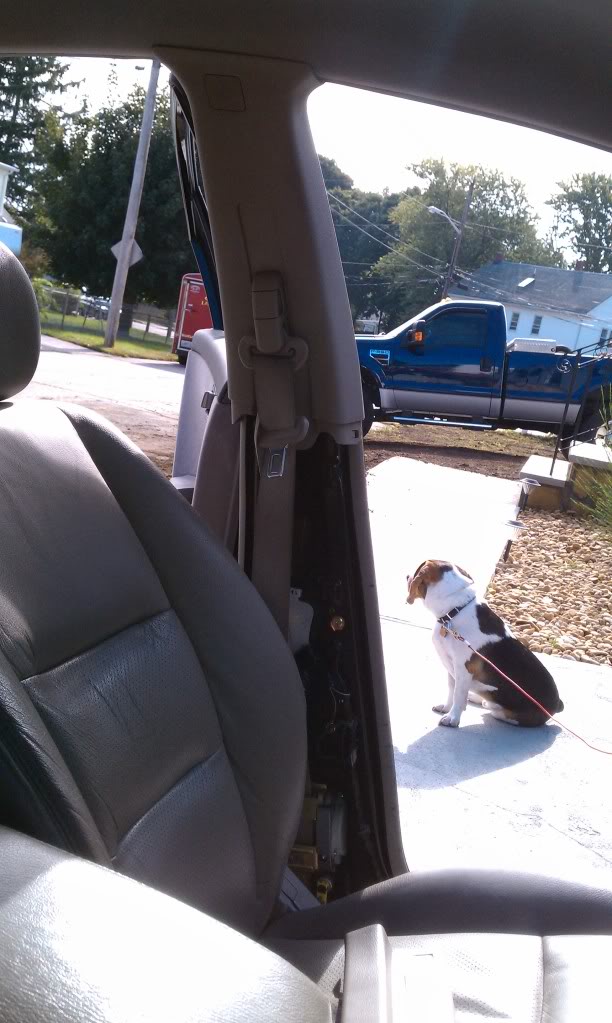
Next, you have to remove the seatbelt from the pillar. If you pull the adjustment tab on the seatbelt in the middle of the pillar, and twist it, it will reveal a 12mm bolt underneath holding the belt on. Remove that bolt, and let the belt hang.
Next, you need to pop the “SRS Airbag” pieces off the pillar with one of your pic tools, revealing a 10MM bolt underneath.
Unbolt that bolt, and you are ready to remove the pillar. Start at the bottom with your panel popping tool, and pop the clips out from bottom up, and the remove the pillar. Repeat for other side.
Now that the pillar is removed, re-attach the seatbelt if you plan on driving the vehicle while the headliner is removed. Also, reinstall the gold bolt that you removed from under the SRS Airbag piece, as that bolt helps hold the airbag in place.
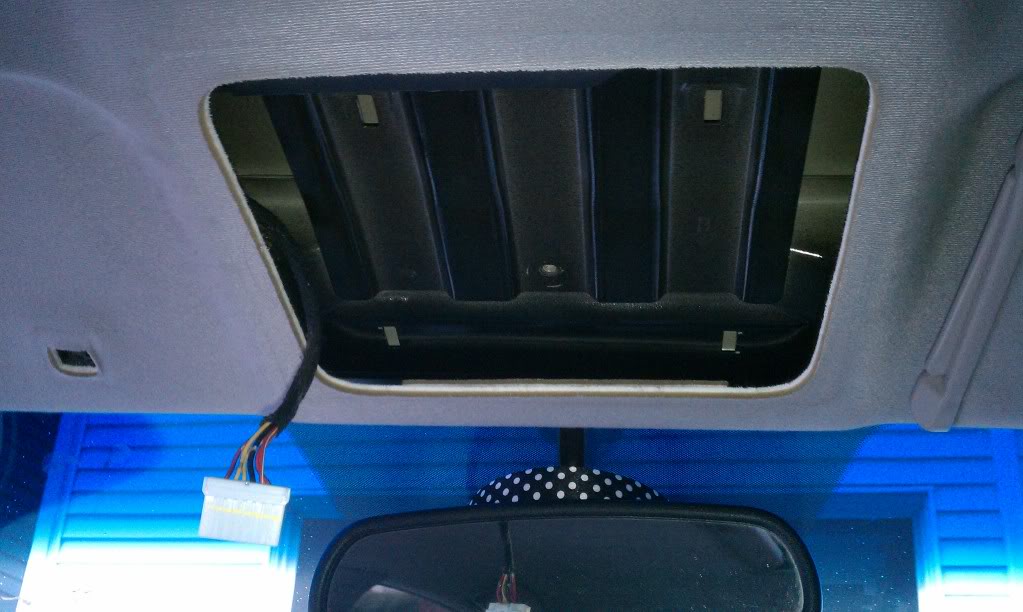
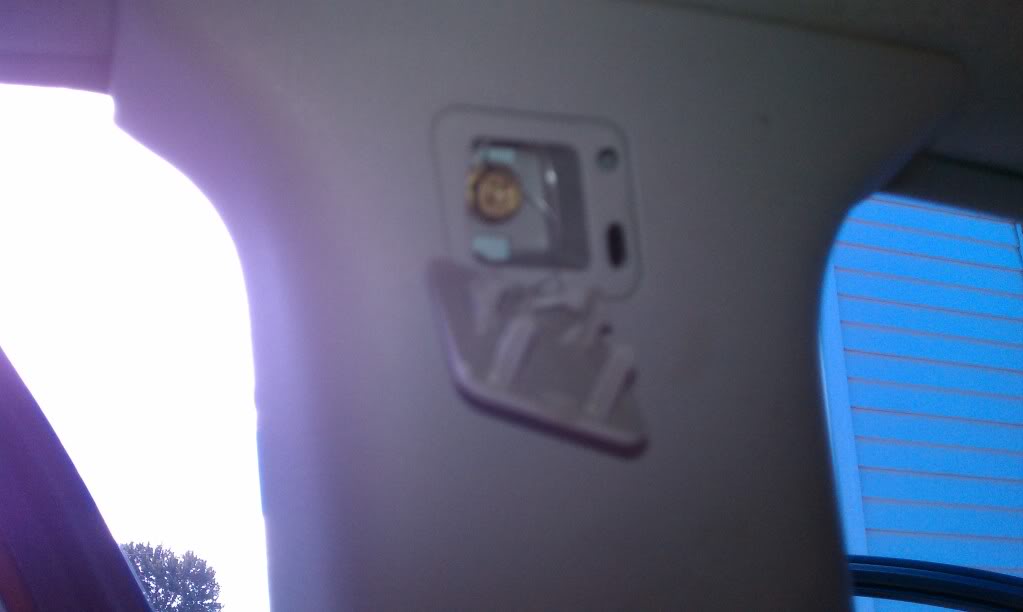
Sixth, The Rear Dome Lights:
Easily pull down on the dome light assembly until it comes down, revealing the harness for the lights.
Unplug the harness, and move on.
Seventh, The C-Pillars:
With your panel popping tool, start popping the clips out at the top of the pillar where it meets the headliner. From there, work your way down to the rear deck, and once you have popped all of the clips out, you will have to play with it and wiggle it out. Repeat for other side.
At this point, you have removed everything holding the headliner up other then the stuff on the headliner itself.
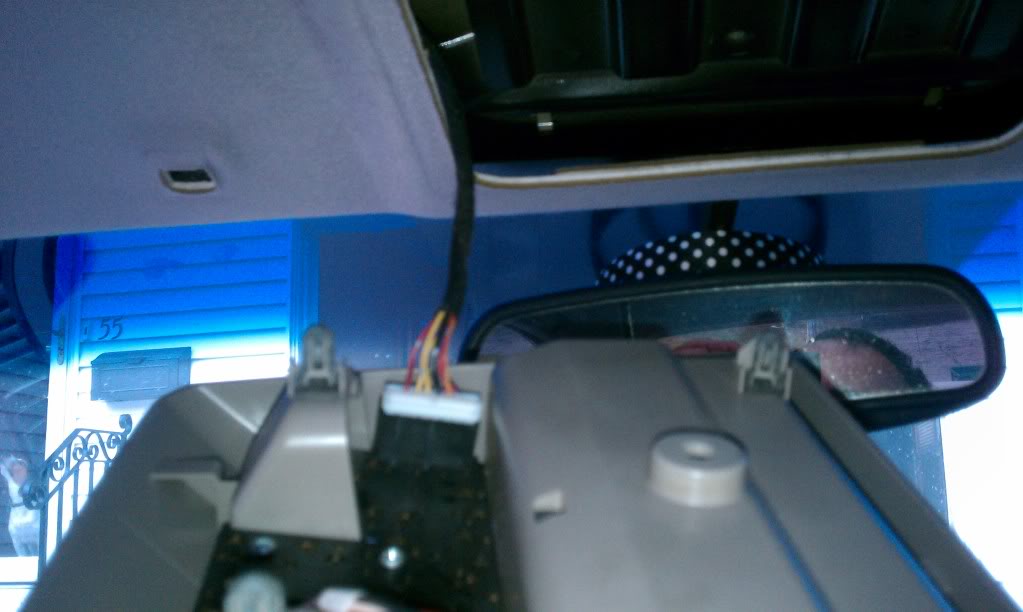
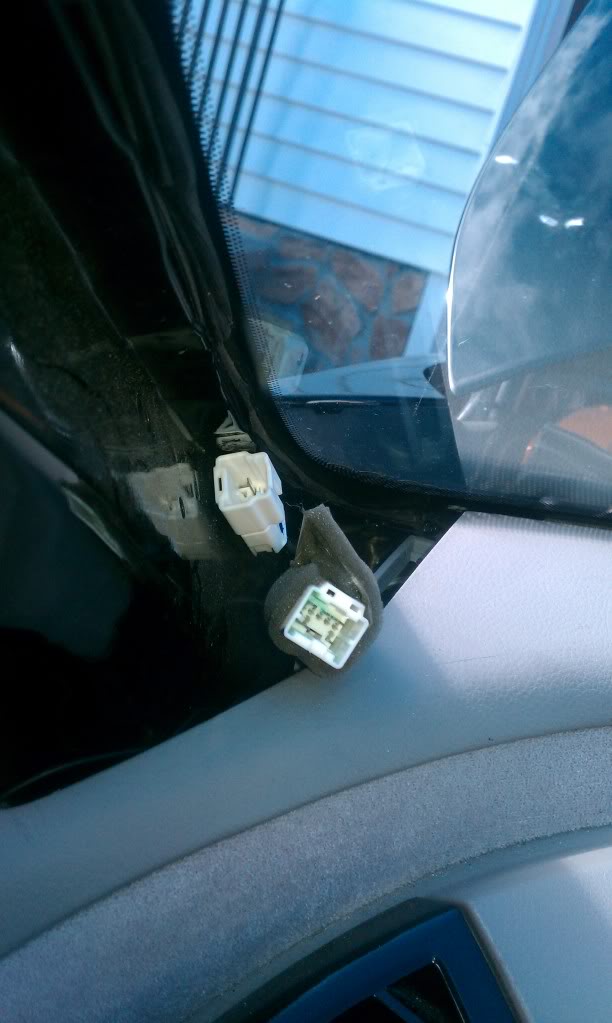
Next, unplug the two harnesses at the bottom of the driver’s side window. These harnesses are what run everything you just removed (vanity lights, dome lights, etc.), they have NOTHING to do with the airbags.
Now that the harnesses are unplugged, remove the three clips holding them to the pillar going up to the headliner.
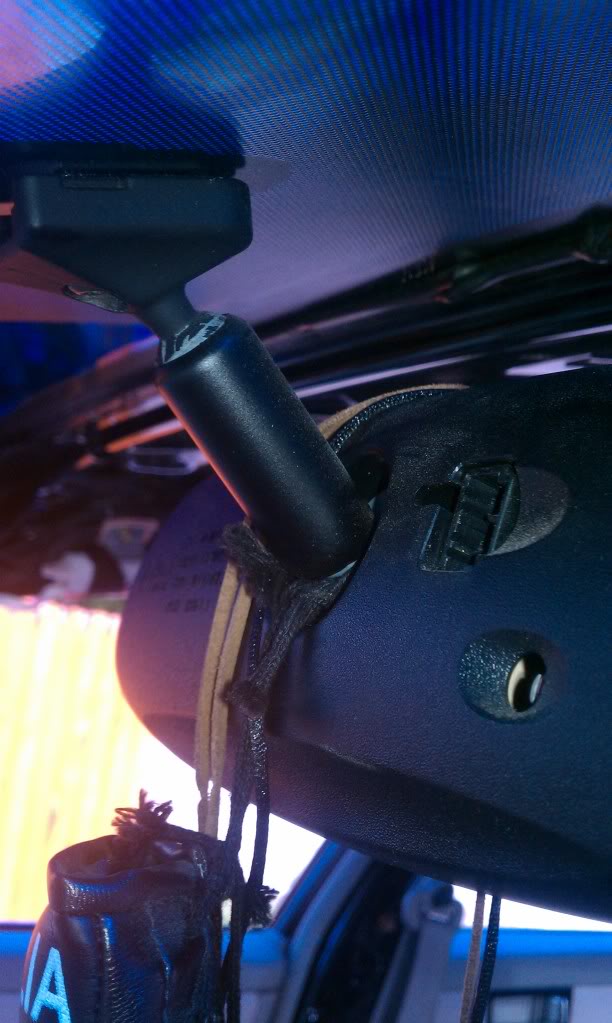
Next, unplug the harness on the rear-view mirror that runs to the harness, and let it hang.
Ok, so now the big drop down starts. Starting at the front doors, slip the headliner out from under the door moldings, so that it starts to hang. Continue on to the back doors as well, so that the headliner is free from front to back on both sides of the vehicle.
Now that that’s done, start to pull down the headliner from the middle of the front windshield. As you see/feel the Velcro release, work your way back, using the sunroof openings as spots to pull down on lightly. Once they are all undone, the headliner should hang, and you should notice a ground wire attached to a screw above where the driver’s side C-Pillar was.
Unbolt that, remove the ground wire, and put the bolt back in. You are now ready to wiggle the headliner assembly out of the vehicle.
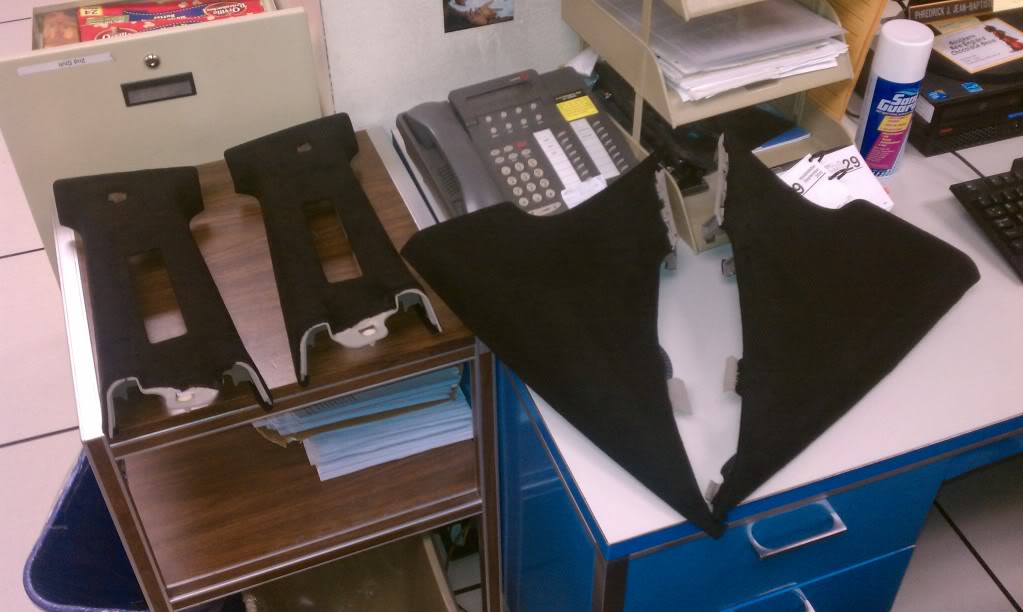
The Skyview Panels:
There is one silver 10mm nut, and one gold 10mm bolt holding on each panel. Remove those two items, and the only thing holding it on will be two white clips and a black metal clip, all of which just pop out. Drop it down, repeat for the other panel, and you are COMPLETELY done with the project. Well, other than putting it all back together.
The Sunroof Panel(Courtesy of DarkDog):
To remove you sunshade (slider panel), after you remove the headliner you will be able to see the rails your panel slides in. Towards the back of those panels, there are two white stops. There is a #1 Phillips screw in the top of each of these stops. Remove those screws, slide the stops out, and you will be able to pull your sunshade the whole way out through the back.
To reinstall, simply reverse the steps.. shade in, stops in place, screws in..
Alot of people dont think very high of doing this mod but if your not one of them and your interested enjoy!
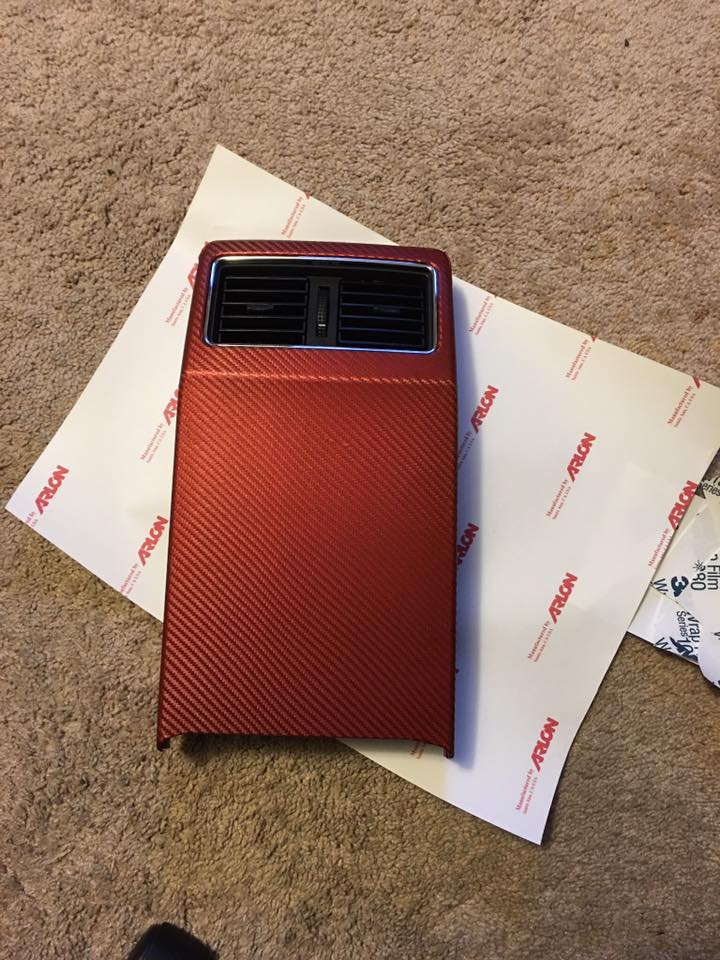
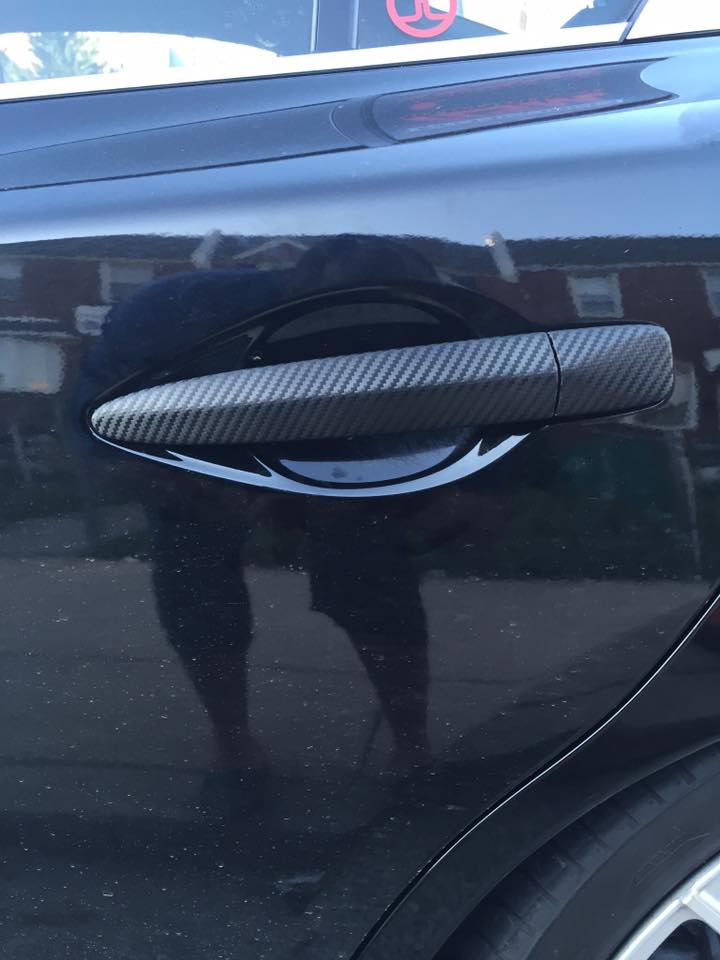
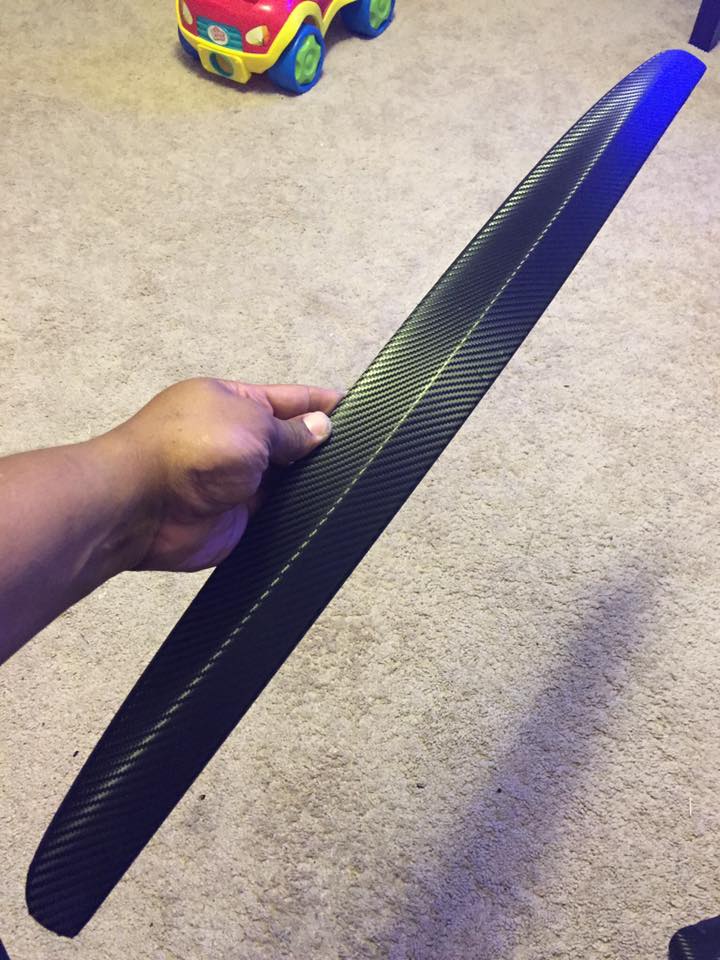
What you need:
( all can be purchased at you local Lowe’s or Home Depot )
1. A razor blade or scissors
2. 3M red double sided heavy duty tape about $9.00
3. 1 9 foot roll of garage door bottom seal about $10.00
Steps:
1. Put the 3M tape on the door seal.
2. Clean the bottom of your bumper where the lip is going.
3. Start removing the tape plastic and attaching your new lip. lol
Below are the most commonly asked questions before starting this conversion. This very similar to getting the hybrid bumper which allows you to retain 2004-2006 Headlights/Hood with 2007/2008 Bumper.
“Where did you get your 2007 bumper?”
I got mine on eBay for about $50.00 on eBay, with about $50.00 in shipping. It was off a wrecked 2007.
“What about the cornering lights in the stock bumper? I would lose those, so does the 2007 have corner lights?”
The stock 2007 does have cornering lights, but they’re in the headlight assembly. The 2007 has the FOGS down below (and we have them in the actual headlight assembly). You’d have to get some aftermarket fogs (the measurement is approximately 3.5″ x 3″, just in case you wanted to go that route. Or you can get 2007 OEM fogs, but those are always so expensive. Oh, and you’ll also have to get FINISH PANELS for the fogs. It’s the little matte plastic “covers” that go “around” the fog lights. It’s simply a cosmetic thing, and I purchased them from www.everythingnissan.com for $9.00 for both (you can also get the fogs there for a cheaper option). So that’s not an issue at all. Here’s what I’m talking about:
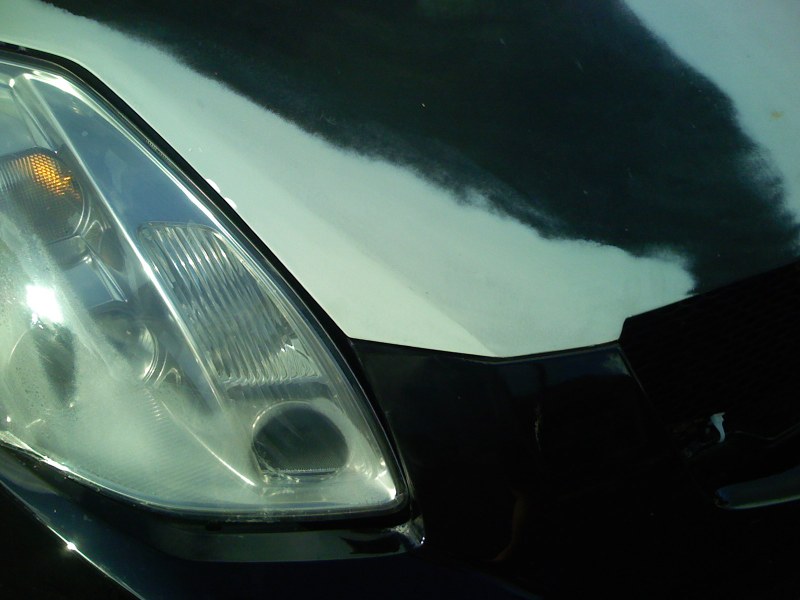
“Do the headlight line up?”
The headlights light up to an extent. There’s a SLIGHT gap under the light, but it’s nothing significant, and aligned properly there’s no gap at all. I’m still working on that. It’s nothing big though, and if you LIFT AND PUSH the bumper into place simultaneously, it should click in properly.
“What about the hood latch?”
This fits perfectly. No issues at all.
“How much did everything cost?”
– bumper – $100.00 (with shipping)
– contours around lights – $150.00
– paint bumper – $250.00 – paint hood – $250.00 – Finish panels – $9.00 – New 07 grille – $200.00 – 07 fog lights – varies. $70.00 – $300.00
“What needs to be modified on the hood?”
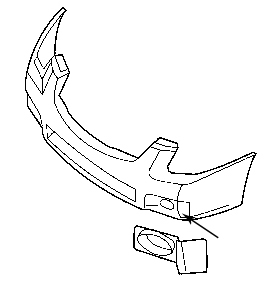
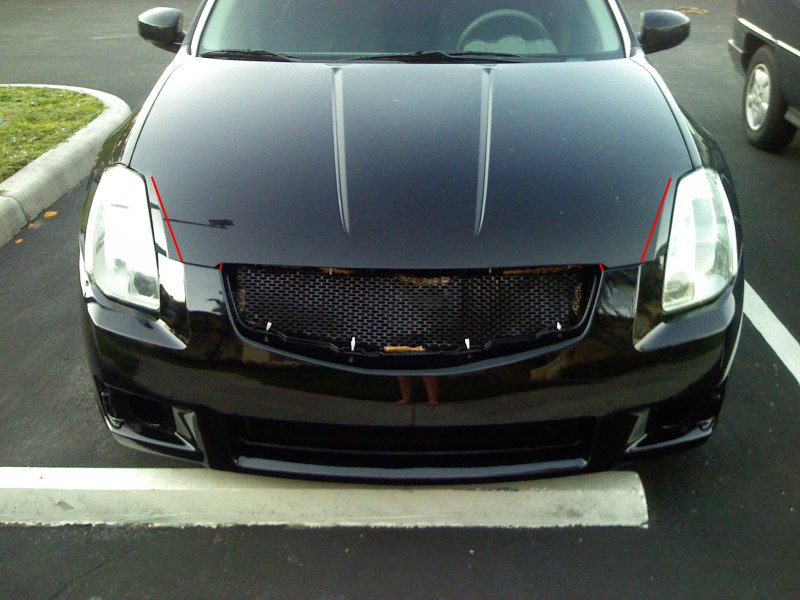
The contour lines around the lights are different from the ’07 lines. Those need to be shaped to the right alignment. The hood needs to be extended a bit in the grille opening to line up properly. I actually just added a little bondo where the grille contours need to be lined-up, so that wasn’t a big deal. Oh, and there’s a slight overlap near the lights that needs to either be shaved or banged down. My bodyshop guy banged them down since the hood is aluminum. Keep in mind, after the hood work, you’re going to have to get the hood repainted. The red lines indicate where a body shop needs to bang and/or bondo to the right shape:
Contours:
Bondo in grille opening:
Reshape passenger headlamp:
Reshape driver headlamp:
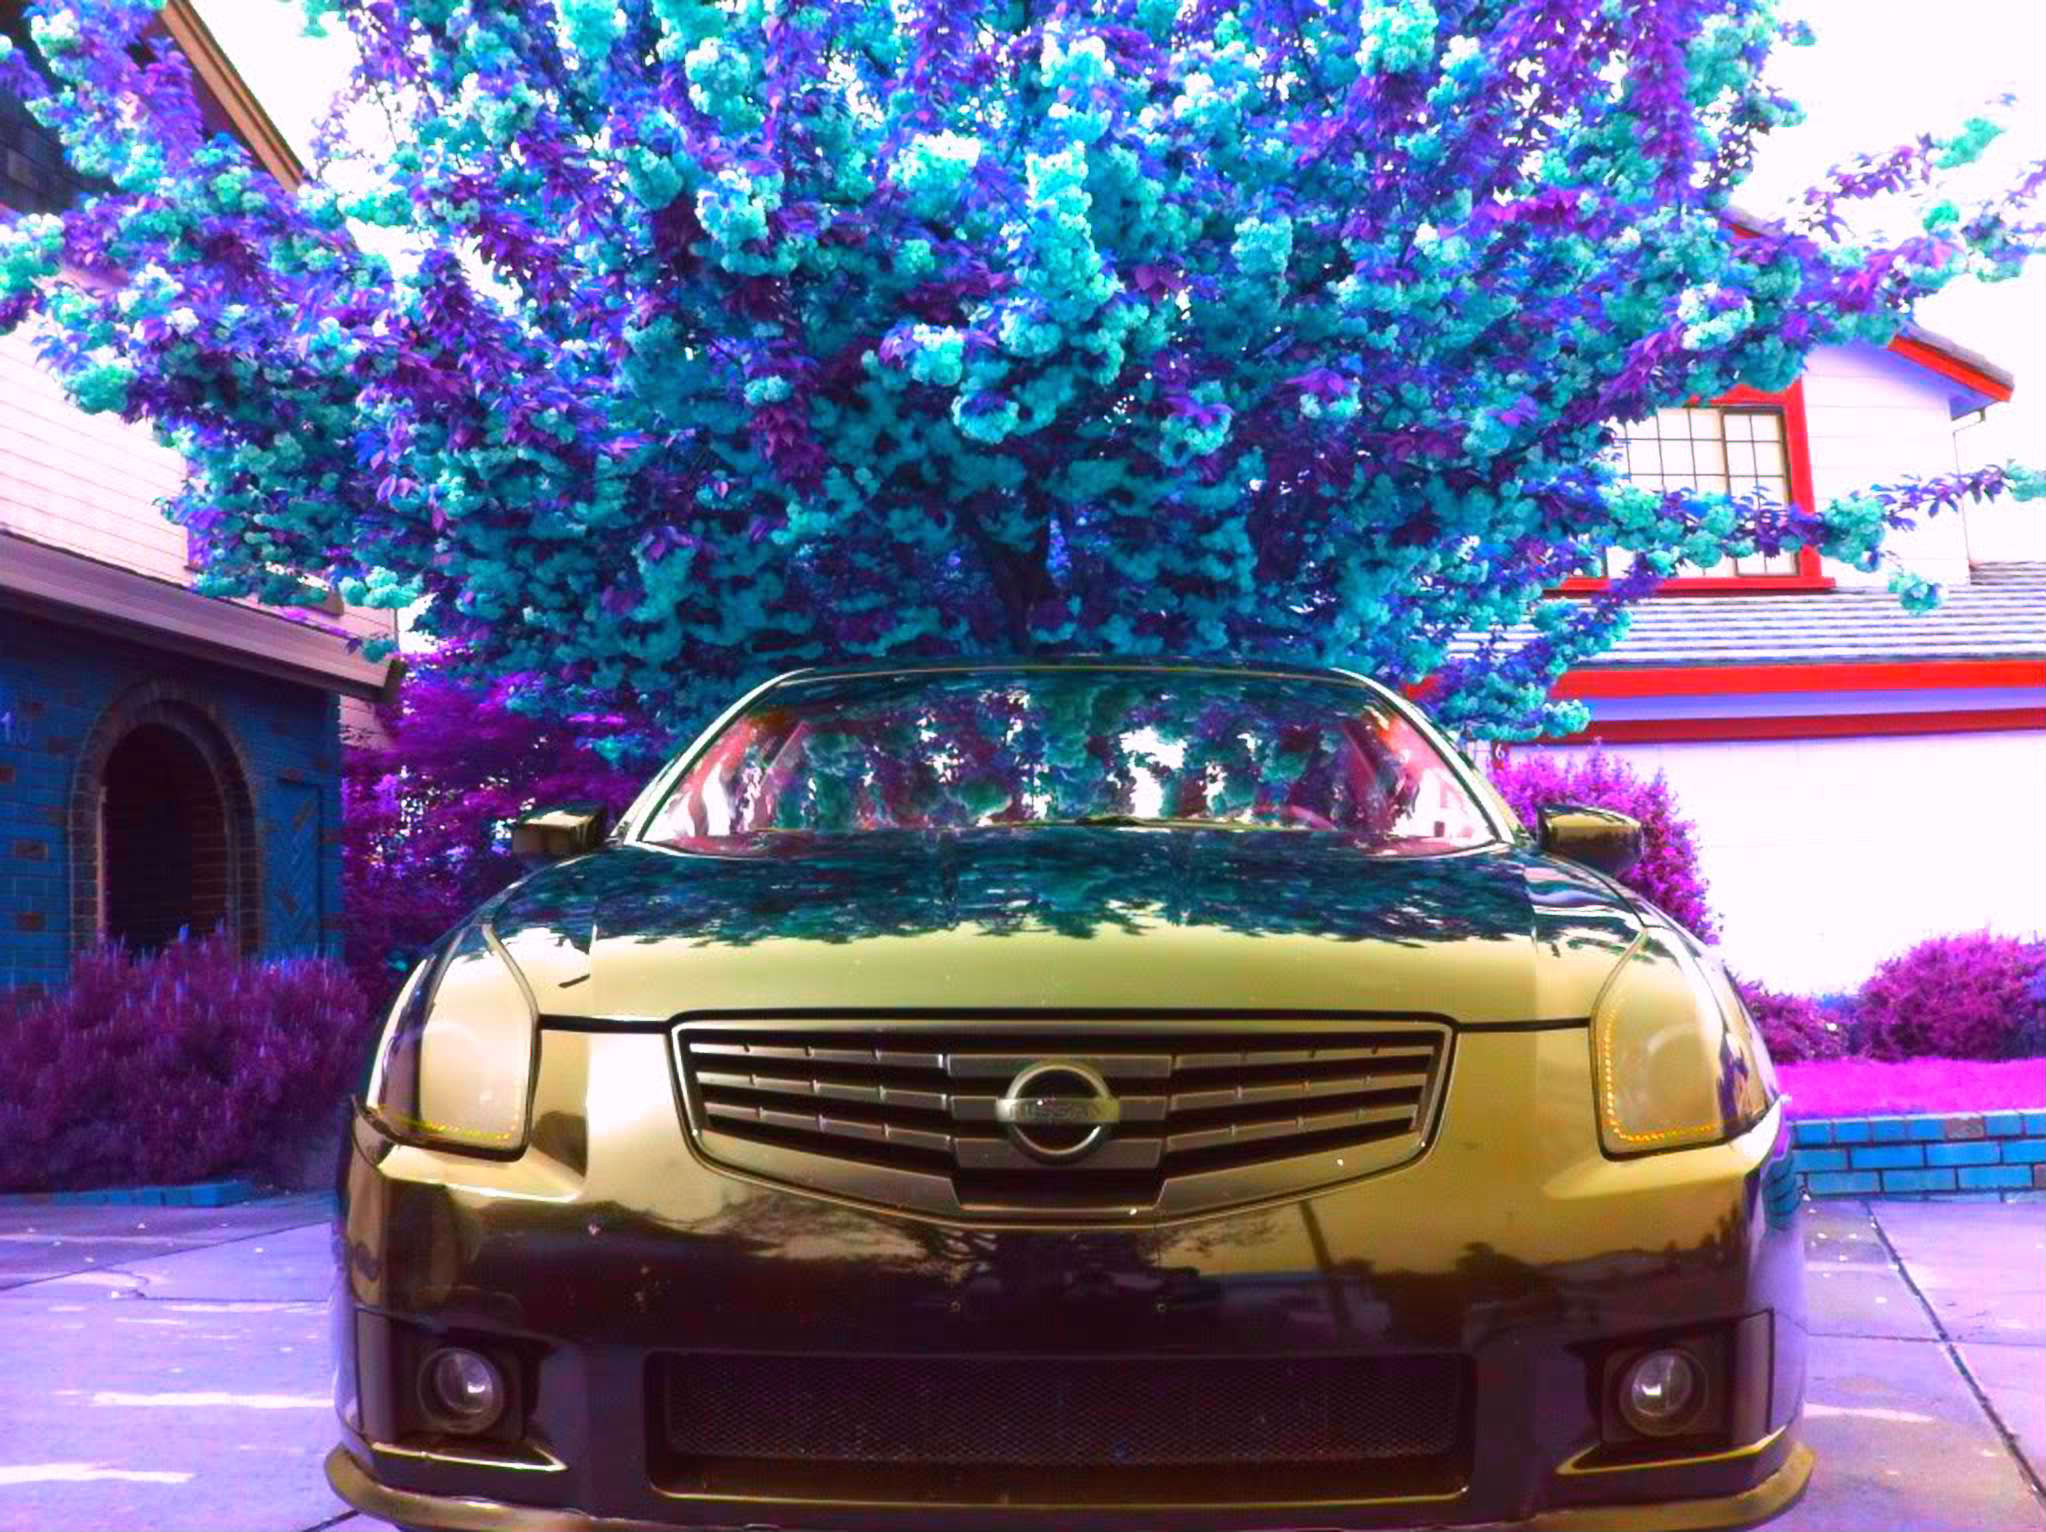
Complete re-contouring:
Finished product:
“What did you ever do with the cornering light assembly and function?”
I have not done anything with the cornering assembly as of yet. I’m still in the market for some fog lights, and Luke said he’d help me wire them to be functional as fogs, not corners.
“Could you cop the 07 hood as well, instead of messing with the contours?”
Well, it is possible, but then you’d have to cop the ’07 lights as well. OR modify THAT hood to fit the 04-06 lights. Either way a hood would have to be modified. At least as far as I can see. And if you did get the 07 lights, the quarter panels would have to be remolded too. I believe I went the cheapest and most effective route. Bumper Removal/Installation
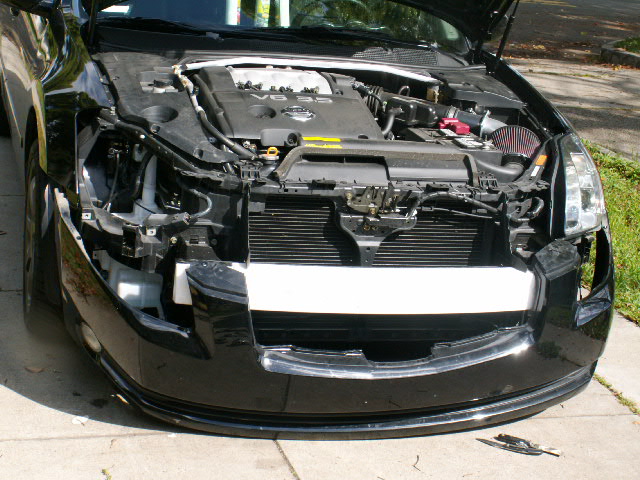
The first step is to remove the grill. The plastic fasteners are easy to remove. If you have two small flat blade screwdrivers, like I didn’t have, you put each one on one side of the center part and pull it up. Then grab it and pull the whole fastener out. Put the grill aside somewhere where you won’t step on it. Now its time to remove the whole front bumper cover. You will need a Phillips screwdriver and your small flat blades. Start on either side of the cover. First you need to have access to some of the fasteners and screws. These are hidden behind the fender well plastic covers. Remove the fasteners that hold the fender well plastic. Remove enough of them that you can pry it open to get your arm in the TIGHT space to remove the screws. Once you get the fender well trim open, there are two screws that hold the cover on. They are hard to get at, but try. Unscrew the two screws. Then go underneath and see many fasteners that hold the underside plastic tray to the bumper cover. These were harder for me to remove. But I got them undone. Now do the other side. The front cover drops down exposing the lights. These are held on by 10 mm screws. Find them and remove them. Here is a pic of the car with cover removed and one headlight out:
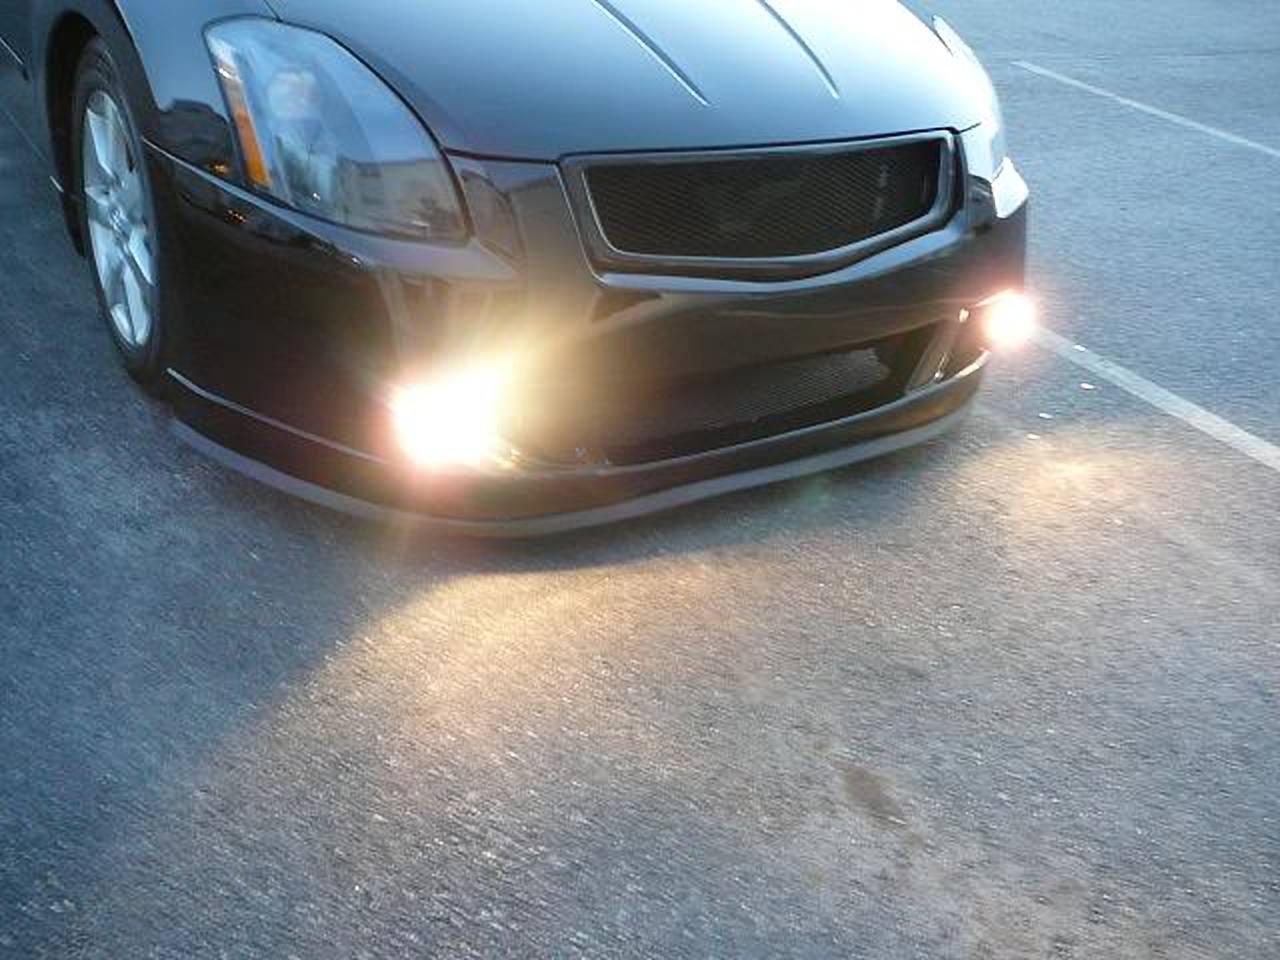
Perform the reverse of removal for the 07 bumper cover and voila! Fog Light Rewire/Conversion
This section is for those planning to install OEM fog lights while controlling them using the factory fog light switch. After the 04-06 bumper is removed uninstall the headlights which are removable by 5-10mm bolts around the corners of the light. Once the light is removed perform the following rewire to allow the headlight fog lights to transform into an additional parking light circuit and for the bumper fog lights to now be the switch controlled fog light.


 Adjust the steering wheel all the way out and down. Inserting flat-head screwdriver in between two plastic pieces on the right side of the steering wheel where the windshield wiper knob is. Carefully pop apart plastic housing surrounding steering wheel and set aside.
 Remove plastic covering over gauges. Using flat-head screwdriver or thin plastic, slide under top middle plastic piece and slowly lift up to pop out. Then slide under each piece on left and right, pop out front part first, then lift and pull towards you.

 On top of gauge cluster is one single screw, remove this:
 Under gauge cluster are two hidden screws, unscrew both but don’t remove, it’s easier to pull out gauge cluster and screws will come out with it, then you can take them out.

.jpg)


")