Tag

Interior, Exterior & Lighting

Browsing

Member Credit: Ghozt

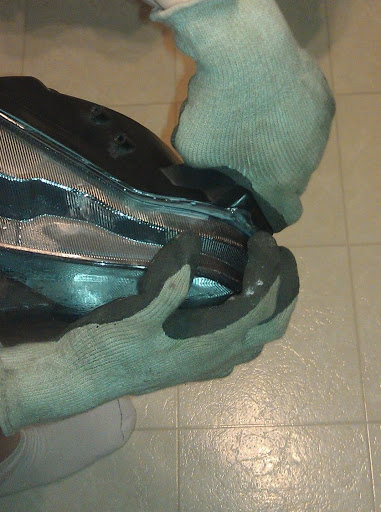
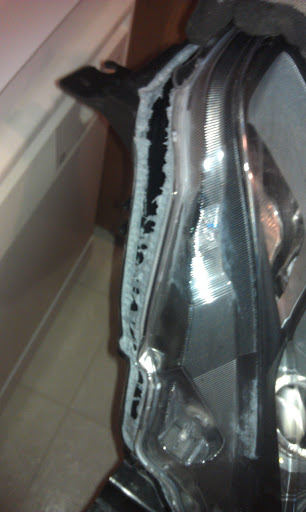
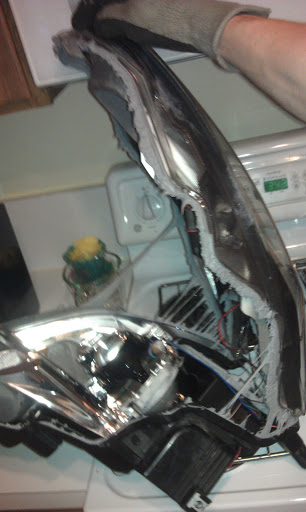
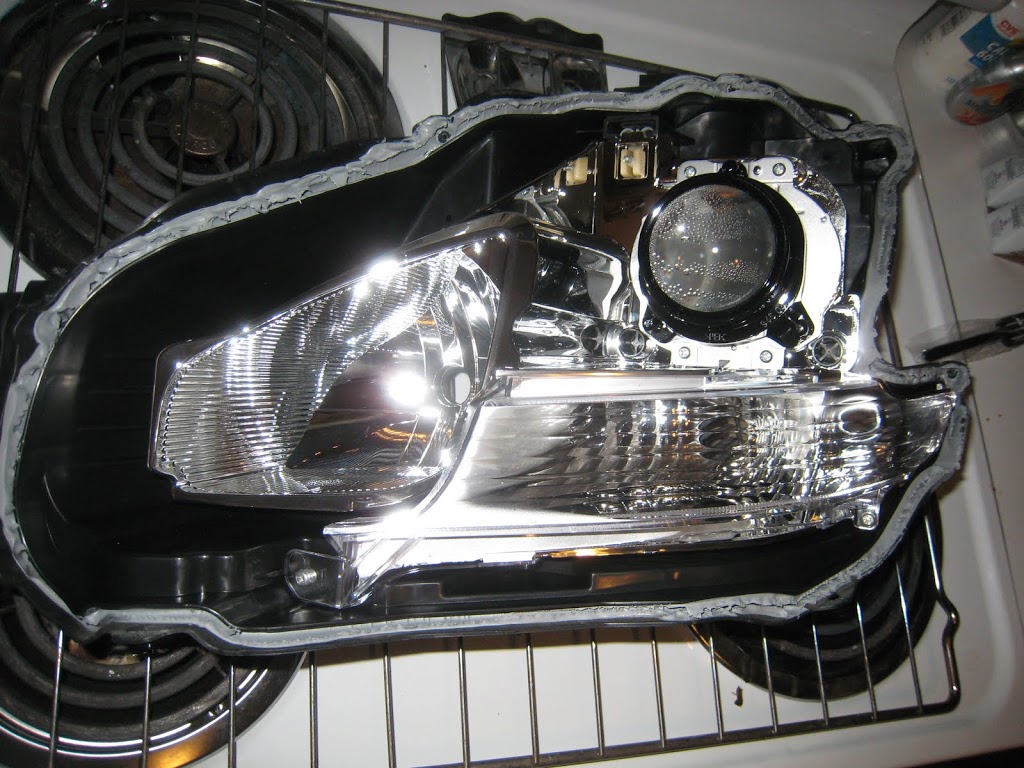
Please refer to the DIY on how to bake and open your headlights first, you will need to get the housing pieces out of the headlight to paint them. The only way to do that is to bake them.

For proper painting technique refer to Youtube for some great DIY painting videos. Simply put, you want to keep the spray can always moving side to side in clean even sweeps going back and forth. Never hold it still and concentrate on one area, you will get runs and drips. Don’t worry about getting complete coverage in one coat that is what multiple coats are for. It also helps to have a little paint area set up where the wind can’t blow your spray onto things you don’t want paint on. If you paint inside make sure it is well ventilated and wear a mask regardless.

Tools needed:
1500 grit wet/dry sandpaper, Small bowl of soapy water, Phillips screwdriver, Rubbing alcohol, Microfiber rag, Duplicolor Adhesion Promoter, Duplicolor High Temp paint in the color(s) you want (or Krylon Fusion as many like to use), VHT nightshades (if you want to tint your amber reflector), some kind of blocks you can set things on to paint them

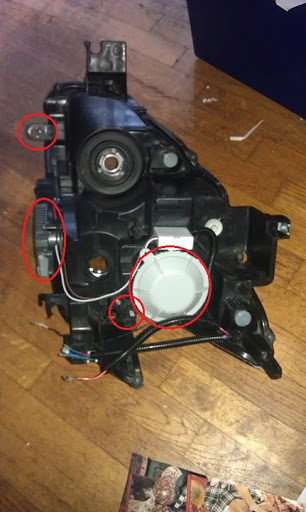
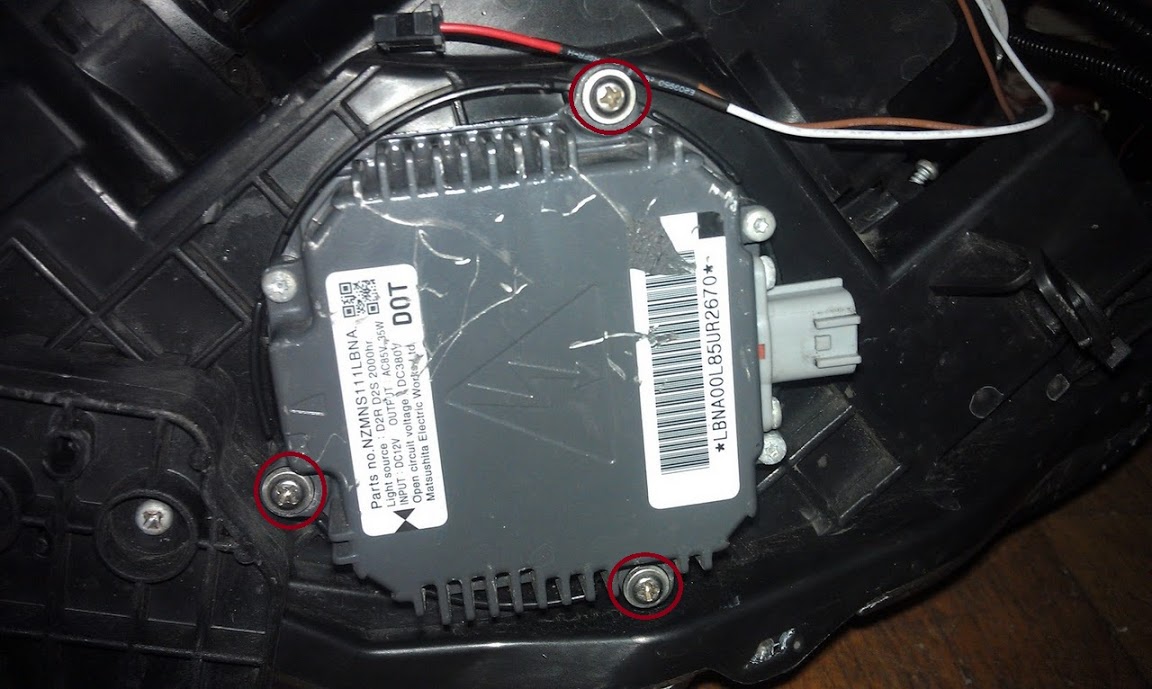
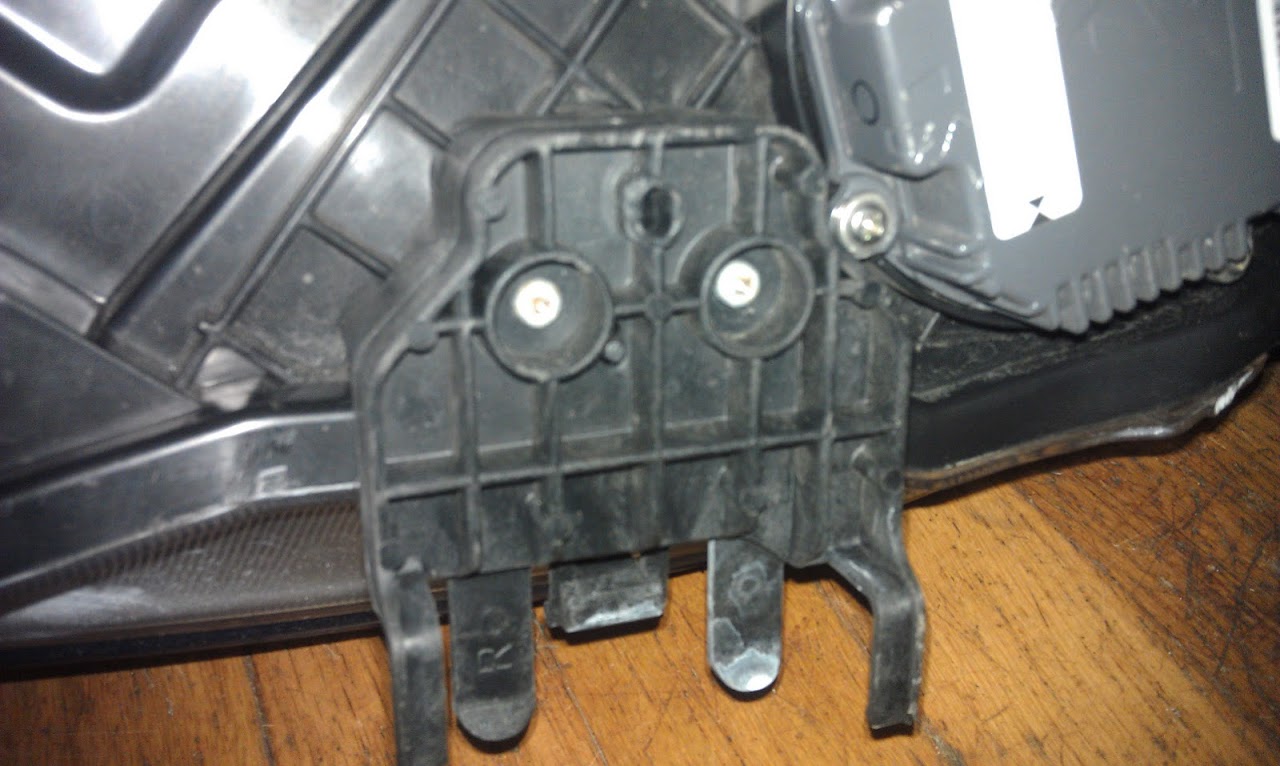
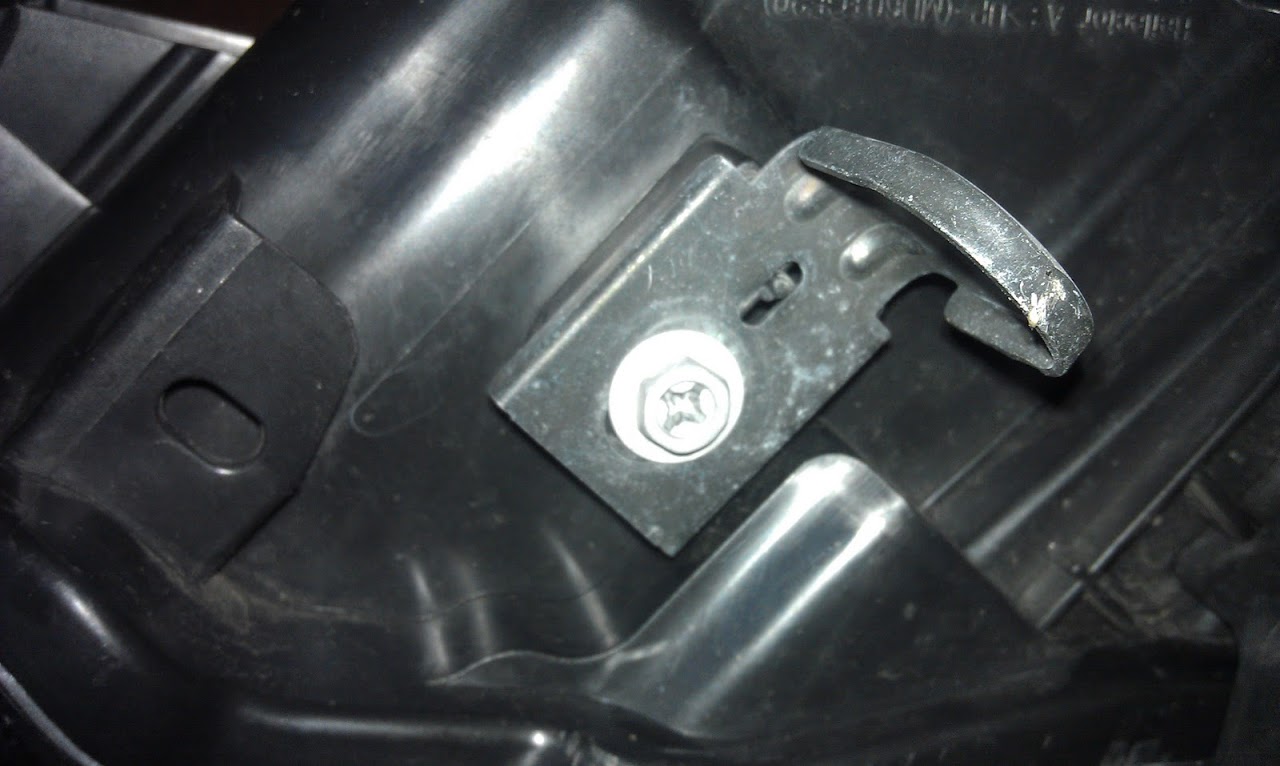
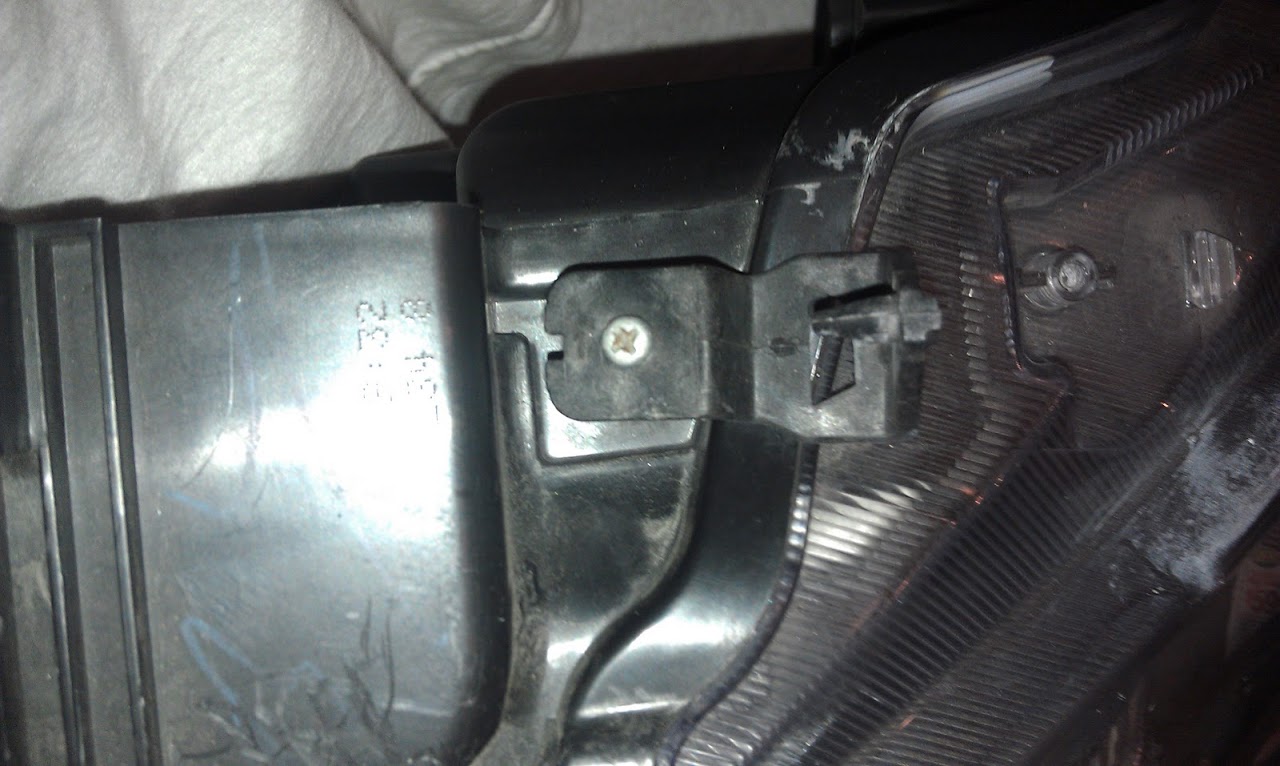
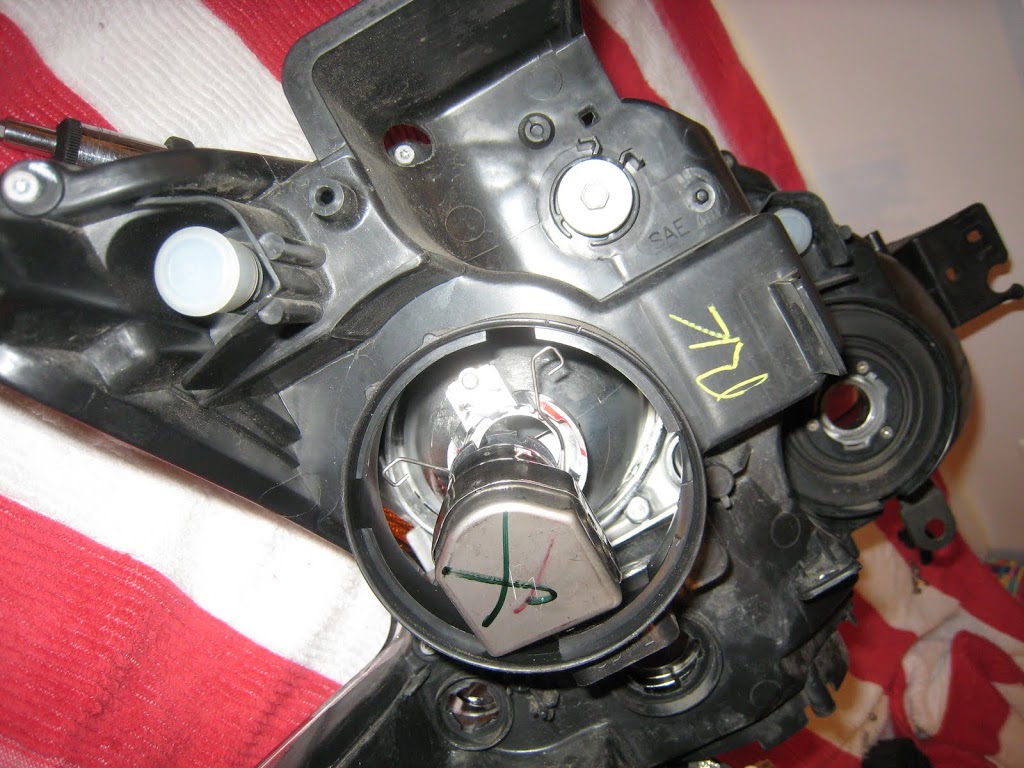
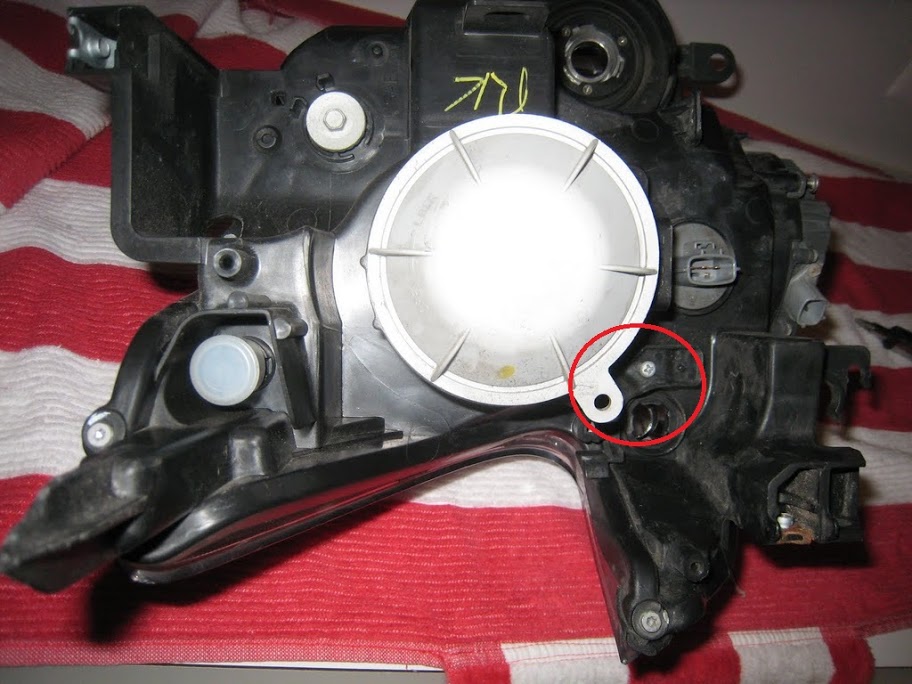
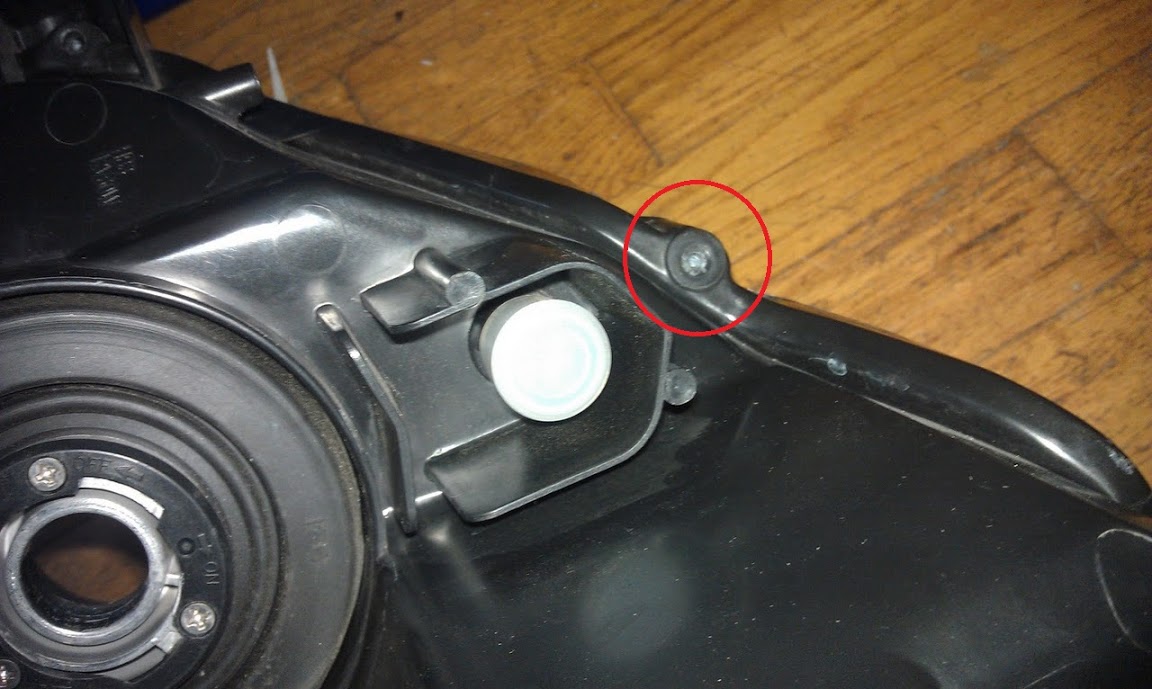
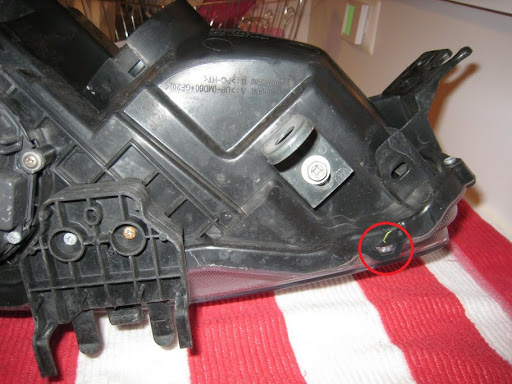
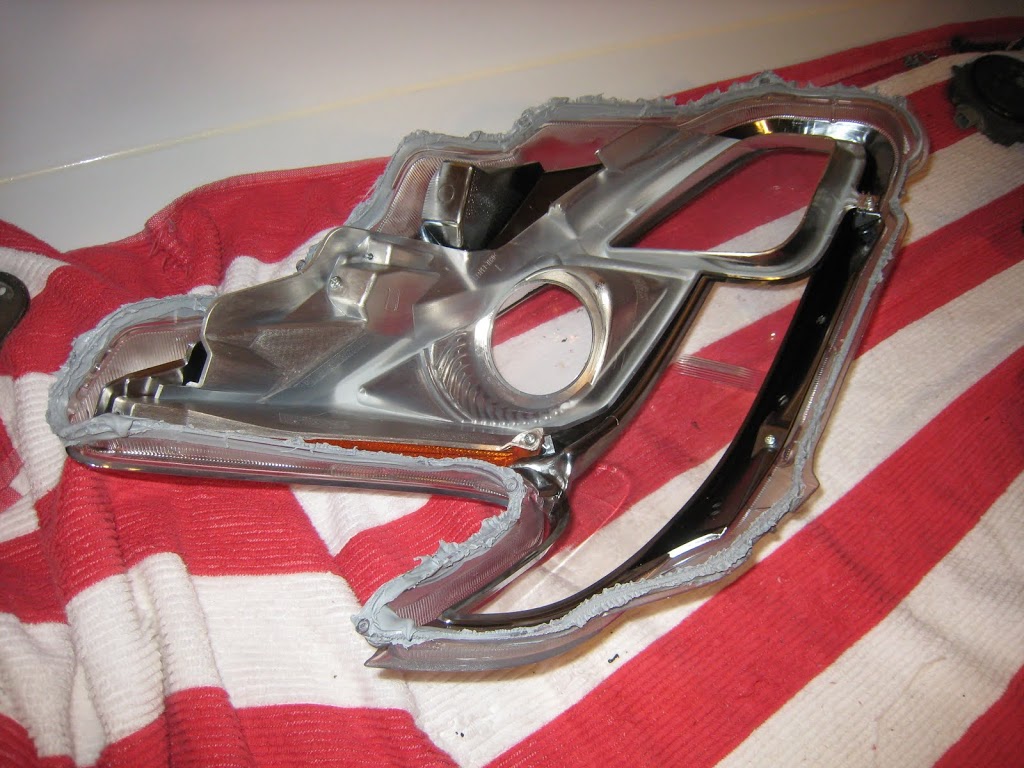
Step 1. With your headlights open, you need to remove 5 phillips screws to get the two housing pieces out. Once these are out the housing pieces slide backwards out of the lens (they have plastic pegs they’re on as well.

Step 2. Sand and prep the housing pieces. Not everyone feels this step is necessary, but I disagree. For paint to hold to a surface the surface needs to be at the very least scrubbed with a scotchbrite pad, but really should be wetsanded to prep. If you are unfamiliar with wetsanding you can see some videos on Youtube for how to do that.

Wetsanding – wetsanding is literally using sandpaper that has been soaked/dipped in soapy water. The soapy water acts as an “oil” to make the sandpaper slide more, taking off less with each swipe. This is the method for prepping pieces for painting so that you can remove what is already there as well as leave a surface that is not perfectly smooth for the paint to grip to. You don’t use much pressure at all just lots of back and forth and dipping into the soapy water.
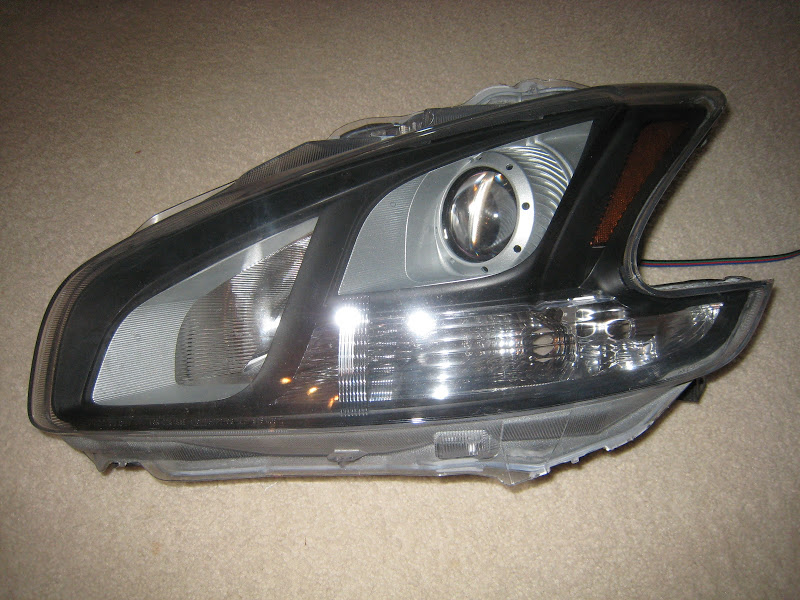
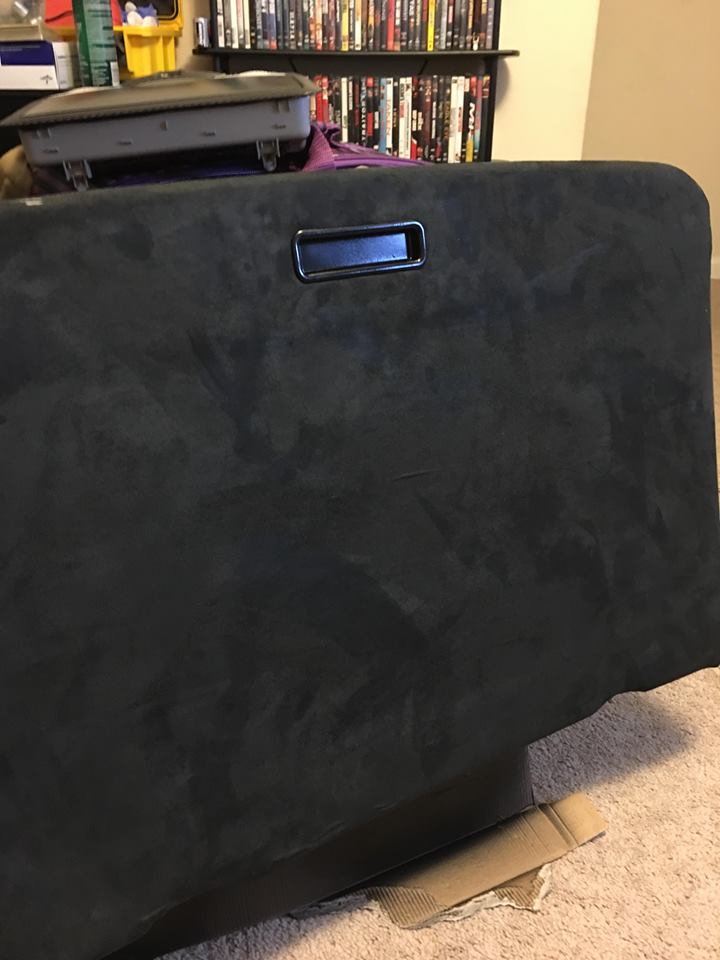
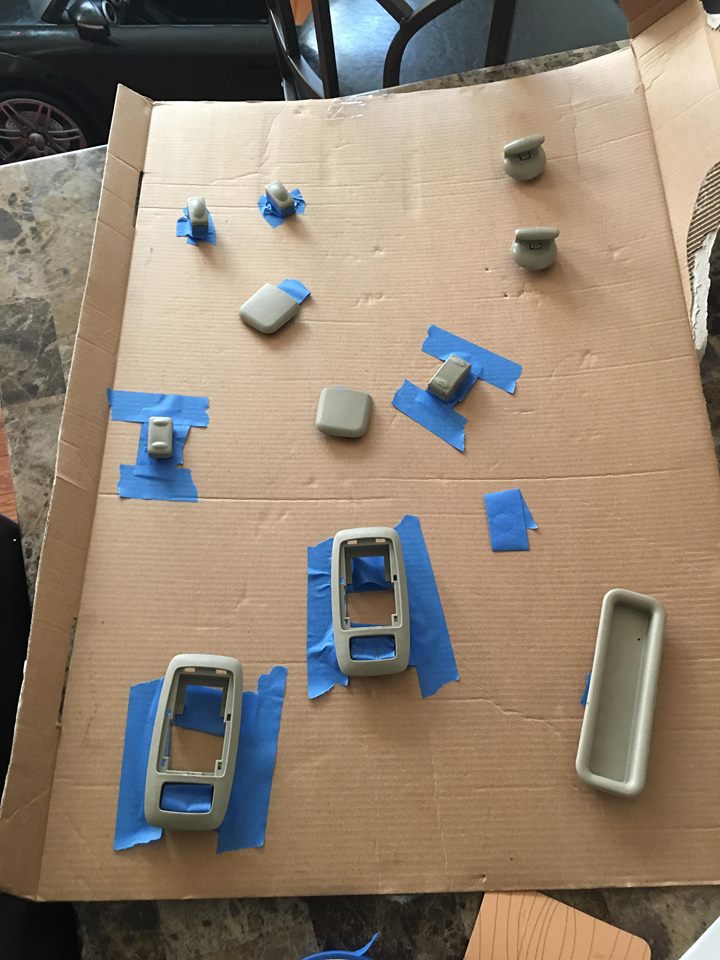
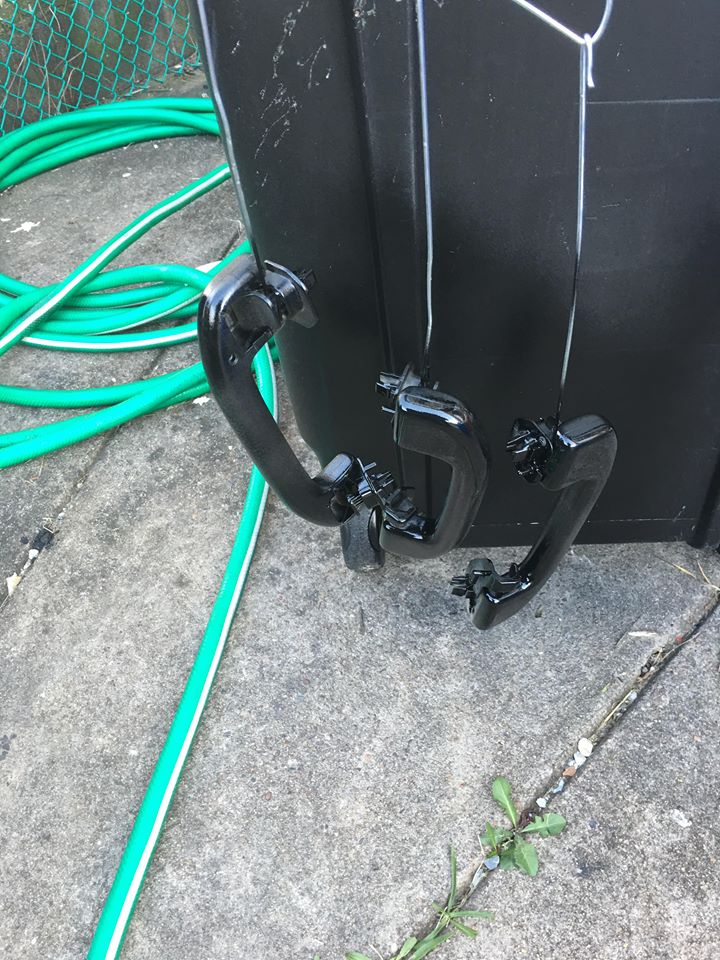
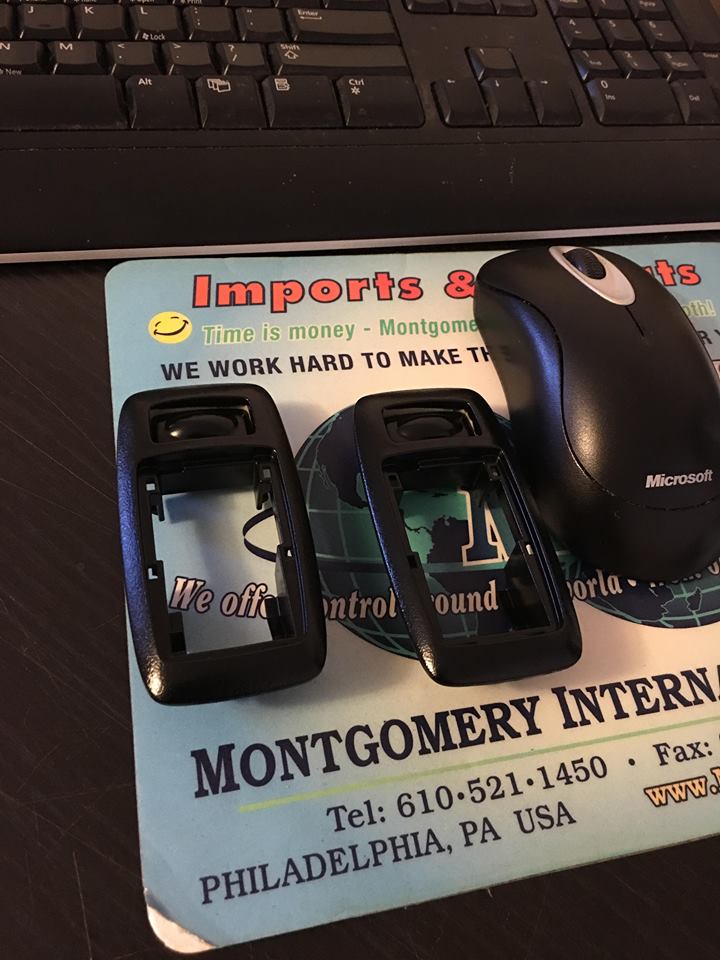
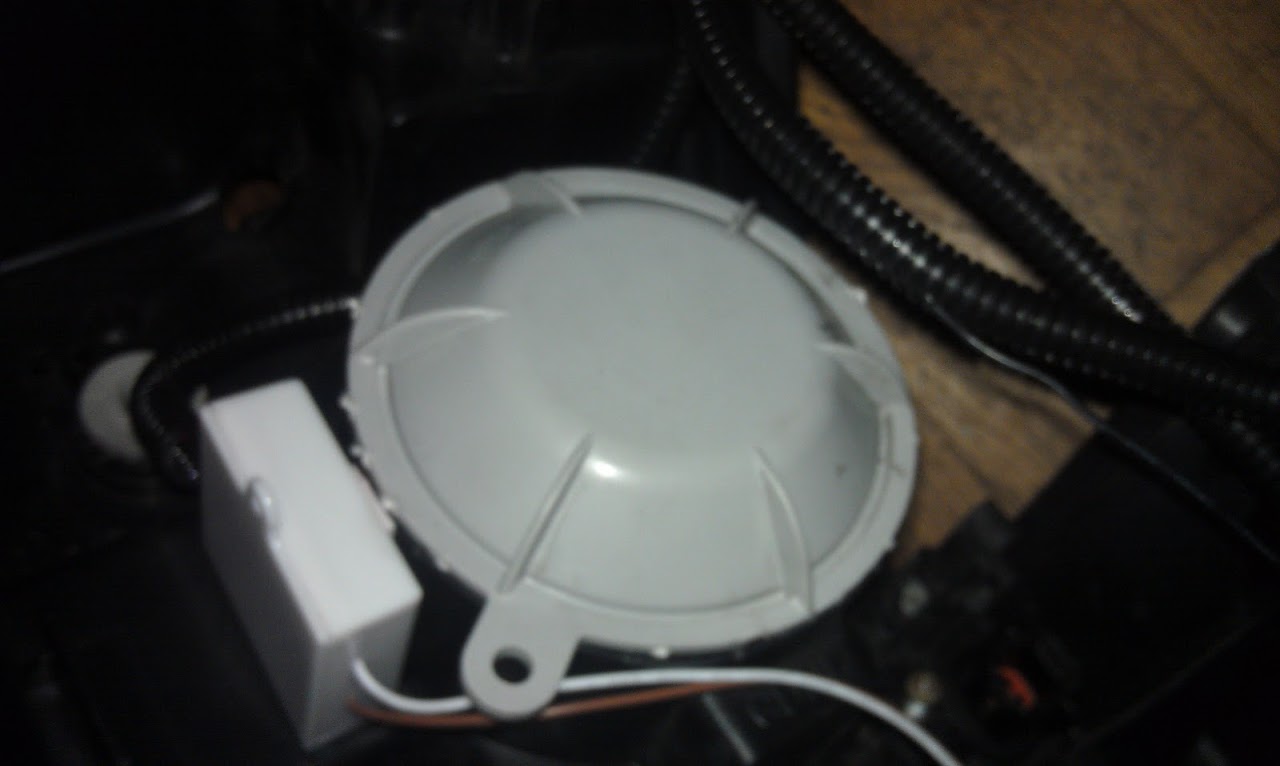
Before:

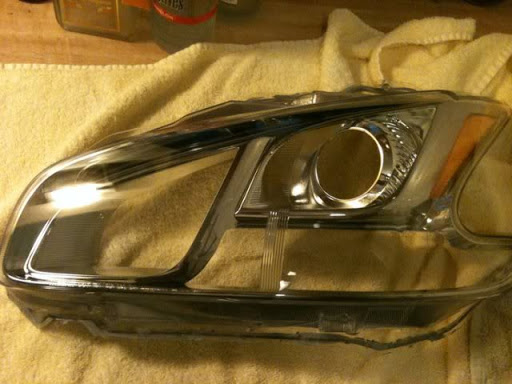
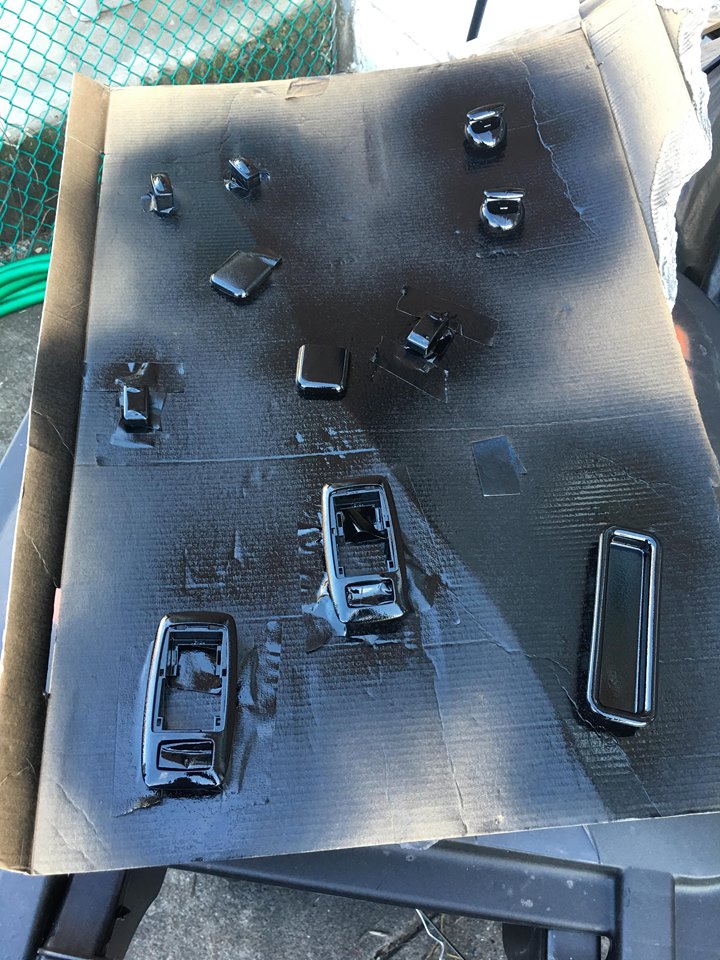
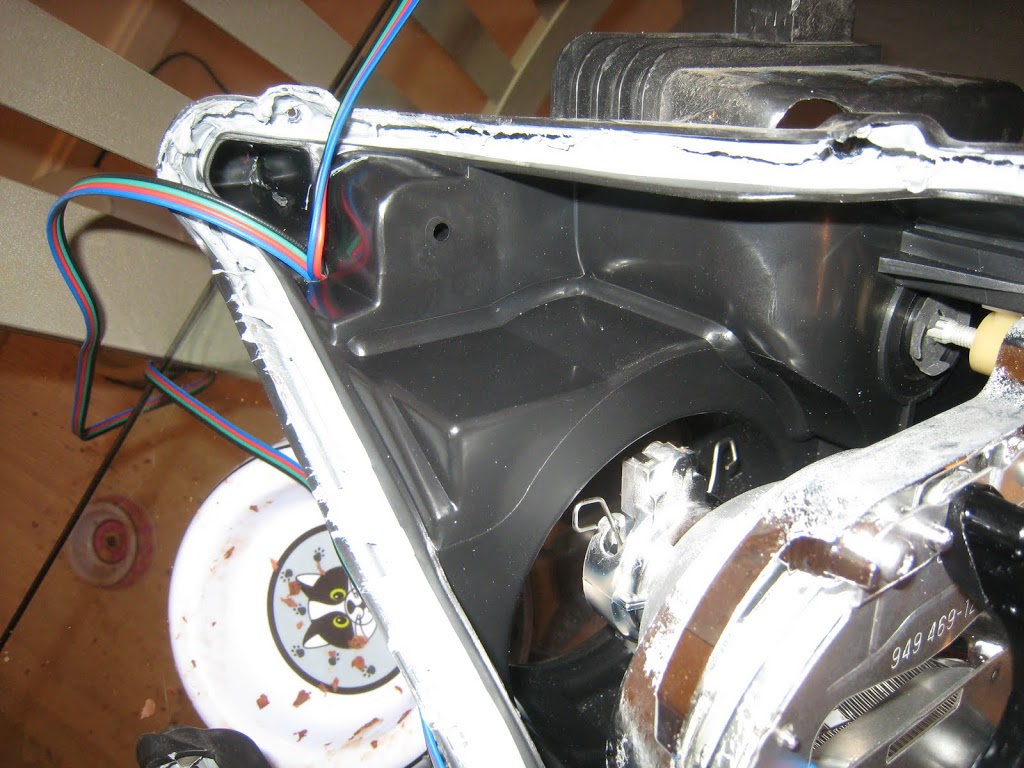
After: yes it’s a matte black underneath the chrome


I left the other housing pieces besides these 2 alone because I want my bulbs to still reflect properly. You can sand and paint more of the housing just be warned that you are preventing your high beam, turn signal, and front side marker bulbs from reflecting properly (and being visible from distances) depending on the area you are painting.

Step 3. Wipe down both housing pieces using rubbing alcohol and the microfiber cloth. This will remove any oils from your hands that will also prevent paint from sticking. From now until they’re painted pick the pieces up using the microfiber cloth.

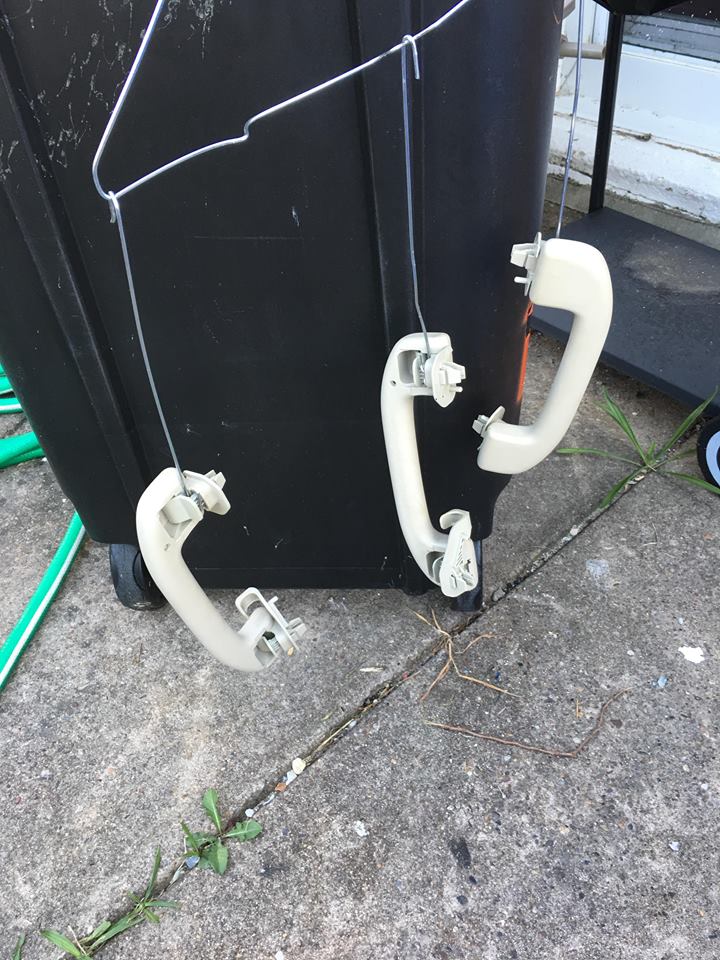
Step 4. Set your housing pieces up in your paint area, whether it be blocks or wires you hang them from. Paint your pieces with primer (adhesion promoter). Follow the instructions on the back of the can; I believe you do 2-3 light coats waiting 5-8 minutes inbetween coats. Don’t let it dry too long, it needs to chemically bond together. After the last coat of clear has been applied wait 8 minutes then move to the next step.

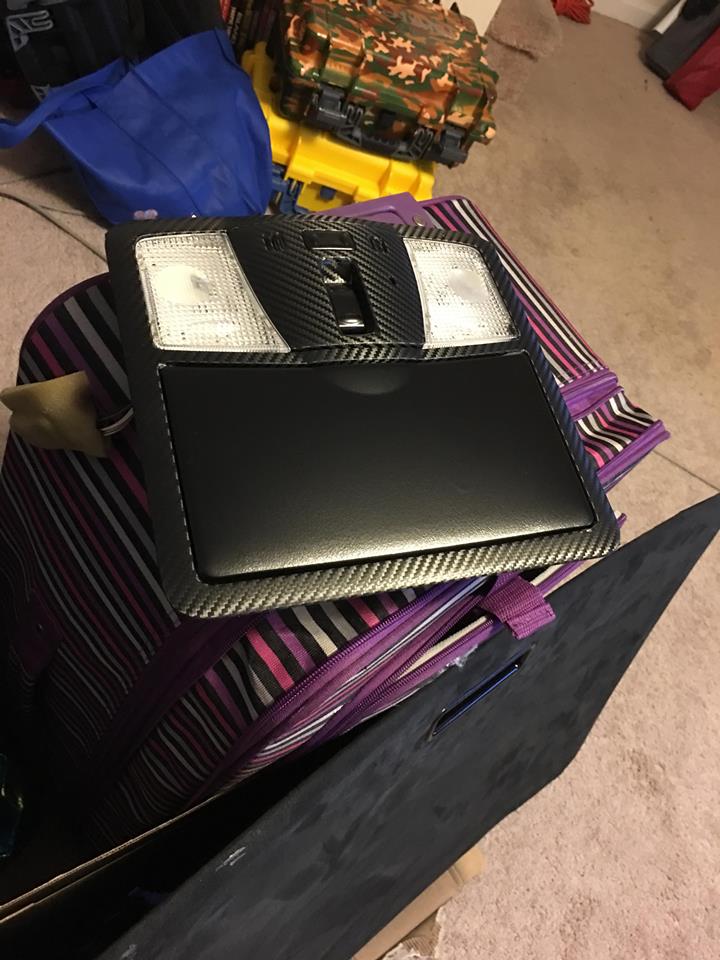
Step 5. Paint your base coat (your color coat) onto the housing pieces. I painted the larger piece matte black and the smaller piece K-12 radiant silver. I had to special order the K-12 in a spray can.


Step 6. Let the paint dry in a clean area free of debris for 24 hours. Do not touch the paint as you will leave indentations on it. Over the next 24 hours gasses leak from the paint that will cause your headlights to condense if you re-install these right away. Depending on type of paint used you may need to wait longer than 24 hours, so if unsure then give it 36-48 hours to let the paint fume. If these paint fumes get on the inside of your lens you’ll need to physically wipe them off, which will require you to re-open the headlights later at some point.

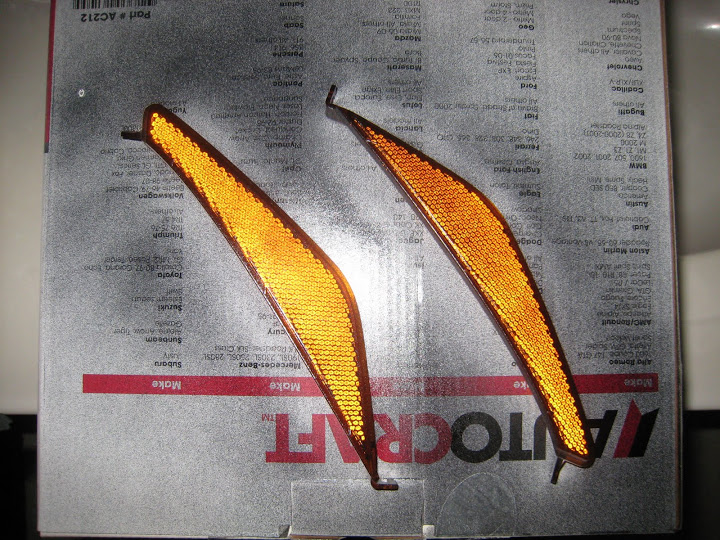
(Optional) How to Tint Your Amber Reflectors:

Step 1. Wetsand the surface of the amber reflector lightly with the 1500 grit sandpaper

Step 2. Wipe down the surface with rubbing alcohol using the microfiber rag to remove any oils

Step 3. Spray paint the amber reflector with a few light coats of primer similar to the headlight housing and wait 8 minutes

Step 4. Spray one light coat of VHT nightshades on the amber reflectors. If you go darker than that they may not reflect anymore (if this is important to you). Best part about 1 coat of nightshades is it makes them much darker almost blacked out but they still shine in light so you are legally compliant

Without flash:

With flash:

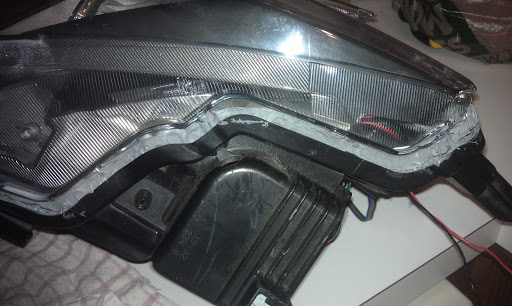
Now you can re-seal your headlight following the last half of the bake and open your headlight DIY tutorial and put back on your car.

Article: https://www.my4dsc.com/bake-open-headlights-7thgen-maxima/


Loading

Member Credit: Mike Mcivor

The black suede came from Amazon. Used the  3M spray glue. The hardest part was removing the headliner. I should of taken out the seats, but when reinstalling I took the passenger seat and center console out. Also painted the trim plastics with Krylon black primer/paint.
Amazon Search Text: Upholstery Micro Suede Headliner Fabric By The Yard (Black)
Amazon Link: https://www.amazon.com/dp/B072P2XLTM/ref=cm_sw_r_cp_api_86RrAbDF284B2

Loading

Member Credit: Mike Mcivor

I purchased the fabric from Amazon. It is Diamond stitch vinyl and used 5 yards to cover everything. Used 3M spray glue from home depot. The black suede headliner also came from amazon. This entire setup cost right under $300.00.

Amazon Item Description: 1 X Vinyl Quilted Black Fabric w/ 3/8″ Foam Backing Upholstery By the Yard
Link: https://www.amazon.com/dp/B0055TXH2E/ref=cm_sw_r_cp_api_QWm7zb5GQYJ3T


Loading

Member Credit: Ghozt

Here are instructions for how to remove your front bumper fascia, or what many of you simply know as the front bumper of your car.

One note: if you have the Stillen lip installed 2 of the screws on the bottom will be covered and only accessible by a small 90 degree bit set or if you drill holes through the Stillen lip. Luckily for most things that you need to remove the bumper for (like replacing bulbs or taking your headlights out) you don’t need to completely remove the bumper. You can just mostly remove it and do what you need.

Tools:

10mm socket set, Phillips bits, small 90 degree socket set (if completely removing), Flat head screwdriver, large pieces of cardboard (big enough for front bumper to sit on)

How To Remove Your Front Bumper Fascia:

Step 1. Place your cardboard underneath your front bumper so that if it were to “sag” it would touch the cardboard and not the ground.

Step 2. Pop the hood and remove your left plastic engine cover. This is held in by a small plastic “screw” up near the windshield, once you remove this you slide the plastic piece towards the front and it comes out.

Step 3. Remove the two bolts on the top corners of the front bumper fascia. You can see where the bumper piece ends and meets the front quarter panels (about halfway down the length of the headlight). The bolts are right below there under the hood. Remove the small black plastic pieces they were holding on. Take care to note how the small black plastic pieces are oriented.


Step 4. Remove the 10mm bolts holding on area in front of the wheel. For the left side you’ll need to cut your wheels all the way to the right, for the right side cut to the left. Pull the black plastic fender liner back to expose the bolt, pointed upwards. You can just hold the fender liner to the side and undo the bolt. Do both sides and remove these bolts.

Step 5. Using your flat head screwdriver, remove the front 4 plastic fasteners holding the front engine bay cover on.

Step 6. Underneath the bumper, use your flat head screwdriver to remove the 6 plastic fasteners holding the black plastic to the bumper. You may or may not have to jack the car up for this step depending on how well you can get underneath your car. If you need to completely remove your bumper there are two additional phillips screws you need to remove. Note: if you have a Stillen lip they are difficult to get to and require a small 90 degree socket set.

Step 7. Pull off the side pieces by just popping them off, they’re held on now by clasps.

Step 8. Push down on the upper arms of the bumper fascia to release a plastic latch, then pull the bumper forward a little

Step 9. Pull the side pieces forward more and they should pop off from their clasps underneath the headlight. Do both sides.

Step 10. Slide the bumper forward, making sure to push down on the upper part slightly so the plastic tabs won’t lock the bumper into place. A good place to hold it is right underneath the top edge of the lower grill as you pull it out and set it down gently on the cardboard pieces you placed underneath the bumper in step 1.

That’s it you are done. You should have access to remove the headlights now to replace bulbs, or to open them up. Follow the first part of the following open and bake your headlights DIY to see how to remove the headlights :

How To Re-install Your Bumper Fascia:

Step 1. Look down into the bumper fascia, you will notice a styrofoam piece that lines the width of it. Make sure this piece is pulled forward and in place as it can fall out when removing the fascia. It needs to be in place for the bumper fascia to fit back on the car.

Step 2. Lift the bumper up and rest it onto the front edge of the engine bay with the plastic engine cover above it, a good place to grab is the top edge of the lower grill area. and fasten the 4 plastic fasteners you you removed from the engine bay cover. Use the plastic fasteners to hold the bumper in place.
(updated pic coming)

Step 3. Push on the body lightly beneath the headlight so the clasp locks, then push on the sides of the bumper so the clasps lock on the side as well so the bumper is basically back on the car minus all the bolts and plastic fasteners from the bottom. If you are having trouble make sure the foam block inside the bumper is in place and the plastic hooks at the top of the bumper fascia are inserted correctly

Step 4. Re-attach all the plastic fasteners underneath the bumper fastening the black undercarriage cover to the bumper.

Step 5. Re-insert the two small black plastic pieces that came out of the engine bay. You’ll notice they have a very specific orientation in how they go. Insert them and then attach the 10mm bolt to hold the plastic in place. Push forward on the bumper fascia in this area while tightening the bolt.

Step 6. Re-attach your last 2 10mm bolts in the fender well to secure the last of the bumper to the car. Push your black fender liner back into place.

Loading

Member Credit: Ghozt

Tools required : Phillips screwdriver, torx bit set, gloves, a cookie/pizza baking sheet, aluminum foil, an oven (the bigger the better, I’ve seen some too small to fit the headlights in so check to make sure it fits before doing anything else)

Personally I was able to bake open and re-seal many times using the original OEM sealant because it is easy to work with and stays in the grooves well. If you are nervous about the reseal you can purchase additional butyl sealant from TheRetrofitsource.com

FYI instructions may be slightly different if you have non-HID OEM headlights.
This DIY first requires you to at least partially remove the front bumper, please click to read instructions for how to remove the front bumper. Once your front bumper is either removed, or partially removed so that it can slide forward you are ready to begin. Now you will begin by removing the headlights from the car.

Optional: You can go in through your wheel wells behind the fender liner and unplug your bulbs/harnesses from the headlight now (there are 4 that need to be unplugged: high beam, low beam, turn signal, front side marker – they all either need to be twisted or pinched to come out) if you want. The other option is to wait until you have unbolted the headlights and slid them forward a few inches so you can access the bulbs that way. Take care not to touch the HID bulbs themselves as the oils from your skin can cause them to burn out prematurely. Clean with rubbing alcohol if you do.

Step 1. Remove the 5 10mm bolts holding the headlight on, 2 are on the side near the top of the light close to the tire, 1 is on the top under the rubber trim the hood rests on, and 2 are on the front (1 underneath, 1 on the inside edge).

1 on the inside edge

2 are on the side near the top of the light

1 underneath the headlight

1 under the rubber trim

Step 2. Now lift the headlight slightly to unhook the plastic hook on the top and slide the headlight towards the front of the car. Note: If you haven’t unplugged the bulbs yet then you can only pull the headlight forward a few inches before the wires reach their length, but this also gives you room to work to remove the 4 bulbs from the back. [I]One of the wire harnesses is clipped onto the back of the headlight, it can be a pain to remove but you pinch it to get it out.[/I] All of the bulbs twist to come out except for the low beam which you just pinch the plastic piece to release the harness. Remember to be careful not to touch the high beam bulbs because oil from your fingers can cause it to prematurely burn out.

Step 3. With both headlights removed from the car, take care to collect your bulbs and place them all in a safe place. If you are concerned about your car having empty holes on the front, a car cover is a great way to cover the car for weather and “security” purposes if you have to park on the street. You are now ready to bake.

To bake and open your headlights:

Step 1. Make sure nothing is in your oven first, then get your cookie or pizza baking sheet, wrap it in aluminum foil, and place it on the very bottom rack. (This is to help prevent anything from melting on the metal rack or sheet.

Step 2. Pre-heat your oven to 200 degrees.

Step 3. You’ll need to remove several pieces off of the headlight before baking it. (Ignore the extra wiring I’ve added.)

Start by removing the 3 screws holding the HID ballast and pull the ballast out. On the other side of the ballast is 1 small screw, remove this screw and unplug the HID bulb from the ballast.

Step 4. Remove the 2 screws holding this black plastic piece on the bottom, then take the black plastic piece off

Step 5. Remove this screw and metal bracket. Take note of where it’s positioned so you can re-install it the same way it is now.

Step 6. Undo this screw on the top, then slide the black plastic piece backwards then up to remove it

Step 7. Twist this grey plastic piece to unlock it, then pull off. Inside is the HID bulb. )Take care not to touch the actual bulb because oils from your hands can cause it to burn out)

Step 8. There are two metal pins holding in the bulb, just pinch them together and pull back and the bulb will come out. The HID bulb has a cable running over to the ballast. Since you already unplugged this pull the bulb and cable out of the headlight – don’t worry its fairly easy to get back in there.

Step 9. Remove this one screw and the plastic piece it holds on, this is blocking one of the Torx screws. It is down/right from the grey cap in the middle of the picture

Step 10. There are 7 Torx (updating shortly with exact size) screws holding on the plastic lens, remove them all. Trace the edge of the headlight lens to find all of them, they’re at the edges like this and look like a star pattern on top

Before proceeding make sure you have removed all the pieces as described so far including bulbs from the headlight.

Step 11. Place the headlight in the oven making sure nothing touches the sides of the oven, and set the timer for 12 minutes. (I know, it’s a little intimidating at first but don’t worry 200 degrees is a safe temp to work with.)

When the timer goes off, put on your gloves (that have good rubberized grip) and move quickly.

Step 12. Take the headlight out of the oven. First make sure the two clear plastic tabs that are on the bottom of the light are lifted up so they don’t prevent you from taking the lens off. Here’s a pic of one of them, in the lower right corner you can see the tab. Don’t worry they won’t break they’re flexible when they’re warm.

Step 13. The easiest way I found to open the headlights up is to simply pull them open like you’re He-Man. Quickly grab the headlight (near the front of it that would be close to the car’s grill when installed) with one hand on the black part and one hand on the lens and just PULL them apart. There are some edges to the lens you can use to help get a grip on it, but you literally can just pull the lens right off the headlight from front to back. [I](You’ll need gloves with some decent rubberized grip for this.)[/I] Open from the front of the light to the back, it will not separate from back to front.

You should see it start to separate and look like melted cheese stretching between the pieces, it will give resistance but still move. If its isn’t moving at all make sure you have all screws removed and then try baking again in small 3-4 minute bakes to soften the adhesive. Don’t worry about the adhesive it stays in the grooves VERY well for re-sealing.

When you pull off your lens you’ll have this.


Now your headlights are open!

If you want to paint your headlight housing, you can click the following link for a How to Paint your Headlight Housing DIY – To do this it will require you to remove the plastic housing from the lens piece to paint them(this is described in the DIY). You can remove your amber side marker or black it out

If you need to drill a hole for new wiring you’re adding, here is where I put mine. I sealed it from the other side using black silicone
You can add desiccant packets to the inside to help prevent moisture build-up as a precaution.

To re-seal the headlights:

Step 1. Re-install the housing pieces by inserting them onto the lens. They slide on to some plastic pegs first, and then you re-attach the 5 screws holding the pieces to the lens.

Step 2. Push the lens back onto the headlight as best you can (it won’t go on that far because the sealant is hard but you can get it in place).

Step 3. Preheat the oven to 200 degrees if you turned it off earlier. When it is preheated, bake the headlight for 10 minutes. When the timer goes off again move quickly and work with gloves on

Step 4. Pull it out of the oven and using your hands squeeze together the edges of the light all around it forcing the lens back into the grooves. Concentrate on getting the rear (the two points) of the lens pushed deep into the grooves then clamp the lens with your hands around the edges to force the lens in around the rest of the light. Don’t worry about getting it perfect we’re baking 1 more time.

Step 5. Bake the headlight in the oven for another 5-6 minutes. While it is baking go get all your Torx screws (the 7 star-shaped ones holding the lens on) and get ready. When you take the headlight out squeeze the headlight pieces together near where each screw hole is while putting in the Torx screws. These really help for a nice seal because they pull the lens against the rest of the headlight. (Don’t overtorque here this is all plastic so easy to strip!)

With your light baked back together, follow the above steps in reverse to add all the extraneous plastic bits and light bulbs back to it, and go plug it in!

If you painted your housings pieces, you should leave one of your bulbs unplugged (or simply not install the headlights and wait) for 24 hours to let it dry out and/or let the paint fumes settle.

Don’t forget to turn your oven off!

Loading

Member Credit: FredMCMC20

This is for models with Navigation only.

This essentially will allow you to use the navigation/touchscreen interface while the car is moving (as opposed to being limited to just what is on the screen). This is incredibly useful if you’re sick of only being able to scroll through the 4 items listed on the screen and need to pull over to select more items. This is NOT useful if you plan on typing and doing other things while the car is moving; and will most likely result in a crash.

By performing this modification you are agreeing to not hold the author, the forum, or anyone else responsible for anything that happens as a result. You are doing this AT YOUR OWN RISK if you plan on using it for unsafe reasons.

Part 1 of 2

Part 2 of 2

Loading

Member Credit: Ghozt

This guide is primarily directed at the 09-11’s who will need to splice into the foot wells for lighting. If you have a 2012 these plug directly in and you can download install instructions from most of the Nissan parts websites. I kept the steps easy and materials simple so anyone can do this and reverse it later if they want, however soldering is the preferred method to extend wires. Most of these instructions will also apply to Deadbolt’s custom illuminated kick plates that he makes; hit him up if you want custom wording/colors.

Tools: Pliers, wire stripper/cutter, butter knife/plastic trim removal tools

Materials: 2012+ illuminated kick plates, 4 tap-in connectors (18-24 gauge), 2-4 wire screws, about 4-8 inches of any wire

Step 1. Open up the box

I hooked them up to a power supply to test; nice looking.

Step 2. Remove existing kick panels, I slid my tool under them until I hit a clip then applied upwards pressure

Step 3. Pry off trim piece directly next to it. Start by pulling it towards the chair to release inner clips, then pull upwards to pop off

Step 4. Cut off the brown plug from the kick plate wiring, trim back the plastic sheath several inches.

Step 5. Install new kick plate, it pops right on. Run the wire through the plastic rings towards the front under the dash and have it pop out from underneath

Step 6. Extend the wires for the passenger side. You can do this for the driver side as well for more slack but I didn’t need to. Here you can use the wire nuts as this guide indicates, or simply solder on roughly 4″ extension to both the positive and negative wires. Only strip the wires where you’re planning on using the twist wire caps.

Step 7. Unscrew bulb from dash, creating slack on the OEM wires to work with. Use the tap-in connectors to splice the red wire from the kick plates to the pink wire of the floor lighting. Squeeze the tap-in connector with your pliers to smash the metal blade and connect the wires. Use the same method to splice the black wire from the kick plates into the yellow wire from the floor lighting. Do not strip wires for this, the tap-in connector is designed to work with wires still covered.

Step 8. Re-install foot well LED and tuck wiring in dash. Re-install plastic trim, take care to align wiring from kick plate as it will be slightly noticeable where it enters the car. For you creative cats I’m sure someone will find a way to run the wire more cleanly; but I wasn’t too gung ho about drilling holes into my car here so ran it like so.

Step 9. Repeat on other side.

Step 10. Enjoy. They will do a slight “warm up” then turn on to full brightness when you open the door.

Loading

Member Credit: jsmithsole

This is for those who would like to install the 7thgen Mirrors on their 6thgens. Considering they are from a different car the fit really well, not perfect but pretty damn close!

The holes for the new mirrors do not match up so all 3 need to be re-drilled. I basically held the mirrors up where it needed to sit and marked the holes and drilled them through. Also there’s a small plastic clip that needs to be removed, it helps hold the tweeter cover in place but also keeps the new mirrors from sitting flush.

Click the image to open in full size.I hoped the plug would be the same (of course it wasn’t) or at least the wires would be the same colors (and they weren’t) So I am waiting to get the wiring breakdown for both mirrors so I can hook up the heat, adjust and folding features.

I did want to hook up the blinkers and I knew that since the 6th gen doesn’t have them I would have to hook these up from scratch. So I looked in the stickies and found which colors the wires we’re because I wanted to tap into them at the BCM instead of running to the front of the car.

The wires at the BCM are as follows:
Turn Signal(L) green/black + BCM, pin 45
Turn Signal(R) green/yellow + BCM, pin 46
Notes: The BCM (Body Control Module) is between the steering column and the fuse box.

So I simply ran wire taps to these wires:

Click the image to open in full size.
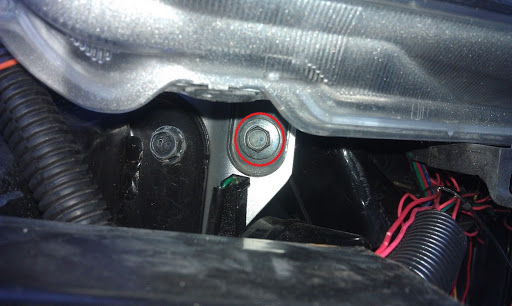
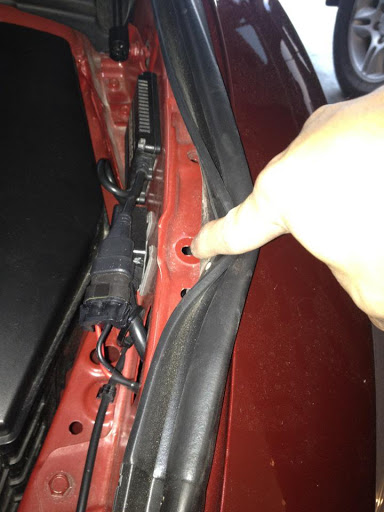
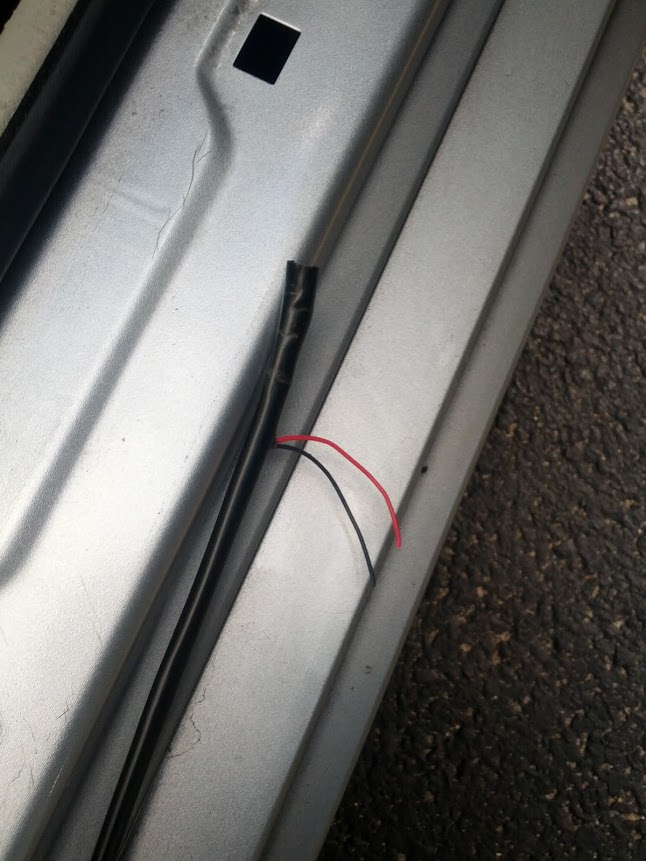
I ran a ground wire from one of the screws inside the door. I then ran the power wire through the side outlet where all the OEM wiring goes to the door (I fed the wire through with a coat hanger, rookie style!) For the passenger side I had to run the wire all the way across under the dash, I snaked it through and used zip ties to keep it in place (I also dropped the glove box to make it easier) I then ran it through to the door with the other OEM wires as on the driver side.

(passenger side, behind the glove box)

Click the image to open in full size.
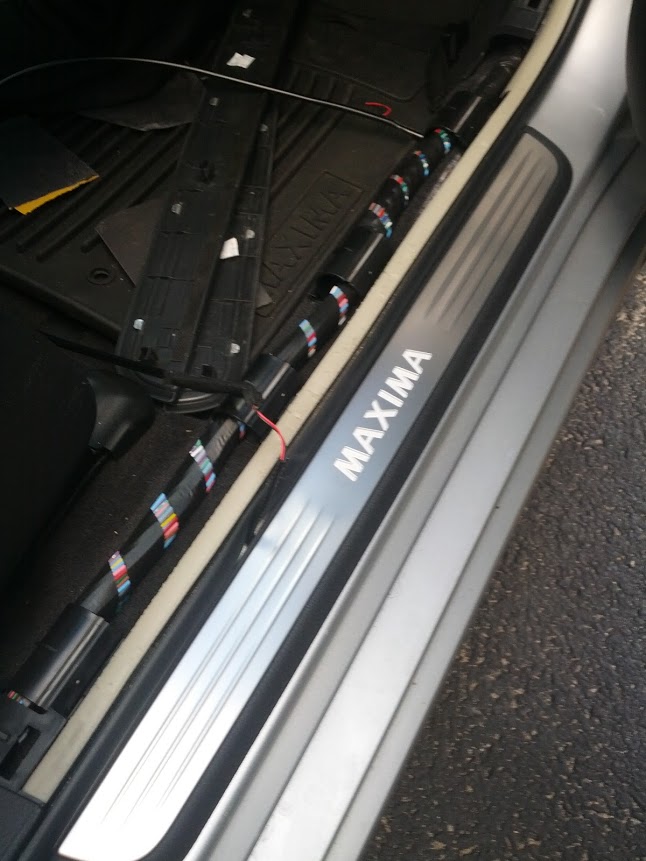
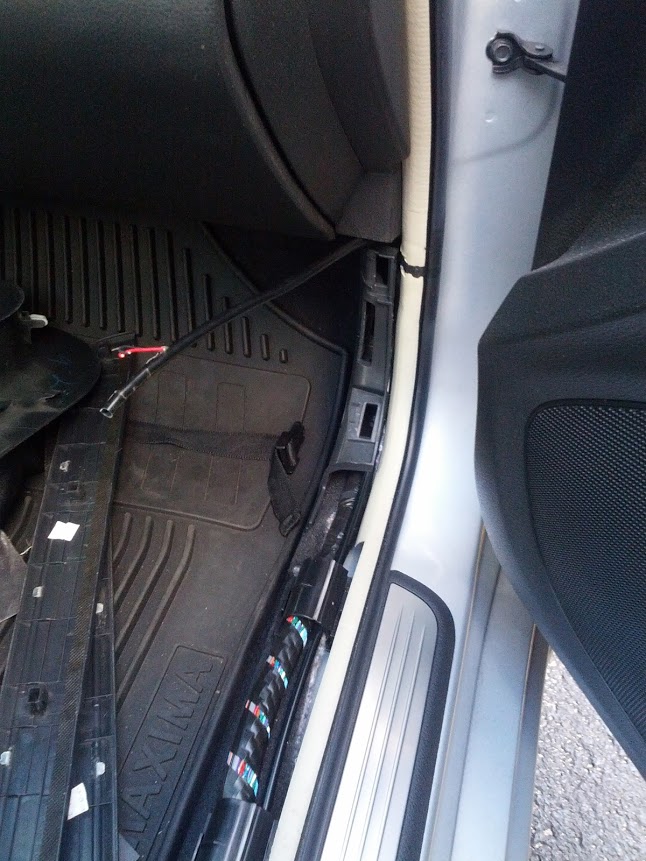
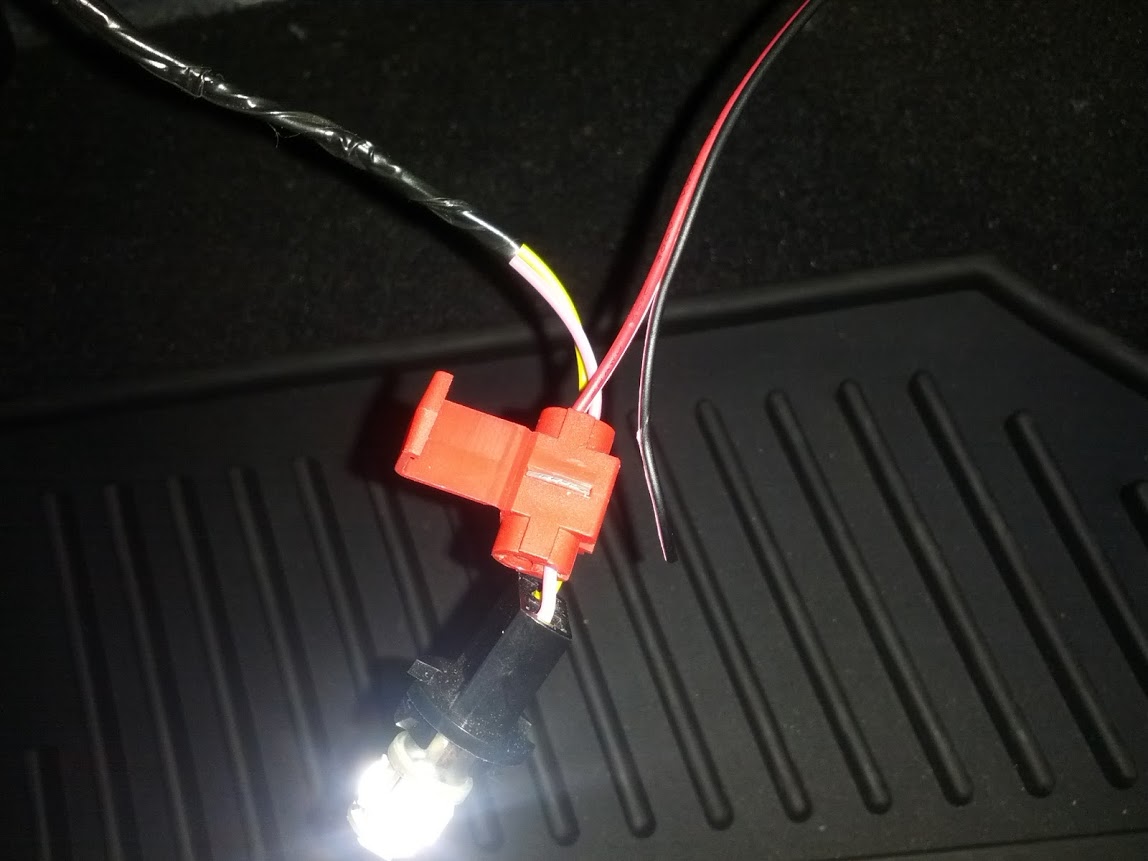
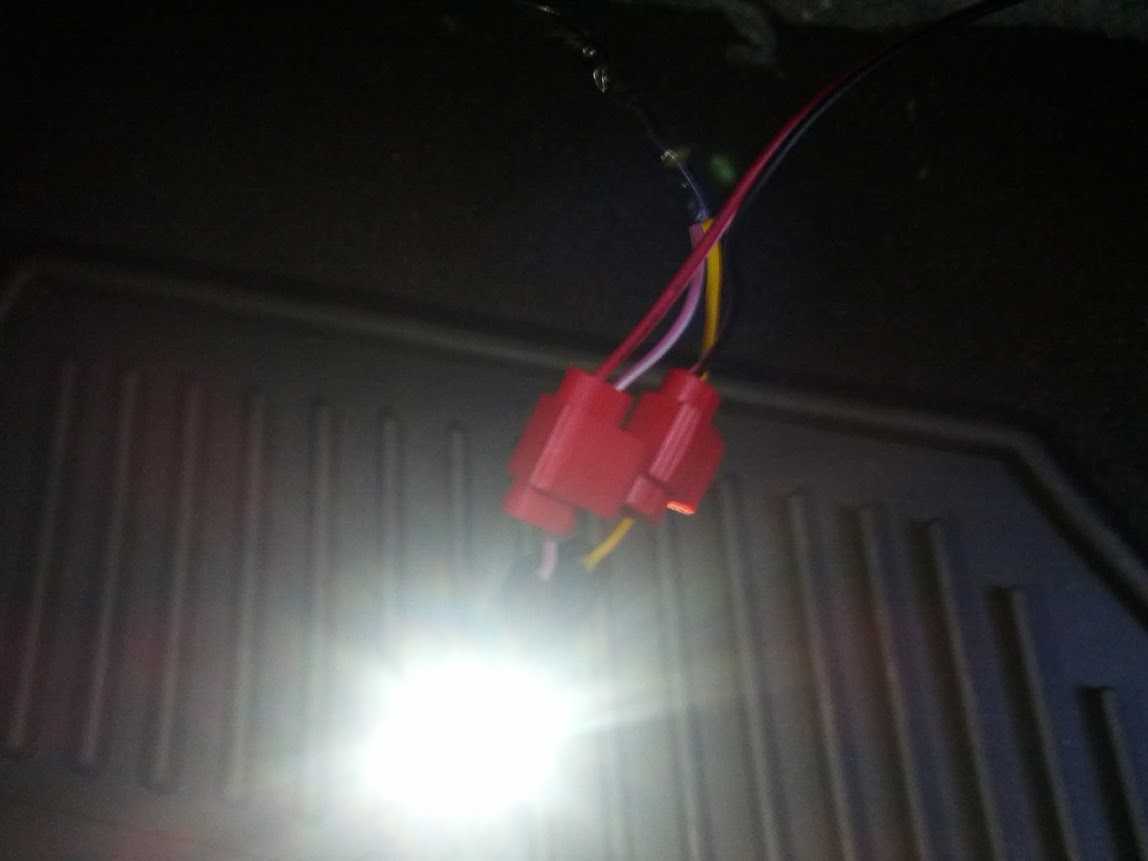
Now the trick was to find out which wires ran the blinkers so through a long process of elimination (lucky for you!!) I figured it out. On the 7th gen mirror plug, the orange wire is the positive and the pink wire is the ground, so I again tapped into these (I didn’t want to just cut any wires at this point due to the fact that I’m not sure exactly how I am going to hook up the rest of the stuff later.
Click the image to open in full size.
Click the image to open in full size.Click the image to open in full size.

Loading

Member Credit: thealliance43 / bambino

This how-to will allow you to install an 07-08 Maxima Spoiler on your 04-06. Great mod that gives your car a sportier look.

You will need the following:

1. Power Drill
2. Play-Doh
3. Drill Bit Set
4. Measuring tape.
5. Blue tape if you are doing it alone.
6. Heavy Duty 16 Gauge wire kit (You will only need about 1 1/2 feet)
7. Black Electric tape
8. Regular metal hanger/ 3/16 rope
Click the image to open in full size.
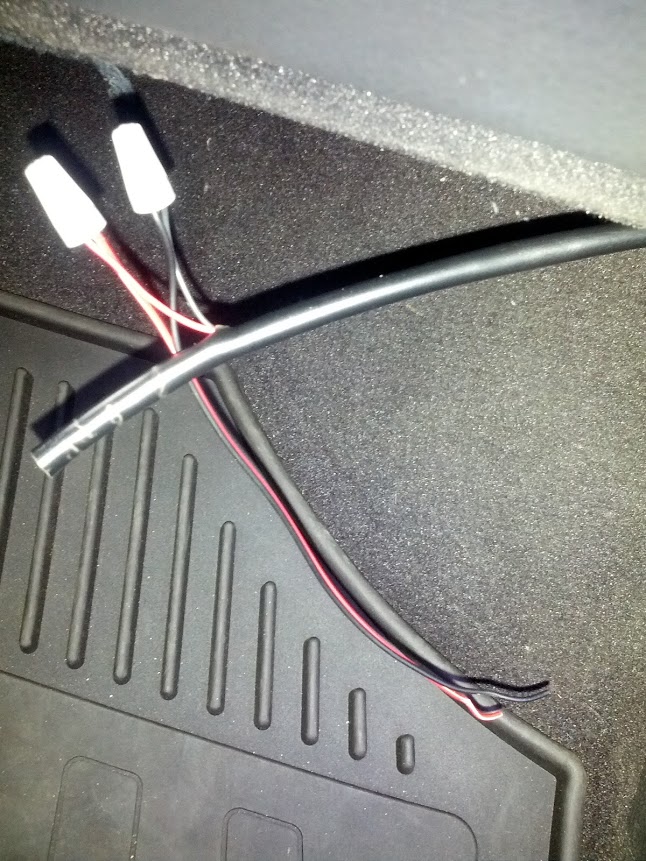
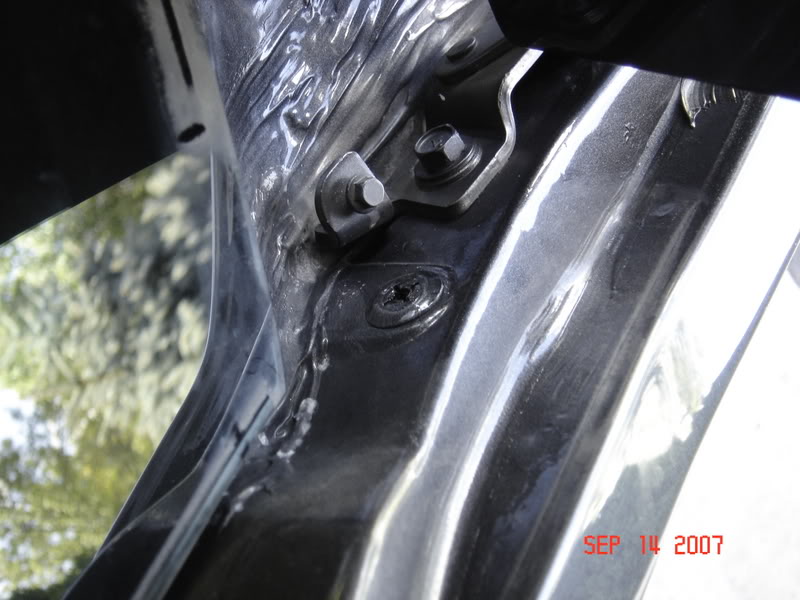
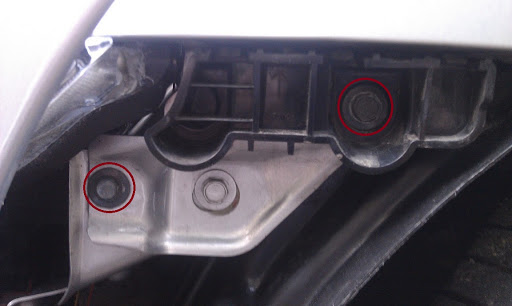
1. Place (2 to 3) play-doh near where you think the holes might be.
2. Once you are sure you have a perfect fit and it’s aligned properly, press down to create a mold of the holes.
3. You will need a 7/32 drill bit. (If I’m not mistaken) Just drill away with precision.
4. Direct Light cable through the hole. Keep it inside the trunk.
Click the image to open in full size.5. Guide it through until you hit the left end side.
6. Pull out the rubber cable protector. (WARNING: it took me a very long time to make the cable go in and make come out the other end.)
7. Connect end of the regular light cable to the new extension cable (1 1/2 feet just to be safe) Tape naked connections.
8. Tape rope to the straighten out hanger end. Find your way through towards the right and through the hole of the back light, until it’s visible from outside.
Click the image to open in full size.
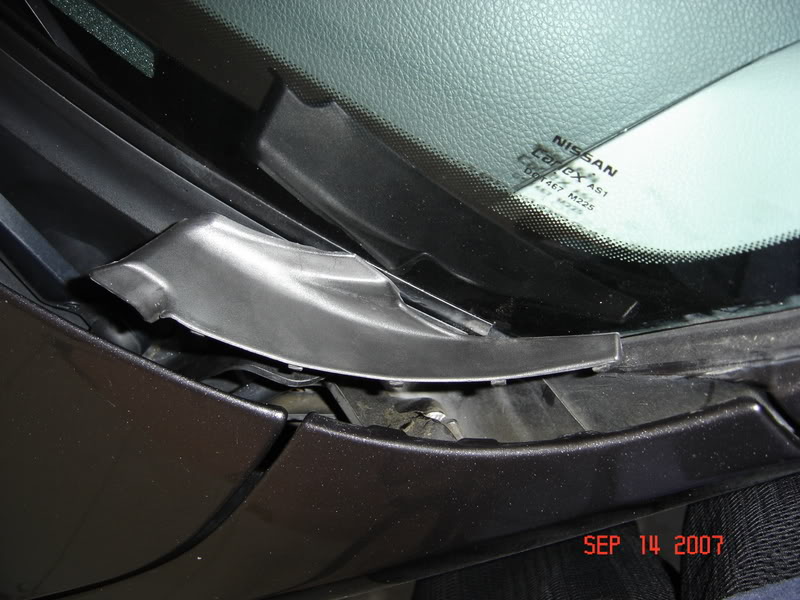
Pull out rope and hanger end very carefully. Remove the tape and hanger.

10. Tie the end of the cable to the end of the rope
11. Pull rope from inside the car towards the 3rd light brake hole.
12. Expose 1/2 inch of the 3rd brake light cable and attach the ends of the brake light spoiler cable. Tape it up, plug 3 light cable unit to its original connection. and put it back in place.Click the image to open in full size.Don’t forget to screw the screws to the spoiler, otherwise, bye bye mod.
Click the image to open in full size.
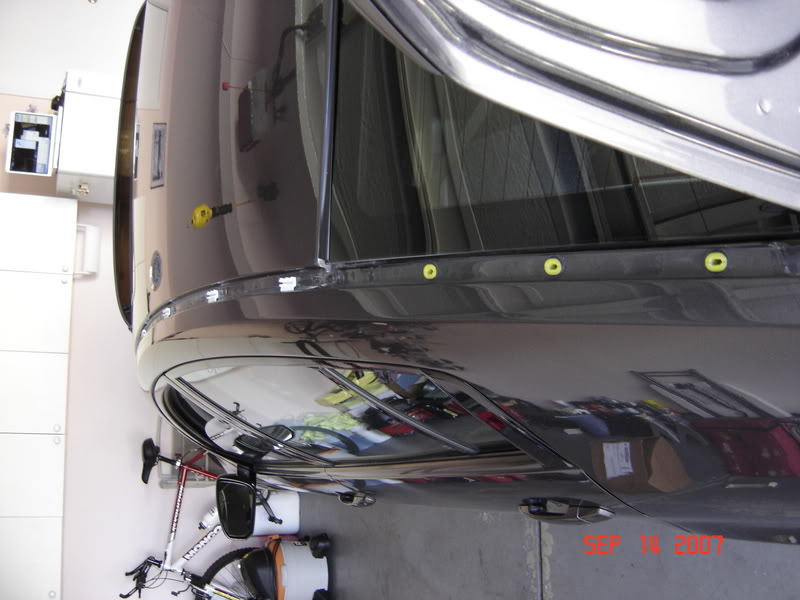
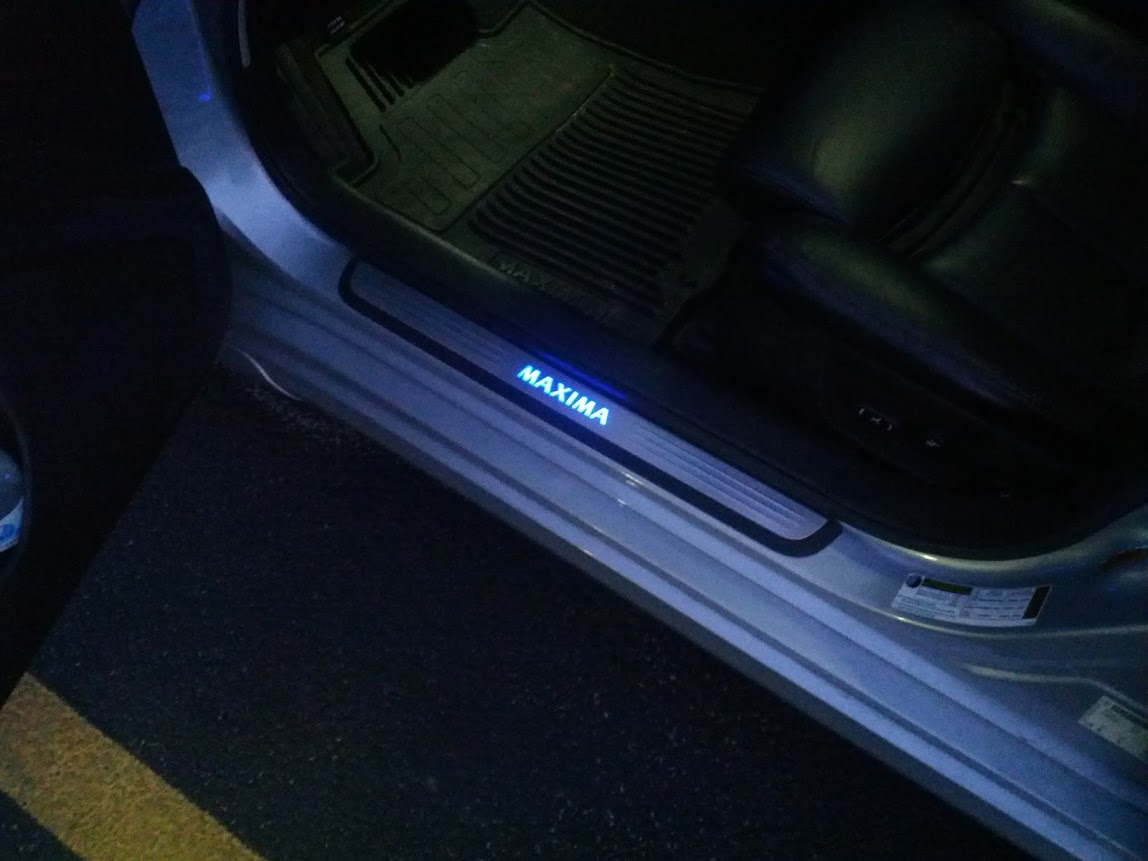
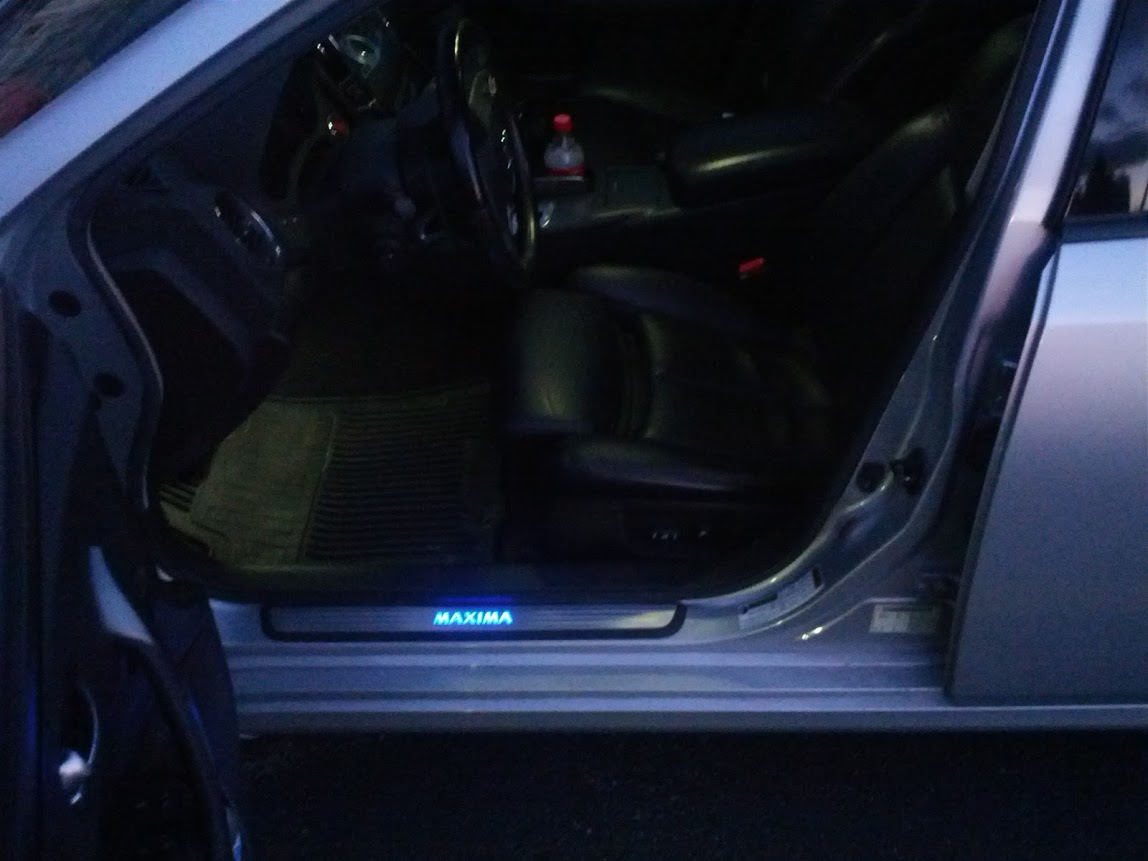
This should be your end result. Hope this helps future mods
Click the image to open in full size.

Loading

Member Credit: 1PrjctMax!

First you pop the trunk and there is ONE screw for each side that holds the rear plastic/chrome piece on. Once you take that screw out, you can carefully pop that one piece out.

Click the image to open in full size.

That’s how it looks removed. Now in the front you take off the black plastic thing by the windshield

Click the image to open in full size. Now you can carefully push on the entire assembly towards the back of the car. The thing “slips” into place, so that is how you take it out as well. When you put it back in, you can just line all of the slots up and “pop” them in.

This is how it looks with them both off.

Click the image to open in full size.

Loading