Thanks to Kirill, we just ordered a set of “Street” Selector Springs for our 2002 6-Speed Supercharged 5thgen Maxima. Will post a review afterward. The owner Peter will get back to you quickly. This is only for the manual FWD RS6 6-Speed and RS5 5-Speed Transmissions. Also, if you are having issues with reverse just make sure the spring cup on the larger spring is not upside down.
Overview & Purpose from Vision1Racing
From the factory, Nissan utilizes two springs within the transmission to “center” the shifter in the 3/4 gate. These OEM springs are very weak and often cause 3rd gear lockout issues when attempting to quickly shift. This is simply due to the driver overpowering the spring’s ability to line up the shift mechanism in the 3rd gear fork. VisionOneRacing offers two kits to fit the driver’s needs.
Our Street Kit is 200% stiffer than the factory and provides a nice, crisp feel. This is truly how it should have come from the factory. Our Race Kit utilizes a higher grade spring steel and is over 300% stiffer than the factory. This will provide the necessary “kick” to the shifter when slamming them gears down the track.
Both kits have received excellent feedback and have propelled the V1R Sentra into the 9’s, being the first QR to do so. They have also helped send the all-motor Maxima into the 10’s with many other success stories along the way!
It’s also worth noting that I highly recommend aftermarket shifter bushings when using our Race Kit. These can be had from 2J Racing among others.
Price Options: Street Kit $45.00 / Race Kit $60.00
Brand new to the market is our HD Detent Kit for the Nissan RS6F51 transmission! Add confidence and enjoyment to your driving experience with these affordable and easy to install springs. Over 70% stiffer than OEM, the V1R HD Detent Kit provides the driver with the positive feedback desired with every gear change.
We have custom tailored each spring to not only increase the performance of your transmission, but also to combat the sloppy reverse feel that is far too common. This kit is suitable for any vehicle – from the daily driver to weekend warrior. Be sure to couple these with Vision One Racing Shift Selector Springs for the ultimate transmission experience!
The Diamond Claw® Crank Lock utilizes precisely sized CBN particles with a hardness of 10,000 Vickers that effectively LOCK your flywheel and harmonic damper in place. With a thickness of only .008″ – Driveline alignment remains unaffected.
Previously only available for the most common platforms – including the Nissan GTR, Vision One Racing remains focused on bringing these solutions to the entire Nissan family. Protect your most expensive and crucial components with this small yet powerful addition! At an affordable cost, the Diamond Claw will be reusable for virtually the entire life of your engine.
When modifying engines and pushing them beyond their designed capabilities, harmonic vibrations are your worst enemy. Long strokes, balance shaft removal, increased RPM, single mass flywheels, turbocharged applications, and even higher compression all are capable of contributing to increased harmonics. These micro-vibrations often times cause surface welding (also known as “fretting”) on the crankshaft, flywheel and other expensive components.
The V1R Diamond Lock® helps to prevent flywheel bolts from backing out with increased RPM and power output. In the event that the flywheel does become loose and begin to vibrate against the crank, the Diamond Claw® can help protect the crankshaft and prevent further damage.
We’ve seen firsthand the detrimental effects that fretting can pose – sometimes even destroying a crankshaft beyond use. While mitigation techniques have been around for ages, nothing has proven to fully prevent this anomaly… UNTIL NOW!
Nabco is a Nissan OEM part manufacturer. Most dealers have this rebranded as Nissan but it’s the same original part number. We purchased these for our 6-Speed Maxima and match exactly the OEM part within the car. This will save you a bunch of $$$$$$$$$$$. For all clutch master, clutch slave, and 1-piece SS line, it comes out to less than $130 shipped.
If you replaced your clutch fluid and it still looks like the photo below then you most likely need to get a new Master Cylinder. Might as well replace both while you are it.
These parts work for the following manual transmission vehicles:
2002-2003 5thgen Nissan Maxima
2004-2006 6thgen Nissan Maxima
2002-2006 Nissan Altima
2002-2006 Nissan Sentra
Master Clutch Cylinder
Nissan OEM Part #: 30610-3Y010
Nabco Part #: 555 38027 330
Nissan Branded Price: Approx. $90.00
Nabco Branded Price: Approx. $43.00
Slave Clutch Cylinder
Nissan OEM Part #: 30620-AU400
Nabco Part #: 556 38001 330
Nissan Branded Price: Approx. $80.00-90.00
Nabco Branded Price: Approx. $26.00
1-Piece Stainless Steel Clutch Line (Highly Recommended)
This is a complete kit from the slave cylinder to the master cylinder. This line will replace your factory metal & rubber lines with a stainless braided line. All clutch lines are single lines made of stainless steel braided hose with a protective PVC covering.
Bolts, washers & fittings are included if required (Shown in picture). All you do is remove the factory OEM line and replace it with our clutch line kit.
Description: Master to Slave Cylinder Complete Clutch Line Kit for 2002-2006 Nissan Maxima
10 mm Socket, 12 mm Socket, 14mm Socket, 15/16, Swivel extension
Clutch Master Cylinder
Pliers
PB/slick 50 etc…
10mm Wrench for Hydraulic Line Screw
Instructions
1. Disconnect clutch fill cup two 10mm screws (no need take of bracket just cup).
2. Locate clutch master cylinder on the inside of the brake master cylinder.
DONT PANIC when you see how far it is in there.
3. Look under your dash and locate the clutch pedal and follow it all the way to the top until you see a small goldish retaining clip and gold pin holding the clutch master cylinder shaft to the pedal. REMOVE THE CLIP AND PIN
4. Follow the master cyl shaft to the firewall you will see 2 – 12 mm screws. Using your wrench/extension/12mm/swivel socket remove both screws.
5. Get a 14mm socket and remove the windshield wipers.
6. Just under your windshield wipers is a black plastic cowl pull it up in the center and all the plastic fasteners will pop up.
7. Remove the windshield wiper motor and assembly 3 – 10mm screws disconnect pigtail.
8. Just under that is a fake me out strut tower brace just under your windshield wiper cowl. locate the 6-7 10mm screws and remove them. FakeSTB!
9. You should now clearly see the clutch master cylinder using a 10mm wrench remove the hydraulic line connected to the top of it.
10. Remove the master cylinder and clutch fill together makes it easier to remove the clip holding the fill cup hose to the master cylinder. should look like this removed
11. Install the new one connecting the retaining clip and pin the the clutch pedal first then tighten up the screws
You are basically done now. I suggest bleeding the clutch before you put everything back just to make sure the master cylinder works correctly.
Clutch Bleeding 101
1. Fill the clutch cup to the top. (you do not need to put the top back on the pressure that the dealer claims need to be there is BS! The way it works is once you depress the clutch the valve closes so no air will ever get in it. I posted this 2 years ago because I listened to the STEALERSHIP and I was totally wrong also so I apologize for the misinformation back them.
2. Get a 15/16 socket (tiny) go to your clutch slave cylinder and unscrew the bleeder valve.
3. Go back to the inside of the car and pump the clutch with your hand 3 times. pour brake fluid in the clutch cup then go back and pump it another 3 times. I suggest doing it a total of three times just to make sure all air is out of the line.
4. On the last or third try when you push the clutch to the floor LEAVE IT TO THE FLOOR and go and close the bleeder valve. go back and pump the clutch after 3 pumps it should be extremely tight. That’s it your done.
Now just put everything back together.
HELPFUL HINT: If ever you come into a situation when your master cylinder fails while driving or at an intersection or tractor trailer coming at you and it won’t let you shift. Turn the car off and you can put the car into first without the clutch turn it back on and take the hell off 🙂
Changing the clutch to an Exedy Stage 2 Clutch and a JWT lightweight flywheel as doing some other maintenance on the car like power steering lines. Everyone says you have to drop the subframe or take the engine out the top but I will show you otherwise!
Well, I did the STS mod today using a bolt and did not like the final version. I originally posted my results in the Free STS post, but decided this was worthy of a new post due to finding the perfect parts to make a perfect STS for less than $2 dollars.
So being bored on this wet Sunday evening, I went to Lowe’s and found the exact part I needed for a DIYer STS.
My original STS was done by drilling a 5/16 hole through the shifter arm and then cutting off the threaded part of a long 5/16 bolt and drilling a small hole for the cotter pin. It was a OK job, but I noticed the bolt allowed for a lil too much play with the shifter cable. Not pleased.
I picked this up from Lowe’s. It is a 5/16×2 Clevis Pin. Just a slight bit bigger in diameter than the bolt and a perfect match to the factory shifter cable connector. Perfect match!
Part Name: Hillman 2-in Clevis Pin Item: 138646 Model: #881076 Description: Clevis pin – adjustable 5/16 x 2 1pc/bag Adjustable
Here is the Clevis Pin installed from below. I had to tap it in place from under the car due to a very tight fit from surrounding items. Look at how it is the same exact height as the factory pin.
Here is the final install with factory pin in place. I originally was gonna use a cotter pin but decided to use the factory one instead. Easier to remove if needed.
Additional Reference via trooplewis
Thought I would share some additional hints if you haven’t messed with stuff like this before, and post a few pictures.
First step, get rid of all the air intake plumbing!
You need to loosen the hose clamp around the pleated rubber that connects to the throttle body, you need to remove the breather hose where it connects to the block, you need to pinch the clip and pull off the MAF connector, and then you need to remove 4 screws to take out all the air intake plumbing.
That takes 5 or 6 minutes if you have not done it before.
When that plastic crap is off, this is what you will see. The area you are going to be working in is in the lower right of this photo, under that red electrical connection you see. Speaking of which, watch your drill, make sure the chuck is not spinning against it. You don’t want to mess up the wires or the connector there.
The hole you are going to drill is DEEP, I don’t think anyone mentioned that before. It is about an inch of metal you drill through. I used regular 30-wt motor oil to keep the tip of the 5/16 bit cool, putting a few drops into the hole every couple minutes. I just took my time, running the drill at a slow speed with moderate pressure on it. If you drill on high speed, you better have some really nice bits or you are going to destroy them. Take your time.
Drill a pilot hole first with a 3/16 or 1/8 inch bit, but then you can use a sharp 5/16 to go all the way through. You do not have to drill the hole twice with 2 bits, just get your pilot hole set so the 5/16 doesn’t “walk” the surface metal. The drilling took about 20 minutes.
I got the same clevis pin at Lowes, but it didn’t fit neatly into the new hole, as there were burrs on the holes in the pin. I had to put it in a vise and take some crocus cloth to it to smooth it down, then it worked OK.
Here is a photo of the location where I put the hole. NOTE in this image the pin is upside down, just there for the purpose of seeing the location. You have to install the pin from below.
OK, I don’t know if anyone can put the clevis pin in from above the car; not enough area to get your hand into. I jacked up the front of the car (be safe!) and crawled under, still could not get my hand with the pin in my fingers up into that area.
I ended up using one of those long magnetic flexible things you use to get nuts and bolts out of hard to get places that they fall into. I put the clevis pin on the magnet and got it up through the hole then an assistant grabbed and held it while I got out from under the car.
I used needle nosed pliers to hold the lower part of the pin while I slid the linkage back over it, and installed the factory lock clip. You can see the end result in this photo.
Nothing binds, everything works well, and the “smile factor” is definitely there. I don’t think this mod affects the side-to-side movement of the shift knob, but it has a big impact on the up-down travel of the shift handle. Way shorter throw, I did not notice a change in ‘notchiness’, but it is a lot of fun.
You will notice I did not re-install the factory washer, I could not get it to fit under the hole the lock pin slides through. I don’t think that will have any effect on the shifting of the car or the life of the bushing in that location.
Took me about an hour and a half from the time I popped the hood to the time I drove out and tested it.
On the firewall, there should be a VIN plate, with the engine and transmission codes. If the transmission code ends with a “V” you have the LSD version. “A” is non-LSD.
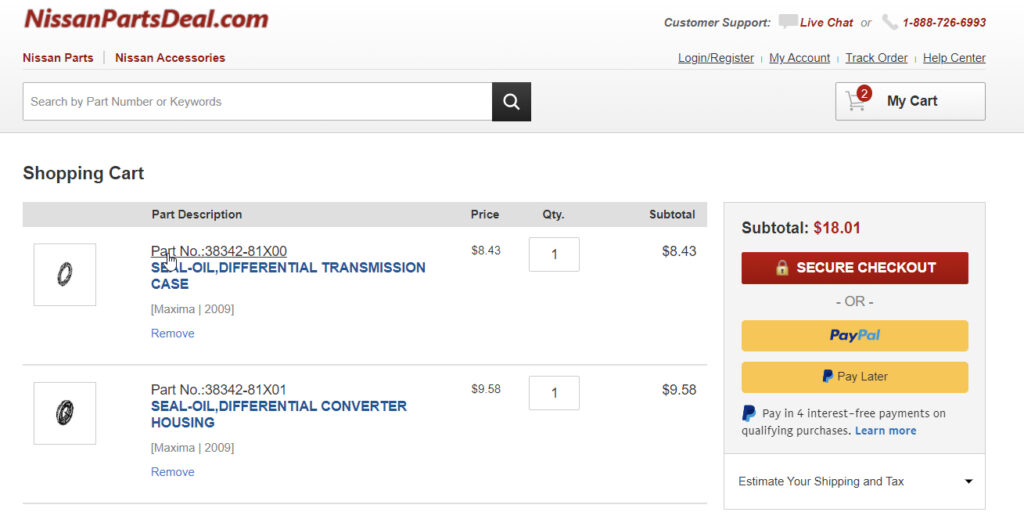
OEM Driver Side Part Number: 38342-81X00 Alternate Non-OEM Part Numbers: Timken / O’Reilly – 710118 Part Description: SEAL-OIL, Nissan Driver Side Output Shaft Seal / Differential Transmission Case Price: $8.00-$9.00
OEM Passenger Side: 38342-81X01 Alternate Non-OEM Part Numbers: Timken / O’Reilly – 710124 Part Description: SEAL-OIL, Nissan Driver Side Output Shaft Seal / Differential Clutch Housing Price: $8.00-$9.00


")


 OEM Replacement | SAVE $$$$$")


")

")


")